Avaya T3 IP Compact User Manual
Connected to integral 55
Hide thumbs
Also See for T3 IP Compact:
- User manual (137 pages) ,
- Service manual (305 pages) ,
- Operating instructions manual (65 pages)
Table of Contents
Advertisement
Quick Links
Download this manual
See also:
Service Manual
Advertisement
Table of Contents

Related Manuals for Avaya T3 IP Compact


Summary of Contents for Avaya T3 IP Compact
- Page 1 IP Telephony Contact Centers Mobility T3 IP Compact Services connected to Integral 55 Benutzerhandbuch User’s guide Manual de usuario Manuel utilisateur Manuale d’uso Gebruikersdocumentatie...
-
Page 2: Table Of Contents
Always dispose of old equipment correctly - keep our environment tidy ..... 10 Software License ....................11 Your T3 IP Compact at a glance ................12 All keys at a glance ....................13 Get to know your telephone ..............14 The display helps you .................... - Page 3 Contents Redialling a call number ..................25 Deactivating the call number and charge display ..........26 Reactivating the call number and charge display ..........26 Cutting in on another call (cut-in)* ...............26 Ending cut-in* ......................26 Making calls from a distant telephone via the system* ........27 Answering calls ......................28 When you receive a call ..................28 If another telephone receives a call (pick-up call) ..........28...
- Page 4 Contents Switching off follow-me on your own telephone ..........38 Switching on follow-me at a different telephone ..........38 Making calls with ease ................39 Editing the Redial list ..................... 40 Dialling an entry from the redial list ..............40 Deleting an entry ....................
- Page 5 Contents Switching the charge display to units ..............51 Determining call charges for private calls and projects* ........52 Lock telephone .......................53 Changing the PIN (Personal Identification Number) ..........53 Lock telephone ....................54 Unlocking the telephone ..................54 Automatic locking ....................55 Lock at .........................55 Customizing the telephone ..............
- Page 6 Contents Selecting the language for the display ..............78 Activating "CSTA answer call"* ................79 Leaving a hunt group* .................... 80 User administration ....................81 Logging out user ....................81 Change PIN ......................82 Delete PIN ......................83 Viewing / changing IP settings ................84 Viewing IP settings ....................
- Page 7 Contents Idle state ......................110 Call status ......................112 Troubleshooting ....................114 Index ........................116...
-
Page 8: Familiarize Yourself With Your Telephone
Familiarize yourself with your telephone Familiarize yourself with your telephone Important notes ....................9 Your T3 IP Compact at a glance ................ 12 All keys at a glance .................... 13... -
Page 9: Important Notes
Important notes Important notes Which systems can you connect your telephone to? This telephone is only intended to be connected to Avaya PBX systems. It must not be con- nected directly to a PSTN. Declaration of conformity We,Avaya GmbH & Co. KG, declare that the T3 IP Compact telephone complies with the basic requirements and other relevant regulations of Directive 1999/5/EU (Radio and Telecommuni- cation Terminal Equipment, R&TTE). -
Page 10: Hints For The Location Of The Phone
Place the telephone on a non-slip surface, especially if the furniture is new or has recently been cleaned or polished. Varnishes or cleaning agents may contain substances which soften the pads on the underside of the telephone and the pads could then mark your furniture. Avaya cannot assume liability for damage of this kind. -
Page 11: Software License
RAL LICENSE TERMS, THE FOLLOWING LICENSE TERMS AND RESTRICTIONS APPLY TO THE PRODUCT. Avaya grants End User a license within the scope of the license types described below. The applicable number of licenses and units of capacity for which the license is granted will be one (1), unless a different number of licenses or units of capacity is specified in the Documentation or other materials available to End User. -
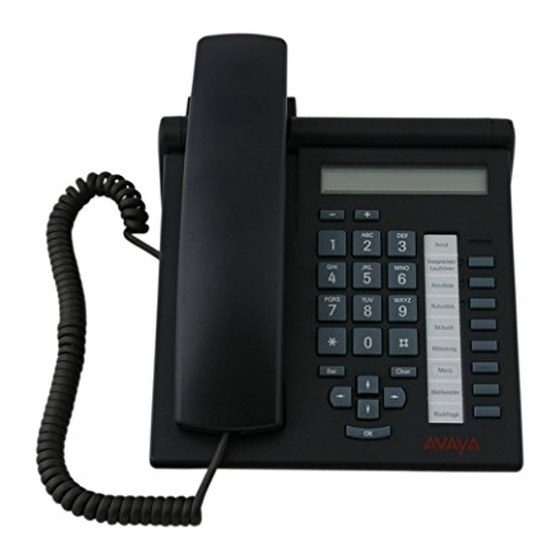
Page 12: Your T3 Ip Compact At A Glance
Familiarize yourself with your telephone Your T3 IP Compact at a glance Your T3 IP Compact at a glance Display Call display Function keys (some of them with LEDs) Clear key Arrow keys for navigating within the display OK key... -
Page 13: All Keys At A Glance
Familiarize yourself with your telephone All keys at a glance All keys at a glance Digit keys with letters: For dialling call numbers and entering letters and symbols. Star and hash: For special functions Escape: Ends the current connection during a call. Also cancels an input (the next higher menu level then appears in the display). -
Page 14: Get To Know Your Telephone
Get to know your telephone All keys at a glance Get to know your telephone The display helps you ..................15 Basic rules of operation ..................16 ... telephoning made easy .................. 19 Putting the telephone into service ..............20... -
Page 15: The Display Helps You
Get to know your telephone The display helps you The display helps you The displays guide you step by step as you use the phone. The display contains various items of information such as the status of your current connection. The phone number of every external ISDN caller appears in the display providing they have not disabled call number display. -
Page 16: Basic Rules Of Operation
Get to know your telephone Basic rules of operation Basic rules of operation The following pages provide a short description of the basic rules of operation for your tele- phone: Selecting functions from the menu Press the "Menu" function key. can be used to scroll to the desired menu item. -
Page 17: Entering Text
Get to know your telephone Basic rules of operation Entering text The first letter of every word in a phone book entry is automatically capitalised. Enter the desired text using the alphanumeric keys. You can find out how many times you have to press the relevant key to obtain the desired cha- racter in the following table: "... -
Page 18: Status Messages
Get to know your telephone Basic rules of operation General key controls • Deleting a character with the Clear key: If the cursor is to the right of the entered text, then the Clear key is the backspace function. (The characters you have already entered are deleted from right to left). If the cursor is in the middle of the text you have entered, pressing the Clear key deletes the selected character, and the right character moves to the left. -
Page 19: Telephoning Made Easy
Get to know your telephone ... telephoning made easy ... telephoning made easy You can make the following settings immediately or during your first telephone calls: ↑ • Adapt thevolume of the ring tone, the handset and the handsfree settings to suit your surroundings ↑... -
Page 20: Putting The Telephone Into Service
Get to know your telephone Putting the telephone into service Putting the telephone into service Telephone, connecting After connecting to the LAN (Local Area Network) and to the power supply (only if the tele- phone is not powered via the LAN) the telephone software is activated and after that a search for a gatekeeper (responsible for access authorization) starts automatically. -
Page 21: Entering Your Own Call Number And Pin
Get to know your telephone Putting the telephone into service Entering your own call number and PIN Scroll to the status message Log on new user Confirm entry. Enter extension number. Scroll to the PIN or SecPIN menu item. Enter your PIN (up to 6 digits are possible). Confirm your selection. -
Page 22: Selecting The Language For The Display
Get to know your telephone Putting the telephone into service Selecting the language for the display Scroll to status message D/GB/F/E/I/NL/TR . Confirm entry. Select the language you want to use for display texts, e.g. Deutsch . Confirm entry. You can change the language at any time later. More information can be found in the section ↑... -
Page 23: Making Calls As Usual
Making calls as usual Putting the telephone into service Making calls as usual Calling someone ....................24 Answering calls ....................28 Making calls without the handset ..............29 Establishing several connections ..............31 Diverting calls ....................34 Answering calls somewhere else (follow-me)* ..........38... -
Page 24: Calling Someone
Making calls as usual Calling someone Calling someone You can use the telephone in the usual way both within your telephone system and outside it. Internal: Dial the desired extension number directly. External: Depending on the system, first dial the external line code, e.g. "0". With the destination keys, you can redial the last ten phone numbers dialled and also call fre- quently used phone numbers. -
Page 25: Automatic Callback
Making calls as usual Calling someone Automatic callback The internal number you dialled is free or busy: Scroll to the Autom. callback menu item. Confirm your selection. Replace the handset. • If the other line was busy, your telephone rings as soon as the other line becomes availa- ble again. -
Page 26: Deactivating The Call Number And Charge Display
Making calls as usual Calling someone Deactivating the call number and charge display During a call: Scroll to the menu item Calling line identification Y / N menu item. Confirm entry. The call number and name of the opposite party are no longer displayed and the call number is not saved in the redial list or talk list. -
Page 27: Making Calls From A Distant Telephone Via The System
Making calls as usual Calling someone Making calls from a distant telephone via the system* You can call your PBX system from a distant telephone in order to, for example, make expen- sive international calls via the system. The charges are then incurred by the system. This is possible from any telephone with DTMF suffix dialling. -
Page 28: Answering Calls
Making calls as usual Answering calls Answering calls You can lift the receiver and speak with the caller in the normal way. It is, however, also possible to answer calls using the "Monitoring/Handsfree" key and then make the calls with the handset on the hook. If another subscriber within your system receives a call, you can divert the call to your phone (pick-up call). -
Page 29: Making Calls Without The Handset
Making calls as usual Making calls without the handset Making calls without the handset The Monitoring function (you and anyone else in the room can hear your call partner via the loudspeaker) and the Handsfree function (your call partner is heard via the loudspeaker and you can speak to him using the built-in microphone) can be operated using the "Monitoring/ Handsfree"... -
Page 30: Handsfree - Continuing The Call Using The Receiver
Making calls as usual Making calls without the handset Handsfree - continuing the call using the receiver During a call in handsfree mode: Lift handset (LED off). Handsfree - ending a call During a call in handsfree mode: Press the "Handsfree/Monit." function key (LED goes out). -
Page 31: Establishing Several Connections
Making calls as usual Establishing several connections Establishing several connections ↑ You can accept another call while you are already making a call (Second call 65]). You can speak with several parties alternately and switch back and forth between them as desired. You can speak with two callers simultaneously (conference). -
Page 32: Speaking With Parties Alternately
Making calls as usual Establishing several connections Speaking with parties alternately If you want to speak with a call party (e.g. 06975058) who has been put on hold: Scroll to the back to 06975058 menu item. Confirm entry. Putting through a second caller If you receive a call during an existing call, e.g. -
Page 33: Conference - Connecting A Party To A Call Using Refer-Back
Making calls as usual Establishing several connections Conference - connecting a party to a call using refer-back During a call (e.g. with 06975058): Press the "Refer-back" function key. The opposite party is put on hold. Enter the call number of the second conference party. You can set up the conference once you are connected to this subscriber. -
Page 34: Diverting Calls
Making calls as usual Diverting calls Diverting calls You can divert your calls to another line. You can also activate a further call diversion destination in order for calls only to be diverted if your line is busy. You also have the option of setting up call diversion so that it kicks in after a certain period of time. -
Page 35: Diverting External Calls After A Certain Period Of Time
Making calls as usual Diverting calls Diverting external calls after a certain period of time* Press the "Call diversion" function key. Scroll to the Ex.aft.time: menu item. Enter the internal phone number to which you want to divert the external calls after the set period of time, e.g. -
Page 36: Delayed Call Diversion
Making calls as usual Diverting calls call diversion, e.g. 6055. Enter your PIN, e.g. 1234. Set up, change or deactivate the call diversion now: Setting up or changing a call diversion: Enter codes for "Activate follow-me", e.g. star, 14. Enter the system’s external line code and the phone number to which you want to divert calls, e.g. - Page 37 Making calls as usual Diverting calls Set automatic call diversion Set up the time slots for the automatic call diversion. This does not switch on or activate call diversion. You do this with Activate automatic . Press the "Call diversion" function key. Scroll to theSet automatic call diversion menu item.
-
Page 38: Answering Calls Somewhere Else (Follow-Me)
Making calls as usual Answering calls somewhere else (follow-me)* Answering calls somewhere else (follow-me)* You can also use another telephone to set up a call diversion for your own telephone. You need to prepare this function on your own telephone first. The follow-me function is set, activa- ted and deactivated by means of particular codes. -
Page 39: Making Calls With Ease
Making calls with ease Answering calls somewhere else (follow-me)* Making calls with ease Editing the Redial list ..................40 Editing the call list ..................... 41 Editing the talk list ..................... 44 Using the phone book ..................46 Calling up messages ..................49 Viewing charges .................... -
Page 40: Editing The Redial List
Making calls with ease Editing the Redial list Editing the Redial list You can view the last ten call numbers dialled in the redial list. The last call number dialled is at the top of the list. You can dial the individual entries, delete them or relocate them to the phone book. -
Page 41: Editing The Call List
Making calls with ease Editing the call list Editing the call list Unanswered calls are saved in the call list with their date and time. The LED next to the "Call list" function key then goes on. You can display this list at any time and return calls to the sub- scribers entered in it. -
Page 42: Deleting An Entry
Making calls with ease Editing the call list Deleting an entry Press the "Call list" function key. Scroll to the desired entry, e.g. 0069123456. Press the "Clear" key. The arrow in front of the entry starts to flash. Press again during flashing to confirm. •... -
Page 43: Call List Activation
Making calls with ease Editing the call list Call list activation* If users have been granted appropriate authorisation by your system administrator, they can change call list entries to some extent. For example, remove internal calls from the call list. An entry is included in the call list only when the internal caller explicitly requests a callback. -
Page 44: Editing The Talk List
Making calls with ease Editing the talk list Editing the talk list The talk list contains an overview of the calls which you have received and the entries in the redial list. You can tell what type of entry it is by the respective symbol. The most recent entry is at the top of the list. -
Page 45: Delete All Entries
Making calls with ease Editing the talk list Delete all entries Press the "Menu" function key. Scroll to the Talk list menu item. Confirm entry. Scroll to the desired entry, e.g. Coltrane. Confirm entry. Scroll to the Delete all entries menu item. Press the OK key. -
Page 46: Using The Phone Book
Making calls with ease Using the phone book Using the phone book Your telephone has a personal phone book. In it you can store up to 268 phone numbers with their associated names, which will only be available on your telephone. You can then dial these numbers quickly and easily. -
Page 47: Editing Entries In The Phone Book
Making calls with ease Using the phone book Editing entries in the phone book Press the "Phone book" function key. Scroll to the desired entry, e.g., Chopin 1234. Confirm your selection. Scroll to theNumber, Name andRem. menu items and change the desired data. ↑... -
Page 48: Dialling An Entry From The Central Phone Book
Making calls with ease Using the phone book Dialling an entry from the central phone book* Press the "Phone book" function key. Scroll to the Search main phone book menu item. Confirm entry. Enter one or more of the first letters in the name. Scroll to the desired entry, e.g. -
Page 49: Calling Up Messages
Making calls with ease Calling up messages Calling up messages Callers can leave messages for you in the same way as with an answering machine, provided your system is connected to voice mail. You can call up these voice messages by making a call. -
Page 50: Deleting All Messages
Making calls with ease Calling up messages Deleting all messages* Press the "Message" function key. Scroll to the Delete all messages menu item. Confirm entry. The selected menu item starts flashing. Press again during flashing to confirm. -
Page 51: Viewing Charges
Making calls with ease Viewing charges Viewing charges All call charges incurred since the last reset are saved and added up in your telephone system. You can view the charges for your last call and delete the display. You can also have the current charges displayed during a call either in units or in your local currency. -
Page 52: Determining Call Charges For Private Calls And Projects
Making calls with ease Viewing charges Determining call charges for private calls and projects* If you want to dial a call number with a project PIN or private PIN: Enter the external line code that is set up in your telephone system for dialling with a pro- ject or private code, e.g. -
Page 53: Lock Telephone
Making calls with ease Lock telephone Lock telephone You can protect your telephone against unauthorized use by locking it with a PIN (personal identification number). You can enter this PIN yourself and change it at any time. The following functions are still available when the phone is locked: •... -
Page 54: Lock Telephone
Making calls with ease Lock telephone Lock telephone Press the "Menu" function key. Scroll to the Lock menu item. Confirm entry. Scroll to the Lock telephone menu item. Confirm entry. • You can only lock the phone if you have changed the default PIN. Unlocking the telephone On the idle display: Scroll to the status message Telephone locked . -
Page 55: Automatic Locking
Making calls with ease Lock telephone Automatic locking The automatic lock can be activated or deactivated. Press the "Menu" function key. Scroll to theLock menu item. Confirm your selection. Scroll to theAutomatic locking menu item. Confirm your selection. Scroll to the desired setting. Confirm your selection. -
Page 56: Customizing The Telephone
Customizing the telephone Lock telephone Customizing the telephone Do not disturb ....................57 Assigning functions / phone numbers to keys ........... 58 Making anonymous calls* .................. 64 Activating second call ..................65 Deactivating direct dialling ................. 66 Auto tone dialling (DTMF) - switching off ............67 Changing the DTMF pulse duration .............. -
Page 57: Do Not Disturb
Customizing the telephone Do not disturb Do not disturb You can switch off the ringing tone, the signal tone and the VIP ringing tone, e.g. if you are in a meeting. If you are then called, you will only hear the alert tone. Press the "Menu"... -
Page 58: Assigning Functions / Phone Numbers To Keys
Customizing the telephone Assigning functions / phone numbers to keys Assigning functions / phone numbers to keys ↑ Functions 104] and call numbers which you frequently use can be assigned to programma- ble function keys. You can then execute these functions or dial the call numbers simply at the press of a key. -
Page 59: Creating A New Destination And Assigning It To A Key
Customizing the telephone Assigning functions / phone numbers to keys Creating a new destination and assigning it to a key Press the "Menu" function key. Scroll to theSettings menu item. Confirm your selection. Scroll to theKeys menu item. Confirm your selection. Scroll to theSet destination keys menu item. -
Page 60: Assigning A Destination From The Phone Book To Keys
Customizing the telephone Assigning functions / phone numbers to keys Assigning a destination from the phone book to keys Press the "Menu" function key. Scroll to the Settings menu item. Confirm entry. Scroll to the Keys menu item. Confirm entry. Scroll to the Set destination keys menu item. -
Page 61: Changing An Existing Destination
Customizing the telephone Assigning functions / phone numbers to keys Changing an existing destination Press the "Menu" function key. Scroll to the Settings menu item. Confirm entry. Scroll to the Keys menu item. Confirm entry. Scroll to the Set destination keys menu item. Confirm entry. -
Page 62: Deleting Key Assignments
Customizing the telephone Assigning functions / phone numbers to keys Deleting key assignments Press the "Menu" function key. Scroll to the Settings menu item. Confirm entry. Scroll to the Keys menu item. Confirm entry. Scroll to the Set function keys or Set destination keys menu item. Confirm entry. -
Page 63: Labelling Function Keys
Customizing the telephone Assigning functions / phone numbers to keys Labelling function keys By default all function keys have frequently used functions pre-assigned to them. You can insert the labelling strips next to the corresponding rows of function keys. These can be found on the enclosed sheet. -
Page 64: Making Anonymous Calls
Customizing the telephone Making anonymous calls* Making anonymous calls* You can specify whether your phone number should be visible to the other parties. This function must be enabled in the system. Press the "Menu" function key. Scroll to the Settings menu item. Confirm entry. -
Page 65: Activating Second Call
Customizing the telephone Activating second call Activating second call If you want to answer an additional call (second call) during a call, you can activate Second call. Press the "Menu" function key. Scroll to the Settings menu item. Confirm entry. Scroll to the Display / Acoustics menu item. -
Page 66: Deactivating Direct Dialling
Customizing the telephone Deactivating direct dialling Deactivating direct dialling By default, the respective number is dialled or a refer-back call made immediately a destina- tion or digit key is pressed. This feature can be disabled separately. Press the "Menu" function key. Scroll to the Settings menu item. -
Page 67: Auto Tone Dialling (Dtmf) - Switching Off
Customizing the telephone Auto tone dialling (DTMF) - switching off Auto tone dialling (DTMF) - switching off Your telephone is set in the factory such that all post-dialled numeric keys are sent as tones during a connection. This allows you, for example, to call up voice mail or remotely control an answering machine. -
Page 68: Changing The Dtmf Pulse Duration
Customizing the telephone Changing the DTMF pulse duration Changing the DTMF pulse duration You can change the DTMF pulse duration (DTMF = dual-tone multi-frequency dialling method). This may be necessary if an answering machine does not react to signals from your telephone. -
Page 69: Activating Key Beep Tones
Customizing the telephone Activating key beep tones Activating key beep tones You can have every press of a key signalled by a beep (key beep tone). Press the "Menu" function key. Scroll to the Settings menu item. Confirm entry. Scroll to the Keys menu item. Confirm entry. -
Page 70: Saving Emergency Numbers
Customizing the telephone Saving emergency numbers Saving emergency numbers You can save two emergency numbers, which you can dial even when your telephone is lok- ked. Press the "Menu" function key. Scroll to the Settings menu item. Confirm your selection. Scroll to the Security menu item. -
Page 71: Setting Up Own Name
Customizing the telephone Setting up own name Setting up own name You can save your name to have it shown on the display. Press the "Menu" function key. Scroll to the Settings menu item. Confirm entry. Scroll to the Display / Acoustics menu item. Confirm entry. -
Page 72: Relocating With The Telephone
Customizing the telephone Relocating with the telephone* Relocating with the telephone* If you move to a different location in the same telephone system, you can log on with your pre- vious call number and previous PIN in order to access your personal settings and phone book there. -
Page 73: Saving Personal Data
Customizing the telephone Saving personal data Saving personal data For security, you can save your personal telephone settings both locally in the telephone itself and - if enabled by your system administrator - centrally in your telephone system. Your data are protected in the telephone system by a password. -
Page 74: Saving Data Centrally Immediately
Customizing the telephone Saving personal data Saving data centrally immediately* Press the "Menu" function key. Scroll to the Settings menu item. Confirm entry. Scroll to the Security menu item. Confirm entry. Scroll to the Save data menu item. Confirm entry. Scroll to the Save data centrally menu item. -
Page 75: Activating Handsfree Answer-Back
Customizing the telephone Activating handsfree answer-back* Activating handsfree answer-back* You can set up your telephone so that calls are answered immediately. If there is a call, you will hear only a short signal tone and your telephone’s microphone and loudspeaker are acti- vated immediately. -
Page 76: Setting Acoustics, Contrast And Language
Customizing the telephone Setting acoustics, contrast and language Setting acoustics, contrast and language You can modify various acoustic settings and the display contrast to suit your requirements. The language for the display texts can be changed at any time. The languages available are English, German, Italian, French, Spanish and Dutch. -
Page 77: Select A Call Tune
Customizing the telephone Setting acoustics, contrast and language Select a call tune You can assign different melodies to the various types of incoming call (internal, external, VIP): Press the "Menu" function key. Scroll to the Settings menu item. Confirm entry. Scroll to the Display / Acoustics menu item. -
Page 78: Selecting The Language For The Display
Customizing the telephone Setting acoustics, contrast and language Selecting the language for the display Press the "Menu" function key. Scroll to the Settings menu item. Confirm entry. Scroll to the Display / Acoustics menu item. Confirm entry. Scroll to the Language (English) menu item. Confirm entry. -
Page 79: Activating "Csta Answer Call
Customizing the telephone Activating "CSTA answer call"* Activating "CSTA answer call"* You can also answer calls on your PC if your telephone network and your PC network are lin- ked together for CSTA (computer service telephony application) and the CSTA answer call function is activated. -
Page 80: Leaving A Hunt Group
Customizing the telephone Leaving a hunt group* Leaving a hunt group* If you are a member of a hunt group, you can leave the hunt group temporarily. Calls are then diverted to the next hunt group subscriber. Press the "Menu" function key. Scroll to the Settings menu item. -
Page 81: User Administration
Customizing the telephone User administration User administration The set-up call number is displayed in the "User administration" menu. You can also log off from the telephone, change your PIN or delete it completely. Logging out user Press the "Menu" function key. Scroll to theSettings menu item. -
Page 82: Change Pin
Customizing the telephone User administration Change PIN Press the "Menu" function key. Scroll to the Settings menu item. Confirm entry. Scroll to the User administration menu item. Confirm entry. Select call number Confirm entry. Scroll to the Change PIN menu item. Confirm entry. -
Page 83: Delete Pin
Customizing the telephone User administration Delete PIN Press the "Menu" function key. Scroll to the Settings menu item. Confirm entry. Scroll to the User administration menu item. Confirm entry. Select call number Confirm entry. Scroll to the Delete PIN menu item. Confirm entry. -
Page 84: Viewing / Changing Ip Settings
Customizing the telephone Viewing / changing IP settings Viewing / changing IP settings You can view various IP (internet protocol)-specific settings in the "IP settings" menu. You can also check the accessibility of individual network components ("Sending ping") and save user data to a network server and load the data from there. This kind of access has been enabled in your telephone to allow your system administrator to adjust various settings for it via the PC and a web browser. -
Page 85: Barring Browser Access To The Telephone
Customizing the telephone Viewing / changing IP settings Barring browser access to the telephone Press the "Menu" function key. Scroll to the Settings menu item. Confirm entry. Scroll to the IP settings menu item. Confirm entry. Scroll to the Security menu item. Confirm entry. -
Page 86: Registering A Cti Application
Customizing the telephone Viewing / changing IP settings Registering a CTI application* In order to control your telephone using a CTI application (e.g. Avaya Com4Tel), the CTI appli- cation must first be registered: Press the "Menu" function key. Scroll to theSettings menu item. -
Page 87: Setting The 802.1X Login Data
Customizing the telephone Viewing / changing IP settings Setting the 802.1X login data The 802.1X login data of your telephone will be verified for its authentication in the IP network. You may change the 802.1X ID and the associated password. Press the "Menu"... -
Page 88: User Data Download
Customizing the telephone Viewing / changing IP settings User data download* Press the "Menu" function key. Scroll to theSettings menu item. Confirm your selection. Scroll to theIP settings menu item. Confirm your selection. Scroll to theUser data menu item. Confirm your selection. Scroll to theData download menu item. -
Page 89: Loading User Data
Customizing the telephone Viewing / changing IP settings Loading user data* Press the "Menu" function key. Scroll to theSettings menu item. Confirm your selection. Scroll to theIP settings menu item. Confirm your selection. Scroll to theUser data menu item. Confirm your selection. Scroll to theData upload menu item. -
Page 90: Setting Up Vip Functions
Customizing the telephone Setting up VIP functions Setting up VIP functions You can set up special functions between telephones of your system, provided you have made the appropriate preparations. For this to be possible, certain pre-settings on both the sending and the receiving telephone have to be the same. - Page 91 Customizing the telephone Setting up VIP functions Switch it to (Authorized) . Confirm entry. Scroll to the Set VIP partner menu item. Confirm entry. Scroll to the Entry phone book or Key assignment entry menu item. Confirm entry. Scroll to the entry for the secretary telephone. Confirm entry.
- Page 92 Customizing the telephone Setting up VIP functions Scroll to the Set VIP partner menu item. Confirm entry. Scroll to the Entry phone book or Key assignment entry menu item. Confirm entry. Scroll to the entry for the executive telephone. Confirm entry. Scroll to the Receive from user (off) menu item.
-
Page 93: Using The Executive Telephone As A Two-Way Intercom System With The Secretary
Customizing the telephone Setting up VIP functions Using the executive telephone as a two-way intercom system with the secretary Setting up the executive telephone Press the "Menu" function key. Scroll to the Settings menu item. Confirm entry. Scroll to the VIP menu item. Confirm entry. - Page 94 Customizing the telephone Setting up VIP functions Setting up the secretary telephone Press the "Menu" function key. Scroll to the Settings menu item. Confirm entry. Scroll to the VIP menu item. Confirm entry. Enter the current PIN. Confirm the input. Scroll to the Receive VIP functions menu item.
-
Page 95: Recogn. Partial No
Customizing the telephone Recogn. partial no. Recogn. partial no. Up to 10 partial number and name allocations can be listed for displaying names for external calls with partial number recognition. Partial number recognition is used for incoming calls and in all lists. Press the "Menu"... -
Page 96: Editing
Customizing the telephone Recogn. partial no. Confirm your selection. Enter the call number and name. Scroll to the Save entry menu item. Confirm your selection. Editing Press the "Menu" function key. Scroll to the Settings menu item. Confirm your selection. Scroll to the Display / Acoustics menu item. -
Page 97: Auxiliary Devices
• Headset for making calls conveniently without the handset. You can also make use of your telephone features from your PC by using Avaya Com4Tel or other CTI applications (e.g. Lotus Organizer). In some cases it will be necessary to make certain settings on your telephone. -
Page 98: Activating The Headset
Auxiliary devices* Activating the headset Activating the headset You can connect a headset to your telephone via the headset link. If you have connected a headset, you only need to change the following setting in your telephone menu: Press the "Menu" function key. Scroll to the Settings menu item. -
Page 99: Headset - Making A Call
Auxiliary devices* Headset - making a call Headset - making a call Enter the desired call number on the telephone. Press the "Handsfree / monitoring" function key. The LED next to the function key begins to flash and, as soon as the required subscriber answers, you can speak to him via the headset. If you want to end the call: Press the "Monitoring/Handsfree"... -
Page 100: Headset - Answering Calls
Auxiliary devices* Headset - answering calls Headset - answering calls You receive a call. Press the "Handsfree / monitoring" function key. The LED next to the function key begins to flash and you can speak to the caller via the headset. If you want to end the call: Press the "Monitoring/Handsfree"... -
Page 101: Continuing A Call With The Headset When The Handset Is Lifted
Auxiliary devices* Continuing a call with the headset when the handset is lifted Continuing a call with the headset when the handset is lifted If you are making a call over the handset but now want to continue the call with the headset: Press the "Handsfree / monitoring"... -
Page 102: Setting A Cti Application
The "TAPI" CTI application is set on your telephone by default. This means that when you want to run a TAPI application (e.g. Avaya Com4Tel), you do not need to make any further set- tings. You must proceed as follows however, if another CTI application has been connected: Press the "Menu"... -
Page 103: Referring Back As Required
Referring back as required Setting a CTI application Referring back as required Function keys ....................104 Information in the idle display ................. 106 Ringing and handset tones ................108 Menu overview ....................110 Troubleshooting ....................114... -
Page 104: Function Keys
Referring back as required Function keys Function keys Look it up if you do not know what a function name such as ’talk list’ means. This alphabetical list contains the functions which you can assign to programmable function keys. Log out user These functions can be assigned a function key in order to speed up log in / out. - Page 105 Referring back as required Function keys Gatekeeper list* You can select a different gatekeeper other than the default gatekeeper from the list. Handsfree / monitoring The Monitoring function (you can hear your call partner over the loudspeaker) and Handsfree function (your call partner is heard over the loudspeaker and you can speak to him using the built-in microphone) can be operated using the "Monitoring/Handsfree"...
-
Page 106: Information In The Idle Display
Referring back as required Information in the idle display Information in the idle display The idle display provides important information on the status of your telephone (e.g. call diver- sion to 1234). The idle display always appears after one minute if you are not speaking and do not press any key. - Page 107 Referring back as required Information in the idle display Headset enabled This message appears in the idle display if a headset is connected and turned on. To switch off the headset: Go to the corresponding menu and select the appropriate line. Hunt group x off You have removed your telephone from hunt group x.
-
Page 108: Ringing And Handset Tones
Referring back as required Ringing and handset tones Ringing and handset tones Tones for internal and external calls Normal ring tone for external calls: ↑ candeactivate this tone 57]. Normal ring tone for internal calls: ↑ candeactivate this tone 57]. Alert tone: Additional call during a conversation, partner beep. - Page 109 Referring back as required Ringing and handset tones • Sabah • Springtime • Waterfall • Rondeau • Jumping • Infantryman...
-
Page 110: Menu Overview
Menu overview Menu overview There now follows an overview of the menu structure of the Integral T3 IP Compact. Depen- ding on whether you access the menu in the idle state or during a call, a different list will be opened. - Page 111 Referring back as required Menu overview Keys > Set destination keys Set function keys Key assignment Key beep Dial settings > Anonymous call DTMF duration DTMF switchover Direct dial Applications > Hunt group CSTA Answer Call Security > Save data Emergency call numbers CTI application >...
-
Page 112: Call Status
Referring back as required Menu overview Menus marked with a * need to be released by your system administrator first. Call status Menu line in call menu ...down one menu level ...down one menu level Talk list > Entries > Date / time Call number Select entry Store in phone book... - Page 113 Referring back as required Menu overview Protocol Serial no.
-
Page 114: Troubleshooting
Referring back as required Troubleshooting Troubleshooting Incorrect time and date are displayed Select Settings > Display / Acoustics > Request time . The time and date are updated by the system. Unknown display ↑ Refer to the section entitled Information in the idle display 106] to see what the display means. - Page 115 Referring back as required Troubleshooting...
-
Page 116: Index
Index Index Symbols ... telephoning made easy 19 Activating "CSTA answer call"* 79 Activating follow-me at a different telephone 38 Activating handsfree answer-back* 75 Activating key beep tones 69 Activating second call 65 Activating the call number display 26 Activating the headset 98 Adding an entry to the phone book 40 Additional functions 10 All keys at a glance 13... - Page 117 Call status 112 Call, picking up a 28 Callback 25 callers, switching 32 Calling 24 Calling back 41 Calling someone 24 Calling up messages 49 Cancelling an action 16 Cancelling or exiting an action 16 Central telephone book 48 Change PIN 82 Changing a call diversion remotely* 35 Changing an existing destination 61 Changing the DTMF pulse duration 68...
- Page 118 Delete PIN 83 Deleting 96 Deleting a message* 49 Deleting all entries 42 Deleting all messages* 50 Deleting an entry 40 Deleting automatic callback 25 Deleting call charges 51 Deleting key assignments 62 Destination key 24 Determining call charges for private calls and projects* 52 Dialling an entry from the central phone book* 48 Dialling an entry from the redial list 40 Dialling an entry from the talk list 44...
- Page 119 If no gatekeeper is found during the automatic search run 20 Important notes 9 Information in the idle display 106 Input, cancelling 16 Integral T3 IP Compact 8 Interconnecting conference partners 33 Internal 24 Keys 13 Labelling function keys 63...
- Page 120 language 22 Language versions of the user manual 10 Leaving a hunt group* 80 Letters 17 License 11 Listening to messages 49 Listening to the caller over the loudspeaker (monitoring) 29 Listening to voice messages* 49 Loading user data* 89 Lock 53 Lock at 55 Lock telephone 53...
- Page 121 phone book 46 phone number from the talk list, dialling 44 Phone number on destination key 60 Phone number to destination key 59 Picking up 28 Pick-up 28 PIN 53 PIN, entering 21 Preparing follow-me on your own telephone 38 Programming 16 Protection 53 Putting the telephone into service 20...
- Page 122 Set automatic call diversion 37 Setting a CTI application 102 Setting acoustics, contrast and language 76 Setting contrast 77 Setting up and activating the double-call destination* 35 Setting up own name 71 Setting up the executive telephone 90 Setting up the secretary telephone 91 Setting up VIP functions 90 Settings 19 Signal tone 57...
- Page 123 Viewing the charge display 51 VIP ringing tone 57 Voice mail 49 What is shown on the idle display? 16 When you receive a call 28 Which systems can you connect your telephone to? 9 Your T3 IP Compact at a glance 12...
- Page 124 0 800 266 - 12 19 (International) +49 69 7505 - 28 33 +49 69 7505 - 5 28 33 infoservice@avaya.com © 2007 All rights reserved for Avaya Inc. and Avaya GmbH & Co. KG. 4.999.106.016 · 06/07 · I55 IEE4/T3 CIII · en avaya.de...
Need help?
Do you have a question about the T3 IP Compact and is the answer not in the manual?
Questions and answers