Blackmagicdesign Pocket Cinema Camera 4K User's Installation And Operation Manual
Hide thumbs
Also See for Pocket Cinema Camera 4K:
- Installation and operation manual (1584 pages) ,
- Installation and operation manual (1750 pages)

Related Manuals for Blackmagicdesign Pocket Cinema Camera 4K


Summary of Contents for Blackmagicdesign Pocket Cinema Camera 4K
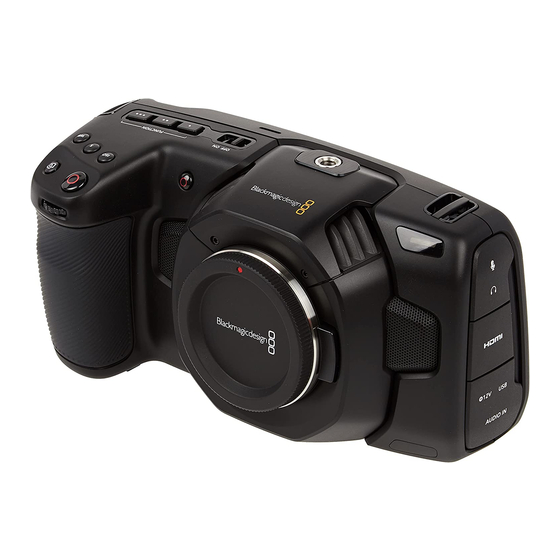
- Page 1 Installation and Operation Manual Blackmagic Pocket Cinema Camera 4K September 2018...
- Page 2 We are extremely excited to see the creative work you produce using your new Blackmagic Pocket Cinema Camera 4K, and look forward to your feedback on new features you would like to see us add to Blackmagic Pocket Cinema Camera 4K! Grant Petty...
-
Page 3: Table Of Contents
Contents Blackmagic Pocket Cinema Camera 4K Getting Started Importing your Clips Attaching a Lens Saving Your Project Turning Your Camera On Working with RAW files Storage Media Editing your Clips CFast Cards Trimming Clips SD Cards Mapping Keyboard Shortcuts USB-C flash disks... -
Page 4: Getting Started
Getting Started Blackmagic Pocket Cinema Camera 4K is a small portable digital cinema camera that records high quality 4K DCI, Ultra HD and HD images on CFast 2.0 and UHS-I and UHS-II SD cards. Your Pocket Cinema Camera 4K is capable of recording clips using professional codecs designed for post production including ProRes, uncompressed CinemaDNG RAW and compressed RAW. -
Page 5: Turning Your Camera On
Now that you’ve attached a lens, you will need to supply power to your camera. Blackmagic Pocket Cinema Camera 4K can be powered by inserting an LP-E6 battery into the camera, or by plugging the supplied power adapter into the power input. -
Page 6: Storage Media
Storage Media Your Blackmagic Pocket Cinema Camera 4K uses standard SD cards, faster UHS-II SD cards or CFast 2.0 cards to record video. Using the USB-C expansion port, you can also connect high capacity USB-C flash disks for increased recording times. -
Page 7: Sd Cards
SD card. Choosing an SD Card If you are recording 4K DCI or Ultra HD on Blackmagic Pocket Cinema Camera 4K, then we recommend using the fastest high speed UHS-II type SD cards available. It’s important to use high speed UHS-II SD cards for Ultra HD and HD recording, or UHS-I cards for HD recording. -
Page 8: Usb-C Flash Disks
Move the lock tab up or down to lock or unlock an SD card Your Blackmagic Pocket Cinema Camera 4K lets you know if you’ve inserted a locked SD card by displaying the word ‘locked’ instead of the card’s duration on the LCD touchscreen, and will display a padlock icon in the storage menu next to the card name. -
Page 9: Choosing A Fast Usb-C Flash Disk
Many USB-C flash disks are designed for home computing and aren’t fast enough to record Ultra HD video. We highly recommend using only the USB-C flash disks from our recommended list. These USB-C flash disks have been tested with Blackmagic Pocket Cinema Camera 4K to support continuous filming at the specified resolutions. -
Page 10: Preparing Media For Recording
HFS+ is natively supported by macOS. exFAT is supported natively by macOS and Windows without needing any additional software, but does not support journaling. Preparing Media on Blackmagic Pocket Cinema Camera 4K Tap either storage indicator at the bottom of the LCD touchscreen to enter the storage manager. - Page 11 Confirm your selection. Tap the format button to continue or ‘cancel’ to cancel the format. Check that you have selected the correct card before formatting The camera notifies you when the format is complete. Tap ‘ok’ to return to the storage manager. Tap ‘exit’...
-
Page 12: Preparing Media On A Mac
Preparing Media on a Mac Use the Disk Utility application included with macOS to format your CFast card, SD card, or USB-C flash disk in the HFS+ or exFAT formats. Remember to backup anything important from your media first as all data will be lost when it is formatted. Connect the storage media to your computer and dismiss any message offering to use your media for Time Machine backups. - Page 13 For lower data rates try lowering your frame rate, resolution, or try a compressed codec such as ProRes. Check the Blackmagic Design website for the latest information at www.blackmagicdesign.com NOTE Partitioned media can be used with your Blackmagic Pocket Cinema Camera 4K, though your camera will only recognize the first partition of your media for...
-
Page 14: Recording
Recording Recording Clips Blackmagic Pocket Cinema Camera 4K features two record buttons. The primary record button is located on the top of the handgrip for triggering with your index finger when holding the handgrip of the camera with your right hand. - Page 15 Your camera is now ready to record in the video format you have selected. Maximum Sensor Frame Rates The tables below contain available codecs, resolutions and their maximum sensor frame rates for Blackmagic Pocket Cinema Camera 4K. Resolution Codec Sensor Scan...
-
Page 16: Record Duration
Record Duration These tables show approximate record duration in minutes and seconds based on format, project frame rate and media size. The maximum recording time for your storage media can vary depending on the data capacity your CFast card, SD card or USB-C flash disk, and the recording format and frame rate you choose. - Page 17 CFast Frame ProRes ProRes ProRes ProRes CinemaDNG CinemaDNG CinemaDNG Card Rate RAW 3:1 RAW 4:1 422 HQ 422 LT 422 Proxy Duration Duration Duration Duration Duration Duration Duration 23.98 75 mins 142 mins 175 mins 189 mins 283 mins 403 mins 877 mins 75 mins 142 mins...
-
Page 18: Trigger Record
Blackmagic Video Assist. This means that when you press record on your Blackmagic Pocket Cinema Camera 4K, your external recorder also starts recording and stops when you stop recording on the camera. Your camera also outputs timecode via HDMI, which means the clips recorded on your external recorder has the same timecode as the clips recorded in your camera. -
Page 19: Camera Features
Tally / Record Indicator Your Blackmagic Pocket Cinema Camera 4K has a small LED on the front of the camera that illuminates red to indicate that the camera is recording. You can enable or disable the tally light indicator, and adjust its brightness in the setup menu. See the ‘setup settings’... -
Page 20: Right Side
Right Side CFast Card Slot Insert CFast 2.0 cards into the slot for record and playback. Refer to the ‘CFast Cards’ section for more information. SD Card Slot Insert SD cards into the slot for record and playback. Refer to the ‘SD Cards’ section for more information. - Page 21 NOTE The 1/4” mount on the top of the Pocket Cinema Camera 4K should only be used for lightweight accessories such as small microphones. Do not support the weight of the camera via the top 1/4” mount by using accessories like a screw in camera handle in conjunction with a heavy lens.
-
Page 22: Camera Underside
‘setup’ menu. By default, button one is set to ‘false color’, button 2 is set to ‘display LUT’ and button 3 is set to ‘frame guides’. Camera Underside Blackmagic Pocket Cinema Camera 4K 1/4-20 Mounting Point Attach your camera to a tripod using the bottom 1/4-20 mounting point. -
Page 23: Camera Rear
‘off speed’ frame rate you’d like to use in your Blackmagic Pocket Cinema Camera 4K’s ‘frame rate’ menu. Once this is set, pressing the HFR button will toggle between your chosen off speed frame rate and project frame rate. It’s worth mentioning that this setting can only be adjusted when the recording is stopped. -
Page 24: Touchscreen Controls
Touchscreen Controls Touchscreen Features Your Blackmagic Pocket Cinema Camera 4K’s LCD touchscreen features a touch and gesture based interface that is specifically designed for fast and intuitive operation. By touching and swiping on different areas of the LCD touchscreen, you can quickly access the camera’s functions while shooting. - Page 25 For information on enabling focus assist on your camera’s HDMI output, see the ‘monitor settings’ section in this manual. Your Blackmagic Pocket Cinema Camera 4K has two focus assist modes. You can switch between ‘peaking’ and ‘colored lines’ focus assistance in the ‘monitor’ settings menu.
- Page 26 To toggle the appearance of frame guides on your Blackmagic Pocket Cinema Camera 4K’s LCD touchscreen, tap the switch icon in the bottom left of the screen. Choose the frame guide you want to use by dragging the slider left and right, or tapping the arrow buttons on either side of the currently selected aspect ratio.
- Page 27 Blackmagic Pocket Cinema Camera 4K’s grid settings Grids and crosshairs are overlays that can help with image composition. When ‘grids’ are enabled, your Blackmagic Pocket Cinema Camera 4K can show a rule of thirds grid, crosshairs, or center dot.
- Page 28 You can enable a combination of ‘thirds’ and ‘crosshairs’ or ‘thirds’ and ‘center dot’ by tapping both options in the ‘grids’ menu. ‘Crosshairs’ and ‘center dot’ cannot be selected together. For information on enabling grids on your HDMI output, see the ‘monitor settings’...
- Page 29 LCD touchscreen. Project frame rate The project frame rate is Blackmagic Pocket Cinema Camera 4K’s recording format frame rate and provides a selection of common frame rates used in the film and television industry. This frame rate is normally set to match your post production workflow.
- Page 30 With ‘off speed frame rate’ enabled, tap the arrows on either side of the sensor frame rate or move the slider to make adjustments By default, your Blackmagic Pocket Cinema Camera 4K’s project and sensor frame rates are matched for a natural playback speed. However, by tapping the ‘off speed frame rate’...
- Page 31 Tapping the ‘shutter’ indicator brings up the suggested shutter values along the bottom of your Blackmagic Pocket Cinema Camera 4K’s touch screen. If you have auto exposure set to ‘off,’ this screen will show you your currently selected shutter value, as well as the available flicker free shutter vallues, based on the mains power frequency you have selected in your Pocket Cinema Camera 4K’s ‘setup’...
- Page 32 Use the manual shutter keypad to enter your shutter timing of choice when shooting outdoors or under flicker free lights Your Blackmagic Pocket Cinema Camera 4K has three shutter based auto exposure modes. To select one of these, tap the ‘auto exposure’ button in the far right of the shutter menu.
- Page 33 Maintains the correct exposure levels by adjusting the aperture, then the shutter value. If the maximum or minimum available aperture is reached and exposure still cannot be maintained, Blackmagic Pocket Cinema Camera 4K begins adjusting the shutter value to keep exposure consistent.
- Page 34 The ‘ISO’ indicator displays the current ISO setting, or light sensitivity. Tapping this indicator lets you adjust your ISO to suit varying lighting conditions. Your Pocket Cinema Camera 4K’s ISO indicator. Tap this to access ISO settings. While in the ‘ISO’ menu, your Blackmagic Pocket Cinema Camera 4K’s...
- Page 35 In bright conditions ISO 100 can provide richer colors. Dual Native ISO Your Blackmagic Pocket Cinema Camera 4K has a dual native ISO of 400 and 3,200, which means that the sensor is optimized for shooting in both low light conditions, as well as bright daylight.
- Page 36 3200K adds some blue to the image. This balances the color so white is accurately recorded. Your Blackmagic Pocket Cinema Camera 4K comes with white balance presets for a variety of color temperature conditions. These are:...
- Page 37 Fill this square with a neutral surface such as a white or gray card and tap ‘update WB’. Your Blackmagic Pocket Cinema Camera 4K will automatically adjust its white balance and tint values so the average of the white or grey inside the white balance square is as neutral as possible.
- Page 38 Record button Next to the histogram, at the bottom of your Pocket Cinema Camera 4K’s touchscreen, is a round grey button. This is the ‘record’ button. Tap it once to begin recording, and tap it again to stop.
- Page 39 LUT is being recorded with the clip Dropped Frame Indicator The ‘record’ button is overlaid with a flashing ‘!’ indicator if your Pocket Cinema Camera 4K begins dropping frames while recording. The time remaining indicator for the affected card walso turns red.
- Page 40 This menu displays the amount of free space on each CFast card, SD card or USB-C flash disk used by your Blackmagic Pocket Cinema Camera 4K, as well as the name of the card or drive, length of the last clip, total number of clips, and the file format for each card or drive.
- Page 41 You can tap the audio meter to bring up volume controls for audio input channels 1 and 2, as well as headset or speaker volume. Tap the audio meters on your Blackmagic Pocket Cinema Camera 4K’s LCD touchscreen to easily access volume and headset or speaker settings...
- Page 42 Swipe up or down to hide all status indicators on your Blackmagic Pocket Cinema Camera 4K’s LCD touchscreen Playback Menu Tap the ‘play’ control button to access the playback menu. You can control previously recorded clips with your camera’s control buttons or the LCD touchscreen.
-
Page 43: Settings
Tap the ‘record,’ ‘monitor,’ ‘audio,’ ‘setup,’ ‘presets,’ and ‘LUTS’ headings to move between your Pocket Cinema Camera 4K’s dashboard tabs Record Settings The ‘record’ tab lets you set your video format, codec, and resolution, as well as other settings that are important for your recorded video, such as dynamic range and detail sharpening. - Page 44 The amount of video you can record on your storage media on Blackmagic Pocket Cinema Camera 4K increases if you choose codecs that use higher compression. Refer to the ‘record duration’ tables in the ‘recording’ section for more information. Resolution This setting works in combination with the ‘codec’ setting. Use it to select the resolution for your desired recording format.
- Page 45 Window Sensor Blackmagic Pocket Cinema Camera 4K can be set to use the ‘full’ sensor area, or for even higher frame rates, you can use ‘window’ mode. This will use only the amount of sensor pixels needed for a given video format rather than downscaling images from the entire sensor.
- Page 46 Stop Rec If Card Drops Frame Use this setting to configure the behavior of your Blackmagic Pocket Cinema Camera 4K when dropped frames are detected. When set to ‘off,’ recording continues with dropped frames.
- Page 47 This means you can drop the timelapse sequence into your post production timeline just like any other clip you have recorded. Your Blackmagic Pocket Cinema Camera 4K will indicate it is in timelapse mode with an icon over the ‘record’ button When you record clips in timelapse mode, the timecode counter updates when a frame of video is recorded.
-
Page 48: File Naming Convention
CinemaDNG RAW. Record LUT to Clip Your Blackmagic Pocket Cinema Camera 4K does not apply, or ‘bake in,’ LUTs by default to recorded footage, however you can choose to ‘bake in’ the LUT to your footage by tapping the ‘record lut to clip’ switch icon. - Page 49 ‘display LUT’ switch in the ‘Monitor’ menu. Display 3D LUT Your Blackmagic Pocket Cinema Camera 4K can apply 3D LUTs to any output to approximate the look of color graded footage. This is especially useful when recording clips using ‘film’...
- Page 50 For more information on using false color, see the ‘touchscreen features’ section in this manual. LCD Monitor Settings 2 The second page of your Blackmagic Pocket Cinema Camera 4K’s ‘LCD’ monitor tab contains settings unique to your LCD touchscreen. ‘Status text’ gives you a clear view of your Pocket Cinema Camera 4K’s preview image...
- Page 51 LCD touchscreen. Overlays such as frame guides, grids, focus assist and zebra remain visible, if enabled. Swiping up or down on your Blackmagic Pocket Cinema Camera 4K’s LCD touchscreen has the same effect. Display...
- Page 52 Your Blackmagic Pocket Cinema Camera 4K can display director specific status text on itsHDMI output Setting the status text to ‘director’ in your Blackmagic Pocket Cinema Camera 4K’s HDMI monitor settings changes the status text for that output to show the following information.
- Page 53 Tap the left or right arrows in the ‘frame guides’ menu setting to cycle through seven frame guide options for all outputs on your Blackmagic Pocket Cinema Camera 4K. The options are detailed in the ‘touchscreen features’ section of this manual, and are also accessible from the LCD monitoring menu in your LCD touchscreen head up display.
- Page 54 Zebra level is adjustable in five percent steps between 75 and 100 percent exposure. For more information, see the ‘zebra’ guide in the ‘touchscreen features’ section of this manual. Both Monitor Settings 2 The second page of your Blackmagic Pocket Cinema Camera 4K’s ‘both’ monitor tab contains the following options: Grids To set which combination of grids and crosshairs you want to display on your camera’s LCD...
-
Page 55: Audio Settings
Audio Settings The ‘audio’ tab lets you adjust the audio input and monitoring settings on your camera. The audio settings for your Blackmagic Pocket Cinema Camera 4K are spread over two pages and divided between channels 1 and 2. You can map each audio channel to a different source, as well as adjusting various settings such as gain control. - Page 56 Camera 4K’s 3.5mm headphone jack. Move the audio slider left or right to adjust levels. Speaker Volume This slider adjusts the output levels for your Blackmagic Pocket Cinema Camera 4K’s built in speaker. Move the audio slider left or right to adjust levels.
-
Page 57: Setup Settings
The date format is year, month, day and the time format is 24 hour. Your Blackmagic Pocket Cinema Camera 4K’s date and time are also used for time of day timecode if an external timecode source is not connected. - Page 58 Set Function Button On the top of your Blackmagic Pocket Cinema Camera 4K you’ll notice three function buttons. The dots on the buttons represent function 1, function 2 and function 3. These can be mapped to frequently used features and are quickly accessible when using your camera.
- Page 59 The Pocket Cinema Camera 4K’s function buttons are represented by dots and are located on the top of your camera To set these buttons, select a function button and then the behavior, settings and parameters you want for that function.
- Page 60 Tally Light LED Your Blackmagic Pocket Cinema Camera 4K has a tally light on the front of the camera that illuminates red when your camera is recording. The tally light can be enabled or disabled by tapping the ‘tally light LED’ switch icon.
- Page 61 ‘setup’ menu. When Bluetooth is enabled, the camera can be detected by Bluetooth devices up to 30 feet away. Because Pocket Cinema Camera 4K uses the same set of commands for Bluetooth control as it does for ‘Blackmagic SDI Camera Control Protocol’, you can write your own applications to control almost every setting in the camera remotely, from monitoring options and audio settings, to the camera’s inbuilt DaVinci Resolve color corrector or even...
- Page 62 Available cameras are listed by a camera letter, followed by a unique hardware ID. For example A:A0974BEA. Select the Blackmagic Pocket Cinema Camera 4K you would like to pair with NOTE When you install the Blackmagic Camera Control App and run it for the first time, you will be asked if you want to ‘allow location access.’...
- Page 63 When your Blackmagic Pocket Cinema Camera 4K connects to your iPad, it confirms it is paired. If pairing the camera to your iPad fails, the camera presents an error message. Try connecting again. NOTE If you are not using Bluetooth to control your Blackmagic Pocket Cinema Camera 4K, it is a good idea to turn Bluetooth off for the purpose of security.
- Page 64 Disconnect Current Device Use this setting to disconnect your Blackmagic Pocket Cinema Camera 4K from the iPad it is currently paired with. Clear Paired Devices Use this setting to clear the list of devices that your camera has been paired with.
-
Page 65: Presets
Pocket Cinema Camera 4K. This is very useful when one camera is used for multiple projects. For example, you may use your Pocket Cinema Camera 4K for a variety of different shoots, from documentaries to music videos, with very different settings between types of projects. Your camera’s ‘presets’... - Page 66 You can update a preset by tapping the ‘update’ icon. This will bring up a prompt asking you if you want to update the preset with your Blackmagic Pocket Cinema Camera 4K’s current setting. Tap ‘update’ to confirm.
-
Page 67: 3D Luts
For example, a LUT may tell your Pocket Cinema Camera 4K to display a vibrant, saturated blue when it receives a relatively dull blue input. This can be useful when shooting RAW footage, or using ‘film’... - Page 68 Your Blackmagic Pocket Cinema Camera 4K supports 33 point 3D LUTs in .cube format created in DaVinci Resolve and 17 point 3D LUTs converted to Resolve .cube format via LUT conversion programs. Your camera processes 3D LUTs using high quality tetrahedral interpolation.
-
Page 69: Entering Metadata
VFX assets to plates. Your Blackmagic Pocket Cinema Camera 4K automatically saves some metadata to each clip, such as camera settings, timecode, date and time. You can use your camera’s slate to add many additional details. - Page 70 ‘Clip’ metadata Making changes to clip metadata works differently in standby mode to playback mode. In standby mode, when your camera is ready to record, clip metadata gets saved to the next clip recorded, except the ‘good take last clip’ button applies a ‘good take’ tag to the most recently recorded clip.
- Page 71 ‚ Lens Type Shows the lens model. If your lens type is not automatically shown here, you can tap this setting to enter the data manually. Your camera has an internal database stored for many commonly used lenses, so if you need to enter data manually, your camera will suggest names automatically as you type.
- Page 72 For example 23A indicates scene twenty three, shot one. If you have a shot letter added to your scene number, your Blackmagic Pocket Cinema Camera 4K suggests the next scene number and shot letter whenever you enter the scene number editor. For example, if your current scene number is 7B, the camera suggests ‘8’...
- Page 73 A small 'A' appears next to the take number on the slate when enabled. When entering ‘take’ metadata, your Blackmagic Pocket Cinema Camera 4K will offer prompts for additional shot types to the right of the touch keyboard Entering Metadata...
-
Page 74: Camera Video Output
Project metadata behaves the same way whether you are in ‘standby’ or ‘playback’ mode. This metadata always refers to your project as a whole and is independent of clip numbers. Your Blackmagic Pocket Cinema Camera 4K’s ‘project’ slate tab Project name Displays your current project name. -
Page 75: Using Davinci Resolve
Blackmagic Pocket Cinema Camera 4K’s USB port. Using DaVinci Resolve Shooting with your Blackmagic Pocket Cinema Camera 4K is only part of the process of creating film and television content, and just as important is the process of media backup and management as well as editing, color correction and encoding final master files. -
Page 76: Importing Your Clips
Included here is information on how to get started using DaVinci Resolve with your camera files. Of course, DaVinci Resolve is extremely advanced and includes a lot more features than you immediately see when first looking at its user interface. To learn more about how to use DaVinci Resolve, please check for the DaVinci Resolve instruction manual pdf file on the DaVinci Resolve software disk, or check online for the many training courses and tutorial videos available. -
Page 77: Saving Your Project
Saving Your Project DaVinci Resolve features powerful options for saving your projects. First save your project by choosing ‘save project’ from the file menu. Once you’ve saved your project once, ’live save’, a fast, on the go autosave mechanism, will save your changes as you make them. For greater control over your project backups, open the Resolve preferences panel and click the user tab. - Page 78 It’s worth shooting in RAW if you are after the highest possible quality, or for shots where there is an extreme variance between highlights and shadows and you may need to push and pull those regions as much as possible in the grade. RAW files can be large and processor intensive, but you can set DaVinci to automatically create proxy files to help your computer with real time playback.
-
Page 79: Editing Your Clips
Select ‘project’ in the ‘Decode Using’ drop down menu. Set the white balance setting to ‘custom’. Set the color space to ‘Blackmagic Design’. This will also set the gamma setting to ‘Blackmagic Design Film’. Choose your resolution from the ‘Decode Quality’ menu. A lower resolution will give you better playback on limited systems. -
Page 80: Trimming Clips
The ‘edit’ page. You can trim your clips, change their order, move them around and add transitions between them using the timeline editor Trimming Clips You can refine your edits to include only the specific frames you want in each shot by using the trim tools. -
Page 81: Mapping Keyboard Shortcuts
Snapping is a helpful feature to use when adding clips to a timeline, or when moving clips around, as they will “snap” together at edit points so you don’t overlap or leave blank space between clips. Snapping can be disabled for greater precision when fine tuning edits. Press the ’N’... -
Page 82: Adding Transitions
If you want to assign an existing shortcut to a new command, a warning will appear below letting you know the shortcut is already in use. Select ‘change’ to set the keyboard shortcut to the new command and both shortcuts will display a hazard symbol to the right. -
Page 83: Adding Titles
Simply drag and drop transitions between adjoining clips Adding Titles You can place a title on any video track just as you would a clip. If you run out of tracks you can easily add new ones by right clicking next to an existing track name and selecting ‘add track’. To create a title: Click on ‘titles’... -
Page 84: Adding Vfx And Compositing
Adding VFX and Compositing Now that you have completed your edit, you can open the Fusion page to add 2D or 3D visual effects and motion graphics right within DaVinci Resolve. Unlike layer based compositing software, Fusion uses nodes, giving you the freedom to build complex effects while routing image data in any direction. - Page 85 Create a new version of your composition by right clicking on a thumbnail and selecting ‘create new composition’. Viewers The viewers are always visible and let you see the different views of your composition, for example an overall 3D perspective via the merge 3D node, a camera output, or your final render output.
-
Page 86: Getting Started With Fusion
Spline When the spline editor is open, it will appear to the right of the nodes window. This editor lets you make precise adjustments to each node, such as smoothing the animation between two keyframes using bezier curves. Keyframes Keyframes for each tool can be added, removed or modified using the keyframes editor. - Page 87 Understanding Nodes It can be helpful to think of each node as a visual icon representing a single tool or effect. Nodes are connected to other nodes to build the overall composition, much like ingredients in a cake. It’s important to understand the inputs and outputs of each node as this will help you navigate the flow of your composition while building detailed visual effects.
- Page 88 The merge node has controls for how the inputs are managed, including settings for size, position, and blend. These settings are all accessible in the inspector panel when the merge node is selected. The toolbar above the node panel contains the most commonly used tools as icons that you can either click on to add the node, or drag the tool to the node panel.
-
Page 89: Using The Motion Tracker And Adding Text
There are different parameters and settings you can adjust for every node depending on its task, from sizing and center positions to changing the number of particles in an emitter node. Setting keyframes and changing the settings over time will animate the effect. Working with Keyframes In the inspector window, set a keyframe by right clicking on a setting and choosing ‘animate’... - Page 90 In the inspector window, click on the ‘track forward’ button to start tracking. A notification window will appear when the tracking is done. Click OK. Tracking options in the inspector panel include track reverse from last frame or current frame, stop track or track forward from current frame or first frame. Track reverse or forward from current frame is great for situations where your area of interest disappears during the render range, such as a car or bird moving out of frame.
- Page 91 Scroll wheels at the bottom of the tracker inspector panel let you adjust the offset position for the text. Now you can play back your composition and see your text attached to the object you have tracked! The green square is the tracker’s current position along the green path, and the red dashed line is the offset position used to animate the text.
-
Page 92: Color Correcting Your Clips
Click on the keyframes tab above the inspector to open the keyframes editor. Any nodes with keyframes applied will have a small arrow next to the node label, and only the parameter with keyframes added will appear in the list below. Click on the magnify icon and drag a box around the area you want to edit. -
Page 93: Using Scopes
With the ‘color’ page you get absolute control over the look of your clips First, click on the ‘color’ tab to open the ‘color’ page. You’ll see the color wheels, curves palettes and general color correction tools as well as the preview and nodes window. - Page 94 The ‘lift, ‘gamma’, ‘gain’ and ‘offset’ color wheels give you total control over the color and tonal balance of your clips. To make a uniform adjustment to all colors for each tonal region, drag the dial underneath the color wheels back and forth Another way to color grade is to use the built in scopes to help you balance shots. You can open a single video scope by clicking the ‘scope’...
-
Page 95: Secondary Color Correction
You can also use the curves palette to make primary color corrections. Simply click to create control points on the diagonal line inside the curve graph, and drag them up or down to adjust the master RGB contrast at different areas of image tonality. The optimum points to adjust are the bottom third, mid, and top third of the curve line. -
Page 96: Adding A Power Window
To qualify a color: Add a new serial node. Open the ‘qualifier’ palette and make sure the ‘selection range’ picker tool is selected. Click on the color in your clip you want to affect. Usually you’ll need to make some adjustments to soften the edges of your selection and limit the region to only the desired color. -
Page 97: Tracking A Window
Now you can make color corrections to your image in just the area you want. Power windows let you make secondary corrections to specific parts of your image Tracking a Window The camera, object or area in your shot may be moving, so to make sure your window stays on your selected object or area, you can use DaVinci Resolve’s powerful tracking feature. -
Page 98: Using Plugins
Most of the time automatic tracking is successful, but scenes can be complex and sometimes an object can pass in front of your selected area, interrupting or affecting your track. This can be solved manually using the keyframe editor. Refer to the DaVinci Resolve manual to find out more. - Page 99 Your new audio track will appear on the timeline. If you wish to change the type of track after creating it, right click next to the name of the track and select ‘change track type to’ and select the type of audio track you want, such as stereo, mono or 5.1.
- Page 100 This guide provides a basic overview of the features on the Fairlight page, but to learn more about all the details for each feature, refer to the DaVinci Resolve manual. The DaVinci Resolve manual provides details on the purpose of each tool and describes how to use them in easy to follow steps.
- Page 101 The Mixer Each audio track in your timeline corresponds to an individual channel strip in the Mixer, and by default there’s a single strip on the right for the ‘main bus’ labeled ‘M1’. Additional channel strips will appear on the right hand side with a set of controls for each additional ‘main’ and ‘submix bus’...
- Page 102 The four band equalizer can be applied to every clip in the timeline Outer bands let you make band filter adjustments using hi-shelf, lo-shelf, hi-pass and lo-pass filters. A pass filter affects all the frequencies above or below a particular frequency, by removing those frequencies completely from the signal.
- Page 103 To add EQ to an individual clip: Select the clip in the timeline that you want to add the EQ filter to. Click on the inspector and then click the ‘clip equalizer’ enable button. To add EQ to a track: Double click in the EQ section for one of your tracks in the mixer to open the equalizer for that track.
-
Page 104: Mastering Your Edit
Mastering your Edit So now you’ve edited, graded your clips and mixed your audio, you’ll want to export a render of your edit in the ‘deliver’ page. This page lets you select the range of clips you want to export, plus the format, codec and resolution you want. -
Page 105: Working With Third Party Software
To import your clips from a CFast 2.0 or SD card: Remove the CFast or SD card from your Blackmagic Pocket Cinema Camera 4K. Mount the CFast or SD card to your Mac or Windows computer using a CFast 2.0 card reader SD card reader or CFast drive. -
Page 106: Using Final Cut Pro X
Double click on the USB-C flash disk to open it and you should see a list of QuickTime movie files or folders that contain your CinemaDNG RAW image files. Depending on the format you chose to record in, you might have a mixture of files, but they should all use the same naming convention. -
Page 107: Using Adobe Premiere Pro Cc
Setting the project name and project options in Avid Media Composer 2018 Launch Avid Media Composer 2018 and the ‘select project’ window will appear. Click the ‘new project’ button and name your project in the ‘new project’ window. In the ‘format’ drop down menu select HD 1080 > 1080p/24 and click ‘ok’ to create the project. -
Page 108: Blackmagic Camera Setup Utility
Launch Adobe Premiere Pro CC. In the ‘welcome’ window select ‘new project’. A window will open containing project settings. Name your project. Choose the location for your project by clicking ‘browse’ and selecting your desired folder. Once you’ve selected your location folder click OK in the ‘new project’... - Page 109 After installing the latest Blackmagic Camera Setup utility on your computer, connect a USB-C cable between the computer and your Blackmagic Pocket Cinema Camera 4K. The USB-C port is located on the left side panel. Simply open the rubber cap to access the port.
-
Page 110: Developer Information
Developer Information Blackmagic Bluetooth Camera Control Blackmagic cameras with Bluetooth LE implement a variety of features and commands that allow users to control their cameras wirelessly. Developers have full access to these features for their custom applications. The following services and characteristics describe the full range of communication options that are available to the developer. - Page 111 Timecode (encrypted) UUID: 6D8F2110-86F1-41BF-9AFB-451D87E976C8 Request notifications for this characteristic to receive timecode updates. Timecode (HH:MM:SS:mm) is represented by a 32-bit BCD number: (eg. 09:12:53:10 = 0x09125310) Camera Status (encrypted) UUID: 7FE8691D-95DC-4FC5-8ABD-CA74339B51B9 Request notifications for this characteristic to receive camera status updates. The camera status is represented by flags contained in an 8-bit integer: None = 0x00...
-
Page 112: Blackmagic Sdi Camera Control Protocol
Studio Camera Control’ section in the Blackmagic URSA Broadcast and URSA Mini manuals, or the ATEM Switchers Manual and ATEM Switchers SDK manual for more information. These can be downloaded at www.blackmagicdesign.com/support. This document describes an extensible protocol for sending a uni directional stream of small control messages embedded in the non-active picture region of a digital video stream. - Page 113 The command id is an 8 bit unsigned integer which indicates the message type being sent. Receiving devices should ignore any commands that they do Command id (uint8) not understand. Commands 0 through 127 are reserved for commands that apply to multiple types of devices. Commands 128 through 255 are device specific.
- Page 114 Data types 129 through 255 are available for device specific purposes. The operation type specifies what action to perform on the specified Operation type (uint8) parameter. Currently defined values are: The supplied values are assigned to the specified parameter. Each element will be clamped according to its valid range.
- Page 115 Group Parameter Type Index Minimum Maximum Interpretation [0] = frame rate – – 24, 25, 30, 50, 60 [1] = M-rate – – 0 = regular, 1 = M-rate 0 = NTSC, 1 = PAL, 2 = 720, [2] = dimensions –...
- Page 116 Group Parameter Type Index Minimum Maximum Interpretation 0.0 = minimum, Mic level fixed16 – 1.0 = maximum 0.0 = minimum, Headphone level fixed16 – 1.0 = maximum 0.0 = minimum, Headphone program mix fixed16 – 1.0 = maximum 0.0 = minimum, Speaker level fixed16 –...
- Page 117 Group Parameter Type Index Minimum Maximum Interpretation Sets the tally front and tally rear brightness to the Tally brightness fixed16 – same level. 0.0 = minimum, 1.0 = maximum Sets the tally front brightness. Tally Front tally brightness fixed16 – 0.0 = minimum, 1.0 = maximum Sets the tally rear brightness.
- Page 118 Group Parameter Type Index Minimum Maximum Interpretation 0 = RAW, 1 = DNxHD, [0] = basic codec – – 2 = ProRes 3 = Blackmagic RAW RAW: 0 = Uncompressed, – – 1 = lossy 3:1, 2 = lossy 4:1 ProRes: 0 = HQ, int8...
-
Page 119: Example Protocol Packets
Example Protocol Packets Packet Operation Length Byte header command data trigger instantaneous auto focus on camera 4 turn on OIS on all cameras set exposure to 10 ms on camera 4 (10 ms = 10000 0x10 0x27 0x00 0x00 us = 0x00002710) add 15% to zebra level 0x33 0x01 (15 % = 0.15 f = 0x0133 fp) -
Page 120: Help
After checking the version of Blackmagic Camera Utility software installed on your computer, please visit the Blackmagic Design support center at www.blackmagicdesign.com/support to check for the latest updates. While it is usually a good idea to run the latest updates, it is wise to avoid updating any software if you are in the middle of an important project. -
Page 121: Regulatory Notices
Technical Regulation Conformity Certification under the Radio law. Hereby, Blackmagic Design declares that the Blackmagic Pocket Cinema Camera 4K is using wideband transmission systems in 2.4 GHz ISM band is in compliance with Directive 2014/53/EU The full text of the EU declaration of conformity is available from compliance@blackmagicdesign.com... -
Page 122: Safety Information
Safety Information Blackmagic Pocket Cinema Camera 4K is suitable for use in tropical locations with an ambient temperature of up to 40 No operator serviceable parts inside Blackmagic Pocket Cinema Camera 4K. Refer servicing to your local Blackmagic Design service center.
Need help?
Do you have a question about the Pocket Cinema Camera 4K and is the answer not in the manual?
Questions and answers