Weber mt CR 8 Operating And Maintenance Manual
Hatz 1 d 81 z
Hide thumbs
Also See for CR 8:
- Mounting instruction (4 pages) ,
- Operating and maintenance manual (32 pages)
Table of Contents

Related Manuals for Weber mt CR 8


Summary of Contents for Weber mt CR 8
- Page 1 Operating and Maintenance Manual CR 8 Hatz 1 D 81 Z Weber Maschinentechnik GmbH Im Boden 5 - 8, 10 57334 Bad Laasphe-Rückershausen / Germany Telephone +49 (0) 27 54 / 398-0 Fax +49 (0) 27 54 / 398-101 E-Mail: info@webermt.de Web: www.webermt.de...
- Page 2 CR 8...
-
Page 3: Table Of Contents
Table of contents Introduction Safety guidelines Graphic presentation Device description Technical data Activities prior to starting work Starting Compacting Taking out of operation Maintenance overview Maintenance work Operating fluids and fill levels Troubleshooting Storage Contact addresses CR 8... -
Page 4: Introduction
If necessary you can obtain additional information from your authorized WEBER dealer, or you can obtain information from one of the contact addresses on the last page. You can obtain information on the assembled Hatz diesel engine at www.hatz-diesel.com The valid conformity declaration is enclosed with every machine delivery. CR 8... -
Page 5: Safety Guidelines
The soil compactor should only be used in technically faultless condition, as intended, in a safety-conscious and hazard-conscious manner, in compliance with the instructions in the operating manual. Malfunctions that impair safety must be eliminated without delay. The CR 8 soil compactor is designed exclusively for compacting – sand – gravel –... - Page 6 Do not position yourself or work under suspended loads. If lubricating oils and fuel come into contact with skin, they can cause skin cancer. Upon contact with the skin, clean affected skin with suitable cleaning agent without delay. CR 8...
- Page 7 Important information for operating and maintenance personnel is marked by pictograms. Warning against irritants or materials hazardous to health Warning against a hazardous place Warning against a suspended load Wear ear protection General regulation Environmental protection Hard hat Safety shoes Protective gloves CR 8...
-
Page 8: Graphic Presentation
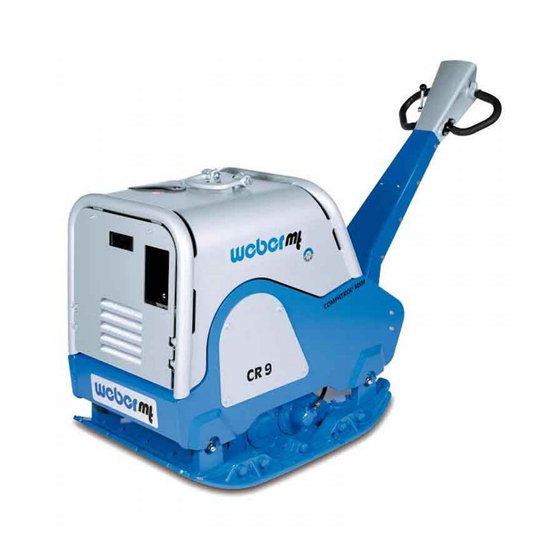
Graphic presentation Overall view CR 8 1 Engine (no image) 9 Gas lever 2 Drive lever 10 Attachment plates 3 Manual guidance rod 11 Tie-down straps (or similar items) 4 Lifting ring 12 Hearing protection (sticker) 5 Ignition module 6 Base plate... -
Page 9: Device Description
Device description The CR 8 compactor is used for road building and landscaping compaction tasks. Drive The compactor is propelled by an air-cooled Hatz diesel engine. Force is transferred to the exciter mechanically via a V-belt. Operation Start the Hatz diesel engine via the electrical start device. -
Page 10: Technical Data
Technical data CR 8 Weight Operating weight CECE in kg w/o AP Dimensions 1830 Overall length (in mm) Width without attachment plates (in mm) Width with attachment plates (in mm) 1160 Height with folded manual guidance rod (in mm) Base plate length (base in mm) - Page 11 1 Description 2 TYPE ....................... 3 Serial number 4 Year of manufacture ....................... 5 Weight 6 Rated power kW ....................... CR 8...
-
Page 12: Activities Prior To Starting Work
(1). Checking the engine oil level Open the maintenance cover (1) (fold forward). Pull the oil dip stick (1) out of the crankcase. The correct oil level is between the min. and max. marks. CR 8... -
Page 13: Starting
Fasten the protective mat with holder, screws, spring-lock washers and nuts on the base plate front and rear. Ensure that the protective mat rests under the base plate. Starting Open the vandalism flap (1). Bring the gas lever (1) into full-throttle position. CR 8... -
Page 14: Compacting
After turning on the ignition, you will be shown the time remaining until the next maintenance inspection in field 5 for 10 s. Compacting Control drive speed and direction of travel with the handle (1). Only run machine within reach of the manual guidance rod. CR 8... -
Page 15: Taking Out Of Operation
Close the vandalism flap (1) and lock with a padlock. During breaks – even if they are short – the machine must be shut down. Parked devices that represent an obstacle must be safeguarded against through conspicuous measures. CR 8... -
Page 16: Maintenance Overview
If lubricating oils and fuel come into contact with skin, they can cause skin cancer. Upon contact with the skin, clean affected skin with suitable cleaning agent without delay. If accessible during maintenance, check the condition and stability of all screws. CR 8... -
Page 17: Maintenance Work
After emptying completely, unscrew the oil drain pipe from the drain valve and screw the cover cap back onto the drain valve. Fill with oil in accordance with the specification. Danger of scalding due to hot oil. CR 8... - Page 18 Checking the battery / acid level Battery acid is extremely caustic. Protect hands and eyes with suitable protective goggles and gloves. Remove the cover cap (1). Check acid level. If insufficient, fill to max. mark with distilled water. CR 8...
- Page 19 Checking the V-belt Remove the V-belt guard (1). Check the V-belt (1) for cracks, damaged flanks, and wear. If there is excessive wear – replace the V-belt as specified in the repair manual. CR 8...
-
Page 20: Operating Fluids And Fill Levels
Operating fluids and fill levels Assembly Operating material Quantity Summer Winter CR 8 Quality Engine Engine oil SAE 10 W 40 1.9 l (– 10 ~ + 50 °C) API - CD CE-CF-CG or SHPD or CCMC - D4 - D5 - PD2 Diesel 10.0 l... -
Page 21: Troubleshooting
Remove / charge battery; fuse defective replace fuse No vibration / Vibrator V-belt defective Change vibrator V-belt no forward motion or insufficient forward motion Unit switches with Air trapped in the hydraulic Bleed the transmission a delay transmission system system CR 8... -
Page 22: Storage
– Store above freezing in a storage room – Attach permanent charger If the machine is to be stored for longer than six months, then contact the Weber service organization to discuss additional measures. CR 8... - Page 23 Comply with the device manufacturer’s operating manual for use of the battery charger. The operating manual of the charger is enclosed in the packaging of the battery charger. The battery charger BA 200 can be purchased using order no. 021000603. CR 8...
- Page 24 CR 8...
- Page 25 CR 8...
- Page 26 CR 8...
-
Page 27: Contact Addresses
+ 48 (0) 22 - 739 70 – 82 05-830 Stara Wies E-Mail info@webermt.com.pl In Tschechien WEBER MT s.r.o. Telefon + 42 (0) 776 222 216 V Piskovne 2054 + 42 (0) 776 222 261 278 01 Kralupy nad Vitavou E-Mail info@webermt.cz... - Page 28 > Vibration rollers > Joint cutters > Internal vibrators and converters > Rollers Weber MASCHINENTECHNIK GmbH Im Boden 57334 Bad Laasphe – Rückershausen Phone +49 (0) 27 54 / 398-0 – Fax +49 (0) 27 54 / 398-101 CR 8...
Need help?
Do you have a question about the CR 8 and is the answer not in the manual?
Questions and answers