Table of Contents
Advertisement
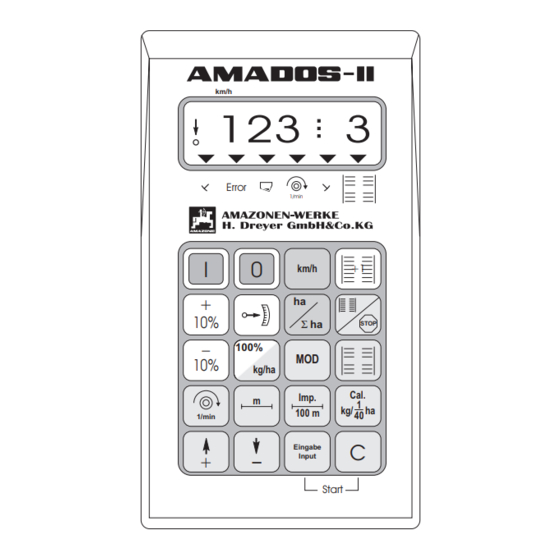
Operating Instructions
for On-Board-Computer
MG 405
DB 531.3 (GB) 05.00
Printed in Germany
GB
km/h
123
3
Error
1/min
I
0
+1
km/h
+
ha
10%
Σ
ha
STOP
_
100%
MOD
10%
kg/ha
Cal.
Imp.
m
1
kg/
100 m
40
1/min
C
Eingabe
_
+
Input
Start
ha
Before starting to operate,
please carefully read and
adhere to this operation manual
and safety advice!
Advertisement
Table of Contents

Related Manuals for Amazone AMADOS-II


Summary of Contents for Amazone AMADOS-II
- Page 1 Operating Instructions for On-Board-Computer km/h Error 1/min km/h Σ STOP 100% kg/ha Cal. Imp. 100 m 1/min Eingabe Input Start MG 405 Before starting to operate, DB 531.3 (GB) 05.00 please carefully read and Printed in Germany adhere to this operation manual and safety advice!
- Page 2 Only immediate claims to be filed with the forwarding agency may lead to replacement. Please check whether all parts mentioned in the following are provided. Copyright © 2000 by AMAZONEN-WERKE H. Dreyer GmbH & Co. KG D-49202 Hasbergen-Gaste Germany All rights reserved AMADOS-II DB 531.3 05.00...
- Page 3 Mounting clamp with magnet 27/51. • Mounting clamp with magnet 50/70. • 10 cable strips. adaptor cable for existing signal plug at the tractor (tractor specific) 2. Adaptor cable for "AMADOS-II" for existing signal- socket on tractors (tractor specific) AMADOS-II DB 531.3 05.00...
-
Page 4: Table Of Contents
Hint-Symbol ............................9 Declined use of the machine ......................9 Safety advices ............................ 9 Important hints for the use of the "AMADOS-II" with the centrifugal broadcaster or as a pure hectare counter......................9 Operating Instructions ........................11 Operation mode "centrifugal broadcaster" ................. 11 3.1.1... - Page 5 4.3.1.2 Fitting to tractors with 4-wheel drive or MB-trac ................67 4.3.1.3 Fitting to Unimog ..........................68 Connecting unit for "AMADOS-II" as hectare meter with shaft speed monitoring ......68 4.4.1 Fitting Sensor "Y" (operational position) ..................69 4.4.2 Fitting Sensor "A" (shaft speed monitoring) ..................70 Personal Notes ..........................
-
Page 6: Informations About The Computer
Informations about the computer Manufacturer AMAZONEN-Werke, H. Dreyer GmbH & Co. KG, P. O. Box 51, D-49202 Hasbergen-Gaste/Germany. AMADOS-II The on-board computer "AMADOS-II" can be used as a display-, monitoring- and controlling device • for centrifugal broadcasters AMAZONE ZA-M, •... -
Page 7: Keypad Layout
Informations about the computer Keypad layout The "AMADOS-II" on-board-computer can be used with a variety of different implements. Depending on the selected implement, the keypad assignment is as follows: seed drill fertiliser spreader hectare meter ON key ON key ON key... - Page 8 AMADOS-II DB 531.3 05.00...
-
Page 9: Important Informations
Any damages resulting from arbitrary changes on the "AMADOS-II" rule out the responsibility of the manufacturer. Before every operation and also during the operation check your device for proper function and for sufficient application accuracy of the machine. - Page 10 Centrifugal broadcaster km/h Error 1/min km/h Σ STOP 100% kg/ha Cal. Imp. 100 m 1/min Eingabe Input Start braun 12 V blau Fig. 3.1 AMADOS-II DB 531.3 05.00...
-
Page 11: Operating Instructions
(8). 7 - Sensor "shutter slide position". 8 - Spindle motor. 9 - Implement plug. "AMADOS-II" is connected via the implement plug (Fig. 3.1/9) with the implement signal distributor (6) of the centrifugal broadcaster. AMADOS-II DB 531.3 05.00... -
Page 12: In General
(do not mind scales). Whenever the supply voltage drops to below 10 volts, e. g. when starting the tractor, the computer automatically switches off. It has to be switched on again as described above. 3.1.1.2 Dial implement-specific data (values) AMADOS-II DB 531.3 05.00... -
Page 13: Preparations For Starting The Operation "Detailed Instruction
(mode "1") only with a disconnected implement plug. 1. While implement plug is disconnected (3.1/9) switch on “AMADOS-II” (pls. refer to para. 3.1.1.1). Initially the display shows the program entering date. For the following period of approx. 10 sec. then no entry is possible. -
Page 14: Entering The Implement-Specific Data
Centrifugal broadcaster - Preparations for starting the operation 3.1.3.2 Entering the implement-specific data 3.1.3.2.2 Enter working width For determining the operated area "AMADOS-II" Switch on “AMADOS-II”. requires information about the working width. The working width should be entered as follows: 3.1.3.2.1 Entering the spread rate... -
Page 15: Calibrating The Distance Sensor
Accurately measure out in the field a calibration required the value "Imp./100m", which sensor "X" distance of 100 m Mark the starting- and ending point releases to "AMADOS-II" when driving down a calibration of the calibration distance. distance of 100 m. -
Page 16: Fertiliser Calibration
An adequate quantity of fertiliser in the hopper. Display at the start of the fertiliser calibration test When calibrating the spread rate entered into the AMADOS-II may not exceed the km/h value shown in column "max. spread rate to be entered for calibrating" in table 3.1 for the entered working widths. - Page 17 "2.50" for 2,5 kg. then press key to confirm. "AMADOS-II" now calculates a calibration factor characteristic for the fertiliser and working width used which can be called up on the display by pressing the After completing the calibration test reinstall the spreading disc.
-
Page 18: Putting Into Operation In The Field
The memory for the hectare meter - part area [ha] calibration. returns automatically to "0". As soon as a shutter slide is opened “AMADOS-II” 3.1.4.3 Spreading extremely small spread rated, recognises that the implement is in working position. The e. - Page 19 2. Look for column 20 m working width and 8 k.p.h. In this column for the setting lever position "27" "AMADOS-II" now detemines a calibration factor (shutter position "27" for rye grass spread rate characteristic for the grass seed and working width 34 kg/ha) read off the spread rate "167"...
-
Page 20: Function-Keys And Their Use During The Spreading Operation
“0”, 1/min release key. A reset will eradicate all !!! memorised data from the AMADOS-II. Therefore, prior to resetting it is imperative to write down all 3.1.4.4.2 Hectare meter important data. Hectare meter - Part area 3.1.4.4.3 Part distance counter... -
Page 21: Pto-Speed Monitor
First press key and then key The display shows a "0" for the actual speed which Depending on the pre-set rated value AMADOS-II is stored as rated value. monitors the speed of a shaft which is equipped with a rev-sensor (special option). If the wanted speed is... -
Page 22: Emptying The Hopper
Operation in the event of electrical failure For emptying the hopper press In the event of electrical faults occuring on the computer "AMADOS-II" or the electrical servo-motors, the keys simultaneously until the operation can be continued even if the fault cannot be remedied straight away. -
Page 23: Fault Messages
In such cases remove the servo- motor. The shutter slide can then be brought into the required position. 3.1.8 Fault messages When using the AMADOS-II on-board-computer, the following fault messages (error messages) may occur: fault Cause Remedy message... - Page 24 Seed drill 5, 5.1 Fig. 3.2 AMADOS-II DB 531.3 05.00...
-
Page 25: Operation Mode "Seed Drill
Operation mode "Seed drill" "AMADOS-II" consists in the main of the following components: Fig. 3.2/... 1. “AMADOS-II” and its functions when in use with seed drills D8, D9, AD, RP-AD and MD8 1 - Computer. 2 - Basic console with bracket (3). - Page 26 Seed drill 5, 5.1 Fig. 3.3 AMADOS-II DB 531.3 05.00...
- Page 27 Seed drill 2. “AMADOS-II” and its functions when in use with The equipment with "AMADOS-II" consists in the main seed drills AD-P, AD-PL, RP-AD-P, FRS or FPS Fig. 3.3/... “AMADOS-II” on the seed drills AD-P, AD-PL, 1 - Computer. RP-AD-P, FRS or FPS 2 - Basic console with bracket (3).
-
Page 28: In General
"machine type" in mode "1". The coding By these keys the implement-specific data (values) depends on the seed drill type (stud-metering which are required for the "AMADOS-II" can directly be wheel or pneumatic seed drill) and on whether the dialed. - Page 29 (=01) or without (=00) a seed rate remote control. 4. Mode “5” 6. Switch off „AMADOS-II“ and connect it to Enter “mode “5” to instruct “AMADOS-II” whether implement plug. while creating tramlines the seed rate adjustment should be reduced or not.
-
Page 30: Preparations For Starting The Operation "Detailed Instruction
If the seed drill is equipped additionally with an electric seed rate remote control via "AMADOS-II", the seed For the mentioned example the coding “machinery type rate can be changed during the sowing operation. - Page 31 Change wanted time via keys Press key and select mode "3". Count up mode by actuating the MOD-key. Press key and thus store the selected value Display after selectring Mode "3" km/h 3 22 Error 1/min AMADOS-II DB 531.3 05.00...
- Page 32 6. Mode "5" b) Procedure with seed drills with seed rate reduction when creating tramlines, i. e. Enter mode “5” to instruct “AMADOS-II” whether while • pneumatic seed drills with seed rate adjustment creating tramlines the seed rate adjustment should be without seed return flow.
- Page 33 For the mentioned example the recommended seed rate 7. Mode "6", Seed rate remote control yes=1 / no=0 reduction is 12 %. Enter “mode “6” to instruct “AMADOS-II” whether the seed drill has been equipped with (=01) or without (=00) a seed rate remote control.
-
Page 34: Calibrating Setting Motor (Only At Seed Drills W I T H Seed Rate Adjustment)
Procedure for calibrating: Pre-dial by the keys the gearbox setting lever position “50” on the display. Switch on „AMADOS-II“ in order that the setting motor moves the gearbox setting lever to position „0“ on the scale of the two-range gearbox. Press... -
Page 35: Deviations Between Displayed And Actual Gearbox Setting Lever Position
“50” How to conduct a new calibration procedure: actual gearbox setting lever position: “51” Switch off and on „AMADOS-II“. The setting motor How to conduct a new calibration procedure: drives the gearbox setting lever on the scale of the two range gearbox in position „0“. -
Page 36: Entering The Implement-Specific Data
For determening the actual forward speed "AMADOS-II" required the value "Imp./100m", which sensor "X" Press once again and check the stored releases to "AMADOS-II" when driving down a calibration distance of 100 m. calibration figure. On the display now the dialed calibration figure must show up. - Page 37 1555 37,0 10.0/75 - 15 28,0 112,0 1568 28,0 36,0 144,0 1513 31x15.50 - 15 27,0 108,0 1512 18,0 72,0 1512 37,0 31x15.5 - 15 Mitas 28,0 22,0 88,0 1366 11.5/80 - 15 16,5 66,0 1386 AMADOS-II DB 531.3 05.00...
- Page 38 Imp./100m (table 3.6) calibration figure. The display should now show the determined calibration figure, e.g. 1005 Imp./100 m. 1005 = 0,95 Conversion factor = 1053 Number of crank turns (actual) = 22,5 x 0,95 = 21,4 AMADOS-II DB 531.3 05.00...
-
Page 39: Enter The Working Width
3.2.3.3.2 Enter the working width 3.2.3.3.3 Enter the seed rate value (only on seed drills with seed rate remote For determining the worked area "AMADOS-II" requires control) the information of the working width. To enable it enter the working width as follows: The desired seed rate can only be entered on the machine stationary. -
Page 40: Conducting The Calibration Test
When the calibrated area of 1/40 ha is Display of the gearbox setting lever position achieved, honk signals sound. km/h Terminate the calibration test only after the audible signal. Display after termination the calibration test km/h Error 1/min 5.0000 Error 1/min AMADOS-II DB 531.3 05.00... - Page 41 Error 1/min Press key and thus store. By this value “AMADOS-II” automatically calculates the new setting lever position. The electric setting motor moves the gearbox setting lever into this position. If the fault message "ERROR 1" is shown, the desired seed rate is not achieved. By changing the pinions in the two range gearbox this fault can possibly be remedied.
-
Page 42: Programming Tramline Rhythm
"AMADOS-II" Look up in the mentioned tables the line in which the seed drill working width (3 m) and the tramline spacing (24 m) are mentioned side by side. Read off control-rhythmus "8" (table 3.8). AMADOS-II DB 531.3 05.00... - Page 43 "8". Thereafter the following display is shown: Display with newly entered switching rhythm km/h Error 1/min Press key once again so that the second STOP figure (0) stops flicking. Table 3.9 shows the switching rhythms possible with "AMADOS-II" . AMADOS-II DB 531.3 05.00...
- Page 44 Switching rhythm r. h. l. h. r. h. l. h. Tramline counter, controlled and displayed by the on-board computer * no tramlines are created Switching rhythm Tramline counter, controlled and displayed by the on-board computer AMADOS-II DB 531.3 05.00...
-
Page 45: Creating Interval Tramlines
Error 1/min When the interval switching has been switched on the monitoring of the counter shaft is switched off. When the interval tramline had been switched on, the triangular symbol is shown above the interval-tramline symbol. AMADOS-II DB 531.3 05.00... -
Page 46: Putting Into Operation In The Field
The vertical arrow with the flicking circle below is shown For starting the operation simultaneously press the when the gearbox sensor sends impulses to "AMADOS-II", i.e. the seed drill has been lowered into operational position and is being pulled across the field. keys. -
Page 47: Changing The Seed Rate During The Sowing Operation
• because of stopping in the field, • because the seed drill is lifted (e.g. when giving way the “AMADOS-II”. In this case “AMADOS-II” sets/ to obstacles) adjusts the seed rate by the electric setting motor on the two-range gearbox. -
Page 48: Commenting The Possible Situation Displays
Error 2 means error metering shaft Error 3 means error counter shaft r.h. Error 4 means error counter shaft l.h. Error 5 means setting motor does not react Marker "l.h." in operational position (only D8/ AD/ MD8). AMADOS-II DB 531.3 05.00... -
Page 49: Function-Keys And Their Use During The Sowing Operation
Press and hold it pressed while pressing “0”, release key. A reset will eradicate all !!! memorised data from the AMADOS-II. Therefore, prior to 3.2.4.6.2 Hectare meter resetting it is imperative to write down all important data. Hectare meter - Part area... -
Page 50: Monitoring The Blower Fan Speed
Depending on the pre-chosen wanted speed stored as new rated value. “AMADOS-II” checks the blower fan speed. If the wanted speed is exceeded or undercut by more than 10 % an audible signal is given and in the display the black triangle above the rev-symbol blinks. -
Page 51: Fault Messages
Seed drill - Fault messages 3.2.5 Fault messages When using the "AMADOS-II" on-board-computer, the following fault messages (error messages) may occur: Table 3.10: Fault messages on the seed drill Error Cause Remedy code - reduce rated value (see para. 3.2.3.3.3) faulty gearbox setting/ rated value too high - new calibration (see para. -
Page 52: Fault Table - Seed Drill
- Using the cable diagram, check whether to give a warning. "bridges" in "AMFÜME" distributor box are correctly connected. - Check whether the signal wire in the distributor box is correctly connected - Remove signs of corrosion from connections AMADOS-II DB 531.3 05.00... - Page 53 The gear wheel may be running out and sensor (approx. 2 mm). occurs more of true. - Repair damaged sensor leads or frequently. replace sensor. - Check cable in distributor box for secure fit. AMADOS-II DB 531.3 05.00...
- Page 54 21 secs) the computer The number of impuses are best displays "1800" as the number of determined in a calibration drive. impuses per 100 metres. AMADOS-II DB 531.3 05.00...
- Page 55 Seed drill AMADOS-II DB 531.3 05.00...
- Page 56 Hectare meter km/h Error 1/min km/h Σ STOP 100% kg/ha Cal. Imp. 100 m 1/min Eingabe Input Start braun 12 V blau Fig. 3.4 AMADOS-II DB 531.3 05.00...
-
Page 57: Operation Mode "Hectare Meter
Hectare meter Operation mode "Hectare meter" Using "AMADOS-II" as a pure hectare meter, e. g. on soil tillage implements: • shows the actual forward speed in [k.p.h.] • functions as a hectare meter and • determines the finished part area in hectares [ha], •... -
Page 58: In General
(please refer to para. 3.3.3.1 ). 3. Switch off "AMADOS-II" and connect it to By these keys the implement-specific data (values) implement plug. which are required for the "AMADOS-II" can directly be dialed. 4. Switch on again “AMADOS-II”. Always confirm dialed values by 5. -
Page 59: Preparations For Starting The Operation "Detailed Instruction
3.3.3.2.1 Entering the working width Initially the display shows the program entering date. For the following period of For determination of the worked are "AMADOS-II" requires the information of the working width. Therefore approx. 10 sec. then no entry is possible. -
Page 60: Calibrating Distance Sensor
For determening the actual forward speed "AMADOS-II" field. Mark start and end point of the test distance. required the value "Imp./100m", which sensor "X" releases to "AMADOS-II" when driving down a calibration distance of 100 m. 100 m For entering the calibration value “Imp./100 m” two possibilities are given: •... -
Page 61: Putting Into Operation In The Field
10%. AMADOS-II DB 531.3 05.00... -
Page 62: Function-Keys And Their Use During The Operation
Press and hold it pressed while pressing “0”, release key. A reset will eradicate all !!! memorised data from the AMADOS-II. Therefore, prior to 3.3.4.2.2 Hectare meter resetting it is imperative to write down all important data. Hectare meter - Part area... -
Page 63: Pto-Speed Monitor
First press key and then key The display shows a "0" for the actual speed which Depending on the pre-set rated value AMADOS-II is stored as rated value. monitors the speed of a shaft which is equipped with a rev-sensor (special option). If the wanted speed is... -
Page 64: Fitting Instructions
Scratch off all paint from the fitting surfaces. Fit the bracket (4.1/3) fitted to the "AMADOS-II" onto the tube of the console, bring it to the desired position and fix by the thumb bolt there. - Page 65 Airstar Avant Fig. 4.1b/ . . . 1 - Battery connecting cable. 2 - Distributor for providing “AMADOS-II” with two sockets DIN 9680 for “AMADOS-II” and light with f ü r A M A D O S switch with electric power 3 - Switch for light.
-
Page 66: Fitting Sensor "X" For Determination Of The Travelled Distance Or Forward Speed
This is being registered by Σ STOP 100% "AMADOS-II". When fitting this sensor, the following kg/ha Cal. Imp. 100 m 1/min conditions should be adhered to:... -
Page 67: Fitting To Tractors With 4-Wheel Drive Or Mb-Trac
Spacing between magnet and sensor to be set in the range between 5 and 10 mm. The sensor should protrude from the bracket in minimum by 25 mm. Fig. 4.4 AMADOS-II DB 531.3 05.00... -
Page 68: Fitting To Unimog
Eingabe Input 2 brackets for fixing sensor "Y" and sensor "A". Start The connecting unit "AMADOS-II" as a hectare meter with shaft speed monitoring is required, when • besides of the determinination of the worked area also the speed of a shaft has to be monitored... -
Page 69: Fitting Sensor "Y" (Operational Position)
40 mm transport position magnet in (operational position off) max. 40 mm transport position range of movement (operational position off) of the magnet range of movement in operational position of the magnet in operational position Fig. 4.7 AMADOS-II DB 531.3 05.00... -
Page 70: Fitting Sensor "A" (Shaft Speed Monitoring)
Fit sensor with enclosed bracket to a firm machinery part opposing the magnet. The gap between the magnet and the sensor should be set within the range of 5 - 10 mm. The sensor must protrude from the bracket by at least 25 mm. AMADOS-II DB 531.3 05.00... -
Page 71: Personal Notes
Mode "6" seed rate remote control yes = 01 / no = 00 _____________ Working width [m] _____________ Switching rhythm _____________ Machine type "Hectare meter" Mode "1" Coding "04" _____________ Imp./100 m _____________ Working width [m] _____________ AMADOS-II DB 531.3 05.00... - Page 72 Tel.: ++49 (0) 54 05 50 1-0 D-49202 Hasbergen-Gaste Telefax: ++49 (0) 54 05 50 11 93 Germany e-mail: amazone@amazone.de http//: www.amazone.de Branch factories at: D-27794 Hude • D-04249 Leipzig • F-57602 Forbach Subsidiaries in England and France Factories for: Fertiliser broadcasters, -storage halls, -handling systems. Seed drills.
Need help?
Do you have a question about the AMADOS-II and is the answer not in the manual?
Questions and answers