
Related Manuals for mikroElektronika SpeakUp


Summary of Contents for mikroElektronika SpeakUp
- Page 1 The SpeakUp is a speech recognition click board. You can ™ set it up to recognize over 200 different voice commands and have the on-board MCU carry them out instantly.
- Page 2 TO OUR VALUED CUSTOMERS I want to express my thanks to you for being interested in our products and for having confidence in MikroElektronika. The primary aim of our company is to design and produce high quality electronic products and to constantly improve the performance thereof in order to better suit your needs.
-
Page 3: Table Of Contents
8.5. Configuring Project Settings 5. Tech Specs 8.6. Assigning An Action 6. Schematics 8.7. Uploading Project 7. How It Works? 8.8. Exporting Constants SpeakUp Firwmware Algorithm 9. Direct Configuration 8. Configuration Through Software 10. Recording Tips 8.1. Typical Workflow 11. Examples Page 3... -
Page 4: Introduction
1. Introduction The SpeakUp is a speaker dependent speech recognition click board with standalone capabilities. You can set it up to recognize over 200 voice commands and have the onboard STM32F415RG MCU carry them out. It works matching sounds with pre-recorded commands. -
Page 5: Applications
2. Applications Wouldn't you rather issue verbal commands and have your machines comply, instead of pressing keys, pushing buttons and flipping switches all the time? There's a wide range of applications for the SpeakUp. Command your lights, doors and home appliances. -
Page 6: Package Contains
3. Package Contains Package dimensions: L 70mm, W 60mm, H 30mm Package weight: ~40g User manual 1x8 headers Recycle Bin document SpeakUp click board ™ Page 6... -
Page 7: 4, How To Use It
2. Configure it 3. Use it Turn the board upside down so that Now you need to train your SpeakUp to The SpeakUp now understands your the bottom side is facing you upwards. obey your commands. Plug in the board commands. -
Page 8: Tech Specs
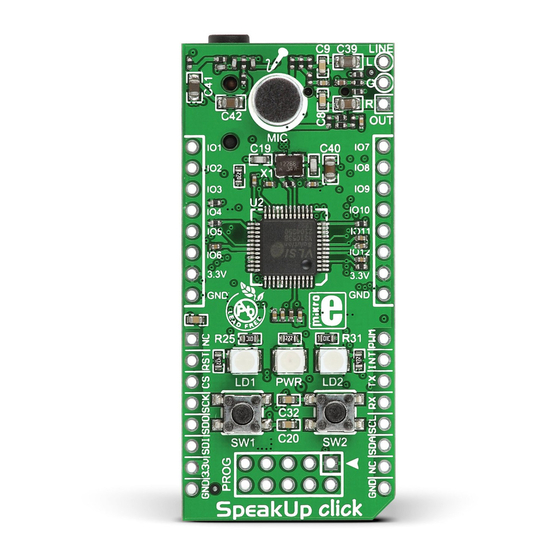
JTAG connector 25.40 mm 1000 mils Along with its key components, the SpeakUp packs other useful bits like two buttons for recording or deleting voice commands manually, while three signal LEDs give recognition feedback and indicate power. Page 8... -
Page 9: Schematics
6. Schematics VCC-3.3V VCC-USB 10uF PMEG3010ER 287K EN ADJ VCC-3.3V VCC-3.3V VCC-1.8V AP7331-ADJ EN ADJ 2.2uF 100K 10uF AP7331-ADJ 100nF 100nF 100nF 100nF 100nF 2.2uF 27K4 3.3nF 100K R6 470 RIGHT 10uF VCC-3.3V VCC-3.3V GBUF LEFT VCC-3.3V VCC-3.3V VCC-1.8V 10uF TMS-SWDIO R10 470 TCK-SWCLK... -
Page 10: How It Works
7. How It Works? What gives the SpeakUp its speech recognition capabilities is the firmware we developed for the on-board MCU. It’s based on the DTW algorithm, which makes it decisive, it turns your talk into action almost instantly. Sound is received through an on-board microphone. There’s also a 3.5mm jack for Input: connecting an external microphone. -
Page 11: Speakup Firwmware Algorithm
The feature vectors extracted from speech signal are required to best represent the speech data, to be in size that can be processed efficiently, and to have distinct characteristics. The SpeakUp Firmware uses Dynamic Time Warping (DTW) algorithm - word-based, isolated word, speaker dependent and template matching algorithm :... -
Page 12: Configuration Through Software
8. Configuration Through Software The SpeakUp software configuration tool is a free PC application for configuring the SpeakUp click board. With it, you can configure the board to recognize over 200 different voice commands and have the on-board MCU carry them out instantly. -
Page 13: Typical Workflow
8.1. Typical workflow Launch the app First time you launch the app a new project is Create a new New project created project or open or last one loaded created automatically. Otherwise, the last project existing manually automatically you were working on will open. Add or Edit voice commands Adjust... -
Page 14: Getting Started
The process lasts about 10 seconds. It’s done when the red signal Once you connect the SpeakUp to your computer you’re just a few LED turns off. After that the board is ready for recording voice clicks away from configuring it. -
Page 15: Creating A New Project
8.3. Creating A New Project To create a new project, press the Create New Project button from the main toolbar of the SpeakUp software. A new window will open, where you can enter your project’s name and destination folder (if the destination folder doesn’t exist, the software will prompt you to create it). -
Page 16: New Voice Command
8.4. New Voice Command Add a voice command Record it Stay within the time limit Hear it back record voice A New Voice Comand dialog The length of the recording The recorded command will be command, press the Add New window will appear. - Page 17 You’re done! If you’re satisfied with the The recorded command will If the SpeakUp fails to detect a voice command, your recording, enter a name for appear as a new tab. You can surrounding might be too noisy. Try again by speaking a bit...
-
Page 18: Configuring Project Settings
At higher values the matching doesn’t have to be so precise, but this increases the probability that the SpeakUp will pick up irrelevant speech and interpret it as a command. You should be able to reach the sweet spot value through some trial &... - Page 19 We recommend that you keep auto detection enabled. That interface (UART or USB). way the SpeakUp Click board will measure the noise level, and perform noise calibration automatically. Auto detection Data rate: Sets the speed used for sending data to the can last a bit longer, usually around 10 seconds.
-
Page 20: Assigning An Action
8.6. Assigning An Action When a new command is recorded, it is time to assign it an action. The action will be performed when the voice command is recognized. Also, a 16-bit index number of the voice command will be sent via chosen communication interface (UART or USB) . There are five types of action that can be assigned : NONE: When this option is selected, no action will be performed on the corresponding GPIO pin upon voice command matching. - Page 21 Pulse parameters The pulse parameters can be set in the Pulse Parameters window (click on the Edit pulse parameters icon Edit pulse parameters to open it) : A period (T) is the time it takes for a signal to complete a single cycle (sum of the high state and low state time periods).
-
Page 22: Uploading Project
8.7. Uploading Project When you’re finished recording and configuring voice commands, it is time to upload the project to the SpeakUp click board. This is done via the Upload Project button. ™ You can monitor the upload process in the Toolbar. -
Page 23: Exporting Constants
The exported document will be in the form of a source file (in any of the three languages), as shown below. mikroC mikroBasic mikroPascal This file is generated by SpeakUp Software. It containts voice commands constants. Creation date: 4/3/2014 Creation time: 11:20:09 AM Name: Turn ON Program A Index: 0 Length: 0.0 s... -
Page 24: Direct Configuration
9. Direct Configuration You can perform some basic configuration directly on the SpeakUp without using the software. Different combinations of button presses will allow you to record, re-record or erase commands. You’ll get feedback from the on-board LEDs. However you won’t be able to assign specific actions with this method. -
Page 25: Recording Tips
Number of voice commands that can be recorded depend on their lengths, typically more than 200 for the voice command length of 1 second. Please keep in mind that the recording is performed by the SpeakUp click board, not the computer, so there is no need to connect ™... -
Page 26: Examples
11. Examples SpeakUp has a world of applications. It’s up to your imagination to come up with the coolest ideas. Here’s a hint or two: Use SpeakUp on top of the Pi click Shield to command XBMC Replace your lamp switch with a SpeakUp click and a relay. - Page 27 No part of this manual, including product and software described herein, may be reproduced, stored in a retrieval system, translated or transmitted in any form or by any means, without the prior written permission of MikroElektronika. The manual PDF edition can be printed for private or local use, but not for distribution.
- Page 28 If you want to learn more about our products, please visit our website at www.mikroe.com If you are experiencing some problems with any of our products or just need additional information, please place your ticket at www.mikroe.com/support/ If you have any questions, comments or business proposals, do not hesitate to contact us at office@mikroe.com...
Need help?
Do you have a question about the SpeakUp and is the answer not in the manual?
Questions and answers