Advertisement
Quick Links
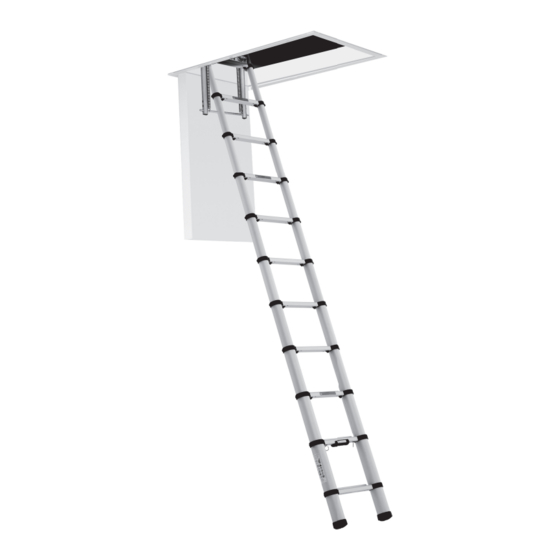
Telescopic
Loftmaster
INSTRUCTIONS
MODELS 101482 (2.6m) & 101483 (2.9m)
Safety
Please ensure you read the Safety section in
this manual before installing or using the
equipment. Your safety and that of others is
paramount to ZARGES.
& 101483 (2.9m)
e Safety section in
ng or using the
d that of others is
Advertisement

Subscribe to Our Youtube Channel
Summary of Contents for zarges 101482
- Page 1 Telescopic Loftmaster INSTRUCTIONS MODELS 101482 (2.6m) & 101483 (2.9m) & 101483 (2.9m) Safety Please ensure you read the Safety section in e Safety section in this manual before installing or using the ng or using the equipment. Your safety and that of others is d that of others is paramount to ZARGES.
-
Page 2: Table Of Contents
Keep these instructions in a safe place for future reference. Safety Please ensure you read the Safety section in this manual starting on page 3 before installing or using the equipment. Your safety and that of others is important. For more information visit: zarges.com/uk... -
Page 3: Important Safety Information
Manual and on the labels affixed to the equipment. Safety Considerations General • Do not install or use the ZARGES Telescopic Loftmaster if damaged in any way. • Never exceed the maximum load of 150 kg. -
Page 4: Main Features
Main Features Loftmaster Details The main features of the ZARGES Telescopic Loftmaster: 101482 101483 • There are two models each adjustable to three lengths for optimum usability. See the table (right) for details. Floor to Floor Floor to Floor • Manufactured in anodised aluminium... -
Page 5: Loftmaster Components
Parts Components Ladder Mounting brackets (x2) Swivel arms (x2) Hinge swivel pins (x2) Ladder sub-frame carrier bar (x1) Ladder sub-frame carrier tubes (x2) Springs (x2) Telescopic pole with hook (x1) Bracket fixing screws (x8) Instructions For more information visit: zarges.com/uk... -
Page 6: Install The Loftmaster
Footprint When the ladder is opened there should be enough space available at the base of the ladder for a person to easily and safely get onto and climb the ladder. For more information visit: zarges.com/uk... - Page 7 Fix the bracket using one of the fixing screws supplied. Similarly drill the other three holes (one on top) and screw in Ceiling Joist the other screws. Repeat for the other Sub-Frame bracket, see Fig 1.3. Carrier Tubes For more information visit: zarges.com/uk...
- Page 8 Fig 1.8. There is groove near each end of the bar for the purpose of holding the spring in place when installed, see Fig 1.8 (inset). Locate each spring in these grooves. For more information visit: zarges.com/uk...
- Page 9 1.10. Now slide the spring eyelet along the pin so that it locates in the groove on the pin, see Fig 1.10. Repeat for the other spring. 1.11. The installation will now be at the stage shown in Figure 1.11. 1.11 For more information visit: zarges.com/uk...
- Page 10 Minimum length - no extension b. Extended by 15cm c. Extended by 30cm Remove the two bolts from the endcaps and have them ready to fix the swivel arms to the ladder at step 1.21. Endcap For more information visit: zarges.com/uk...
- Page 11 Repeat the same setting on the 1.18 Left stile Left stile right-hand top stile from step 1.15. 90° clockwise 180° clockwise Note that this stile must be rotated 90° and 180° CCW for 15 and 30 cm extensions respectively. For more information visit: zarges.com/uk...
- Page 12 Repeat for the other side of the ladder. 1.21d. Shows both sides of the ladder fastened to the swivel arms. Installation is now complete. For more information visit: zarges.com/uk...
-
Page 13: Close & Stow The Loftmaster
During this operation the springs Stowage Bracket will pull the ladder into a horizontal position. Remove the pole and close the loft hatch. Pole Hooked onto Carrier For more information visit: zarges.com/uk... -
Page 14: Open The Loftmaster
Make sure all the rungs are locked (indicated by the red buttons being extended below the rungs). Important! Do not climb the ladder if any of the red levers beneath the rungs are not in the locked position. For more information visit: zarges.com/uk... -
Page 15: Specifications
fitting or use of such with, or by reason of, or the inability to use the parts. ZARGES Telescopic Loftmaster for any purpose. For more information visit: zarges.com/uk... - Page 16 Telescopic Loftmaster ZARGES (UK) Limited. Unit 8 Holdom Avenue, Saxon Park Industrial Estate, Bletchley, Milton Keynes MK1 1QU 8 Holdom Avenue, Saxon Park Industrial Estate, Bletchley, Milton Keynes MK1 1QU Tel: 01908 641118 08 641118 Email: sales@zarges.co.uk Web: zarges.com/uk k W b...


Need help?
Do you have a question about the 101482 and is the answer not in the manual?
Questions and answers