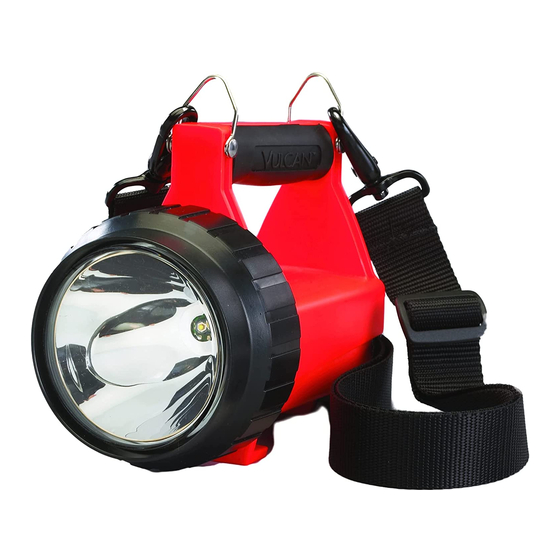
StreamLight FIRE VULCAN Service Manual
Hide thumbs
Also See for FIRE VULCAN:
- Operating instructions (4 pages) ,
- Operating instructions (3 pages)
Table of Contents
Advertisement
Quick Links
- 1 Troubleshooting
- 2 General Notes
- 3 Section I, Removing/Replacing the Facecap
- 4 Section II, Testing/Replacing the Lamp
- 5 Section IV, Testing/Replacing the Switch/Pcb Assembly
- 6 Section V, Testing/Repairing the Charger System
- 7 Section VI, the Body
- 8 Fire Vulcan Replacement Parts
- Download this manual
TABLE OF CONTENTS
Preface............................................................................................................ -2-
Troubleshooting DIAGRAM....................................................................... -3-
General Notes............................................................................................... -4-
Section I, Removing/Replacing The Facecap ..................................... -5-
Section Ii, Testing/Replacing The Lamp ............................................... -6-
SECTION III, TESTING THE VULCAN BATTERY............................................. -8-
Section Iv, Testing/Replacing The Switch/Pcb Assembly.............. -12-
Section V, Testing/Repairing The Charger System........................-22-
Section Vi, The Body........................................................................-29-
VULCAN REPLACEMENT PARTS AND DIAGRAM........................................... -30-
VULCAN SWITCH/PCB SCHEMATIC........................................................-31-
VULCAN CHARGE RACK PCB SCHEMATIC..............................................-32-
FIRE VULCAN TROUBLESHOOTING DIAGRAM...............................................-34-
Fire Vulcan General Notes...................................................................... .35-
Testing/Replacing The Switch/Pcb Assembly....................................-36-
Fire Vulcan Replacement Parts AND DIAGRAM..................................-42-
FIRE VULCAN SWITCH SCHEMATIC........................................................-43-
- 1 -
Advertisement
Table of Contents
Troubleshooting

Related Manuals for StreamLight FIRE VULCAN


Summary of Contents for StreamLight FIRE VULCAN
- Page 1 VULCAN REPLACEMENT PARTS AND DIAGRAM....…..………..-30- VULCAN SWITCH/PCB SCHEMATIC………………………………………………..-31- VULCAN CHARGE RACK PCB SCHEMATIC……………..………………………..-32- FIRE VULCAN TROUBLESHOOTING DIAGRAM........……….-34- FIRE VULCAN GENERAL NOTES.............……… .35- TESTING/REPLACING THE SWITCH/PCB ASSEMBLY..……....…..…-36- FIRE VULCAN REPLACEMENT PARTS AND DIAGRAM....….…..…….-42- FIRE VULCAN SWITCH SCHEMATIC……………………………………….……….-43- - 1 -...
- Page 2 VULCAN SERVICE MANUAL PREFACE The purpose of this manual is to provide the information needed to service the Streamlight Vulcan flashlight system. This manual is dated (see front cover). Additions, deletions and changes to this manual will display a later date.
- Page 3 - 3 -...
- Page 4 If the problem remains elusive the Vulcan and all of its available components (including the charge rack and plug-in wall transformer) should be returned to Streamlight for factory service. Charge Contacts The charge contacts located on the Vulcan and the charge rack must be kept clean. If the charge rack contacts become dirty they can become stuck in the down position and fail to make proper contact, resulting in the Vulcan not receiving a proper charge.
- Page 5 SECTION I REMOVING/REPLACING THE FACECAP The facecap of the Vulcan is designed to prevent water from entering and damaging the flashlight. A proper seal is achieved through the use of two internally mounted O-rings. It is very important that the facecap be properly reinstalled after it has been removed. Removal A.
- Page 6 SECTION II TESTING/REPLACING THE LAMP A. Remove the facecap from the Vulcan as described in Section I. B. Carefully lift the lamp/reflector assembly away from the Vulcan body. C. There are two different styles of bulbs. The single filament bulbs have two leads. Dual filament bulbs have three leads.
- Page 7 2. Bulb replacement. Note: Single and Dual filament bulbs are not interchangeable. A single filament bulb socket is connected to the circuit board by two wire leads. A dual filament bulb socket is connected by three wire leads. Dual Filament Socket Single Filament Socket a.
- Page 8 SECTION III TESTING/REPLACING THE BATTERY Test for Charge Power to the Battery A. Remove the facecap from the Vulcan as described in Section I. B. Place a multimeter into the DC Volts position. C. Place the red meter lead onto the positive (red) battery terminal and the black meter lead onto the negative (black) battery terminal.
- Page 9 Quick Battery Test A. Charge the Vulcan in a known good charge rack for 12 hours, or until the Green LED lights. B. Remove the Vulcan from the charge rack. C. Place a multimeter into the DC Volts position. D. Place the red meter lead onto the positive (red) battery terminal and the black meter lead onto the negative (black) battery terminal.
- Page 10 3. Normal intensity and short run time may indicate sulfation. 4. Low intensity and normal run time may indicate shorted cells. 5. Batteries which exhibit signs of sulfation or shorted cells must be replaced. The sealed lead acid battery in this product is recyclable. At the end of its useful life, under various state laws, it may be illegal to dispose of this battery in the municipal solid waste stream.
- Page 11 Negative Terminal Positive Terminal (–) Charge Leads Battery Clamp Positive Charge and Battery Leads. 3. Replace the battery clamp, routing the positive (red) charge and battery leads between the body and the clamp. 4. Secure the clamp to the body with the Phillips head screws. 5.
- Page 12 SECTION IV TESTING/REPLACING THE SWITCH/PCB ASSEMBLY Note: There are currently several different switch versions. The instructions for checking the PCB are the same for all versions. The different switches are addressed individually in this chapter. Testing the Printed Circuit Board Charge Circuit A.
- Page 13 Testing the Toggle Switch Note: There are procedures included for testing the toggle switch. However, the toggle switch is not serviceable, and if it fails any test it must be replaced. A. The toggle switch contact points on the PCB are aligned vertically for the single filament Vulcan, and horizontally on the dual filament Vulcan.
- Page 14 Toggle Switch/PCB Removal Note: The Vulcan body with the toggle switch is physically different from, and not interchangeable with, the Vulcan body using the paddle switch. Note: As you remove the toggle switch/PCB, note the routing of battery and charge leads. A.
- Page 15 Toggle Switch/PCB Installation A. Obtain a replacement toggle switch/PCB assembly. Single Filament Assembly P/N 440118 Dual Filament Assembly P/N 440119 This nut must be bottomed on the threads. Do not over tighten. B. Reattach the leads to the charge contact screws and secure them in place. 1.
- Page 16 2. Route the battery leads and charge leads between the mounting posts and the walls of the body. 3. Reconnect the battery leads and test the switch for function. After confirming the switch functions properly, remove the battery leads and proceed to Step D D.
- Page 17 Testing the Paddle Switch Contacts Note: Replacement parts for the Paddle Switch versions are no longer available. If adjusting the switch contacts does not fix the problem, the entire Body/PCB assembly must be replaced. A. Reconnect the negative (black) battery lead. B.
- Page 18 Paddle Switch/PCB Removal Note: As you remove the switch/PCB, note the routing of battery and charge leads. A. Unscrew the two Phillips mounting screws which secure the battery clamp and remove the battery clamp. B. Remove the negative (black) lead from the battery and remove the positive (red) lead from the battery.
- Page 19 F. Inspect the ends of the contact to insure that they are not touching the pads on the PCB. The ends should be about 1/32” above the board. Note: There is a somewhat critical relationship between the ends of the contact, the bends in the contact, and the circuit board.
- Page 20 Paddle Switch/PCB Installation Single Filament Assembly P/N 440008 Dual Filament Assembly P/N 440027 B. Reattach the leads to the charge contact screws and secure them in place. 1. The negative (black) lead goes to the charge contact screw on the left side (open side of body facing upward, handle facing away from you) and the positive (red) charge lead goes to the contact screw on the right.
- Page 21 Positive Battery and Charge Leads Negative Charge Lead 3. Align the holes in the switch/PCB with the mounting standoffs and secure the assembly with the Phillips screws. (Note: Insure that there is an insulating washer under the head of the mounting screw located on the side with the positive leads. 4.
- Page 22 SECTION V TESTING/REPAIRING THE CHARGER SYSTEM The Vulcan currently has two charge racks available, a “direct wire” with a permanently attached 12 V DC power cord, and a “standard” rack with a socket that accepts a variety of charge cords for various DC and AC power sources. Note: All power sources must provide the charge rack with 12 - 15 V DC during charging.
- Page 23 (a known good 12V DC source is also suitable). Note: Direct Wire Systems must be connected to the vehicle battery through either a switched or un-switched connection. Streamlight recommends that Direct Wire Systems not be connected to the accessory rail of a “battery saver” or supplemental charger. Some such devices can destroy the Vulcan charge circuitry and will void the warranty.
- Page 24 A. Connect the charge rack to its power supply. (Direct wire rack connected to vehicle battery; Standard rack connected to a known good power supply). B. Measure the charge rack output at the charge pins at the front of the charge rack. 1.
- Page 25 C. Compress the mounting posts and remove the base plate of the charging rack. Mounting Posts Key Slot D. The power input connector has a key slot that faces toward the base plate of the rack. 1. Testing the standard power input connector. (See pictures on Page 26.) a.
- Page 26 Positive contact Negative contact (PC Board) Positive contact (Power Input) 2. Testing the Direct Wire power input leads. Note: Disconnect charge racks with permanently wired input power from the input source. a. Disassemble the charge rack as directed on page 24, Testing the Internal Wiring. b.
- Page 27 Testing For Proper Charge Rack Function A. Use a known good Vulcan to test the charge rack. B. Remove the facecap from the Vulcan as described in Section I. C. Unscrew and remove the lens/reflector assembly from the lamp holder. D.
- Page 28 Replacing the Charge Rack PCB A. Unscrew the Phillips head screw located above the single base plate mounting post. Mounting Screw B. Carefully lift the PCB assembly straight up and out of the charger housing. C. Obtain the proper replacement assembly. 1.
- Page 29 Cracked bodies must be replaced to maintain the Vulcan's hermetic integrity and safety ratings. Streamlight strongly recommends that any cracked Vulcan bodies be returned to the factory for proper replacement. Streamlight will vacuum test for proper hermetic integrity and compliance with applicable safety rating requirements.
- Page 30 ulcan Replacement Parts ITEM DESCRIPTION ITEM DESCRIPTION 440002 FACE CAP 440040 BODY/HANDLE ASSY., YELLOW 440033 O-RING, FACE CAP 440040-6 BODY/HANDLE ASSY., GREEN 440070 REFLECTOR/LENS ASSY. 440102 COVER, CHARGE RACK YELL. 440023 SCREW, BATTERY CLAMP 440102-6 COVER, CHARGE RACK GRN 440005 CLAMP, BATTERY 450022 SPRING, LATCH RELEASE...
- Page 32 Obsolete Style With Paddle Switch...
- Page 34 Note : Review the charger note at bottom of Vulcan troubleshooting diagram on page 3 of this manual. See General Notes (p. 35) for information regarding the tail lights on the Fire Vulcan...
- Page 35 Tail Light Lenses The tail light lenses on the rear of the body of the Fire Vulcan are sonically welded in place and are not field serviceable. The integrity of the lenses must be maintained to assure the hermetic integrity and class rating of the flashlight. If the lenses are damaged the entire flashlight should be returned to Streamlight for factory service.
- Page 36 TESTING/REPLACING THE SWITCH/PCB ASSEMBLY Testing the Printed Circuit Board Charge Circuit A. Remove the facecap from the Vulcan as described in Section I (page 5). B. Place the Vulcan on a solid work surface with the open end facing upwards and with the handle away from you.
- Page 37 Testing the Toggle Switch Note: There are procedures included for testing the toggle switch. However, the toggle switch is not serviceable, and if it fails any test it must be replaced. A. Disconnect the negative (-) battery lead. B. Note the location of the toggle switch contacts in the photo below. C.
- Page 38 Toggle Switch/PCB Removal Note: As you remove the toggle switch/PCB, note the routing of battery and charge leads. A. Unscrew the two Phillips mounting screws which secure the battery clamp and remove the battery clamp. Negative Battery Lead Battery Clamp Positive Battery Lead...
- Page 39 E. Unscrew the Phillips mounting screws that secure the LED tail light boards to the flashlight body. LED tail light board screws F. Use a 5/8" wrench to loosen the toggle switch boot (see picture below). Toggle Switch Boot G. Once the toggle switch boot has been loosened it can be unscrewed and removed from the toggle switch.
- Page 40 Toggle Switch/PCB Installation A. Obtain a replacement LED toggle switch assembly p/n: 440127 ( - ) Negative Charge Lead ( - ) Negative Battery Lead LED Tail Light Boards ( + ) Positive Battery Lead ( + ) Positive Charge Lead B.
- Page 41 C. Place the toggle switch boot nut over the switch handle and tighten the nut with a 5/8” wrench. Note: Do Not Over Tighten the Nut. D. Insert the battery into the body of the flashlight. The battery terminals should be pointing upward and the positive battery contact should be adjacent to the charge contact mounting holes.
- Page 42 FIRE VULCAN REPLACEMENT PARTS...
- Page 43 Jumper A Jumper B - 43 - AGT Battery Supply - Authorized Streamlight Dealer / www.agtbattery.com...
Need help?
Do you have a question about the FIRE VULCAN and is the answer not in the manual?
Questions and answers