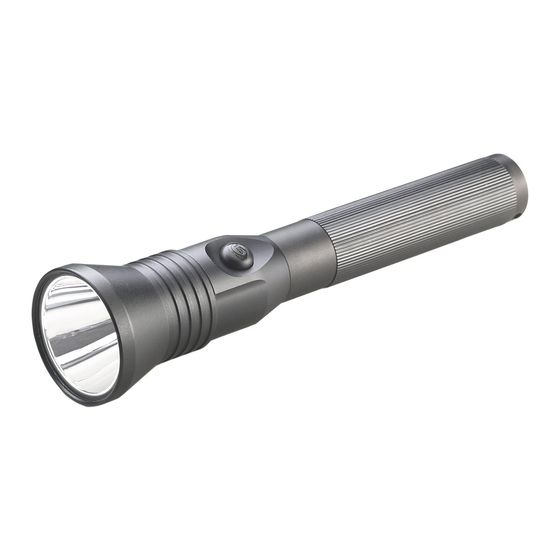
Summary of Contents for StreamLight Stinger Series
- Page 1 tinger erieS ® tinger ® ® tinger hp tinger ® ltra tinger ® tinger xt ® ® tinger xt hp Operating Instructions Instrucciones de funcionamiento Instructions d’utilisation Bedienungsanleitung...
-
Page 2: Charger Mounting
The bulb gets extremely hot. Do not touch a lighted bulb with your bare fingers. M. Use of this product for other than a lighting device is not recommended. Streamlight specifically disclaims liability for other than recommended use. -
Page 3: Fast Charging
This will force the arms apart and allow the head to enter into its proper position. This insertion method allows the Stinger to be mounted with almost zero clearance at its ends. Before mounting a Streamlight charger in a vehicle, please read the following section. INSTALLING A DIRECT WIRE CHARGER The 12V DC Direct Wire Charge Cord (#22050) is offered for those who would like to permanently mount a Streamlight charger in their vehicle. -
Page 4: Bulb Replacement
If no obvious external fault is found, return the system to Streamlight for service. B. If you notice that it always takes longer than 2.5 hours for the LED to blink, especially if the flashlight has not been fully discharged, return the system for service. - Page 5 ® Streamlight warrants this product to be free of defect for a lifetime of use. We will repair, replace or refund the purchase price, at our option, of any Streamlight product that does not work or that you manage to break for as long as you own it.
- Page 6 MONTAJE DEL CARGADOR El cargador Streamlight no debe montarse nunca contra una superficie de vinilo o sensible al calor. Aunque el cargador está diseñado para soportar la Stinger en prácticamente cualquier orientación, la posición más segura es con la linterna vertical y el cabezal hacia arriba.
- Page 7 Este método de inserción permite que la Stinger se pueda montar sin apenas separación en sus extremos. Antes de montar un cargador Streamlight en un vehículo lea la sección siguiente. LA INSTALACIóN DE UN CARGADOR DIRECTO DE ALAMBRE El 12V DC cuerda de directa de alambre (#22050) se oferta para aquellos que a gustaría montar permanentemente un carga-...
- Page 8 2. Deje que la bombilla de la Stinger se enfríe antes de sustituirla. Lleve protección para los ojos. 3. Antes de trabajar en la Streamlight, quite la tapa trasera y la pila. 4. Desenrosque y retire el conjunto de casquillo frontal/reflector y el muelle del foco del UltraStinger. Esto dejará al descubi- erto la bombilla y la parte delantera del módulo del conmutador...
- Page 9 Stinger y posibles lesiones. 5. Para obtener el servicio más seguro y prolongado de sus productos recargables, Streamlight, conjuntamente con los princi- pales fabricantes de pilas de níquel-cadmio, ofrece las siguientes recomendaciones: A.
- Page 10 L’ampoule est extrêmement chaude. Il ne faut pas toucher avec les doigts nus une ampoule allumée. M. Il n’est pas recommandé d’utiliser ce produit pour une application autre que l’éclairage. Streamlight rejette spécifique- ment toute responsabilité pour toute autre utilisation.
- Page 11 à chaque nouveau contact. Si aucun problème n’est évident, renvoyer le système à Streamlight pour réparation. B. Si la recharge rapide prend toujours plus de 2 heures et demie, spécialement si la torche n’était pas complètement déchargée, renvoyer le système pour réparation.
- Page 12 Cette méthode d’insertion permet le montage de la torche Stinger avec pratiquement aucun espace à l’extrémité. Avant de monter un chargeur Streamlight dans un véhicule, lisez s’il vous plaît la section suivante. MONTAGE DANS UN VEHICULE, BASE DE RECHARGE A BRANCHEMENT DIRECT Installer d’un chargeur de fil direct...
- Page 13 5. Pour obtenir le service le plus long possible, en toute sécurité, avec des produits rechargeables, Streamlight, Inc., en collaboration avec les fabricants des accus au nickel-cadmium, offre les recommandations suivantes.
- Page 14 Haftung für andere als die vorgesehene Nutzung ab. AUFBAU DES LADEGERÄTES Das Streamlight-Ladegerät sollte niemals auf Vinyl- oder hitzeempfindlichen Oberflächen angebracht werden. Obwohl das Ladegerät so konzipiert ist, daß es die Stinger-Lampe in praktisch jeder Lage halten kann, befindet sich die Lampe vertikal mit dem Kopf nach oben in der sichersten Position.
- Page 15 Streamlight zurück. B. Wenn Sie feststellen, daß es immer länger als 2,5 Stunden dauert, bis die LED-Anzeige des Systems zu blinken beginnt, besonders wenn die Batterie nicht vollständig entladen war, schicken Sie es bitte zur Wartung an Streamlight zurück.
- Page 16 Vor dem Besteigen des Streamlight Ladegeräts in einem Fahrzeug, lesen Sie bitte das folgende. INSTALLIEREN EINES DIREkTEN LEITUNGSLADERGARÄTS Die 12V DC leiten Sie Leitungslastschnur (#22050) wird für Kunden angeboten, die ein Streamlight-Ladegerät permanent in ihrem Auto montieren möchten. : Bevor Sie eine elektrische Verbindung in einem Fahrzeug herstellen, sollten Sie sich darüber klar sein, daß eine kurzge- wichtig schlossene Autobatterie Stromstärken von hunderten von Ampere leisten und leicht ein Feuer verursachen kann.
- Page 17 Druck zum Platzen der Batterie und folglich zur Schädigung der Lampe und zu möglichen Verletzungen führen. 5. Um die sicherste und längste Lebensdauer Ihrer wiederaufladbaren Produkte zu erzielen, hat Streamlight gemeinsam mit den führenden Herstellern von Nickel-Kadmium-Batterien die folgenden Empfehlungen zusammengestellt: A.
- Page 18 ® ENREGISTREMENT DE LA GARANTIE – Pour enregistrer votre garantie, dirigez-vous vers le site www.streamlight.com (enregistrement de garantie en ligne) dans un délai de dix (10) jours suivant l’achat. Conservez votre reçu ou toute preuve d’achat. UTILISATION DU PRODUIT – Les torches Streamlight sont construites pour utilisation comme source d’éclairage à...


Need help?
Do you have a question about the Stinger Series and is the answer not in the manual?
Questions and answers