
Subscribe to Our Youtube Channel
Related Manuals for VTech VH6212


Summary of Contents for VTech VH6212
- Page 1 VH6212 Go to businessphones.vtech.com to register your product for DECT Convertible enhanced warranty support Cordless Headset and the latest VTech product with Dongle news. User’s manual...
- Page 2 Congratulations on your purchase of this VTech product. Before using this product, please read the Important safety information. This Abridged user’s manual provides you with the basic installation and use instructions. A limited set of features are described in abbreviated form.
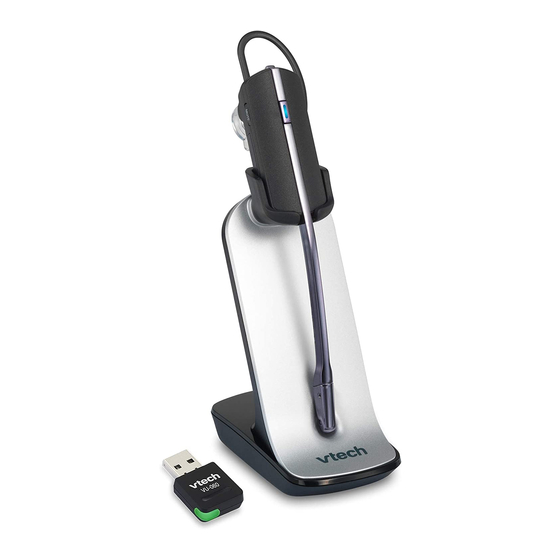
- Page 3 Introduction The VH6212 includes a cordless headset, charger, and a Dongle. The Dongle functions as a headset base so that this product allows you to have handsfree phone conversations. The Dongle allows you to connect your headset using either one of the following methods: •...
- Page 4 What’s in the box Your product package contains the following items. Save your sales receipt and original packaging in the event warranty service is necessary. User's manual Dongle Cordless headset with earbud attached Battery with battery Headset charger Headset charger compartment cover power adapter Four over-the-ear hooks...
-
Page 5: Table Of Contents
Dongle ....27 PHONE mode - Connect to Registering Headset to an IP phone ......9 other products ....28 Plug the Dongle to a VTech/ Registering Dongle to other SNOM IP phone ....9 products ......28 PC mode - Connect to Troubleshooting .....29... -
Page 6: Getting Started Headset Overview
Getting started Headset overview 1 – VOL+/VOL- • Slide the volume switch to the right or left to adjust the headset ringer volume while in idle mode, or the listening volume while on a call. 2 – ON/OFF button and LED light •... -
Page 7: Headset Lights
Getting started Headset lights ON/OFF button and LED light Press to make, answer or end a call. Color LED light status Meaning Steady light on The battery is low and the headset is charging in the headset charger. Flash every 10 seconds The battery is low and the headset is not in the headset charger. -
Page 8: Headset Alert Tones
Getting started Headset alert Headset alert tones Alert tone behavior Meaning • One short beep every The microphone is muted. 30 seconds • Two beeps Error alert tone. • The speaking volume has reached its highest or lowest setting. • Any key is pressed while the headset is out of range. -
Page 9: Headset Charger Overview
Getting started Headset charger overview 1 – Magnetic charging mount • Place the headset here for charging. -
Page 10: Dongle Overview
Getting started Dongle overview 1 – Magnetic charging mount • Press and hold for about 4 seconds to enter the registration mode. • For LED light patterns, see Dongle LED lights below. Dongle LED lights Color LED light status • Green Steady green when the Dongle is not in use. -
Page 11: Install Headset Battery
When fully charged, the headset battery supports up to 5 hours of talk time or 48 hours of standby time. • To order a replacement battery pack (model BT291865), visit our website at businessphones.vtech.com or call 1 (800) 595-9511. In Canada, dial 1 (800) 267-7377. -
Page 12: Power Up The Headset Charger
Getting started Power up the headset charger 1. Plug the small end of the headset charger power adapter at the back of the headset charger. 2. Plug the large end into an electrical outlet not controlled by a wall switch. Charge the headset battery Hang the headset onto the magnetic charging mount. -
Page 13: Connection Methods
Connect to an IP phone • You can connect the headset to an IP phone by plugging the Dongle to the USB port on your VTech/SNOM IP phone. The headset acts as a supplementary device that can make and receive calls with the IP phone. -
Page 14: Phone Mode - Connect To An Ip Phone
Visit businessphones.vtech.com for the compatibility list of IP phone models that are compatible for USB connection. 1. Plug the Dongle to the USB port on your VTech/SNOM IP phone. The Dongle LED light will turn steady green. 2. At the telephone base of your VTech/SNOM IP Phone, press to turn on the headset mode. -
Page 15: Pc Mode - Connect To A Computer
1. Plug the Dongle to the USB port on your computer. The Dongle LED light will turn steady green. 2. Install the VTech Control. • Visit businessphones.vtech.com/support/downloads to download and install the software. You can also download the Installation and Operation Guide there for installation and operation instructions of the software. - Page 16 Make sure VTech Headset is selected under the speakers and microphone settings. NOTES: • The VTech Control does not support the App versions of Skype, including both mobile APP and desktop APP. • After the installation of VTech Control, Skype will prompt a message “VTechControl.exe is requesting access to Skype”.
- Page 17 Audio settings in Skype for Business 2016: i. Launch the Microsoft Lync program. ii. Click on Options, then Audio Device. iii. Make sure VTech Headset is selected under the Audio device setting. IMPORTANT INFORMATION • Periodically check for software updates. For more details, download the VTech Control - Installation and Operation Guide under the product page of VH6210/VH6211/VH6212 on businessphones.vtech.com/...
-
Page 18: Position The Headset
Getting started Position the headset Over-the-ear hook Attach the headset accessories and wear the headset: 1. Mount the earhooks over your ear and insert the earbuds to check the best fitting. Remove them from your ear after checking. 2. Insert your desired earhook to the headset. •... - Page 19 Getting started Position the headset 3. Insert your desired earbud to the headset. • Make sure the protruding bump is pointing towards your mouth when placed on your ear. The protruding bump on the earbud holds the headset securely in your ear. 4.
- Page 20 Getting started Position the headset Remove the earbud and earhook: Remove the earbud and earhook, when you need to replace them in the Over-the-ear hook, when you need to change to the over- the-head and behind-the-neck style. 1. Hold both sides of the earbud. Twist and pull the earbud until it separates from the earpiece.
-
Page 21: Over-The-Head Band
Getting started Position the headset Over-the-head band Attach the headband and wear the headset: 1. With the headset at a vertical angle (microphone pointing down), insert the headset earpiece into the headband. 2. Rotate the headset to a horizontal direction until it holds into place. - Page 22 Getting started Position the headset 3. Adjust the headband to fit your head. 4. Rotate the angle of the headset until the microphone is pointing towards your mouth. • Make sure the protruding bump is pointing towards your mouth when placed on your ear. The protruding bump on the earbud holds the headset securely in your ear.
-
Page 23: Over-The-Neck-Band
Getting started Position the headset Over-the-neck-band Attach the neckband and wear the headset: 1. With the headset at a vertical angle (microphone pointing down), insert the headset earpiece into the neckband. 2. Rotate the headset to a horizontal direction until it clicks into place. - Page 24 Getting started Position the headset 3. Place the neckband around your neck and over your ears. 4. Adjust and rotate the angle of the headset until the microphone is pointing towards your mouth. • Make sure the protruding bump is pointing towards your mouth when placed on your ear.
-
Page 25: Operate
Operate Headset power on/off To power on the headset: • Press and hold ON/OFF button for two seconds. LED light flashes blue three times, and you hear three beeps when it is being powered on. To power off the headset: •... -
Page 26: Phone Mode - Operate With An Ip Phone
Operate PHONE mode - Operate with an IP Phone Before use Make sure you have plugged your Dongle to the USB port on your VTech/SNOM IP Phone. Make and receive calls To make a call: 1. Press the ON/OFF button on the headset. You hear a dial tone in the headset earpiece. -
Page 27: Pc Mode - Operate With A Computer
VH6210/VH6211/VH6212. Unzip and install the VTech Control after download. Make and receive calls You can make and receive VoIP calls with your VTech Control through Skype and Skype for Business. Caller ID announce The Caller ID announce feature with your VTech Control lets you... -
Page 28: Sound Settings
Operate Sound settings Headset ringer The headset do not have external ringers. When you receive calls, the headset earpiece rings. To change the volume of the earpiece ringer: • Slide the volume switch at the top of the headset towards VOL+ or VOL- when the headset is not in use. -
Page 29: Change Audio Bandwidth
Operate Sound settings Change audio bandwidth The default audio bandwidith is narrowband. The wideband audio mode works only if the telephone/device to which your headset is connected supports wideband audio. When you switch the audio bandwidth from narrowband to wideband, the frequency response of a call will be widened and the HD audio quality will be enhanced, whilst the battery power consumption will also be increased, thereby resulting in reduced talk time. -
Page 30: Temporary Ringer Silencing
Operate Sound settings Temporary ringer silencing Press MUTE on the ringing headset to temporarily silence the ringer in the headset earpiece without disconnecting the call. The next incoming call rings normally at the preset volume. Volume control To adjust the listening volume during a call: •... -
Page 31: Appendix
Registering Headset to Dongle Register your Headset to the Dongle The VH6212 headset comes pre-registered to the Dongle. If, for some reason, the headset is not registered to the Dongle, follow the instructions below to register your headset to the Dongle. -
Page 32: Deregistering Headset
Appendix Deregistering Headset You may need to deregister your Headset from the Dongle if: • You wish to register your Headset other products. • You wish to register your Dongle other products. Please read carefully through all the instructions on this page before beginning the deregistration process. -
Page 33: Registering Headset To Other Products
Appendix Registering Headset to other products Download the user’s manual of VH6210 under the product page of VH6210 at businessphones.vtech.com/support/downloads, for instructions on registration of the Headset to other products. Registering Dongle to other products Download the user’s manual of VU-060 under the product page of VU-060 at businessphones.vtech.com/support/downloads,... -
Page 34: Troubleshooting
Troubleshooting If you have difficulty with your product, please try the following suggestions. For customer service, visit our website at businessphones.vtech.com or call 1 (800) 222–3111. In Canada, dial 1 (800) 267-7377. I cannot find Download the complete instructions on the... - Page 35 VoIP calling software. Make sure the audio settings in your VoIP calling software are set to use your "VTech Headset". My headset You need to deregister the headset from the Dongle, isn’t working.
- Page 36 Appendix Troubleshooting I have The VH6212 headset comes pre-registered to the Dongle. If, for some reason, the headset is not manually or registered to the Dongle, follow the instructions below accidentally to register your headset to the Dongle. deregistered my headset 1.
- Page 37 Appendix Troubleshooting I cannot Make sure you have properly installed the answer or VTech Control software application. end, and mute Make sure the audio setting is properly configured in or end mute your Windows system. a call directly from my...
-
Page 38: Maintenance
Appendix Maintenance Taking care of your headset • Your cordless headset contains sophisticated electronic parts, so it must be treated with care. • Avoid rough treatment. • Place the headset down gently. Save the original packing materials to protect your headset if you ever need to ship it. Avoid water •... -
Page 39: Important Safety Information
Appendix Important safety information When using your equipment, basic safety precautions should always be followed to reduce the risk of fire, electric shock and injury, including the following: Safety information • Read and understand all instructions in the user’s manual. Observe all markings on the product. -
Page 40: Especially About Cordless Headsets
CAUTIONS • Use only the power adapter provided with this product. To obtain a replacement, visit our website at businessphones.vtech.com or call 1 (800) 595-9511. In Canada, dial 1 (800) 267-7377. • Use only the supplied rechargeable battery or replacement battery (model BT191665). -
Page 41: Precautions For Users Of Implanted Cardiac Pacemakers
Appendix Important safety information The RBRC® Seal means that the manufacturer is voluntarily participating in an industry program to collect and recycle lithium-ion rechargeable batteries when taken out of service within the United States. These batteries may be taken to a participating local retailer of replacement batteries or recycling center. -
Page 42: For C-Ul Compliance
Appendix For C-UL compliance In compliance with the bilingual requirements for safety, caution, and warning markings of Canadian Federal and Provincial/Territorial statutes and regulations, the French version of Important safety information is included. Mesures de sécurité importantes Lorsque vous utilisez votre appareil, vous devriez toujours suivre certaines mesures de précaution de base afin de réduire les risques d’incendie, d’électrocution et de blessures corporelles, dont ceux qui suivent : Information relative à... - Page 43 MISES EN GARDE • N’utilisez seulement l’adaptateur inclus avec ce produit. Pour obtenir une pièce de rechange, visitez notre site Web au businessphones.vtech.com ou composez le 1 (800) 595-9511. Au Canada, composez le 1 (800) 267-7377. • N’utilisez que la pile de rechargeable incluse ou une pile de rechange (modèle BT191665).
- Page 44 Appendix For C-UL compliance • Interférences potentielles aux téléviseurs: Certains casques d’écoute sans fil fonctionnent sur des fréquences pouvant causer des interférences aux téléviseurs et magnétoscopes. Pour réduire ou prévenir de tels parasites, ne pas déposer le socle du casque d’écoute à proximité d’un téléviseur ou magnétoscope, ni directement sur celui-ci.
- Page 45 Appendix For C-UL compliance • N’ouvrez pas et n’endommagez les piles. L’électrolyte qui s’en dégagerait est corrosif et peut causer des blessures aux yeux ou à la peau. L’électrolyte est toxique si avalé. • N’incinérez pas les piles. Vérifiez auprès des autorités locales pour les instructions de mise aux rebus locales.
-
Page 46: Fcc Part 15
Appendix FCC Part 15 This equipment has been tested and found to comply with the requirements for a Class B digital device under Part 15 of the Federal Communications Commission (FCC) rules. These requirements are intended to provide reasonable protection against harmful interference in a residential installation. - Page 47 Appendix FCC Part 15 Industry Canada This device complies with Industry Canada licence-exempt RSS standard(s). Operation is subject to the following two conditions: (1) this device may not cause harmful interference, and (2) this device must accept any interference received, including interference that may cause undesired operation.
-
Page 48: California Energy Commission Battery Charging Testing Instructions
When the CEC battery charging testing mode is activated, all headset functions, except battery charging, will be disabled. If you have registered the cordless headset to the VH6212 Dongle, below are the testing instructions. To activate the CEC battery charging testing mode: 1. -
Page 49: Limited Warranty
Limited warranty 1. What does this limited warranty cover? VTech of this VTech product warrants to the holder of a valid proof of purchase (“CONSUMER” or “you”) that the product and all accessories provided in the sales package (“PRODUCT”) are free from defects in material and workmanship, pursuant to the following terms and conditions, when installed and used normally and in accordance with the PRODUCT operating instructions. - Page 50 VTech will notify you and will request that you authorize the cost of repair prior to any further repair activity. You must pay for the cost of repair and return shipping costs for the repair of products that are not covered by this limited warranty.
- Page 51 In no event shall VTech be liable for any indirect, special, incidental, consequential, or similar damages (including, but not limited to lost profits or revenue, inability to use the PRODUCT or other associated equipment,...
-
Page 52: Technical Specifications
Appendix Technical specifications RF frequency band 1921.536MHz - 1928.448MHz Channels Operating temperature 32°F - 122°F 0°C - 50°C Headset charger voltage Output 1: 6VDC @350mA (AC adapter output) Output 2: 6VDC @300mA Headset operating voltage 3.2VDC - 4.2VDC Battery 3.7V 140mAH... - Page 53 VTech Communications, Inc. and its suppliers assume no responsibility for any loss or claims by third parties that may arise through the use of this product. VTech Communications, Inc. and its suppliers assume no responsibility for any damage or loss caused by deletion of data as a result of malfunction, dead battery, or repairs.
- Page 54 And your life. VTech Communications, Inc. A member of THE VTECH GROUP OF COMPANIES. VTech is a registered trademark of VTech Holdings Limited. Specifications are subject to change without notice. © 2018 VTech Communications, Inc. All rights reserved. 06/18. VH6212_CIB_V2.0...
Need help?
Do you have a question about the VH6212 and is the answer not in the manual?
Questions and answers