Table of Contents
Advertisement
Quick Links
www.nacebrands.com
User Manual
This manual includes instructions for using and
managing the product. Pictures, charts, images and all
other information hereinafter are for description and
explanation purposes only. The information contained
in the manual is subject to change, without notice.
Please find the latest version on the company
website. Please use this user manual under the
guidance of professionals.
WARNING: THIS PRODUCT CAN EXPOSE YOU
TO POLYBROMINATED BIPHENYLS, WHICH IS
KNOWN TO THE STATE OF CALIFORNIA TO
CAUSE CANCER AND BIRTH DEFECTS OR
OTHER REPRODUCTIVE HARM. FOR MORE
INFORMATION GO TO
WWW.PROP65WARNINGA.CA.GOV
Legal Disclaimer
SURVEILLANCE LAWS VARY BY JURISDICTION. PLEASE
CHECK ALL RELEVANT LAWS IN YOUR JURISDICTION
BEFORE USING THIS PRODUCT IN ORDER TO ENSURE
THAT YOUR USE CONFORMS TO THE APPLICABLE
LAWS. OUR COMPANY SHALL NOT BE LIABLE IN THE
EVENT THAT THIS PRODUCT IS USED FOR
ILLEGITIMATE PURPOSES.
IN THE EVENT OF ANY CONFLICTS BETWEEN THIS
MANUAL AND THE
APPLICABLE LAW, THE LATER PREVAILS.
ST-HDC2FB
ST-HDC2FB-2.8
QUICK START GUIDE
www.securitytronix.com
Advertisement
Table of Contents

Related Manuals for Security Tronix ST-HDC2FB


Summary of Contents for Security Tronix ST-HDC2FB
-
Page 1: Quick Start Guide
ST-HDC2FB ST-HDC2FB-2.8 QUICK START GUIDE www.nacebrands.com www.securitytronix.com User Manual This manual includes instructions for using and managing the product. Pictures, charts, images and all other information hereinafter are for description and explanation purposes only. The information contained in the manual is subject to change, without notice. -
Page 2: Regulatory Information
Regulatory Information FCC Information Please take attention that changes or modification not expressly approved by the party responsible for compliance could void the user’s authority to operate the equipment. FCC compliance: This equipment has been tested and found to comply with the limits for a Class A digital device, pursuant to part 15 of the FCC Rules. - Page 3 Safety Instruction These instructions are intended to ensure that user can use the product correctly to avoid danger or property loss. The precaution measure is divided into “Warnings” and “Cautions”. Warnings: Serious injury or death may occur if any of the warnings are neglected.
- Page 4 Do not place the camera in extremely hot, cold (the operating temperature should be -22°F to +140°C), dusty or damp locations, and do not expose it to high electromagnetic radiation. To avoid heat accumulation, good ventilation is required in the operating environment. Keep the camera away from liquid while in use.
-
Page 5: Installation
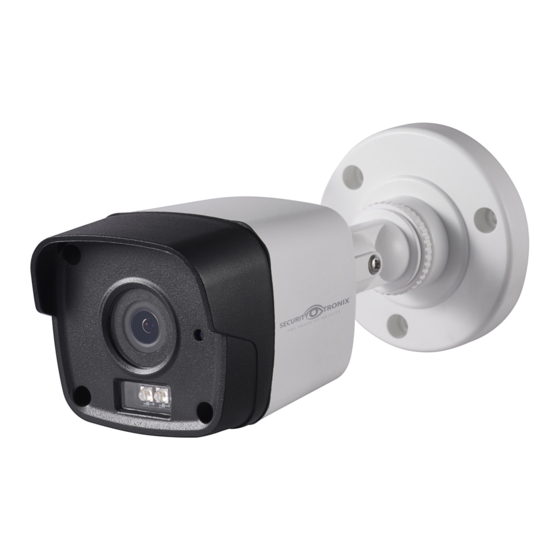
1 Introduction 1.1 Product Features The camera is applicable for both indoor and outdoor conditions, and the application scenarios include road, warehouse, underground parking lot, bar, etc.. The main features are as follows: High performance CMOS sensor Low illumination, 0.005 Lux @ (F2.0, AGC ON), 0 Lux ... - Page 6 Screw Hole Cable Hole Template Side Opening Drill Template Figure 2-1 Note: Drill the cable hole if planning to route the cable through the ceiling/wall. Attach the bracket to the ceiling/wall and secure the camera with the supplied screws. Fixing Screw Adjusting Screws Fix the Camera to the Ceiling Figure 2-2...
- Page 7 2.2 Ceiling/Wall Mounting with Junction Box The Junction box is not included in the package. Steps: 1. Stick the drill template (supplied) to the place where you want to install the camera. 2. Drill screw holes and the cable hole in the ceiling/wall according to the holes of the drill template.
-
Page 8: Menu Description
9. Reattach the junction box cover with camera to the junction box's body. Fix junction box cover to body Figure 2-7 10. Adjust the viewing angle (aim). Refer to step 6 in section 2.1. 3 Menu Description Purpose: Call the menu by clicking the button in PTZ Control, or call preset No.95. - Page 9 BRIGHTNESS EXPOSURE MODE FORMAT SENSE UP MODE RETURN MODE DAY NIGHT RETURN CONTRAST MAIN MENU SHARPNESS VIDEO SETTINGS COLOR GAIN 3D DNR MIRROR RETURN PRIVACY MOTION FUNC CAM ID LANGUAGE RETURN RESET SAVE & EXIT Figure 3-2 Main Menu Overview 3.1 FORMAT PAL (Phase Alternating Lines) PAL is a color encoding system for analog television...
- Page 10 BRIGHTNESS Brightness refers to the brightness of the image. You can set the brightness value from 1 to 10 to darken or brighten the image. The higher the value, the brighter the image is. EXPOSURE MODE You can set the EXPOSURE MODE to GLOBAL, BLC, or WDR.
- Page 11 3.3.3 DAY NIGHT Color, BW (Black White), and AUTO are selectable for DAY NIGHT modes. COLOR The image is in color (day mode) at all times. The image is black and white (night mode) at all times, and the IR LED turns on in low-light conditions. AUTO You can turn on/off the INFRARED and set the value of SMART IR in this menu.
- Page 12 MIRROR DEFAULT, H, V, and HV are selectable for mirror. DEFAULT: The mirror function is disabled. H: The image flips 180° horizontally. V: The image flips 180° vertically. HV: The image flips 180° both horizontally and vertically. 3.3.5 FUNC (Functions) In the FUNC sub-menu, you can set privacy mask, motion defection, and camera ID settings.
-
Page 13: Save And Exit
Set the MODE as on. Click up/down/left/right buttons to choose the camera ID and the position. 3.3.6 RESET Resets all settings to their default values. 3.3.7 SAVE & EXIT Move the cursor to SAVE & EXIT, then click Iris+ to save settings and exit the menu.
Need help?
Do you have a question about the ST-HDC2FB and is the answer not in the manual?
Questions and answers