Table of Contents
Advertisement
Advertisement
Table of Contents

Related Manuals for Jetson JUPITER


Summary of Contents for Jetson JUPITER
- Page 1 JUPITER -MANUAL-...
-
Page 2: Table Of Contents
Table Of Contents Introduction Included In The Box Features And Specs Assembly Unfolding And Folding Adjusting The Handlebar How To Apply The Brake How To Change Batteries LED Light Functions Safety Warnings Warranty Product Registration... -
Page 3: Introduction
1-(888) 976-9904 or email us at customerservice@jetsonbike.com. This product manual can help you understand, use, and maintain your Jupiter. In order to avoid danger caused by collisions, falls, and loss of control, please use caution and learn how to ride the Jupiter safely. -
Page 4: Included In The Box
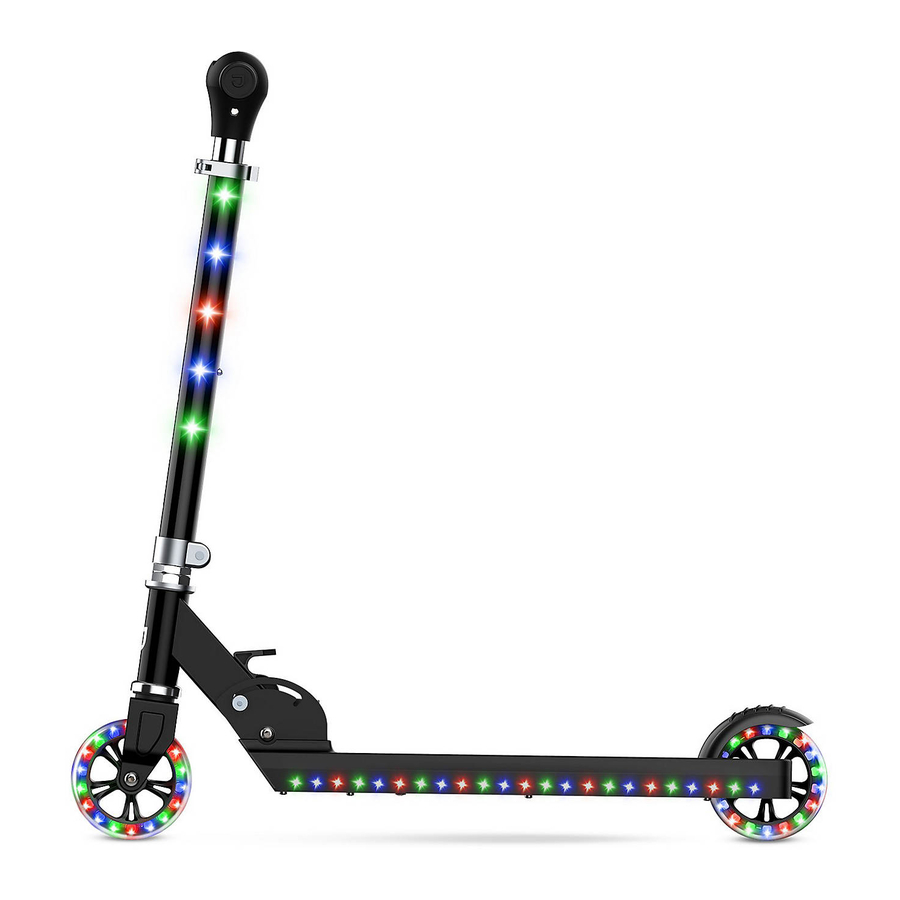
INCLUDED IN THE BOX Stem Handlebar Stem Clamp LED Light-Up Stem **Batteries Required. Quick Release Lever Rear Brake LED Light-Up Knob Wheels LED Light-Up Deck **Batteries Required. Battery door (See image below) Power Button Battery door... -
Page 5: Features And Specs
Jupiter). Make sure the Handlebar is secure. UNFOLDING AND FOLDING To unfold the Jupiter, push out the Locking Lever and turn the Knob counterclockwise (make sure you do not remove the Knob completely.) Once the Locking Lever is loose, locate the Quick Re- lease Lever and pull it up. - Page 6 While pulling up on the Quick Release Lever pull the Stem up from the Deck so it extends to a 90° angle. Once you hear it click, it’s fully unfolded. Tighten the Locking Lever by turning the Knob clockwise and pushing the Locking Lever in. To fold, push out the Locking Lever and turn the Knob counterclockwise.
-
Page 7: Adjusting The Handlebar
ADJUSTING THE HANDLEBAR To Adjust the Handlebar, push out the Stem Clamp and turn the Knob counterclockwise to loosen (make sure you do not remove the Knob completely.) Press the button on the Stem in. Lift or low- er the Handlebar until it clicks and suits the height of the rider. Once fully adjusted turn the Knob clockwise and push in the Stem Clamp to secure. -
Page 8: How To Change Batteries
HOW TO CHANGE THE BATTERIES The Jupiter has over 100 LED lights located in the Stem, the Deck, and the Wheels. In order to have them illuminate, you will need to add 3 AA batteries to the bottom of the deck. -
Page 9: Safety Warnings
ADDITIONAL OPERATION CAUTIONS Do not lift the Jupiter off the ground while it is in operation and the wheels are in motion. This can result in freely spinning wheels, which may cause injury to yourself or others nearby. Do not jump on or off the Jupiter, and do not jump while using it. -
Page 10: Warranty
• Warranty is void if weather related water damage is determined. Owner is responsible for storage and protection from weather. • Jetson® makes no warranty with respect to products or trade accessories not made by Jetson®, including, but not limited to, motors, tires, wheels, and batteries, such products or trade accessories, such items being subject to the original manufacturer’s warranty, if any. -
Page 11: Product Registration
For myself For my child For my grandchild Gift for someone else (adult) Gift for someone else (child) How did you hear about the Jupiter? ______________________________________________ _____________________________________________________________________________________ Complete this form and mail it to: Attention: Product Registration Jetson Electric Bikes... - Page 12 JUPITER...
Need help?
Do you have a question about the JUPITER and is the answer not in the manual?
Questions and answers