Advertisement
Quick Links
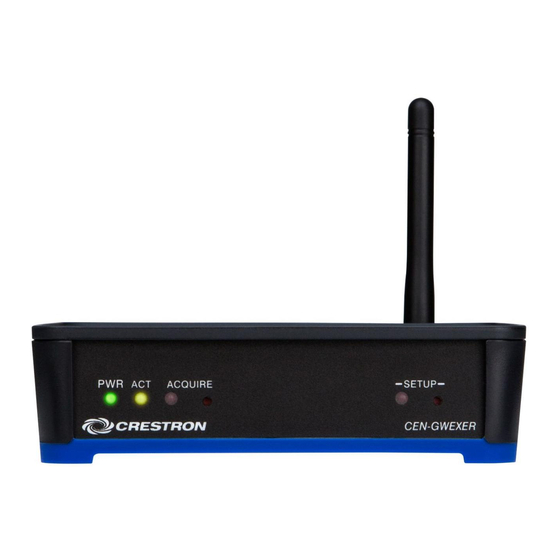
CENI-GWEXER
Wireless Gateway
Installation Guide
Description
The Crestron
®
CENI-GWEXER is a 2-way RF wireless transceiver designed for use with
products that use the in NET EX
wireless communications protocol. It is also compatible
®
with Extended Range (ER) wireless devices. A single CENI-GWEXER gateway enables an
entire wireless network of Crestron remotes, keypads, lighting dimmers, motorized
shades, thermostats, door locks, and other devices to communicate with a Crestron
control system.
Additional Resources
Visit the product page on the Crestron website (www.crestron.com)
for additional information and the latest rmware updates. Use a QR
reader application on your mobile device to scan the QR image.
Installation
NOTES: Observe the following points:
• This product must be installed and used in accordance with appropriate electrical
codes and regulations.
• This product must be installed by a quali ed electrician.
NOTE: Before using the CENI-GWEXER, ensure the device is using the latest rmware.
Check for the latest CENI-GWEXER rmware at www.crestron.com/ rmware. Load the
rmware onto the device using Crestron Toolbox™ software.
The CENI-GWEXER can be mounted to a DIN rail or any vertical, at surface. It can also
be placed on any at, level surface. Refer to the illustrations below for DIN rail or any
vertical, at surface mounting examples.
NOTE: Do not install this gateway within 4.6 meters (15 feet) of other in NET EX
gateways, Crestron ER gateways, or Wi-Fi access points.
NOTE: The CENI-GWEXER can also be rack mounted. For rack mount installation, refer
to the RMK-IFE-1U Installation Guide (Doc. 7627) at www.crestron.com/manuals.
DIN Rail Mounting
Vertical Flat Surface Mounting
NOTE: Do not use the included screws to mount the bracket to the bottom of the
CENI-GWEXER if the device will be mounted on a DIN rail. Removing the
CENI-GWEXER from the DIN rail will not be possible.
For optimum performance when installing multiple CENI-GWEXERs near each other:
• Do not place multiple gateways on the same channel.
• Place gateways at least 4.6 meters (15 feet) apart.
For optimum performance when installing a CENI-GWEXER:
• Place gateways at least 4.6 meters (15 feet) from the nearest Wi-Fi
• Place gateways at least 1.8 meters (6 feet) from the nearest Bluetooth
For more information, refer to the Best Practices for Installation and Setup of Crestron RF
Products Reference Guide (Doc. 6689) at www.crestron.com/manuals.
Make Connections
Make the necessary connections as called out in the illustrations that follow. Apply power
after all connections have been made.
NOTE: When making connections to the CENI-GWEXER, use Crestron power supplies
for Crestron equipment.
NOTE: The antenna must be attached directly to the antenna connector. It can be
extended with an optional ANT-EXT-10 Antenna Extender (sold separately).
Hardware Connections for the CENI-GWEXER
ANTENNA:
COMPUTER:
From included
To
antenna
PC
If using a CENI-GWEXER-PWE, perform the following.
1. Attach the supplied ac power cord to the IEC 320 connector on the PoE (Power
over Ethernet) injector.
2. Use a CAT5 cable to connect the LAN port of the PoE injector to the LAN.
3. Use a CAT5 cable to connect the LAN POE port of the PoE injector to the LAN PoE
port of the CENI-GWEXER.
4. Insert the other end of the power cord into an active ac outlet.
NOTE: In the listing of LAN PoE and LAN pins in the following image, arrows denote
internal pin connections.
LAN PoE and LAN Pin Assignments
LAN PoE Pins
1. Data Pair 1
2. Data Pair 1
3. Data Pair 2
4. +Vdc
5. +Vdc
6. Data Pair 2
7. -Vdc
Pin 8 Pin 1
8. -Vdc
®
access point.
device.
®
24 V 0.75A:
LAN POE:
From included power
Ethernet to LAN and
pack (if not using PoE
PoE input (LAN must
injector)
always be connected;
PoE provided only
when using PoE
injector)
LAN Pins
1. Data Pair 1
2. Data Pair 1
3. Data Pair 2
4. No Connection
5. No Connection
6. Data Pair 2
7. No Connection
Pin 8 Pin 1
8. No Connection
Advertisement

Related Manuals for Crestron CENI-GWEXER


Summary of Contents for Crestron CENI-GWEXER
- Page 1 Crestron Toolbox™ software. The CENI-GWEXER can be mounted to a DIN rail or any vertical, at surface. It can also be placed on any at, level surface. Refer to the illustrations below for DIN rail or any...
- Page 2 NOTE: The CENI-GWEXER must be placed in Acquire mode before an in NET EX device is placed in Acquire mode. To acquire an in NET EX or ER device via the ACQUIRE button on the CENI-GWEXER, perform the following procedure: 1.
Need help?
Do you have a question about the CENI-GWEXER and is the answer not in the manual?
Questions and answers