Table of Contents
Advertisement
SELEKTA
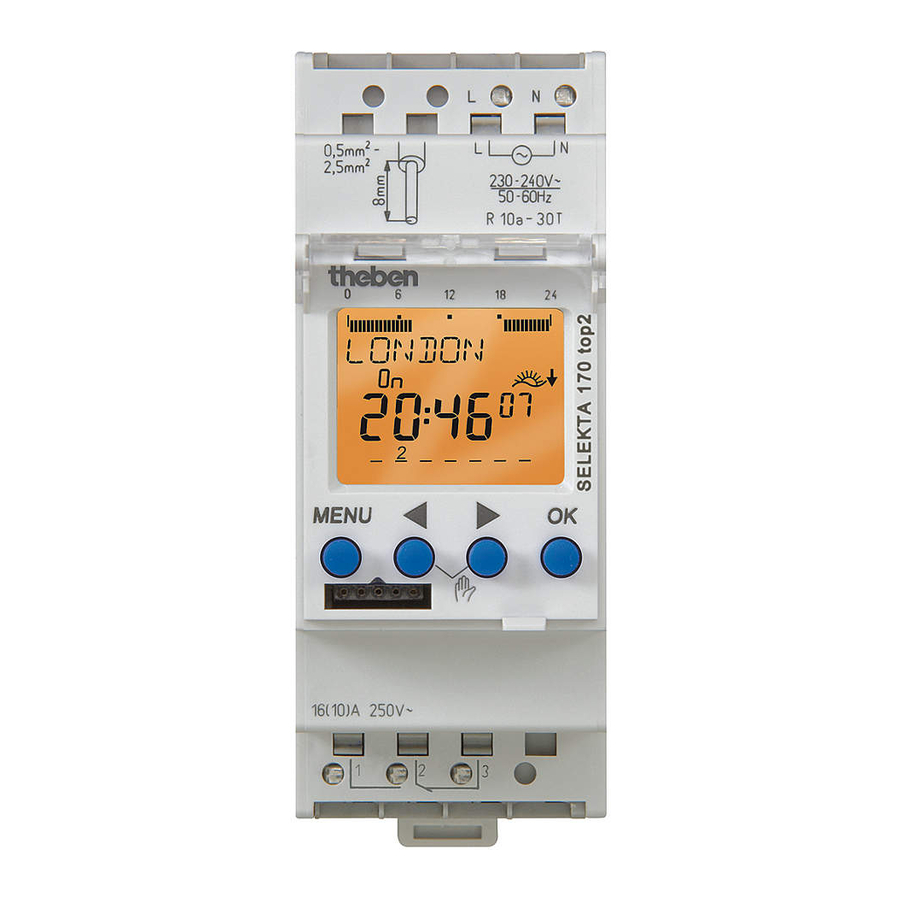
SELEKTA 170 top2
170 0 100
Installation and
Operating Manual
Digital astronomic time switch
D
GB
F
I
E
P
NL
PL
L
N
2
0,5mm -
2
2,5mm
230-240V~
50-60Hz
R 10a -30T
0
6
12
18
24
MENU
OK
16(10)A 250V~
1
2
3
SELEKTA 170 top2
Correct connection required for smooth zero crossing switch
operation (see connection diagram)!
309 081 03
GB
Advertisement
Table of Contents

Related Manuals for Theben SELEKTA 170 top2


Summary of Contents for Theben SELEKTA 170 top2
- Page 1 309 081 03 SELEKTA SELEKTA 170 top2 0,5mm - 2,5mm 230-240V~ 50-60Hz 170 0 100 R 10a -30T Installation and Operating Manual MENU Digital astronomic time switch 16(10)A 250V~ SELEKTA 170 top2 Correct connection required for smooth zero crossing switch...
-
Page 2: Table Of Contents
Contents Basic safety instructions Display and keys/operating instructions Overview of menu selection Connection/installation Initial start-up Menu item ASTRO Astro times, complete simulation, offset, astromode, position Change position Menu item PROGRAM Set switching time Menu item MANUAL Manual and permanent switching Menu item OPTIONS PIN code Operating hours counter... -
Page 3: Basic Safety Instructions
Basic safety instructions WARNING Danger of death through electric shock or fire! Installation should only be carried out by a professional electrician! • The device is designed for installation on DIN top hat rails (in accordance with EN 60715) •... -
Page 4: Display And Keys/Operating Instructions
Screen display and keys Operating instructions Programmed 1. Read text lines ON times Flashing text/symbol Sunrise/sunset display is a prompt Date display Time display Channel status ON = On Days of the week 2. Make a decision OFF = Off from 1 to 7 Display of active keys with relevant function... -
Page 5: Overview Of Menu Selection
Overview of menu selection 19 10 08 ASTRO PROGRAM TIME/DATE MANUAL OPTIONS 9:40 OPERATING HOUR ASTRO TIME PERM ON TIMES PERM OFF TOTAL CHECK SET DATE LCD-ILLUMINA- SIMULATION TION OFFSET SU--WI OVERRIDE ON LANGUAGE MODIFY WEEK DAY ASTROMODE... -
Page 6: Connection/Installation
Connection/installation WARNING Warning, danger of death through electric shock! Must be installed by a professional electrician! Disconnect power source! Cover or shield any adjacent live components. Ensure device cannot be switched on! 45° cable Check power supply is disconnected! ... -
Page 7: Initial Start-Up
Initial start-up Set language, country, town/city, date, time as well as summer/winter time (SO-WI) Press required key and display follows on screen (see fig). DEUTSCH RETAIN STUTTGART COUNTRY FORM DATE DEUTSCHLAND PROGRAMS ENGLISH DELETE COORDINATES SPAIN YEAR... -
Page 8: Astro Times, Complete Simulation, Offset, Astromode, Position
ASTRO menu • Astro mode – Evenings on, mornings off Switches on at sunset, switches off at sunset In the ASTRO menu astro times, complete (Example: street lighting) simulation, offset, astromode as well as posi- – Evenings off, mornings on tion (location) can be viewed or changed. -
Page 9: Change Position
Change position E.g. enter different country, a different city. Press MENU (see fig.). ASTRO ASTRO TIMES TOTAL SIMULATION OFFSET ASTROMODE LOCATION COUNTRY FRANCE AJACCIO BAYONNE COORDI SPAIN NATES ESTONIA BORDEAUX DEUTSCHLAND BREST CAEN GREAT BRITAIN... -
Page 10: Set Switching Time
Set switching time A time switch always consists of a start time and an end time (DURATION UNTIL). (e.g. night switch-off on Monday PROGRAM MEM FREE 56 23:00 – 05:00 hrs) CHECK NIGHT LIGHT ON BREAK MODIFY HOUR ... -
Page 11: Manual And Permanent Switching
Manual and permanent switching Manual control Manual and permanent switching can be set Reversing the channel status to the next auto- using the menu in MANUAL or (in the auto- matic or programmed switching. matic screen) by key combination (see fig). Permanent switching Channel As long as a permanent switching (on or off) is... -
Page 12: Pin Code
PIN code The PIN code is set in OPTIONS via the menu. OPTIONS If you have lost your PIN call the Theben Hotline. OPERATING HOUR Operating hours counter LCD-ILLUMINA- TION The operating hours of the channel (relay) are LANGUAGE displayed and deleted in the OPTIONS menu. -
Page 13: Obelisk Top2 Memory Card
OBELISK top2 memory card COPY COPY PROGRAM OBELISK TSWI COPY TSWI COPY ALL Using memory card OBELISK Insert memory card in the time switch. OBELISK PROGRAM Request saved switch timings, read to/from the time switch or start the Obelisk program. ... -
Page 14: Technical Data
Suitable for switching SELV (Safe Extra-Low Voltage) Service address Switching capacity: 16 A/250 V~ cos ϕ = 1 Theben AG Switching capacity: 10 A/250 V~ cos ϕ = 0.6 Hohenbergstr. 32 Switching capacity min.: 10 mA/230 V AC 72401 Haigerloch...
Need help?
Do you have a question about the SELEKTA 170 top2 and is the answer not in the manual?
Questions and answers