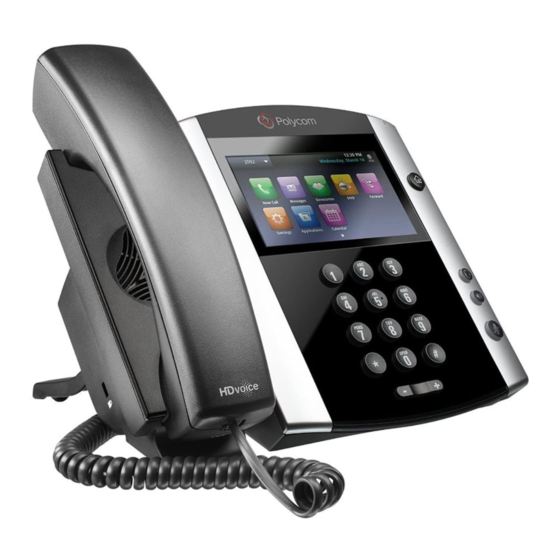
Polycom VVX 600 User Manual
Business media phone
Hide thumbs
Also See for VVX 600:
- Long format manual (15 pages) ,
- Quick start manual (9 pages) ,
- Phone manual (7 pages)
Table of Contents
Advertisement
Advertisement
Table of Contents

Subscribe to Our Youtube Channel
Related Manuals for Polycom VVX 600


Summary of Contents for Polycom VVX 600
- Page 1 ® Version 1...
- Page 2 , the Polycom logo and the names and marks associated with Polycom products are ® trademarks and/or service marks of Polycom, Inc. and are registered and/or common law marks in the United States and various other countries. All other trademarks are property of their respective owners. No portion hereof may be reproduced or transmitted in any form or by any means, for any purpose other than the recipient's personal use, without the express written permission of Polycom.
- Page 3 Polycom up to three (3) years after the distribution date of the applicable product or software at a charge not greater than the cost to Polycom of shipping or distributing the software to you. To receive software information, as well as the open source software code used in this product, contact Polycom by email at OpenSourceVideo@polycom.com.
-
Page 4: Table Of Contents
Typographic Conventions ......................... 1 Related Documentation ........................2 Overview of Phone Hardware and Keys ................... 3 VVX 500 Series and VVX 600 Series Hardware ............... 3 Overview of the Phone Interface ....................... 5 User Screens ..........................5 Icons and Status Indicators ....................... 9 Entering Information in Data Fields .................... - Page 5 Rejecting Calls with Do Not Disturb ..................26 Redirecting Incoming Calls ......................27 Forwarding Incoming Calls to a Contact ................. 27 Divert Calls to a Contact ......................29 Tips for Conference Calls ....................... 30 Audio Conference Calls ........................30 Initiate Conference Calls ......................31 Join Calls to Create a Conference Call ...................
- Page 6 Use Your Headset for All Calls ....................51 Using Electronic Hookswitch ....................52 Disconnect Your Headset ......................54 Using Bluetooth Headsets with VVX 600 Phones ..............54 Connecting Polycom VVX Expansion Modules to Your Phone ............57 VVX Expansion Module Hardware Features ................58 Connect VVX Expansion Modules ..................
- Page 7 Update the Phone Configuration ..................... 72 Test Phone Hardware ........................73 Clean the Touchscreen ........................73 View Software Details ........................74 Speakerphone ..........................75 USB Port ............................75 Troubleshoot Audio and Echo Issues ..................... 75 Bluetooth Headset ........................76...
-
Page 8: Typographic Conventions
® products: VVX 500 and 501 business media phones ● VVX 600 and 601 business media phones ● A few typographic conventions, listed next, are used in Polycom guides to distinguish types of in-text information. Typographic Conventions Convention Description Bold... - Page 9 For additional information about the Polycom VVX Business Media Phones, the VVX Camera, and the VVX Expansion Modules, view the following support pages: Polycom VVX 500 Series ● Polycom VVX 600 Series ● You can view the following types of documents on each product page: Quick Tips A quick reference on how to use the phone’s most basic features.
-
Page 10: Vvx 500 Series And Vvx 600 Series Hardware
Polycom Voice Support. The following figure displays the hardware features on the VVX 500, 501, 600, and 601 business media phones. The table lists each numbered feature shown in this figure. VVX 500 series and VVX 600 series hardware features... - Page 11 VVX 500 Series and 600 Series Hardware Feature Descriptions Reference Feature Feature Description Number Reversible tab Secures the handset in the cradle when your phone stand is positioned at a high angle. To secure the handset, remove the tab, reverse it so the protrusion points up, and re-insert it.
-
Page 12: User Screens
Your VVX phone has icons, status indicators, and user screens to help you navigate the interface and understand important information on the state of your phone. The following topics describe how to navigate your phone’s interface: User Screens ● Icons and Status Indicators ●... - Page 13 The total number of calls is displayed on your line, and if you have multiple lines on your phone, calls display under the associated line. Calls screen on VVX 600 series phones Display the Calls Screen When you have more than one call on your phone, you can display the Calls screen from any other screen on your phone.
- Page 14 The Lines screen is supported on VVX 500 series and 600 series phones and is the default screen when your phone is not in use. When you have multiple calls on your phone, the number of calls you have is displayed next to the line number.
- Page 15 Display the Active Call Screen The Active Call screen displays only when an active call is in progress on your phone. To display the Active Call screen: » Do one of the following: Place a call. On VVX 500/501 and 600/601 phones, press the Home key during an active call.
- Page 16 Do Not Disturb enabled Unregistered line Phone warning Placing a call Login credentials invalid Active call using Polycom HD Voice Shared line Held call Shared line with a held call Incoming call in Lines screen Call forwarding is enabled...
- Page 17 You can enter information and edit fields using the dial pad keys on the phone console or using the onscreen keyboard on VVX 500/501, 600/601. Before you enter information into fields, you can choose how to enter the information using the following soft keys: Mode Enables you to enter just numbers or text in title case, lowercase, or uppercase characters.
- Page 18 You can use the dial pad keys on your phone console to edit or update field information. The following table describes how to enter different types of data on your phone using the dial pad. Using the Dial pad Keys to Enter Information Data Type Action Enter numbers, or characters in uppercase,...
-
Page 19: Enter Information Using The Onscreen Keyboard
The onscreen keyboard is available on VVX 500 and 600, and the keyboard enables you to enter field information using your touchscreen. The onscreen keyboard is displayed on screen when data fields are available. When a data entry field requires only numbers, the onscreen keyboard displays only numbers. To access and use the onscreen keyboard: 1 Tap 2 Tap... -
Page 20: Placing And Answering Audio Calls
VVX business media phones enable you to place and answer SIP and H.323 calls, ignore incoming calls from all or individual contacts, place and manage conference calls, manage calls on shared lines, and perform server-dependent tasks. This section includes the following topics: ●... - Page 21 You can place calls in numerous ways, including placing international calls, placing calls from Recent Calls or directories, placing calls to contacts or favorites, calling authorized numbers on a locked phone, or calling a contact from a VVX Expansion Module. If enabled, you can also place an intercom call to a specified contact or hide your number before placing a call.
- Page 22 In addition to the Dialer, you can place calls from the Recent Calls list, which has calls that were recently placed, answered, or missed on your phone. To place calls from the Recent Calls list: 1 Do one of the following: ...
- Page 23 You can place a call to a contact directly from your directory or you can select contacts in your directory to call from the New Call screen. To call a contact from your directory: 1 Do one of the following: ...
- Page 24 When you receive an incoming call on your phone, you can choose to answer the call in various ways. This section includes the following topics on answering calls: ● Answer Incoming Calls ● Answer Calls from the Calls Screen ● Answer a Call When in a Call ●...
- Page 25 When you don’t answer an incoming call within 10 seconds, the Incoming Call screen disappears, and either the Calls screen is displayed. To answer the call from the Calls screen: » Select the incoming call, and select Answer. Note: Answering calls when your phone is locked If your phone is locked, you must enter a user password before answering the call.
- Page 26 » After the call is answered, press the Mute key and reply. You can answer calls using the line keys on your VVX phone or from your VVX Expansion Module. See the section Connecting Polycom VVX Expansion Modules to Your Phone for more information on using expansion modules To answer calls: »...
- Page 27 You can place and answer calls on your phone using the handset, speakerphone, or headset. You can alternate among the three modes during calls, if available. To switch among the handset, headset, and speakerphone: » During a call, pick up the handset, press the Headset key or press the Speakerphone key For example, if you’re using the handset, press the Headset key to switch to the headset, or press the...
- Page 28 You cannot end calls that are on hold. You must resume held calls before ending them. To end a held call: » From the Calls screen, select the held call and press Resume > End Call. When you are in a call, you can place a call on hold and resume the call. You can place any active call on hold.
- Page 29 You can resume calls placed on hold by other contacts from your VVX Expansion Module. A flashing red LED light on a line key on the expansion module indicates a call is on hold on the contact’s line. To resume a held call: »...
- Page 30 If a contact does not answer the transfer or you want to remain speaking with the contact on your line, you can cancel the transfer before it is complete. To cancel a transfer before the call connects: » Select Cancel. The call is not transferred and becomes active.
- Page 31 You can also view multiple calls on your line from the Calls screen. To display your calls in the Calls screen: » Do one of the following: From the Lines or Home screen, press On VVX 500/501 and 600/601 phones, tap in the status bar. The Calls screen is displayed with the list of active and held calls for each line on the phone.
-
Page 32: Ignore Or Silence Incoming Calls
When you receive an incoming call, you can choose to ignore or reject the call instead of answering. This section shows you how to reject or ignore incoming calls in the following ways: Ignore or Silence Incoming Calls Reject Incoming Calls ... - Page 33 The DND icon is displayed in the status bar on all VVX phones. On VVX 600/601 phones, you can tap the DND icon in the status bar to enable or disable the feature. ● When your phone is idle, the DND icon is displayed next to your phone line on the Lines screen. If you have new messages or call forwarding is enabled, the messages or forwarding icon is displayed instead.
-
Page 34: Forwarding Incoming Calls To A Contact
You can redirect incoming calls in the following ways: ● Forwarding Incoming Calls to a Contact ● Forwarding Incoming Skype for Business Calls ● Divert Calls to a Contact You can choose to forward an incoming call to a contact or forward all incoming calls to one of your contacts. Note: Call Forwarding and Microsoft Skype for Business Server If you are signed into Skype for Business on your phone, your call forwarding options are different than those described below. - Page 35 You can set up your phone to forward all incoming calls to a contact using one of the following forwarding types: Always ● Forwards all incoming calls. No Answer ● Forwards all unanswered incoming calls. Busy ● Forwards incoming calls when you’re in a call. For shared lines, you can only choose Always as your forwarding type;...
- Page 36 You can divert all incoming calls from a particular contact to another contact. To divert incoming calls from a contact: 1 Select Directories > Contact Directory. 2 From the Contact Directory, select a contact. 3 From the Contact Information screen, select Edit or tap 4 From the Edit Contact screen, select Divert Contact, and enter a contact’s number.
-
Page 37: Tips For Conference Calls
You can initiate audio conference calls with various contacts on your VVX business media phone. When you initiate a conference call, you can hear audio for two or more contacts, manage conference participants, and join calls into a conference or split a conference into individual calls. See the following topics for more information on initiating and managing conference calls: ●... - Page 38 You can initiate a conference by calling two people and selecting the Conference soft key or hard key. To initiate a conference call: 1 Call a contact. 2 After the contact answers, select the Conference soft key, or on VVX 1500 phones, press the Conference key.
- Page 39 By default, when you end a conference call, your connection to the call ends, and the other participants in the conference remain in the call. However, your system administrator can set up your phone so that all connections terminate when you end a conference call. To end a conference call: »...
-
Page 40: View Recent Calls
All VVX business media phones support a Recent Calls list and a Contact Directory. This section describes each of these in the following topics: ● View Recent Calls ● Managing the Contact Directory Note: Feature availability Your phone may not support all of the features described in this section. Check with your system administrator to find out which features are available on your phone. -
Page 41: View Call Details
In the Recent Calls list, you can view call details, edit call details before calling a contact, save a contact to your directory, and delete call entries. To view call details: » Select Info or tap next to a call record. From the Call Details screen, you can save a contact to the Contact Directory. - Page 42 You can customize the Recent Calls list to view calls by call type, time, and call name. When you sort calls by the time of the call, you can order them in ascending (oldest call first) or descending (most recent call first) order. When you sort calls by name, you can order them in ascending (alphabetical) or descending (reverse-alphabetical) order.
-
Page 43: Delete A Contact
You can store a large number of contacts in your phone’s Contact Directory. Contact your administrator for the exact number of contacts available on your phone. You can perform the following tasks in your Contact Directory: ● Search for Contacts in the Contact Directory ●... -
Page 44: Managing Favorites
When you add a contact to your Contact directory, you can choose how much information you want to enter for your contact. You are required to only enter a contact number for each new contact. The following is a list of information you can enter for each contact: First and Last Name ●... - Page 45 From your Contact Directory, you can view information for any contacts saved to the directory. To view contact information: 1 Navigate to Directories > Contact Directory. 2 In your Contact Directory, select a contact. The Contact Information screen is displayed with the contact’s name and phone number. Additional information, such as a job title, label, or email address, can also display.
- Page 46 Contact Directory, designate a index number for favorites, view favorites on the Home or Lines Another contacts directory question screen depending on your phone, and delete favorites. on the Polycom phones On VVX 500 & 600 phones, a star is displayed for contacts saved as favorites. To add a contact as a Favorite: 1 Navigate to Directories >...
-
Page 47: Reorder Favorites
You can view favorites in your Favorites list in the Directory or the New Call screen. Favorites display consecutively according to their index number. The contact with the lowest number is displayed first. To reorder your favorites, see the section Reorder Favorites. - Page 48 You can delete favorites to make room for new favorites. To delete a favorite: 1 From your Contact Directory, select the contact. 2 From the Contact Information screen, select Edit or tap 3 From the Edit Contact screen, select Favorite Index, and delete the favorite index number. 4 Select Save.
-
Page 49: Access Voicemail And Video Messages
Your phone may not support all of the features described in this section. Check with your system administrator to find out which features are available on your phone. Voicemail is available on all Polycom VVX phones. Contact your system administrator to find out if your phone supports video messages. -
Page 50: Instant Messages
“Call me” and “Can’t chat now”, or you can use the dial pad or onscreen keyboard to enter a custom Not sure about instant messages, since the option message. is there on the Polycom phones but I can't get it to work Instant messages display in the order they are received with the first message received displaying first. -
Page 51: Set The Language
This section explains how to customize your phone so that it is unique to you. Basic customizations include changing the time and date format and updating the screen brightness. You can also set up a screen saver or use your phone as a digital picture frame. This section includes the following topics: ●... - Page 52 The time and date display in the status bar. When your phone cannot obtain a time and date, the time and date display flashes. If this happens, or if the time and date are incorrect, contact your system administrator. The following figure shows the default format for the time and date. You can customize the time and date by choosing between a variety of time and date formats, including options to display the day, month, or year.
- Page 53 intensities.
- Page 54 You can change the Backlight On intensity and the Backlight Idle intensity separately, and you can choose a high, medium, or low intensity, or turn off the backlight entirely. When you change the Maximum Intensity, you modify the entire backlight intensity scale. For example, if you decrease the Maximum Intensity, the low, medium, and high levels for both Backlight On and Backlight Idle intensities decrease.
-
Page 55: Change Incoming Call Notifications
You can change the following audio settings for your phone: ● Change Incoming Call Notifications ● Set a Ringtone for Incoming Calls ● Set a Ringtone for Individual Contacts ● Change the Volume You can choose whether you hear sound effects—all phone sounds except call audio—from the handset, headset, speaker, or the active audio device you set. - Page 56 You can select unique ringtones for various contacts in your directory. This helps you quickly identify callers as your phone rings. To select a ringtone for a contact: 1 From your Contact Directory, select a contact. 2 From the Contact Information screen, select Edit or tap 3 From the Edit Contact screen, select Ring Type and select a ringtone.
-
Page 57: Using A Headset With Your Phone
(EHS). You can also pair and connect a Feature Profile 37477: Using Headsets with Polycom Bluetooth headset with your VVX 600/601 phone. See Phones for a list of compatible headsets. - Page 58 Quick Start Guide For setup information on how to connect a headset to your phone, see the for your phone on Business Media Phones Support page. Your phone does the following when connected to analog and USB headsets: ● When an analog headset is connected and in use, the headset key glows green. ●...
- Page 59 Typically, you can work wirelessly up to 300 feet (91 meters) from your phone and still use the EHS controls. Check with your headset’s user guide for the precise range restrictions. Feature Profile 37477: Using Headsets with Polycom Phones for a list of compatible headsets.
- Page 60 To enable electronic hookswitch on your phone: 1 Connect your headset and EHS adapter to your phone. See the Quick Start Guide for your phone on Polycom Voice Support for information on connecting a headset to your phone. 2 Navigate to Settings > Basic > Preferences > Headset > Hookswitch Mode.
- Page 61 Bluetooth headset is used automatically for all calls. This section provides you with information on how to enable Bluetooth on your VVX 600/601, how to pair and connect your Bluetooth headset, how to use your Bluetooth headset with your phone, and how to disconnect...
- Page 62 In order to use a Bluetooth headset with your phone, you need to enable Bluetooth, pair your headset, and connect your Bluetooth device to your phone. You can pair up to four Bluetooth headsets with your phone; however, you can connect only one headset at a time. The following instructions are intended as a guide, and do not apply to all Bluetooth devices.
- Page 63 When your Bluetooth headset is turned on, paired, and connected with your phone, you can perform the following tasks: ● Use the headset to handle calls, including muting and adjusting the call volume. ● Initiate and end calls on your headset by pressing the Headset key , or using a control on the headset.
- Page 64 The Polycom VVX Expansion Modules are consoles you can connect to Polycom VVX Business Media phones to add additional lines. VVX Expansion Modules enable you to handle large call volumes on a daily basis and expand the functions of your phone.
- Page 65 The following figure illustrates the features, components, and keys available on the VVX Color Expansion Modules. The table lists each numbered feature shown in this figure. VVX Color Expansion Module features...
- Page 66 VVX Color Expansion Module Hardware Feature Descriptions Reference Feature Feature Description Number Line Key Selects available line key contacts, functions, and assignments. Indicates a line or busy lamp field contact’s status. The following lists the LED LED Indicators Indicator behaviors shown on the expansion modules: Solid Green Indicates an active call in progress.
-
Page 67: Vvx Expansion Module Hardware Features
The next figure illustrates the features, components, and keys available on the VVX Expansion Modules with a paper display. The table lists each numbered feature shown in this figure. VVX Expansion Module with paper display features VVX Expansion Module Hardware Feature Descriptions Reference Feature Feature Description... - Page 68 Quick Start Guide for For more information on setting up VVX Expansion Modules, see the Polycom VVX Expansion Modules To connect the VVX Expansion Module to your phone: » Connect an auxiliary cable from the AUX port on the phone to the AUX 1 port on the expansion module.
- Page 69 VVX 400 series VVX 500 series VVX 600 series Note: Additional favorites and Skype for Business contacts display in your Contact Directory After you fill all the display spaces on your phone and assign functions to all the lines on your expansion module, you can find additional favorites or Skype for Business contacts in the Contact Directory.
- Page 70 You can assign favorites to line keys on VVX Expansion Modules and automatically call contacts using the line keys on the expansion modules. When you assign favorites on your phone, favorites are assigned to the next available line key on the expansion module regardless of the index number. You can reorder your favorites once they are created by changing the value of their index number.
- Page 71 The Smart Paging feature arranges line key assignments and distributes pages on the VVX Color Expansion Modules based on the number of expansion modules connected to a VVX phone. Smart Paging is automatically enabled for VVX Color Expansion Modules connected to VVX phones with UC Software 5.1.1 or later. Smart Paging does not affect how pages are ordered on VVX Expansion Modules with paper displays.
- Page 72 Pages 2, 5, and 6 display on the second expansion module. ● If you have three expansion modules connected to your VVX phone, the pages are ordered non-sequentially. As shown in the next figure, the pages display on the three expansion modules in the following order: ...
- Page 73 When Smart Paging is disabled, the ordering of the pages on the expansion modules is not affected by the number of expansion modules connected to your VVX phone. With Alternate Paging, the expansion modules’ pages are ordered sequentially from 1 to 9. The next figure shows Alternate Paging on three expansion modules.
-
Page 74: Features For Hearing-Impaired Users
This section provides information for the following accessibility features available on VVX business media phones: ● Features for Hearing-Impaired Users ● Features for Vision-Impaired and Blind Users ● Features for Mobility-Impaired Users The following table lists the accessibility features on VVX business media phones for hearing-impaired users. Accessibility Features on VVX Business Media Phones for Hearing-Impaired Users Accessibility Feature Description... - Page 75 Accessibility Features on VVX Business Media Phones for Hearing-Impaired Users Electronic hookswitch support If you use a headset that supports electronic hookswitch (EHS), you can use the controls on your headset to answer and end calls. In addition, you may be able to mute calls and control volume from your headset (see Enable Electronic Hookswitch).
- Page 76 The following table lists the accessibility features on VVX business media phones for visually-impaired and blind users. Accessibility Features on VVX Business Media Phones for Vision-Impaired and Blind Users Accessibility Feature Description Adjustable backlight settings You can change the brightness of the screen by adjusting backlight intensity settings (see Setting the Backlight Intensity and...
- Page 77 (see your phone's Start Guide Polycom Voice Support web page). Polycom Desktop Connector You can use your computer's mouse and keyboard to enter information and application navigate screens on your VVX phone (see Using the Polycom Desktop Connector).
-
Page 78: Investigate Phone Warnings
You can view details about the issues from the Warnings screen. If you have a VVX 600/601, the icon has a counter indicating the number of warning messages you have, and you can tap the icon to view the messages. - Page 79 Your system administrator may ask you to restart your phone if your phone malfunctions or to assist in troubleshooting. Caution: Restarting your phone Before you restart your phone, contact your system administrator. If your phone is malfunctioning, you may be able to restore normal operation without restarting the phone. In addition, your administrator may want to troubleshoot your phone before you restart it.
-
Page 80: Clean The Touchscreen
Your system administrator may ask you to access a diagnostics menu on your phone to test its hardware. You can test your phone’s microphones, speaker, handset, third-party headset (if connected), keypad mappings, touchscreen, and LEDs. See your system administrator for instructions on how to perform these tests. To test your phone hardware: 1 Navigate to Settings >... - Page 81 You can view the details for the software version on your phone, the latest software update available for your phone, and the status of the latest update. To view details for the software on your phone: » Navigate to Settings > Status > Software Update.
-
Page 82: Speakerphone
USB flash drive to your phone to use the following features: ● USB headset ● USB charging device on the VVX 600/601 Contact your system administrator for help on enabling the USB port on your phone. -
Page 83: Bluetooth Headset
If you encounter any issues using a Bluetooth headset, see the following table for possible solutions to common problems. Common Bluetooth Headset Issues and Solutions Issue Corrective Action The Bluetooth settings do not display on my phone Do one of the following: Check with your system administrator to see if the Bluetooth feature is enabled on your phone.
Need help?
Do you have a question about the VVX 600 and is the answer not in the manual?
Questions and answers