Table of Contents

Related Manuals for Midea 1034N1A


Summary of Contents for Midea 1034N1A
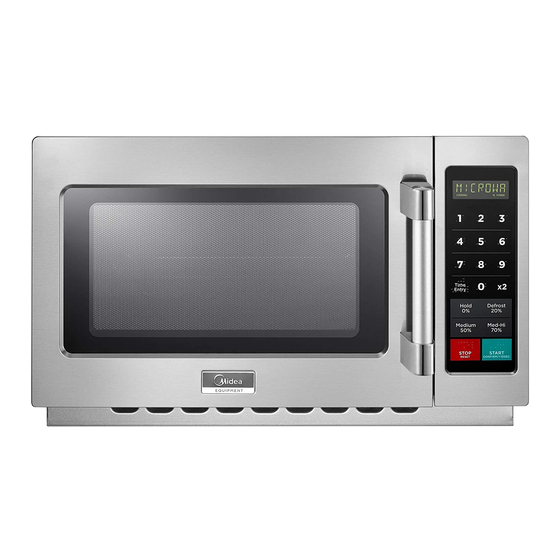
- Page 1 Commercial Microwave Oven INSTRUCTION MANUAL Model:1034N1A Read these instructions carefully before using your microwave oven, and keep it for refer nce If you follow the instructions, your oven will provide you with many years of dependable service. CAREFULLY...
-
Page 3: Table Of Contents
OPERATION INSTRUCTION USER OPTION DEFAULT COOK TIMES FUNCTION INST CTION CLEANING & MAINTENANCE CLEANING INSTRUCTION MAINTENANCE Specifications Model: 1034N1A Oven Capacity: 1.2 Cu.Ft. Rated Voltage: 120V~ 60Hz External dimensions: 21.8x19.2x13.5 inch Rated Input Power(Microwave): 1600 W Net Weight: Approx. 40.6 lbs... -
Page 4: Precautions
PRECAUTIONS TO AVOID POSSIBLE EXPOSURE TO EXCESSIVE MICROWAVE ENERGY (a).Do not attempt to operate this oven with the door open since this canresult in harmful exposure to microwave energy. It is important not to defeat or tamper with the safety interlocks.properly qualified service personnel. - Page 5 IMPORTANT SAFETY INSTRUCTIONS 7. Some products such as whole eggs and sealed containers-for example, closed glass jars-are able to explodeand should not be heated in the oven. 8. Use this appliance only for its intended uses as described in this manual. Do not use corrosive chemicals or vapors in this appliance.
-
Page 6: Grounding Instructions
GROUNDING INSTRUCTIONS This appliance must be grounded. In the event ofan electrical short circuit, grounding reduces the riskof electric shock by providing an escape wire for theelectric current. This appliance is equipped with a cord having grounding wire with a grounding plug. The plug must be plugged into an outlet that is properly installed and grounded. -
Page 7: Radio Interference
A short power-supply cord is provided to reduce the risks resulting from becoming entangled in or tripping over a longer cord. Longer cord sets or extension cords are available and may be used if cared is exercised in their use. If a long cord sets or extension cord is used: 1). -
Page 8: Safety
SAFETY The oven must be on a leveled surface. The turntable and turntable roller rest must be in the oven during cooking. Place the cookware gently on the turntable and handle it carefully to avoid possible breakage. Incorrect use of browning dish may cause the turntable to break. Use only the specified bag size when using Direct Access Popcorn. - Page 9 UTENSILS CAUTION Personal Injury Hazard Tightly-closed utensilscould explode. Closedcontainers should be openedand plastic pouches should bepierced before cooking. See the instructions on "Materials you can use inmicrowave oven or to be avoided in microwave oven."There may be certain non-metallic utensils that are notsafe to use for microwaving.
-
Page 10: Utensils
Materials you can use in microwave oven UTENSILS REMARKS Shielding only. Small smooth pieces can be used to cover thin parts of meat Aluminum foil or poultry to prevent overcooking. Arcing can occur if foil is too close to oven walls. The foil should be at least 1 inch (2.5cm) away from oven walls. Follow manufacturer’s instructions. - Page 11 SETTING UP YOUR OVEN Names of Oven Parts and Accessories Remove the oven and all materials from the carton and oven cavity.Your oven comes with the following accessories: Instruction Manual A) Control panel and Display B) Observation window C) Door assembly D) Safety interlock system E) Ceramic Bottom Plate Note:...
-
Page 12: Installation
Countertop Installation Remove all packing material and accessories.Examine the oven for any damage such asdents or broken door. Do not install if oven isdamaged. Cabinet: Remove any protective film foundon the microwave oven cabinet surface. Do not remove the light brown Mica coverthat is attached to the oven cavity toprotect the magnetron.. -
Page 13: Control Panel
CONTROL PANEL Control Panel and Features (1) Power Buttons (2) Time Entry Button (3) X2 Button (4) Stop/Reset Button (5) Start Button (6) Number Button... -
Page 14: Operation Instruction
OPERATION INSTRUCTION Five power levels are available. M. High Med. Defrost Hold Level High Power 100% Display Appendix. A User Options Items bolded below are the default values. Option Discription Setting 3 s econds beep O O P P : : 1 1 0 0 Continuous beep OP:11 EOC Tone... -
Page 15: Default Cook Times
OPERATION INSTRUCTION Appendix. B Default Cook Times The oven shall ship with the following Preset Cook Times unless otherwise noted in the product Specification. Button Display (Time) Power 0:10 100% 0:20 100% 0:30 100% 0:45 100% 1:00 100% 1:30 100% 2:00 100% 3:00... - Page 16 OPERATION INSTRUCTION Power Up _ _ _ _ " " displays when the oven is plugged in for the first time. If " " button pressed, the oven will change to Idle Mode. Idle Mode 1) The oven shall enter Idle Mode after a period of time have expired in Ready Mode or Pause Mode without any operation.
- Page 17 OPERATION INSTRUCTION Pause Mode 1) While in cooking state, if the door is opened and then closed, or if the " " pad is pressed, the oven will enter Pause Mode. 2) While paused,the screen will display the remaining cooking time. 3) In Pause Mode, if the "...
- Page 18 OPERATION INSTRUCTION Manual Cook Mode 1) In Ready Mode, press the " " pad. And the screen will display "00:00". 2) Press number buttons to input the cooking time. 3) If you press " "," "," " or " " button to select power level, the screen will display the related power.
- Page 19 OPERATION INSTRUCTION For example: set the program as memory cooking. Power level 70% and cooking time is 1 minute and 25 second Step1: Open the door, press number button "1" for 5 seconds,"PROGRAW " displays. Step 2: Press number button "3", 2 seconds later, the screen will display the related time .
- Page 20 OPERATION INSTRUCTION a. Open the door,press number button "1" for 5 seconds,"PROGRAW" displays. b. Press number button "3", after two seconds, the screen will display the related time. c. Press "1","2","5" to input the cooking time. "1:25" displays. d. Press " "...
-
Page 21: Cleaning Instruction
Cleaning Instructions Always keep the oven clean 1. Cleaning the glass viewing window, the inner door panel and oven front face. For best performance and to maintain the high degree of safety, the inner door panel and oven front face should be free of food or grease build-up. - Page 22 or call the help center at 1-855-238-5604. damp with a mild cleanser wipe with a damp towel then sanitizer. with cover e. Cook food covered. Call support center. with cover cover d. e. Cook food PN:16170000A60747...
Need help?
Do you have a question about the 1034N1A and is the answer not in the manual?
Questions and answers
Can we change the default cook times
Yes, the default cook times on the Midea appliance with part number 1034N1A can be changed. This can be done by entering programming mode and reprogramming the pads with new cook times and power levels.
This answer is automatically generated