Dimplex Revillusion RBF30 Owner's Manual
Built-in electric firebox
Hide thumbs
Also See for Revillusion RBF30:
- Service manual (16 pages) ,
- Owner's manual (111 pages) ,
- Owner's manual (24 pages)
Advertisement
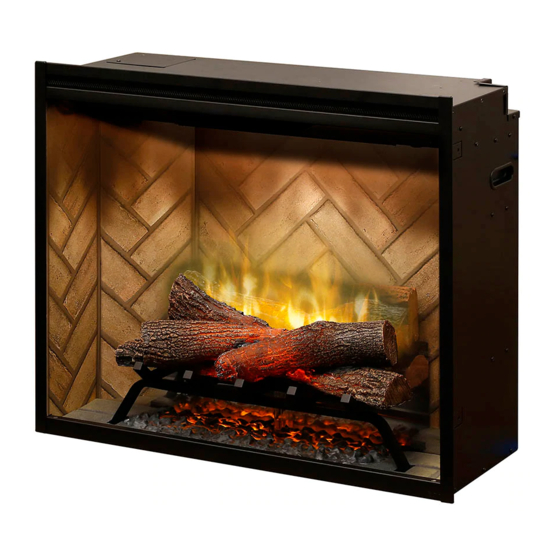
Revillusion™ Built-in Electric Firebox
IMPORTANT SAFETY INFORMATION: Read this manual first before attempting
to install or use the Revillusion
warnings and safety instructions contained in this manual to prevent personal
injury or property damage.
To view the full line of Dimplex products, visit www.dimplex.com
Owner's Manual
Model RBF30 (6909780100)
Model RBF36 (6909790100)
Model RBF36P (6909790200)
Model RBF42 (6909800100)
Built-in Electric Firebox. Always comply with the
™
7214620100R03
Advertisement
Table of Contents

Related Manuals for Dimplex Revillusion RBF30


Summary of Contents for Dimplex Revillusion RBF30
- Page 1 Revillusion Built-in Electric Firebox. Always comply with the ™ warnings and safety instructions contained in this manual to prevent personal injury or property damage. To view the full line of Dimplex products, visit www.dimplex.com 7214620100R03...
-
Page 2: Table Of Contents
CAUTION: Procedures and techniques which, if not carefully followed, will result in damage to the equipment. WARNING: Procedures, precautions and techniques which, if not carefully followed, will expose the user to the risk of fire, serious injury, or death. www.dimplex.com... -
Page 3: Welcome
Welcome Thank you for purchasing a Revillusion™ Built-in Electric Firebox by Dimplex. Please use our convenient online registration page to record your model and serial numbers for future reference at: www.dimplex.com/register Model Number MODEL / CAT NO SERIAL NO Serial Number CAUTION: Read all instructions and warnings carefully before starting installation. -
Page 4: Important Instructions
⑥ Do not use this firebox outdoors. ⑦ Never locate the firebox where it may fall into a bathtub or other water www.dimplex.com... - Page 5 IMPORTANT INSTRUCTIONS Special Precautions FCC Compliance WARNING: Remote control contains CAUTION: This unit has been tested a small battery. Keep away from children. and found to comply with the limits for If swallowed, seek medical attention Class B digital device, pursuant to part immediately.
-
Page 6: Specifications
104 F (-20 to 40 WARNING: Electrical outlet wiring must comply with local building codes and other applicable regulations to reduce the risk of fire, electric shock, or injury to persons. www.dimplex.com... -
Page 7: Installation
Installation Framing The Revillusion Built-in Electric Firebox does not require any special venting. Rough in the framing opening. Following the recommended framing dimensions below. NOTE: The materials used for the finished surround must be cut to precise dimensions (dimensions B & C) as the 1/4" (0.6 cm) self trimming flange is only to create a finished appearance. -
Page 8: Electrical
The label beside the jumper Attach the firebox to frame using is "HT EN". four mounting flanges on the sides Reinstall the previously removed of firebox and suitable hardware. panel. www.dimplex.com... - Page 9 Electrical General Electrical The installation of the built-in electric . Feed the service cable through the firebox must comply with the applicable electrical cover on the back of the Local and/or National Electrical Codes unit and secure using a 1/2" (1.3 and utility requirements.
- Page 10 N (white) from the power supply. . Make sure all connections are tight. Terminate L2 (red) with a wire connector (not included). Connect L1 (black) wire from the built-in electric firebox to the L1 (black) from the power supply. www.dimplex.com...
- Page 11 Electrical Direct Power Wiring (240 V) All wiring must be completed prior to installing the built-in electric firebox. Use 3-conductor wires with ground (4 wires total) from the power supply (breaker panel) to the junction box on the built-in electric firebox. WHITE - N WHITE - N 240 V...
- Page 12 WHITE - N 120 V WHITE - N POWER BLUE - NH SUPPLY RED - L2 WALL BLACK - L1 BLACK - L1 SWITCH BREAKER PANEL GROUND - G GROUND - G www.dimplex.com...
- Page 13 Electrical To install a 120 V wall switch: in electric firebox to the G (green) Pull out the 5 wires marked L1, L2, ground wire of the main power wall N, NH, and G (black, red, white, switch by using a wire connector blue, and green).
- Page 14 WHITE - N WHITE - N 240 V POWER BLUE - NH SUPPLY RED - L2 RED - L2 WALL SWITCH BLACK - L1 BLACK - L1 BREAKER PANEL GROUND - G GROUND - G www.dimplex.com...
- Page 15 Electrical Connect the L1 wire from the power To install a 240 V wall switch: supply to the L1 terminal of the Pull out the 5 wires marked L1, L2, main power wall switch. N, NH, and G. (black, red, white, Connect the L2 (black) wire from blue, and green).
- Page 16 Electrical www.dimplex.com...
-
Page 17: Operation
Operation Touch Panel and Remote Controls WARNING: The Revillusion Built-in Electric Firebox must be installed properly before it is used. CAUTION: Except for installation and cleaning described in this manual, an authorized service representative should perform any other servicing. The manual controls for the Revillusion Built-in Electric Firebox are located on the front panel. - Page 18 ), on the unit, for Heat Enable 2 seconds. Temperature displays on the screen. Hold both Heat ( ) and Temp– ( ), on the unit, Heat Disable for 2 seconds, when temperature is adjusted "---" displays on the screen. www.dimplex.com...
- Page 19 Operation Icon Function Description Press multiple times to change the flame base colors from Red to Blue to Off. (The first segment on the Color display will change from "r" to "b" to blank) This Themes feature is active only when the flame effect is On. Press multiple times to change the LEDs on the sides and back of the unit from Midnight mode to white to yellow to red.
-
Page 20: Maintenance
To remove fingerprints or other marks, clean the reflector screen damp cloth. Never use abrasive cleaners. Dry the screen completely with a lint free cloth to prevent water spots. www.dimplex.com... -
Page 21: Warranty
2 years from the What Dimplex will do in the event of a defect date of the first purchase of such products as In the event a product or part covered by this... - Page 22 Warranty • Dimplex will in its sole discretion either repair or • For surrounds (mantels) and trims for the period ending at midnight on the first anni- replace such defective product or part without charge. If Dimplex is unable to repair or replace...
-
Page 23: Technical Support
Contracts for the Sale of Goods shall not apply to this limited warranty or the sale of products covered by this limited warranty. Dimplex North America Limited 1367 Industrial Road Cambridge ON Canada N3H 4W3 © 2016 Dimplex North America Limited...
Need help?
Do you have a question about the Revillusion RBF30 and is the answer not in the manual?
Questions and answers