Advertisement

Quick Links

Installation and User's Guide
We value your feedback!
Your input helps to create even
better products and experiences.
Share the warmth and leave a review.
dimplex.com/sharethewarmth
IMPORTANT SAFETY INFORMATION:
Read this manual first before attempting to install or use this electric fireplace. Always comply with the
warnings and safety instructions contained in this manual to prevent personal injury or property damage.
To view the full line of Dimplex products, visit www.dimplex.com
7214620200R03
Models
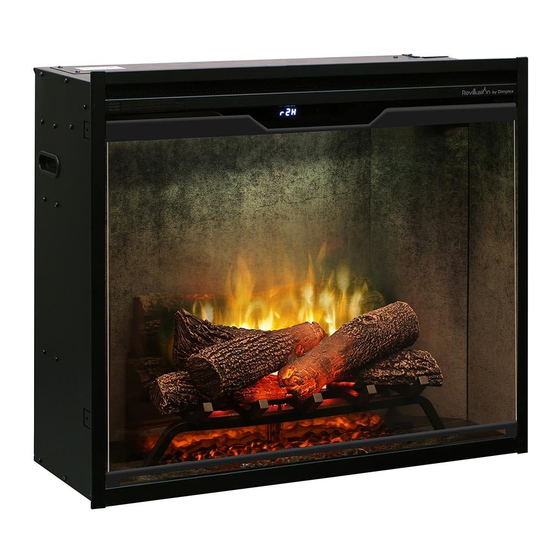
500002388 RBF30-FG
500002389 RBF30WC-FG
500002400 RBF36-FG
500002401 RBF36WC-FG
500002398 RBF36P-FG
500002399 RBF36PWC-FG
500002410 RBF42-FG
500002411 RBF42WC-FG

Advertisement

Table of Contents
loading

Summary of Contents for Dimplex Revillusion RBF30-FG

  • Page 1 Read this manual first before attempting to install or use this electric fireplace. Always comply with the warnings and safety instructions contained in this manual to prevent personal injury or property damage. To view the full line of Dimplex products, visit www.dimplex.com 7214620200R03...
  • Page 2: Table Of Contents

    NOTE: Procedures and techniques that are considered important enough to emphasize. CAUTION: Procedures and techniques which, if not carefully followed, will result in damage to the equipment. WARNING: Procedures and techniques which, if not carefully followed, will expose the user to the risk of re, serious injury, or death. www.dimplex.com...
  • Page 3: Welcome

    Please record your model and serial numbers for future reference. Model and serial numbers can be found on the label located behind the front glass of your replace. Register your product online at www.dimplex.glendimplexamericas.com/en-ca/support/register-your-product to ensure our customer service team can quickly acess your information when you contact us, allowing them to help you sooner.
  • Page 4: Important Instructions

    ⑥ Do not use this firebox outdoors. CAUTION RISK OF ELECTRIC SHOCK DO NOT OPEN NO USER-SERVICEABLE PARTS INSIDE SAVE THESE INSTRUCTIONS www.dimplex.com...
  • Page 5 IMPORTANT INSTRUCTIONS FCC Compliance WARNING: CAUTION: This unit has been tested and found Remote control contains small batteries. to comply with the limits for Class B digital Keep away from children. If swallowed, seek device, pursuant to part 15 of the FCC Rules. medical attention immediately.
  • Page 6: Technical Specifications

    676 mm 788 mm 788 mm 12 ⅛" 12 ⅛" 12 ⅛" 12 ⅛" Depth 307 mm 307 mm 307 mm 307 mm 66.5 lb 74.7 lb 81.1 lb 88.6 lb Weight 30.2 kg 33.9 kg 36.8 kg 40.2 kg www.dimplex.com...
  • Page 7: Package Contents

    Read this manual first before attempting to install or use the Revillusion™ Electric Fireplace. Always comply with the warnings and safety instructions contained in this manual to prevent personal injury or property damage. To view the full line of Dimplex products, visit www.dimplex.com 7214620100R07 Front glass...
  • Page 8: Installation

    If permanent disconnection of the heater is required, follow steps for Heater Hardware Disconnect on page 14 of this manual before installing the replace. • If the plug kit will be used, follow the instructions on page 14 and connect the power cord before installing the replace. www.dimplex.com...
  • Page 9: Installation Instructions

    Installation Installation Instructions 1. Rough-in the framing opening, following the recommended framing dimensions below. NOTE: The materials used for the nished surround must be cut to precise dimensions (dimensions B & C) as the ¼" (0.6 cm) self-trimming ange is only to create a nished appearance. Figure 3 Figure 1 Figure 2...
  • Page 10 (not included). (Figure 5) 7. Reinstall the inner decorative side panels by inserting the bottom rst, then tilting upward to place. 8. Install the front glass. (Reference page 11) www.dimplex.com...
  • Page 11: Front Glass Installation

    Installation Front Glass Installation 1. Secure the glass pins to the bottom brackets of the Hardware glass. (Figure 6, hardware A and B) 2. Secure the left (L) and right (R) brackets to the top of the replace. (Figure 7, hardware C) 3.
  • Page 12: Electrical Installation

    WARNING: This heater is not intended for use with an extension cord. Plug the cord directly into an appropriate wall receptacle. must comply with the applicable Local and/or National Electrical Codes and utility requirements. NOTE: The power cord installation must comply with the applicable Local and/or National Electrical Codes and utility requirements. www.dimplex.com...
  • Page 13 Installation 120 V Hardwire Installation 240 V Hardwire Installation Use 2-conductor wires with ground (3 wires total) from Use 3-conductor wires with ground (4 wires total) from the power supply (breaker panel) to the junction box on the power supply (breaker panel) to the junction box on the built-in electric rebox.
  • Page 14: Plug Kit Installation

    120 V Power Cord Installation WHITE - N 120 V WHITE - N POWER BLUE - NH SUPPLY 1 2 0 V RED - L2 POW ER C ORD BLACK - L1 BLACK - L1 BREAKER PANEL GROUND - G GROUND - G www.dimplex.com...
  • Page 15: Wiring Diagram

    Wiring Diagram...
  • Page 16: Operation

    NOTE: The replace will retain the previously used settings after a power interruption. Figure 16 Figure 17 D i sp lay Indi c at or L i g h t s www.dimplex.com...
  • Page 17 Operation Press to turn the unit on or put it in standby mode. Standby When the unit is turned back on, it will retain the previously used settings. Flame Press to turn the ame effect on or off. Press to turn the heat on or off. Heat The replace can be operated in heat only mode by turning off the ame and color effects.
  • Page 18: Resetting The Temperature Cutoff Switch

    Er2 will be displayed on the unit. It can be reset by turning the unit off at the main disconnect panel and waiting 5 minutes before turning the unit back on. CAUTION: If you need to continuously reset the heater, turn the unit off at the main disconnect panel and call technical support at: 1-888-346-7539. www.dimplex.com...
  • Page 19: Maintenance

    Maintenance Remote Control Battery Replacement Figure 18 1. Remove the battery cover screw using a Philips screwdriver. 2. Slide the battery cover open. 3. Install a 3V (CR2032) lithium battery in the battery holder. The positive (+) side of the battery faces up. 4.
  • Page 20: Troubleshooting

    Troubleshooting For more troubleshooting, consult the Revillusion Service Manual which can be found at www.dimplex.com/product-downloads Problem Display Cause Solution Ensure unit is wired correctly Fireplace does not turn on with No incoming power Check main disconnect panel the manual touch controls...
  • Page 21: Warranty

    Yukon Territory, Nunavut, Northwest Territories, Hawaii, or Alaska are not covered by this limited warranty. Products What Glen Dimplex Americas will do in the event of a purchased in these States, provinces, or territories are sold defect...
  • Page 22 DAMAGES, SO THE ABOVE LIMITATION OR EXCLUSION either repair or replace such defective surrounds (mantels) MAY NOT APPLY TO THE PURCHASER. and trims or part thereof without charge. If Glen Dimplex How State and Provincial law apply Americas is unable to repair or replace such product...
  • Page 23 Your input helps to create even better products and experiences. Share the warmth and leave a review. dimplex.com/sharethewarmth 1-888-346-7539 | www.dimplex.com In keeping with our policy of continuous product improvement, we reserve the right to make changes without notice. © 2023 Glen Dimplex Americas...

Table of Contents