Table of Contents
Advertisement
Quick Links
Advertisement
Table of Contents

Related Manuals for Landice L10 90 Series


Summary of Contents for Landice L10 90 Series
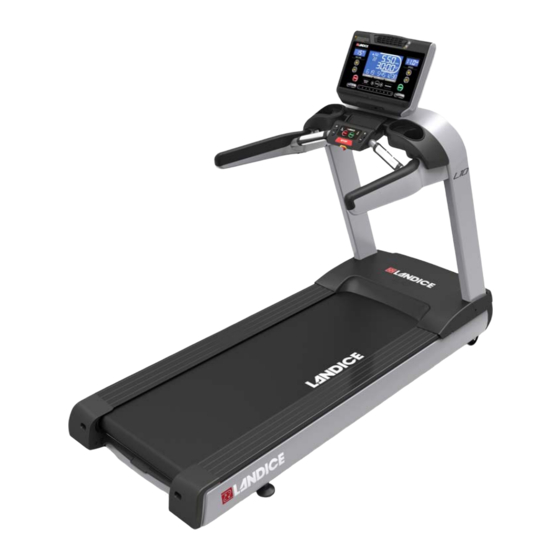
- Page 1 L10 Treadmill 90 Series Installation Manual Part Number: 73208...
-
Page 3: Important Safety Instructions
1. Important Safety Instructions 1.1. Safety Read all instructions before using the treadmill. Save these instructions. Veuillez lire toutes les instructions avant d'utiliser le tapis roulant. VEUILLEZ CONSERVER CES INSTRUCTIONS. To reduce the risk of electric shock: always unplug DANGER the treadmill from the electrical outlet immediately after using and before cleaning. -
Page 4: Grounding Instructions
Failure to leave ample clearance around the WARNING treadmill could cause you to be trapped between the treadmill and a wall if you fall, resulting in burns or other serious injury from the moving treadbelt. Allow a minimum clearance of 18 inches (46 cm) on each side of the treadmill. -
Page 5: 200 - 240-Volt Treadmills
Improper connection of the grounding connector DANGER can result in a risk of electric shock. Check with a qualified electrician/service technician if you are in doubt as to whether the treadmill is properly grounded. Do not modify the plug provided with the treadmill–if it will not fit the outlet, have a proper outlet installed by a qualified electrician. - Page 6 Les tapis roulant sur lesquels est inscrit 200-240 CA (VAC) sont destinés à une utilisation à une tension nominale supérieure à 220 V et équipés en série d'un câble électrique et d'une fiche spécifiques pour permettre le branchement sur une prise adaptée. Si le tapis roulant doit être configuré...
-
Page 7: Table Of Contents
Contents Contents 1. Important Safety Instructions ........... 1 1.1. Safety................... 1 1.2. Grounding Instructions............2 1.3. 200 – 240-Volt Treadmills ............ 3 2. Installation ................7 2.1. Tools Needed............... 7 2.2. Hardware Included............... 7 2.3. Unpacking ................8 2.4. Assembly ................13 2.5. - Page 8 Contents...
-
Page 9: Installation
2. Installation 2.1. Tools Needed • M4-Allen Wrench 4mm (included in hardware #22) • M6-Allen Wrench 6mm (included in hardware #21 blue handle) • Installer provides the following tools: • Allen Wrench 5mm • Med Philips Screwdriver • Socket wrench 16mm and 17mm 2.2. -
Page 10: Unpacking
Installation Unpacking • M10x25-4 pieces (#10 on blister pack) • M10 Nylon Lock Nut-2 pieces(#11 on blister pack) • M10 Flat Washer-2 pieces (#12 on blister pack) • M4x10-2 pieces (#18 on blister pack) • M4x75 –4 pieces (#15 on blister pack) •... - Page 11 Unpacking Installation Figure 2-2. Free Space Areas 24” (0.6m) 12” 79” (2m) (0.3m) 24” (0.6m) 2. Move boxed unit to room where it will be used, cut the straps, and take off the top of the box (Figure 2-3). Figure 2-3. Open Shipping Box Small Box Large Box...
- Page 12 Installation Unpacking 3. Remove wood bracing from inside the box. You will have to slide larger box toward center to remove wood brace covering it (Figure 2-4). Figure 2-4. Bracing Removal Large Box Small Box 4. Open the large box. Inside you will find: Figure 2-5.
- Page 13 Unpacking Installation 5. Open smaller box. Inside you will find the console/display (Figure 2-6). Figure 2-6. Console/Display 6. Remove Upright from box (Figure 2-7). Figure 2-7. Packed Upright Upright...
- Page 14 Installation Unpacking 7. Cut open the box and remove bubble wrap (Figure 2-8). Figure 2-8. Packed Base 8. Remove the Treadmill base from the box and place where it will be used as determined in Step 1. One person uses the Grab Bar and two people lift at each front corner as shown in Figure 2-9.
-
Page 15: Assembly
Assembly Installation 2.4. Assembly 1. Remove the two M6x20 and four M5x15 Socket Head Cap Screws that secure the motor covers in place and place them in a safe place for reuse later when the covers are re-installed (Figure 2-10). Figure 2-10. - Page 16 Installation Assembly Figure 2-11. Motor Cover Inner Screws Screws Failure to leave ample clearance around the WARNING treadmill could cause you to be trapped between the treadmill and a wall if you fall, resulting in burns or other serious injury from the moving treadbelt.
- Page 17 Assembly Installation 4. On both sides: The M10x165 and M10x180 Hex Head Bolts used to secure the Upright to the Frame are shipped in the Frame, held in place during shipment with 16mm nuts. Remove the nuts and allow the bolts to slide down and rest on the floor (Figure 2-12). Figure 2-12.
- Page 18 Installation Assembly Figure 2-13. Upright Installation Welded Nut Alignment Pin 7. Remove the two Nylon Lock Nuts #11 from the blister card. 8. On both sides: Push the Rear Bolt up through the Frame and Upright Base Plate and install the Nylon Lock Nut. Do not fully tighten at this time.
- Page 19 Assembly Installation Figure 2-14. Upright Side Bolts 10x30 Hex Head Bolts (4X) 11. Tighten all eight M10x30 Hex Head Bolts. 12. Slide Lower Control Assembly onto Center Upright Bracket and the End Plates into the Side Brackets as shown in Figure 2-15.
- Page 20 Installation Assembly Figure 2-15. Lower Control Assembly Installation Center Upright Bracket Lower Control Assembly Side Brackets End Plate (both ends) (both sides) 13. Attach the Lower Control Assembly to the Center Upright Bracket from the bottom using four M8x15 Socket Head Cap Screws (#13 on card) with the provided blue Allen wrench (#21 on card).
- Page 21 Assembly Installation Figure 2-16. Lower Control Assembly Center Upright Bracket Mounting Hardware M8x15 Socket Head Cap Screws (4X)
- Page 22 Installation Assembly 14. On both sides: Attach the Lower Control Assembly to the Upright Brackets using one M8x16 Button Head Allen Screw (5mm) and M8-6 Nut as shown in Figure 2-17. These are unlabeled, below the Allen wrench on the blister pack as indicated by the red arrows in Figure 2-1.
- Page 23 Assembly Installation 16. Loosely attach each Handrail to the Upright Bracket and the Lower Control Assembly End Plates with M8x15 Socket Head Cap Screws and Star Washers. Tighten all Screws that secure the Lower Control Assembly to the Upright. (Figure 2-19). Figure 2-19.
- Page 24 Installation Assembly Figure 2-20. Plastic Bridge Installation - Upper Screws Ribbon Cable from Accessories Tray Lower Control Panel Plastic Bridge 19. Route the Ribbon Cable through the hole in the Plastic Bridge and the Upright indicated by the red arrow (Figure 2-20). Figure 2-21.
- Page 25 Assembly Installation 21. Secure the bridge from underneath with two M6x15 Button Head Cap Screws as shown using the 5mm Allen wrench (Figure 2-22). Figure 2-22. Plastic Bridge Installation - Lower Screws M6x15 Button Head Cap Screws (2x) 22. Remove Display Console from box. There are three cables coming from the bottom of the Console: the long Upper Wire Harness (PWM version shown), the flat ribbon cable, and the wireless pulse cable.
- Page 26 Installation Assembly Upper Wire Harness through the Upright and out of the Upper Access Hole (Figure 2-24). Figure 2-24. Upper Wire Harness Routing Path Guide Wire Tie Upright Cable Routing Hole 24. Connect the Ribbon Cable and the optional Pulse Cable, if present, from the Lower Control Panel to the corresponding cables from the Display Console (Figure 2-25).
- Page 27 Assembly Installation 26. Remove four M6X75 screws from bag stapled to the console box. Using 5mm hex wrench, secure Display Console assembly to upright with four M6X75 button head cap screws (Figure 2-26). Figure 2-26. Control Assembly Bolts M6x75 (4x) Button Head Cap Screws 27.
-
Page 28: Leveling Treadmill
Installation Leveling Treadmill Figure 2-27. Accessory Tray Installation Notch 2.5. Leveling Treadmill 1. Ensure that all feet touch the floor: Loosen the 19mm Jam Nut and the 14mm Adjustment Nut using open end or adjustable wrench and turn the Adjustment Nut until the foot touches the floor (Figure 2-28). - Page 29 Leveling Treadmill Installation There must be a minimum of 150 pounds on the CAUTION treadmill’s side steps for the reading to be accurate. Il doit y avoir un minimum de 150 livres sur les ATTENTION étapes latérales du tapis roulant pour que la lecture soit précise.
-
Page 30: Treadbelt Tensioning
Installation Treadbelt Tensioning 2.6. Treadbelt Tensioning 1. Treadbelts are tensioned at the factory prior to shipment and normally need no adjustment. To determine if the treadbelt needs adjustment, straddle the treadbelt by stepping on the straddle covers. Start the treadmill, step on the treadbelt and increase speed to 3mph. - Page 31 Treadbelt Tracking Installation parallel, each is at right angles to the frame, so that the treadbelt tension from side to side is equal as shown in the following figure. If the treadbelt is running diagonally, with unequal gaps between the treadbelt and sides then the rollers must be adjusted (see Figure 2- 30).
-
Page 32: Cover Installation
Installation Cover Installation b. Using a 9/16" wrench, tighten the right-hand adjustment bolt a quarter-turn. c. Loosen the left-hand adjustment bolt a quarter-turn. d. Let treadbelt stabilize (rotate for 30 seconds). In this example, the treadbelt will change tracking as shown by the blue arrow due to the increased tension on the right side and the reduced tension on the left. - Page 33 Cover Installation Installation Figure 2-32. Motor Cover Outer Screws M5x15 Socket Tabs Head Cap Screws (2X) Forward Cover (2X) M6x20 Socket Head Cap Screws (4X) 3. Install the four M6x20 Socket Head Cap Screws (Figure 2-32). 4. Start treadmill and walk at 2.5 mph for 20 to 45 minutes, walking from front to back over the entire surface, to properly “walk in”...
- Page 34 Installation Cover Installation...
- Page 36 111 Canfield Avenue, Suite A-1, Randolph, NJ 07869 1-800-LANDICE U.S. Tel. (+1) 973-927-9010 · Fax (+1) 973-927-0630 International Tel. (+1) 973-927-9010 www.landice.com...
Need help?
Do you have a question about the L10 90 Series and is the answer not in the manual?
Questions and answers