Makeblock mBot Instruction Manual
Mbot add-on pack
interactive light & sound
Hide thumbs
Also See for mBot:
- Manual (120 pages) ,
- Construction manual (11 pages) ,
- Quick manual (9 pages)
Advertisement
Table of Contents
- 1 Table of Contents
- 2 A.contents
- 3 B.introduction to Product
- 4 C.parts List
- 5 D.tool Tips
- 6 E.me Light Sensor
- 7 F.me Sound Sensor
- 8 G.me RGB LED
- 9 Example 1: Light Chasing Robot
- 10 Example 2: Intelligent Desk Light
- 11 Example 3: Scorpion Robot
- 12 Suggestion about Programming
- Download this manual
See also:
Manual
For more add-on packs and building instructions,
please visit:
We appreciate your opinions about our products,
please contact us with your suggestion at:
Makeblock Co., Ltd.
Technical support: tec-support@makeblock.com
Tel: 0755-2639 2228
Address: 4th Floor, Building C3, Nanshan iPark, No.1001 Xueyuan Avenue, Nanshan
District, Shenzhen, Guangdong Province, China
:@Makeblock
learn.makeblock.com/mbot-add-on-packs/
: @Makeblock
: +Makeblock
D1.1.3_7.40.3621
Advertisement
Table of Contents

Related Manuals for Makeblock mBot


Summary of Contents for Makeblock mBot
- Page 1 We appreciate your opinions about our products, please contact us with your suggestion at: Makeblock Co., Ltd. Technical support: tec-support@makeblock.com Tel: 0755-2639 2228 Address: 4th Floor, Building C3, Nanshan iPark, No.1001 Xueyuan Avenue, Nanshan District, Shenzhen, Guangdong Province, China...
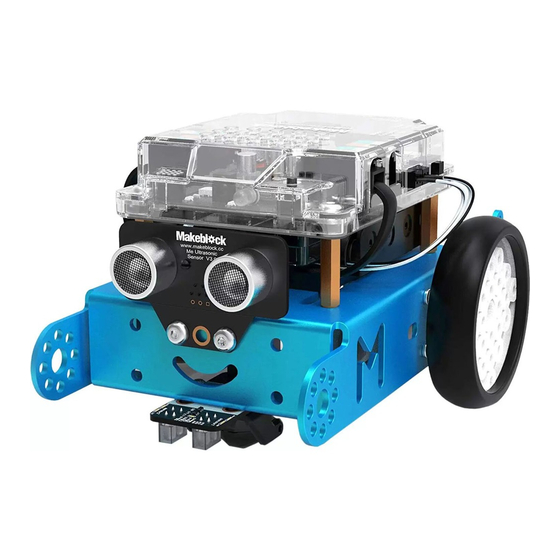
- Page 2 Add-on Pack Interactive Light & Sound www.makeblock.com...
-
Page 3: Table Of Contents
Contents 1. Basic information A.Contents ................1 B.Introduction to product ............2 C.Parts list ................. 3 D.Tool tips ................. 4 E.Me light sensor ..............5 F.Me sound sensor ..............6 G.Me RGB LED ................7 2. Example 1: Light chasing robot ..........8 3. -
Page 4: B.introduction To Product
Introduction to product mBot interactive light & sound pack is a 3-in-1 add-on pack. With the parts in the pack, you can build out three robots based on mBot : “light chasing robot” , “intelligent desk light” and “scorpion robot” . -
Page 5: C.parts List
Parts list 2× Me Light Sensor 2× Beam0808-072 1× Me RGB LED 2× Beam0824-080 1× Me Sound Sensor 1× Plate 45° 2× RJ25 cable-35cm 4× Spacer 4*7*3mm 1× Wrench M5+M7 Screws and nuts (1:1 Scale) 9× Nut M4 4× Screw M4*8 9×... -
Page 6: D.tool Tips
Tool tips Phillips screw Hexagon socket screws Fix the screws forcibly Fix the nuts forcibly as shown as shown... -
Page 7: E.me Light Sensor
Me Light Sensor The light sensor is developed based on the principle of semiconductor’ s photoelectric effect. It can be used to detect the light intensity in the surrounding area and determine the light difference on different color surfaces. Moreover, it can also be used to make some items interacted with light, like intelligent dimming clearance light and intelligent light chaser robot. -
Page 8: F.me Sound Sensor
Me Sound Sensor The sound sensor can be used to detect the sound intensity in the surrounding area, empowering the robot with “listening” capacity. Such sensor is developed based on microphone, and its core component is LM2904 low power amplifier. You can use this sensor to make some interactive items, like voice operated switch, intelligent voice-activated light and robot dancing with music rhythm. -
Page 9: G.me Rgb Led
Me RGB LED The colored Me RGB LED module includes four RGB LEDs with adjustable full color gamut. For each LED, its color is determined by the value of red (R), green (G) and blue (B), and the LED itself is characterized by highlight and adjustable brightness, realizing flowing water, flashing, rainbow light and other effects. -
Page 10: Example 1: Light Chasing Robot
Pack ‒ Light Chasing Robot Function description: It detects the light intensity around mBot via two light sensors on each side. When the light intensity on the left side is greater than that on the right side, the robot will turn left;... - Page 11 Building steps Beam0808-072 ×2 Screw M4*14 ×4 Nut M4 ×4 Beam0808-072 x2 M4*14 x4 Me Light sensor ×2 Screw M4*8 ×4 Me Light Sensor x2 M4*8 x4...
- Page 12 Assembled diagram Right light sensor Left wheel (left motor) Left light sensor Wiring diagram Right light sensor (Port4) Left light sensor (Port3) Right motor Left motor Me line follower sensor Me ultrasonic sensor Please follow page 20 for programming...
-
Page 13: Example 2: Intelligent Desk Light
Pack ‒ Intelligent Desk Light Function description By changing the building configuration, mBot can turn into an “intelligent desk light” . The light has two operating modes: touch mode in which the light brightness can be regulated by touching the line follower sensor with fingers, and voice control mode, in which the sound intensity in the surrounding area has to be sensed, and when the intensity is large, the light will come on, like the voice-activated light at the stairway. - Page 14 ×1 Nut M4 ×4 Screw M4*22 ×4 M4*22 x4 M4螺母 x4 Beam0824-080 x1 Beam0808-072 x1 Note: Some parts in this building example come from mBot, so you need to disassemble mBot first. Beam0808-072 ×1 Beam0824-080 ×1 Nut M4 ×4 Screw M4*22 ×4 Spacer4*7*3 ×4 M4*22 x4...
- Page 15 Beam0824-080 ×1 Screw M4*14 ×2 M4*14 x2 Beam0824-080 x1 Me Line follower sensor ×1 Beam0808-072 ×1 Nut M4 ×3 Screw M4*14 ×3 Screw M4*22 ×1 M4*22 x1 M4*14 x3 M4螺母 x3 Beam0824-080 x1 Me Line Follower x1 Screw M4*22...
- Page 16 ×1 Me RGB LED ×1 Me Sound Sensor ×1 Screw M4*8 ×4 M4*8 x4 Me SoundSensor x1 Me RGB LED x1 mBot 壳 x1 Nut M4 ×2 Screw M4*14 ×2 M4*14 x2 M4螺母 x2...
- Page 17 Assembled diagram Wiring diagram Me sound sensor Me line follower sensor Me RGB LED Please follow page 20 for programming...
-
Page 18: Example 3: Scorpion Robot
Function description Add mBot with a vivid “tail” , enabling it to look like a scorpion. In this case, by adding an arc tail at the rear part of mBot, the center of gravity of the robot is changed, thus making it easier for the mBot to raise its head. - Page 19 Building steps Beam0824-080 ×1 Me RGB LED ×1 Me Sound Sensor ×1 Nut M4 ×2 Screw M4*8 ×2 Screw M4*14 ×2 Me SoundSensor x1 Me RGB LED x1 M4*14 x2 M4*8 x2 M4螺母 x2 Beam0824-080 x1 Beam0808-072 ×1 Nut M4 ×1 Screw M4*22 ×1 Screw M4*14 ×1 M4*14 x1 M4*22 x1 M4螺母 x1 Beam0808-072 x1 Screw M4*22...
- Page 20 Plate 45° ×1 Beam0808-072 ×1 Screw M4*14 ×4 Nut M4 ×4 M4*14 x4 M4螺母 x4 Beam0808-072 x1 Plate 45° x1 Nut M4 ×2 Screw M4*14 ×2...
- Page 21 When you use a lithium battery to power mBot, you need to remove the lithium battery from the battery shell and fix it to the back of mBot with Velcro, so as to ensure the center of mBot’ s gravity moves backwards.
-
Page 22: Suggestion About Programming
Suggestion about programming Congratulations, you have completed the building of the robot. Now start to practice controlling your robot. Please visit learn.makeblock.com/mbot-add-on-packs/ to download the latest mBlock graphical program. What is mBlock? mBlock is a graphic programming software based on Scratch2.0. This software is simple to operate and can allow you to program your Arduino project quickly.
Need help?
Do you have a question about the mBot and is the answer not in the manual?
Questions and answers