Makeblock mBot Construction Manual
Hide thumbs
Also See for mBot:
- Manual (120 pages) ,
- Instruction manual (26 pages) ,
- Quick manual (9 pages)
Advertisement
Quick Links
Advertisement

Related Manuals for Makeblock mBot


Summary of Contents for Makeblock mBot
- Page 1 Stem in a box mBot Construction Guide Step by Step Guide to Construct mBot...
- Page 2 Upgrade Parts List for mBot Sensor Bumper Upgrade Claw Arm Upgrade 1 x M3X12mm Bolt – Ultrasonic 1 x M3 Nut – Ultrasonic 2 x M3 Washers 4 x M3X8mm Bolts – Servos 4 x M3X10 mm Bolts – Light Sensors 2 x Small Metal Geared Servos 2 x M2 Washers –...
- Page 3 Battery Upgrade Place battery between two motors underneath chassis and anchor using zip tie. Connect battery cable to power port on board...
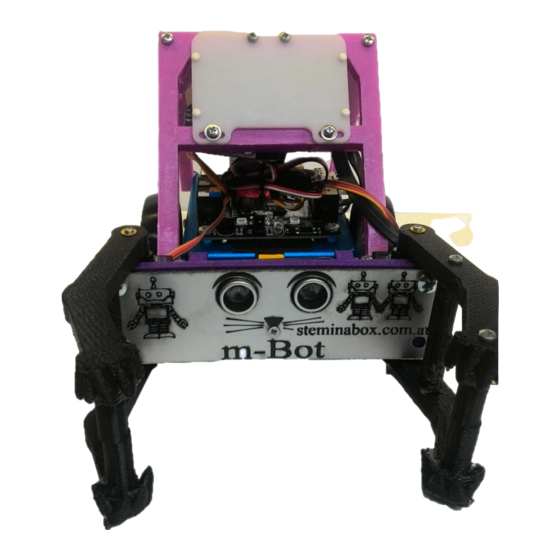
- Page 4 Sensor Bumper Upgrade Use 1 x M3X12mm Bolt and 1 x M3 Nut to secure Ultrasonic Distance Sensor and face plate in 3D Printed Bumper (Below) Use 4 x M3X 10mm Bolts and 4 x M3 Nuts to secure 2 x Light Sensors in 3D Printed Bumper (Above) Use 2 x M5X8mm Bolts to...
- Page 5 Claw Arm Upgrade Use 4 x M3X8mm Bolts to anchor servos to 3D Printed Bumper (Below) Use 2 x M3X16mm Ensure the servo spline is facing outside of bumper Bolts and 2 x M3 Washers to secure claw to bottom of 3D printed bumper (Above) Use 4 x M3X40m...
- Page 6 To ensure that when programming claws to open and close simultaneously with one servo command; connect the left servo to a servo reverser then to a Y-Servo cable then connect to a Makeblock RJ25 adapter slot 1.
- Page 7 Handle Frame Upgrade 2xM4 Nuts 2xM4 Nuts M4X20mm M4X20mm Bolt Bolt Use 2 x M4X30mm Bolts and Use 2 x M4X16mm Bolts to 4 x M4 Nuts to secure handle secure bumper to chassis to and bumper to chassis ensure no moving (Left) (Above &...
- Page 8 Handle Frame Upgrade Cont. Use 2 x M3X16mm Bolts to hold handle frame together by overlapping and bolting handles Use 2 x M4X16mm Bolts and 2 x M4 Nylocs to secure handle to rear of chassis...
- Page 9 Face Plate & LED Matrix Upgrade Use 4 x M3X12mm Bolts to anchor name plate to rear of handles 4 x M3X10mm Bolts Ensure LED Matrix is upright Use 4 x M3X10mm Bolts and 2 x M3 Washers to secure handle to rear of chassis 2 x M3 Washers...
Need help?
Do you have a question about the mBot and is the answer not in the manual?
Questions and answers