
Related Manuals for Mitsubishi MR-J2-10A


Summary of Contents for Mitsubishi MR-J2-10A
- Page 1 General-Purpose AC Servo Series General-Purpose Interface MR-J2- Specifications and Installation Guide...
- Page 2 Thank you for choosing this Mitsubishi AC servo. This Installation guide gives handling information and precautions for using the servo amplifier and servo motor. Incorrect handling may cause an unexpected fault. Before using the servo amplifier and servo motor, please read this Installation guide carefully to use the equipment to its optimum.
- Page 3 SAFETY INSTRCUTIONS 1. To prevent electric shock, note the following: WARNING Before wiring or inspection, switch power off and wait for more than 10 minutes. Then, confirm the voltage is safe with voltage tester. Otherwise, you may get an electric shock. Connect the servo amplifier and servo motor to ground.
- Page 4 4. Additional instructions The following instructions should also be fully noted. Incorrect handling may cause a fault, injury, electric shock, etc. (1) Transportation and installation CAUTION Transport the products correctly acordng to their weights. Stacking in excess of the specified number of products is not allowed. Do not carry the motor by the cables, shaft or encoder.
- Page 5 The encoder may become faulty. Do not subject the servo motor shaft to more than the permissible load. Otherwise, the shaft may break. When the equipment has been stored for an extended period of time, consult Mitsubishi. – 4 –...
- Page 6 (2) Wiring CAUTION Wire the equipment correctly and securely. Otherwise, the servo motor may misoperate Do not install a power capacitor, surge absorber or radio noise filter (FR-BIF option) be- tween the servo motor and servo amplifier. Connect the output terminals (U, V, W) correctly. Otherwise, the servo motor will operate improperly.
- Page 7 (5) Corrective actions CAUTION When it is assumed that a hazardous condition may take place at the occur due to a power failure or a product fault,, use a servo motor with electromag<->netic brake or an external brake mechanism for the purpose of prevention. Configure the electromagnetic brake circuit so that it is activated not only by the servo amplifier signals but also by an external emergency stop signal.
- Page 8 This servo amplifier conforms to the standards related to the Low Voltage Directive to facilitate CE marking on machines and equipment into which the servo amplifiers will be installed. To ensure ease of compliance with the EMC Directive, Mitsubishi Electric prepared the "EMC INSTALLATION GUIDELINES" (IB(NA)67310) which provides servo amplifier installation, control box making and other procedures.
- Page 9 3) When the EMC filter is used, the radio noise filter (FR-BIF) described in (5), Section 6-2-6 is not required. (7) Servo motor For outline dimension drawings not shown, contact Mitsubishi. (8) Performing EMC tests When EMC tests are run on a machine/device into which the servo amplifier has been installed, it must conform to the electromagnetic compatibility (immunity/emission) standards after it has satisfied the operating environment/electrical equipment specifications.
- Page 10 202 • 352 (4) Capacitor discharge time The capacitor discharge time is as listed below. To ensure safety, do not touch the charging section for 10 minutes after power-off. Servo Amplifier Discharge Time [min] MR-J2-10A(1)•20A(1) MR-J2-40A(1)•60A MR-J2-70A~350A – 9 –...
-
Page 11: Table Of Contents
CONTENTS CHAPTER 1 INTRODUCTION ....................1-1~1-17 Inspection at Delivery ......................1-2 1-1-1 Packing list .........................1-2 1-1-2 Model definition ......................1-2 1-1-3 Combination with Servo Motor ................1-7 Parts Identification and Applications ................... 1-8 1-2-1 Servo amplifier ......................1-8 1-2-2 Servo motor ......................1-13 Function List .......................... - Page 12 CHAPTER 5 ABSOLUTE POSITION DETECTION SYSTEM ..........5-1~5-6 CHAPTER 6 OPTIONS AND AUXILIARY EQUIPMENT ............6-1~6-27 Dedicated Options ........................6-2 6-1-1 Regenerative brake options ..................6-2 6-1-2 Cable connectors ..................... 6-7 6-1-3 Junction terminal block ..................6-14 6-1-4 Maintenance junction card ..................6-15 6-1-5 Set-up software ......................
- Page 13 CHAPTER 11 SELECTION ..................... 11-1~11-13 11-1 Specification Symbol List ....................11-2 11-2 Position Resolution and Electronic Gear Setting ............11-3 11-3 Speed and Command Pulse Frequency ................11-4 11-4 Stopping Characteristics ..................... 11-5 11-5 Capacity Selection ....................... 11-6 11-6 Load Torque Equations ....................... 11-8 11-7 Load Inertia Moment Equations ..................
-
Page 14: Chapter 1 Introduction
CHAPTER 1 INTRODUCTION This chapter provides basic information needed to use this servo. 1-1 Inspection at Delivery 1-1-1 Packing list 1-1-2 Model definition 1-1-3 Combination with Servo Motor 1-2 Parts Identification and Applications 1-2-1 Servo amplifier 1-2-2 Servo motor 1-3 Function List 1-4 Basic Configuration 1-4-1 MR-J2-100A or less 1-4-2 MR-J2-200A or more... - Page 15 3PH+1PH200 – 230V 60Hz 5.5A 1PH 230V 50/60Hz Rated output current OUTPUT: 170V 0 – 360Hz 3.6A SERIAL : TC3XXAAAAG52 Current status + serial number MITSUBISHI ELECTRIC CORPORATION MADE IN JAPAN 2) Model MR-J2-100A or less MR-J2-200A•350A MR-J2- A Series...
- Page 16 (2) Servo Motors 1) Name plate AC SERVO MOTOR HC-MF13 Model Serial number SERIAL Date of manufacture DATE MITSUBISHI ELECTRIC CORPORATION MADE IN JAPAN AC SERVO MOTOR Model HC-RF153 Input power INPUT 3AC 145V 8.2A Rated output OUTPUT 1.5Kw IEC34-1 1994...
- Page 17 1. INTRODUCTION b. HA-FF series (low inertia, small capacity) HA-FF Appearance Series name 1) Compliance with Standard Symbol Specifications None Standard model (Japan) EN • UL/C-UL Standard 2) Shaft type 3) Reduction gear Symbol Shaft Shape HA-FF None (Note) Standard 053 to 73 Symbol Reduction Gear...
- Page 18 1. INTRODUCTION c. HC-SF series (middle inertia, middle capacity) HC-SF Appearance Series name 1) Shaft type Shaft shape Symbol Standard None (Straight shaft) With keyway Note: Without key 2) Reduction gear Symbol (Note) Reduction Gear Without None For general industrial machine (flange type) For general industrial machine...
- Page 19 1. INTRODUCTION d. HC-RF series (low inertia, middle capacity) HC-RF Appearance Series name 1) Shaft type Shaft Shape Symbol Standard None (Straight shaft) With keyway Note: Without key 2) Reduction gear Reduction Gear Symbol Without None For precision application 3) Electromagnetic brake Symbol Electromagnetic Brake 4) Rated speed...
- Page 20 1. INTRODUCTION 1-1-3 Combination with Servo Motor The following table lists combinations of servo amplifiers and servo motors. The same combinations apply to the models with electromagnetic brakes, the models with reduction gears, the EN Standard- compliant models and UL/C-UL Standard-compliant models. Servo Motors Servo Amplifier HC-SF...
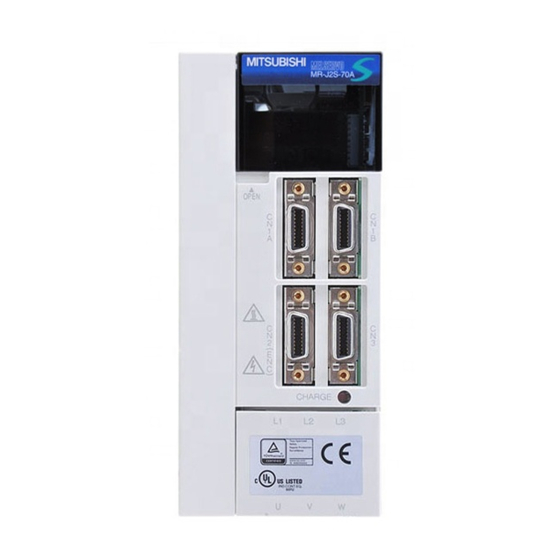
- Page 21 1. INTRODUCTION 1-2 Parts Identification and Applications 1-2-1 Servo amplifier (1) MR-J2-200A or less 1– 8...
- Page 22 1. INTRODUCTION Name/Application Refer To Battery holder Chapter 5(5) Contains the battery for absolute position data backup. Battery connector (CON1) Chapter 5(5) Used to connect the battery for absolute position Section 6-2-8 data backup. Display The four-digit, seven-segment LED shows the servo Section 2-3 status and alarm number.
- Page 23 1. INTRODUCTION (2) MR-J2-200A or more MODE DOWN The servo amplifier is shown without the front cover. For removal of the front cover, refer Installation notch (4 places) to page 1-12. Cooling fan 1– 10...
- Page 24 1. INTRODUCTION Name/Application Refer To Battery holder Chapter 5(5) Contains the battery for absolute position data backup. Battery connector (CON1) Chapter 5(5) Used to connect the battery for absolute position Section 6-2-8 data backup. Display The four-digit, seven-segment LED shows the servo Section 2-3 status and alarm number.
-
Page 25: Servo Amplifier
1. INTRODUCTION Removal of the front cover 1) Hold down the removing knob. 2) Pull the front cover toward you. Front cover Reinstallation of the front cover 1) Insert the front cover hooks into the front cover sockets of the servo amplifier. -
Page 26: Servo Motor
1. INTRODUCTION 1-2-2 Servo motor Name/Application Refer To Encoder cable Section 6-1-2 Encoder connector for HC-SF/HC-RF Section 3-2 Encoder Section 10-1 Power cable • Power leads (U, V, W) • Earth lead Section 3-2 • Brake lead (For motor with electromagnetic brake) Power supply connector for HC-SF/HC-RF Section 4-2 (4) Servo motor shaft... -
Page 27: Function List
1. INTRODUCTION 1-3 Function List (Note) Function Description Refer To Control Mode Section 2-1-1 Position control mode MR-J2-A is used as position control servo. Section 2-2-2 (2) Section 3-1-3 (1) Section 2-1-2 Speed control mode MR-J2-A is used as speed control servo. Section 2-2-2 (3) Section 3-1-3 (2) Section 2-1-3... -
Page 28: Basic Configuration
1. INTRODUCTION 1-4 Basic Configuration To prevent an electric shock, always connect the protective WARNING earth (PE) terminal (terminal marked ) of the servo amplifier to the protective earth (PE) of the control box. 1-4-1 MR-J2-100A or less (1) Three-phase 200V or single-phase 230V power supply models (Note 2) Options and Auxiliary Equipment Refer To... - Page 29 1. INTRODUCTION (2) Single-phase 100V power supply model Options and Auxiliary Equipment Refer To 1-phase 100V power supply No-fuse breaker Section 6-2-2 Magnetic contactor Section 6-2-2 Set-up software Section 6-1-5 Regenerative brake option Section 6-1-1 No-fuse breaker Cables Section 6-2-1 (NFB) or fuse Servo amplifier MR-J2- A1...
-
Page 30: Mr-J2-200A Or More
1. INTRODUCTION 1-4-2 MR-J2-200A or more Options and Auxiliary Equipment Refer To No-fuse breaker Section 6-2-2 Magnetic contactor Section 6-2-2 3-phase 200V Set-up software Section 6-1-5 power supply Regenerative brake option Section 6-1-1 Cables Section 6-2-1 No-fuse breaker (NFB) or fuse Servo amplifier Positioning unit To CN1A... -
Page 31: Chapter 2 Operation
CHAPTER 2 OPERATION This chapter gives basic connection examples and operation procedures. 2-1 Standard Connection Examples 2-1-1 Position control mode 2-1-2 Speed control mode 2-1-3 Torque control mode 2-2 Operation 2-2-1 Pre-operation checks 2-2-2 Start-up 2-3 Display and Operation 2-3-1 Display flowchart 2-3-2 Status display 2-3-3 Diagnostic mode 2-3-4 Alarm mode... -
Page 32: Standard Connection Examples
2. OPERATION 2-1 Standard Connection Examples CAUTION Always follow the instructions in Chapter 3. 2-1-1 Position control mode For single-phase 100V power supply (1) Connection with the FX-1GM Make up a sequence which CAUTION switches off the MC at alarm occurrence or emergency stop. - Page 33 2. OPERATION Note: 1. To prevent an electric shock, always connect the protective earth(PE) terminal (terminal marked ) of the servo amplifier to WARNING the protective earth (PE) of the control box. Note: 2. Connect the diode in the correct direction. If it is connected re- versely, the servo amplifier will be faulty and will not output sig- CAUTION nals, disabling the emergency stop and other protective circuits.
- Page 34 2. OPERATION (2) Connection with the AD75P /A1SD75P For single-phase 100V power supply Make up a sequence which CAUTION switches off the MC at alarm occurrence or emergency stop. Servo amplifier MR – J2 – Power supply Single-phase 100VAC Make up a sequence which CAUTION switches off the MC at alarm Servo motor...
- Page 35 2. OPERATION Note: 1. To prevent an electric shock, always connect the protective earth (PE) terminal (terminal marked ) of the servo amplifier to the WARNING protective earth (PE) of the control box. Note: 2. Connect the diode in the correct direction. If it is connected reversely, the servo amplifier will be faulty and will not output signals, disabling the emergency stop and other protective cir- CAUTION...
-
Page 36: Speed Control Mode
2. OPERATION 2-1-2 Speed control mode For single-phase 100V power supply Make up a sequence which CAUTION switches off the MC at alarm occurrence or emergency stop. Servo amplifier MR – J2 – Power supply Single-phase 100VAC Make up a sequence which CAUTION switches off the MC at alarm occurrence or emergency stop. - Page 37 2. OPERATION Note: 1. To prevent an electric shock, always connect the protective earth (PE) terminal (terminal marked ) of the servo amplifier to the WARNING protective earth (PE) of the control box. Note: 2. Connect the diode in the correct direction. If it is connected re- versely, the servo amplifier will be faulty and will not output sig- CAUTION nals, disabling the emergency stop and other protective circuits.
-
Page 38: Torque Control Mode
2. OPERATION 2-1-3 Torque control mode For single-phase 100V power supply Make up a sequence which CAUTION switches off the MC at alarm occurrence or emergency stop. Servo amplifier MR – J2 – Power supply Single-phase 100VAC Make up a sequence which CAUTION switches off the MC at alarm occurrence or emergency stop. - Page 39 2. OPERATION Note: 1. To prevent an electric shock, always connect the protective earth (PE) terminal (terminal marked ) of the servo amplifier to the WARNING protective earth (PE) of the control box. Note: 2. Connect the diode in the correct direction. If it is connected re- versely, the servo amplifier will be faulty and will not output sig- CAUTION nals, disabling the emergency stop and other protective circuits.
-
Page 40: Pre-Operation Checks
2. OPERATION 2-2 Operation 2-2-1 Pre-operation checks Before starting operation, check the following: Servo amplifier (1) Wiring Servo MR – J2 A 1) A correct power supply is connected to the power motor input terminals (three-phase 200V: L1, L2, L3; Three-phase 200 to 230V single-phase 230V: L1, L2;... -
Page 41: Start-Up
2. OPERATION 2-2-2 Start-up Do not operate the switches with wet hands. You may get an electric shock. WARNING 1. Before starting operation, check the parameters. Some machines may perform unexpected operation. 2. During power-on or soon after power-off, do not touch the servo ampli- CAUTION fier heat sink, regenerative brake resistor, servo motor, etc. - Page 42 2. OPERATION (2) Position control mode Disconnect the servo motor from the machine, make sure that it operates properly , and recon- nect it with the machine. 1) S w i t c h o ff t h e s e r v o - o n s i g n a l Power on (SON).
- Page 43 2. OPERATION When the servo-on signal (SON) is switched on, the servo ampli- Servo on fier is ready to operate and the servo motor shaft is locked. (Servo lock state) If the shaft is not servo-locked, SON is not on. Check the external sequence on the diagnostic display.
- Page 44 2. OPERATION (3) Speed control mode Disconnect the servo motor from the machine, make sure that it operates properly , and reconnect it with the machine. 1) S w i t c h o ff t h e s e r v o - o n s i g n a l Power on (SON).
- Page 45 2. OPERATION When the servo-on signal (SON) is switched on, the servo amplifier Servo on is ready to operate and the servo motor shaft is locked. (Servo lock state) If the shaft is not servo-locked, SON is not on. Check the external sequence on the diagnostic display.
- Page 46 2. OPERATION (4) Torque control mode Disconnect the servo motor from the machine, make sure that it operates properly, and recon- nect it with the machine. 1) S w i t c h o f f t h e s e r v o - o n s i g n a l Power on (SON).
- Page 47 2. OPERATION When the servo-on signal (SON) is switched on, the servo amplifier is Servo on ready to operate.Check the external sequence on the diagnostic display. Checking procedure Power on Press MODE once. Switch SON on. This display appears • • • • when SON switches on.
-
Page 48: Display And Operation
2. OPERATION 2-3 Display and Operation 2-3-1 Display flowchart Use the display (4-digit, 7-segment LED) on the front panel of the servo amplifier for status display, parameter setting, etc. Set the parameters before operation, diagnose an alarm, confirm external sequences, and/or confirm the operation status. Press the button once to MODE DOWN... -
Page 49: Status Display
2. OPERATION 2-3-2 Status display The servo status during operation is shown on the 4-digit, 7-segment LED display.Press the button to change display data as desired. DOWN When the required data is selected, the corresponding symbol is displayed. Press button to display that data. Display Name Symbol... -
Page 50: Diagnostic Mode
2. OPERATION 2-3-3 Diagnostic mode Name Display Description Not ready. Indicates that the servo amplifier is being initialized or an alarm Sequence Ready. Indicates that the servo was switched on after completion of initialization and the servo amplifier is ready to operate. Indicates the ON-OFF states of the external I/O signals. - Page 51 2. OPERATION (1) External I/O signal display The ON/OFF states of the digital I/O signals connected to the servo amplifier can be con- firmed. 1) Operation Call the display screen shown after power-on. Press MODE once. Press UP once. • • • • • • • • External I/O signal display screen 2) Display definition CN1B...
- Page 52 2. OPERATION a. Control modes and I/O signals Signal (Note 2) Symbols of I/O Signals in Control Modes Input/Output Connector Pin No. (Note 1) I/O CR/SP1 (Note 3)SP1 (Note 3)SP1 SP1/CR CN1A (Note 6,8)18 INP/SA /INP (Note 8)19 (Note 9)4 (Note 7)5 (Note 6)6 TLC/VLC...
- Page 53 2. OPERATION 3) Default signal indications a. Position control mode TL (CN 1 B-9) Torque limit PC (CN 1 B-8) Proportional control CR (CN 1 A-8) Clear RES (CN 1 B-14) Reset SON (CN 1 B-5) Servo on LSN (CN 1 B-17) Reverse rotation stroke end EMG (CN1B-15) External emergency stop...
- Page 54 2. OPERATION (2) Output signal forced output The output signal can be forced on/off independently of the servo status. This function is used for output signal wiring check, etc. This operation must be performed in the servo off state (SON signal off). Operation Call the display screen shown after power-on.
- Page 55 2. OPERATION (3) Test operation mode 1. The test operation mode is designed to confirm servo operation and not to confirm machine operation. In this mode, do not use the servo CAUTION motor with the machine. 2. If any operational fault has occurred, stop operation using the external emergency stop (EMG) signal.
- Page 56 2. OPERATION 2) Motor-less operation Without connection of the servo motor, the servo amplifier can provide output signals and display the status as if the servo motor is running actually in response to the external input signal. This function can be used to make a sequence check on the host positioning unit, etc.
-
Page 57: Alarm Mode
2. OPERATION 2-3-4 Alarm mode The current alarm, past alarm history and parameter error are displayed. The lower 2 digits on the display indicate the alarm number that has occurred or the param- eter number in error. Display examples are shown below. Name Display Description... -
Page 58: Parameter Mode
2. OPERATION 2-3-5 Parameter mode The servo amplifier is factory-set in the position control mode. Change the parameter settings when: 1) The control mode is changed; 2) The regenerative brake option is used; 3) The number of pulses per servo motor revolution is changed (When the number of pulses per servo motor revolution has been set to the position com- mand unit, set the number of pulses in the parameter of the position command unit unless the maximum number of pulses is restricted);... - Page 59 2. OPERATION 2) 5-digit parameter The following example shows the operation procedure performed to change the electronic gear denominator (parameter No. 4) into "12345": Call the display screen shown after power-on. Press MODE once. Select parameter No. 4 with UP / DOWN . Press SET once.
- Page 60 2. OPERATION (2) Expansion parameters To use the expansion parameters, change the setting of parameter No. 19 (parameter write disable). After setting parameter No. 19, switch power off once, then switch it on again to make the parameter valid. Basic Parameters Expansion Parameters Set Value Operation...
- Page 61 2. OPERATION (3) Parameter list For any parameter whose symbol is preceded by *, set the parameter and switch power off once, then switch it on again to make that parameter valid. The symbols in the Control Mode field represent parameters used in the corresponding modes. (P: Position control mode, S: Speed control mode, T: Torque control mode) Control Customer...
- Page 62 2. OPERATION Control Initial Customer No. Symbol Name Unit Mode Value Setting *OP2 Function selection 2 P • S • T 0000 *OP3 0000 Function selection 3 (Command pulse selection) *OP4 Function selection 4 P • S • T 0000 Feed forward gain Zero speed P •...
- Page 63 2. OPERATION (4) Detailed explanation of the parameters To make the parameter marked * valid, set the parameter and switch power off once, then switch it on again. The symbols in the Control Mode field represent parameters used in the corresponding modes. (P: Position control mode, S: Speed control mode, T: Torque control mode) Initial Setting...
- Page 64 2. OPERATION Initial Setting Control Class No. Symbol Name and Function Unit Value Range Mode Auto tuning: 0102 0001h P • S Used to set the response level, etc. for execution of auto tuning. 0215h Auto tuning response level setting Response Level Set Value Low response...
- Page 65 2. OPERATION Control Initial Setting Class No. Symbol Name and Function Unit Mode Value Range 1 to 32767 Electronic gear (Command pulse multiplying factor denominator): Used to set the divisor of the command pulse input. pulse 0 to 10000 In-position range: Used to set the droop pulse range in which the in- position (INP) signal will be output.
- Page 66 2. OPERATION Control Initial Setting Class No. Symbol Name and Function Unit Value Range Mode 1000 r/min Internal speed command 3: 0 to instan- Used to set speed 3 of internal speed commands. taneous per- missible Internal speed limit 3: speed Used to set speed 3 of internal speed limits.
- Page 67 2. OPERATION Control Initial Setting Class No. Symbol Name and Function Unit Value Range Mode 0 to 20000 Torque command time constant: Used to set the constant of a low pass filter in response to the torque command. Torque command Torque After filtered...
- Page 68 2. OPERATION Control Initial Setting Class No. Symbol Name and Function Unit Mode Value Range Analog monitor output: 0100 0000h P • S • T Used to set the signal output for analog monitor. 0A0Ah Analog monitor CH1 output selectionThe set values and their definitions are as in analog monitor CH2.
- Page 69 2. OPERATION Initial Setting Control Class No. Symbol Name and Function Unit Value Range Mode *DMD Status display selection: 0000 0000h P • S • T Used to select the status display shown at power-on. 001Ch Selection of status display at power-on 0: Cumulative feedback pulses 1: Servo motor speed...
- Page 70 2. OPERATION Control Initial Setting Class No. Symbol Name and Function Unit Mode Value Range *BLK Parameter block: 0000 0000h P • S • T Used to select the reference and write ranges of the parameters. 000Ch Set Value Reference Range Write Range 0000 No.0 to 19...
- Page 71 2. OPERATION Control Initial Setting Class No. Symbol Name and Function Unit Mode Value Range *OP3 Function selection 3 (Command pulse selection): 0000 0000h Used to select the input form of the pulse train input signal. 0012h (Refer to Section 3-3 (1) 4).) Command pulse train input form 0: Forward/reverse rotation pulse train 1: Signed pulse train...
- Page 72 2. OPERATION Control Initial Setting Class No. Symbol Name and Function Unit Mode Value Range *OP4 Function selection 4: 0000 0000h P • S • T 7301h Selection of servo motor stop pattern at LSP/LSN signal off 0: Sudden stop 1: Slow stop •...
- Page 73 2. OPERATION Control Initial Setting Class No. Symbol Name and Function Unit Value Range Mode 0 to 100 Feed forward gain: Used to set the feed forward gain in position control. By setting 100% for constant-speed operation, droop pulses will not be generated. Note that sudden acceler- ation/deceleration will increase overshoot.
- Page 74 2. OPERATION Control Initial Setting Class No. Symbol Name and Function Unit Mode Value Range Depends —999 to 999 Analog speed command offset: on servo Used to set the offset voltage of the analog speed amplifier. command (VC). When automatic VC offset is used, the automatically offset value is set to this parameter.
- Page 75 2. OPERATION Control Initial Setting Class No. Symbol Name and Function Unit Mode Value Range 1 to 1000 P • S Speed integral compensation Used to set the constant of integral compensation. 0 to 1000 P • S Speed differential compensation: Used to set the differential compensation value.
- Page 76 2. OPERATION Control Initial Setting Class No. Symbol Name and Function Unit Mode Value Range *DI2 Input signal selection 2 (CN1B-pin 5): 0111 0000h P • S • T This parameter is unavailable 0999h when parameter No. 42 is set to MEMORANDUM assign the control change signal (LOP) to CN 1B-pin 5.
- Page 77 2. OPERATION Control Initial Setting Class No. Symbol Name and Function Unit Mode Value Range *DI3 Input signal selection 3 (CN1B-pin 14): 0222 0000h P • S • T 0999h This parameter is unavailable when parameter No. 42 is set to MEMORANDUM assign the control change signal (LOP) to CN1B-pin 14.
- Page 78 2. OPERATION Control Initial Setting Class No. Symbol Name and Function Unit Mode Value Range *DI6 Input signal selection 6 (CN1B-pin 8): 0883 0000h P • S • T 0999h This parameter is unavailable when parameter No. 42 is set to MEMORANDUM assign the control change signal (LOP) to CN1B-pin 8.
- Page 79 2. OPERATION Control Initial Setting Class No. Symbol Name and Function Unit Mode Value Range *DO1 Output signal selection 1: 0000 0000h P • S • T Used to select the connector pins to output the alarm code, warning (WNG) and battery warning (BWNG). 0551h Setting of alarm code output Connector Pins...
-
Page 80: Adjustments
2. OPERATION 2-4 Adjustments 2-4-1 Auto tuning In general machines, gains are automatically adjusted by auto tuning. As the corresponding pa- rameter is factory-set to make auto tuning valid, merely running the servo motor will automatically set the optimum gains for the machine without special operation or setting. However, if you are not satisfied with machine motions during operation, change and adjust the response level setting (parameter No. - Page 81 2. OPERATION The following parameters are used for manual gain adjustment. Note that 000C should be set in parameter No. 19 (parameter write disable) to make the expansion parameters valid. Parameter No. Name No. 2 Auto tuning No.34 Ratio of load inertia moment to servo motor inertia moment No.22 Function selection 4 (Machine resonance suppression filter) No.6...
- Page 82 2. OPERATION Adjustment 2 Step Operation Description Auto tuning is selected. Set 0101 in parameter No. 2. Response is set to low level. Set the machine's load inertia moment to servo When this parameter value is set, the following motor inertia moment in parameter No. 34. parameter values are set automatically.
- Page 83 2. OPERATION Adjustment 4 Step Operation Description Set 0101 in parameter No. 2. Auto tuning is selected. Response is set to low level. Switch servo on and perform operation several Auto tuning is performed. times. Check to see if vibration reduced. Make gain adjustment in either of the following Temporary adjustment methods 1) and 2).
-
Page 84: Slight Vibration Suppression Control
2. OPERATION 2-4-3 Slight vibration suppression control The slight vibration suppression control mode is used to reduce servo-specific ±1 pulse vibration at the time of a stop. This mode produces an effect especially when the ratio of load inertia moment to servo motor inertia moment is small (2 to 5 times). -
Page 85: Chapter 3 Wiring
CHAPTER 3 WIRING This chapter provides information required for wiring of connectors, terminals, etc. Before doing wiring work, always read this chapter. 3-1 Servo 3-1-1 Terminal blocks 3-1-2 Signal connectors 3-1-3 Detailed information on I/O signals 3-1-4 Interfaces 3-2 Connection of Servo Amplifier and Servo Motor 3-2-1 Connection instructions 3-2-2 Connection diagram 3-2-3 I/O terminals... - Page 86 3.WIRING 1. Any person who is involved in wiring should be fully competent to do the work. 2. Before starting wiring, make sure that the voltage is safe in the tester more than 10 minutes after power-off. Otherwise, you may get an electric shock.
-
Page 87: Servo Amplifier
3.WIRING 3-1 Servo Amplifier Only the specified voltage should be applied to each terminal. Otherwise, a CAUTION burst, damage, etc. may occur. 3-1-1 Terminal blocks (1) Signal arrangement Terminal block signals are as listed below: Servo Amplifiers MR–J2–10A MR–J2–10A1 MR–J2–70A MR–J2–200A MR–J2–100A MR–J2–350A... - Page 88 3.WIRING (2) Signals Symbol Signal Description Main circuit power input terminals Supply L1, L2 and L3 with the following power: Servo amplifier MR-J2-10A MR-J2-100A MR-J2-10A1 Power supply to 70A to 350A to 40A1 L1, L2, L3 Main circuit power supply 3-phase 200 to 230VAC, 50/60Hz L1•L2•L3...
- Page 89 3.WIRING 2) Connection Insert the core of the cable into the opening and tighten the screw with a flat-blade screwdriver so that the cable does not come off. (Tightening torque: 0.5 to 0.6N • Before inserting the cable into the opening, make sure that the screw of the terminal is fully loose.
-
Page 90: Signal Connectors
All connectors are half-pitch connectors (Molex 52986-2011 or equivalent).CN1A and CN1B signals change with the control mode. Refer to (2) in this section. CN1A CN1B MITSUBISHI MELSERVO–J2 *The connector frames are connected with the PE terminal inside the servo amplifier. - Page 91 3.WIRING (2) CN1A and CN1B signal assignment Pin assignment (Note 2) Symbols of I/O Signals in Control Modes Signal Input/Output Connector Pin No. (Note 1) I/O – – P15R P15R/P15R P15R P15R P15R P15R (Note 8)8 CR/SP1 (Note 3)SP1 SP1/SP1 (Note 3)SP1 SP1/CR –...
- Page 92 3.WIRING Note: 1. I: Input signal, O: Output signal, -: Others (e.g. power) 2. P: Position control mode, S: Speed control mode, T: Torque control mode, P/S: Position/speed control change mode, S/T: Speed/torque control change mode, T/P: Torque/position control change mode 3.
- Page 93 3.WIRING (4) Signal explanations In the Control Mode field of the table : Denotes that the signal may be used in the initial setting status. : Denotes that the signal may be used by setting the corresponding parameter among parameters No. 1 and 43 to 49. : Denotes that the signal cannot be used.
- Page 94 3.WIRING Control Mode Connec- Signal Symbol Functions/Applications Division (Note 2) tor Pin (Note 1) P S T Torque limit CN1B DI–1 Connect TL-SG to limit torque according to the voltage level (max. torque: +8V) of analog torque limit (TLA). Across TL-SG Torque Limit Open Internal torque limit 1 (parameter No.
- Page 95 3.WIRING Control Connec- Mode Signal Symbol Speed Command tor Pin Division (Note 2) (Note 1) P S T Speed selection 1 CN1A <Speed control mode> DI–1 Used to select the command speed for operation. Across Across Functions/Applications SP2-SG SP1-SG Open Open Analog speed command (VC) Internal speed command 1...
- Page 96 3.WIRING Control Connec- Mode Signal Symbol Functions/Applications Division (Note 2) Pin No. (Note 1) P S T Connect PC-SG to switch the speed amplifier from the Proportion control CN1B DI–1 proportional integral type to the proportional type. If the servo motor at a stop is rotated even one pulse due to any external factor, it generates torque to compensate for a position shift.
- Page 97 3.WIRING Control Connec- Mode Signal Symbol Functions/Applications Division (Note 2) Pin No. (Note 1) P S T Analog torque limit CN1B Analog input To use this signal in the speed control NOTICE mode, set any of parameters No. 43 to 48 to make TL available.
- Page 98 3.WIRING 2) Output signals Control Connec- Mode Signal Symbol Functions/Applications Division (Note 2) Pin No. (Note 1) P S T Trouble CN1B ALM-SG are disconnected when power is switched off or the DO–1 protective circuit is activated to shut off the base circuit. Without alarm, ALM-SG are connected within 1 second after power on.
- Page 99 3.WIRING Control Connec- Mode Signal Symbol Functions/Applications Division (Note 2) (Note 1) Pin No. P S T Battery warning BWNG – DO–1 in parameter No. 49 to use NOTICE this signal. BWNG-SG are connected when battery cable breakage warning (A. 92) or battery warning (A. 9F) has occurred. When there is no battery warning, BWNG-SG are disconnected within 1 second after power-on.
- Page 100 3.WIRING Control Connec- Mode Signal Symbol Functions/Applications Division (Note 2) Pin No. (Note 1) P S T Encoder Z-phase CN1A Outputs the zero-point signal of the encoder. One pulse is DO–2 pulse output per servo motor revolution. OP and LG are connected (Open collector) when the zero-point position is reached.
- Page 101 3.WIRING 3) Power supply Control Connec- Mode Division Signal Symbol Functions/Applications (Note 2) (Note 1) Pin No. P S T I/F internal power CN1B Used to output 24VDC for input interface. supply Connect with COM to use this power supply. Permissible current: 80mA Digital I/F power CN1A...
-
Page 102: Detailed Information On I/O Signals
3.WIRING 3-1-3 Detailed information on I/O signals (1) Position control mode 1) Torque limit a. Torque limit and generated torque By setting parameter No. 28 (internal torque limit 1), torque is always limited to the maxi- mum value during operation. A relationship between limit value and servo motor-gener- ated torque is shown in Fig. - Page 103 3.WIRING c. Torque limit signal (TL) and valid torque limit Use the torque limit signal (TL) to select the torque limit made valid by internal torque limit 1 or analog torque limit (TLA) as indicated in Table 3-1: Table 3-1 TL and Valid Torque Limit Value Valid Torque Limit Value Across TL-SG Internal torque limit 1 (parameter No.
- Page 104 3.WIRING 4) Pulse train input Encoder pulses can be input in any of three different forms and are available in positive or negative logic. Use parameter No. 21 to set the command pulse train form. The arrow in the following table indicates the timing of importing the pulse train. Pulse Train Form For Forward Rotation For Reverse Rotation Parameter No.
- Page 105 3.WIRING a. Open collector system Servo amplifier DC24V Approx. 1.2kΩ Approx. 1kΩ The explanation assumes that the input waveform has been set to the negative logic and forward and reverse rotation pulse trains (parameter No.21 has been set to 0010). The waveforms in the table on the preceding page are voltage waveforms of PP and NP based on SG.
- Page 106 3.WIRING (2) Speed control mode1 1) Speed setting a. Speed command and speed The servo motor is run at the speeds set in parameters No. 8 to 10 (internal speed com- mands 1 to 3) or at the speed set in the applied voltage of the analog speed command (VC).
- Page 107 3.WIRING c. Speed selection 1 (SP1)/speed selection 2 (SP2) and speed command values Use speed selection 1 (SP1) and speed selection 2 (SP2) to select the speed from among those set to the internal speed commands 1 to 3 and set to the analog speed command (VC) as indicated in Table 3-3.
- Page 108 3.WIRING (3) Torque control mode 1) Torque control a. Torque command and generated torque A relationship between the applied voltage of the analog torque command (TC) and the torque generated by the servo motor is shown in Fig. 3-7. Generated torque limit values will vary about 5% relative to the voltage depending on products.
- Page 109 3.WIRING c. Analog torque command offset Using parameter No. 30, the offset voltage of -999 to 999mV can be added to the TC applied voltage as shown in Fig. 3-9. Max. torque Parameter No. 30 offset range -999~+999mV TC applied voltage [V] Fig.
- Page 110 3.WIRING b. Connection diagram Generally connect as shown in Fig. 3-11. When a precision speed command is required, connect as shown in Fig. 3-12. In this case, the temperature fluctuation of the command voltage is ±0.002%/°C. Note that as the maximum value of the command voltage is approx. +6V, adjust the maximum value using parameter No.
- Page 111 3.WIRING (4) Position/speed control change mode 1 in parameter No. 0 to switch to the position/speed control change mode. This func- tion is not available in the absolute position detection system. 1) Control change (LOP) Use control change (LOP) to switch between the position control mode and the speed con- trol mode from an external contact.
- Page 112 3.WIRING 3) Speed setting in speed control mode a. Speed command and speed The servo motor is run at the speed set in parameter No. 8 (internal speed command 1) or at the speed set in the applied voltage of the analog speed command (VC). A relationship between analog speed command (VC) applied voltage and servo motor speed and the rotation directions determined by the forward rotation start signal (ST1) and reverse rota- tion start signal (ST2) are as in 1)a, (2) in this section.
- Page 113 3.WIRING (5) Speed/torque control change mode 3 in parameter No. 0 to switch to the speed/torque control change mode. 1) Control change (LOP) Use control change (LOP) to switch between the speed control mode and the torque control mode from an external contact. Relationships between LOP-SG status and control modes are indicated in Table 3-9.
- Page 114 3.WIRING 4) Speed limit in torque control mode a. Speed limit value and speed The speed is limited to the limit value set in parameter No. 8 (internal speed limit 1) or the value set in the applied voltage of the analog speed limit (VLA).
- Page 115 3.WIRING (6) Torque/position control change mode 5 in parameter No. 0 to switch to the torque/position control change mode. This func- tion is not available for the absolute position detection system. 1) Control change (LOP) Use control change (LOP) to switch between the torque control mode and the position con- trol mode from an external contact.
-
Page 116: Interfaces
3.WIRING 3-1-4 Interfaces The details of the interfaces (refer to I/O Division in the table) to the signals indicated in Section 3- 1-2 (2) are given below. Refer to the following and connect the interfaces with the external equip- ment. (1) Digital input interface DI-1 Give a signal with a relay or open collector transistor. - Page 117 3.WIRING 2) Lamp load For use of internal power supply For use of external power supply Servo amplifier Servo amplifier 24VDC 27VDC or ALM, etc. ALM, etc. less (3) Pulse train input interface DI-2 1) Open collector system • Interface example For use of internal power supply For use of external power supply Servo amplifier...
- Page 118 3.WIRING 2) Differential line driver system • Interface example • Conditions of the input pulse Servo amplifier tLH=tHL<0.1µs Max. input pulse tc>1µs frequency 400kpps tF>3µs Am26LS31 Approx. 100Ω PG(NG) PP(NP) (4) Encoder pulse output DO-2 1) Open collector system • Interface example Max.
- Page 119 3.WIRING (5) Analog input (6) Analog output Input impedance Output ±10V 10~12kΩ Max. 1mA Servo amplifier Servo amplifier +15VDC 10kΩ P15R (MO2) Upper limit Reading in setting 1kΩ VC, etc. one or both 2kΩ directions 1mA meter Approx. 10kΩ (7) Source input interface When using the input interface of source type, all DI-1 input signals are of source type.
-
Page 120: Connection Of Servo Amplifier And Servo Motor
3.WIRING 3-2 Connection of Servo Amplifier and Servo Motor 3-2-1 Connection instructions Insulate the connections of the power supply terminals to prevent an elec- WARNING tric shock. 1. Connect the wires to the correct phase terminals (U, V, W) of the servo amplifier and servo motor. -
Page 121: Connection Diagram
3.WIRING 3-2-2 Connection diagram The following table lists wiring methods according to the servo motor types. Use the connection diagram which conforms to the servo motor used. For cables required for wiring, refer to Section 6-2-1. For encoder cable connection, refer to Section 6-1-2. Servo Motor Connection Diagram Servo amplifier... -
Page 122: I/O Terminals
3.WIRING 3-2-3 I/O terminals (1) HC–MF(–UE) series Encoder connector signal arrangement Power supply lead 4–0.5 0.3m With end-insulated round crimping terminal 1.25-4 : U phase White : V phase Black : W phase Green : Earth Encoder cable 0.3m Brake cable With connector 172169-9 2–0.5 0.3m... - Page 123 3.WIRING (3) HA–FFC–UE series Power supply connector signal arrangement CE05–2A14S–2PD–B Encoder connector Signal MS3102A20–29P Power supply connector Brake connector CE05–2A14S–2PD–B MS3102E10SL–4P (Earth) Connector Servo Motor For power supply For encorder For brake HA–FF053C(B)–UE CE05–2A14S–2PD–B MS3102A20–29 MS3102E10SL–4P HA–FF63C(B)–UE Encoder connector signal arrangement Brake connector signal arrangement MS3102A20–29P MS3102E10SL–4P...
- Page 124 3.WIRING (5) HC–SF/HC–RF•HC–UF 2000r/min series Motor plate (Opposite side) Servo Motor Side Connectors Servo Motor Electromagnetic For power supply For encoder Brake Connector HC–SF81(B) CE05–2A22– The connector for HC–SF52(B) to 152(B) Down 23PD–B power is shared. MS3102A20– HC–SF53(B) to 153(B) HC –...
-
Page 125: Connectors Used For Servo Motor Wiring
3.WIRING 3-2-4 CONNECTORS USED FOR SERVO MOTOR WIRING The connector make-ups classified by the operating environment are given below. Use the models of the manufactures given or equivalent. (1) HC–MF(–UE) • HA–FF • HC–UF3000r/min series Use round crimping terminals (1.25-4) for connection of the power supply and electromagnetic brake. - Page 126 3.WIRING • For brake connection wCable Connector qPlug Cable Cable qPlug wCable Connector wCable connector qPlug Servo Motor Servo Motor Side Connector (Daiichi Denshi Kogyo) Type Maker Cable OD Model 4 to 8 ACS–08RL–MS10F Nippon Flex Straight 8 to 12 ACS–12RL–MS10F Daiwa Dengyo 5 to 8.3...
- Page 127 3.WIRING • For encoder connection wConduit qPlug Connector Conduit Conduit qPlug wConduit Connector wConduit Connector Conduit qPlug Servo Motor Servo Motor Side Connector (Daiichi Denshi Kogyo) Type Maker Size Model Model RCC–104RL–MS20F VF–04 14.0 Nippon Flex RCC–106RL–MS20F VF–06 19.0 Straight MSA–16–20 FCV16 15.8 Daiwa Dengyo...
- Page 128 3.WIRING 2) EN Standard/UL/C-UL Standard-compliant a. When using cabtyre cables • For power supply connection qPlug wCable Connector Cable Cable qPlug wCable Connector wCable connector qPlug Servo Motor Servo Motor Side Connector (Daiichi Denshi Kogyo) Maker Type Cable OD Model 4 to 8 ACS–08RL–MS14F Straight...
- Page 129 3.WIRING • For brake connection wCable Connector qPlug Cable Cable qPlug wCable Connector wCable Connector qPlug Servo Motor Servo Motor Side Connector (Daiichi Denshi Kogyo) Type Maker Cable OD Model 4 to 8 ACS–08RL–MS10F Nippon Flex Straight 8 to 12 ACS–12RL–MS10F Daiwa Dengyo 5 to 8.3...
- Page 130 3.WIRING • For encoder connection wConduit qPlug Connector Conduit Conduit qPlug wConduit Connector wConduit Connector Conduit qPlug Servo Motor Servo Motor Side Connector (Daiichi Denshi Kogyo) Type Maker Size Model Model RCC–104RL–MS20F VF–04 14.0 Nippon Flex RCC–106RL–MS20F VF–06 19.0 Straight MSA–16–20 FCV16 15.8 Daiwa Dengyo...
- Page 131 3.WIRING (3) HA–SF•HC–RF•HC–UF 2000r/min series 1) Non–waterproof/UL/C–UL Standard-compliant a.When using cable type cables • For power supply connection wCable wCable qPlug qPlug Cable Cable Clamp Clamp qPlug (Daiichi Denshi Kogyo) wCable clamp Servo Motor Servo Motor (Daiichi Denshi Kogyo) Side Connector Type Model HC–SF52(B) to 152(B)
- Page 132 3.WIRING • For brake connection wCable Connector qPlug Cable Cable qPlug wCable Connector wCable Connector qPlug Servo Motor Servo Motor Side Connector (Daiichi Denshi Kogyo) Type Maker Cable OD Model 4 to 8 ACS–08RL–MS10F Nippon Flex Straight 8 to 12 ACS–12RL–MS10F HC–SF202(B) to 702(B) Daiwa Dengyo...
- Page 133 3.WIRING b. When using flexible conduits • For power supply connection wConduit qPlug Conduit Connector Conduit qPlug wConduit Connector wConduit Connector Conduit qPlug Servo Motor Servo Motor Side Connector (Daiichi Denshi Kogyo) Type Maker Size Model Model RCC–104RL–MS22F VF–04 14.0 Nippon Flex RCC–106RL–MS22F VF–06 19.0...
- Page 134 3.WIRING • For encoder connection wConduit qPlug Connector Conduit Conduit qPlug wConduit Connector wConduit Connector Conduit qPlug Servo Motor Servo Motor Side Connector (Daiichi Denshi Kogyo) Type Maker Size Model Model RCC–104RL–MS20F VF–04 14.0 Nippon Flex RCC–106RL–MS20F VF–06 19.0 Straight MSA–16–20 FCV16 15.8 HC–SF52(B) to 702(B)
- Page 135 3.WIRING 2) Waterproof (IP65)/EN Standard/UL/C-UL Standard-compliant a. When using cable type cables • For power supply connection wCable wCable qPlug qPlug Cable Cable Clamp Clamp qPlug (Daiichi Denshi Kogyo) wCable Clamp (Daiichi Denshi Kogyo) Servo Motor Servo Motor Side Connector Type Model Cable OD...
- Page 136 3.WIRING • For brake connection wCable Connector qPlug Cable Cable qPlug wCable Connector wCable Connector qPlug Servo Motor Servo Motor Side Connector (Daiichi Denshi Kogyo) Type Maker Cable OD Model 4 to 8 ACS–08RL–MS10F Nippon Flex Straight 8 to 12 ACS–12RL–MS10F HC–SF202(B) to 702(B) Daiwa Dengyo...
- Page 137 3.WIRING b. When using flexible conduits • For power supply connection wConduit qPlug Conduit Connctor Conduit qPlug wConduit Connector qPlug wConduit Connector Conduit Servo Motor (Daiichi Denshi Kogyo) Servo Motor Side Connector Model Type Maker Size Model Model RCC–104RL–MS22F VF–04 14.0 Nippon Flex RCC–106RL–MS22F VF–06 19.0...
- Page 138 3.WIRING • For encoder connection wConduit qPlug Connector Conduit Conduit qPlug wConduit Connector qPlug wConduit Connector Conduit Servo Motor (Daiichi Denshi Kogyo) Servo Motor Side Connector Model Type Maker Size Model Model RCC–104RL–MS20F VF–04 14.0 Nippon Flex RCC–106RL–MS20F VF–06 19.0 Straight MSA–16–20 FCV16 15.8...
-
Page 139: Common Line
3.WIRING 3-3 Common Line The power supply and its common line are shown below. CN1A CN1A CN1B CN1B 24VDC ALM, etc. Digital output Digital input RES, etc. For open collector pulse train input PG • NG PP • PN For differential line driver pulse train input PG •... -
Page 140: Grounding
3.WIRING 3-4 Grounding 1. Ground the servo amplifier and servo motor securely. 2. To prevent an electric shock, always connect the protective earth (PE) WARNING terminal (marked ) of the servo amplifier with the protective earth (PE) of the control box. The servo amplifier switches the power transistor on-off to supply power to the servo motor. -
Page 141: Power Supply Circuit
3.WIRING 3-5 Power Supply Circuit 1. When the servo amplifier has become faulty, switch power off on the servo amplifier power side. Continuous flow of a large current may cause a fire. CAUTION 2. Use the trouble signal to switch power off. Otherwise, a regenerative brake transistor fault or the like may overheat the regenerative brake resistor, causing a fire. - Page 142 3.WIRING (3) Timing chart SON accepted (1s) 3-phase power supply Base circuit 60ms 10ms 10ms Servo on (SON) 60ms Reset (RES) 20ms 10ms 20ms 10ms 20ms 10ms Ready (RD) Power ON Timing Chart Servo amplifier (4) Emergency stop To ensure safety, always install an external emergency stop switch across EMG-SG.
-
Page 143: Alarm Occurrence Timing Chart
3.WIRING 3-6 Alarm Occurrence Timing Chart When an alarm has occurred, remove its cause, make sure that the opera- CAUTION tion signal is not being input, ensure safety, and reset the alarm before restarting operation. When an alarm occurs in the servo amplifier, the base circuit is shut off and the servo motor is coated to a stop. -
Page 144: Servo Motor With Electromagnetic Brake
3.WIRING 3-7 Servo Motor with Electromagnetic Brake Make up the electromagnetic brake operation circuit so that it is activated not only by the servo amplifier signals but also by an external emergency stop signal. Shut off by servo-on signal OFF, Shut off by emergency stop alarm or electromagnetic brake signal. - Page 145 3.WIRING (3) Timing charts 1) Servo-on signal (SON) ON/OFF The following chart shows the way of holding the motor shaft in vertical lift applications. Adjust Tb to minimize a drop after servo-off. The servo motor starts coasting Tb after the servo switches off. When using this sequence, therefore, the servo should be switched off after the servo motor has stopped.
- Page 146 3.WIRING 3) Alarm occurrence Dynamic brake Dynamic brake Electromagnetic brake Servo motor speed Electromagnetic brake Base circuit Invalid(ON) Electromagnetic brake Electromagnetic operation delay time brake interlock(MBR) Valid(OFF) No(ON) Trouble (ALM) Yes(OFF) 4) Main circuit power off Dynamic brake Dynamic brake Electromagnetic brake Servo motor speed Electromagnetic brake...
-
Page 147: Installation
CHAPTER 4 INSTALLATION This chapter deals with the installation method and environmental conditions. Follow the instructions in this chapter when installing the equipment. 4-1 Servo Amplifier 4-2 Servo Motor CHAPTER 1 INTRODUCTION OPERATION CHAPTER 2 CHAPTER 3 WIRING CHAPTER 4 INSTALLATION CHAPTER 5 ABSOLUTE POSITION DETECTION SYSTEM... -
Page 148: Servo Amplifier
9. Do not install or operate a faulty servo amplifier or servo motor. 10. When the product has been stored for an extended period of time, consult Mitsubishi. 4-1 Servo Amplifier 1. The equipment must be installed in the specified direction. Otherwise, a fault may occur. - Page 149 4.INSTALLATION (2) Installation direction and clearances 1) Installation of one servo amplifier Control box Control box 40mm (1.6 in.) Wiring clearance or more 70mm (2.8 in.) 10mm 10mm (0.4 in.) (0.4 in.) or more or more Bottom MR – J2 40mm (1.6 in.) or more...
- Page 150 4.INSTALLATION 3) Others When using heat generating equipment such as the regenerative brake option, install them with full consideration of heat generation so that the servo amplifier is not affected. Install the servo amplifier on a perpendicular wall in the correct vertical direction. (2) Keep out foreign materials 1) When installing the unit in a control box, prevent drill chips and wire fragments from entering the servo amplifier.
- Page 151 4.INSTALLATION 4-2 Servo Motor 1. Do not hold the cable, shaft or encoder to carry the servo motor. Otherwise, a fault or injury may occur. 2. Securely fix the servo motor to the machine. If fixed insecurely, the servo motor will come off during operation, leading to injury. 3.
- Page 152 4.INSTALLATION 1000 1500 2000 2500 3000 3500 Speed [r/min] (2) Transportation Do not hold the encoder or shaft to carry the servo motor. (3) Load mounting precautions (Prevention of impact on shaft) 1) When mounting a pulley to the servo motor shaft provided with a keyway, use the screw hole in the shaft end.
-
Page 153: Servo Motor
4.INSTALLATION Radial load Thrust load Note: For the symbols in the table, refer to Serbo Motor [mm] [in] [N] [kgf] [lb] [N] [kgf] [lb] the following diagram: 053·13 19.8 13.3 Radial load HC–MF 23·43 25.0 55.1 10.0 22.0 40.0 88.2 15.0 33.1 11.0... - Page 154 The HC-MF series servo motor is not equipped with a V ring or an oil seal and cannot be used with the gear box as described above. Oil should be shut off on the gear box side. Some HA-FF series servo motors are equipped with an oil seal. Please contact Mitsubishi. Servo Motor Height above Oil Level h [mm] ([in]) 053 ·...
- Page 155 4.INSTALLATION (6) Installation orientation The servo motor may be installed in any orientation. When the servo motor with electromag- netic brake is installed with the shaft end at top, the brake plate may generate sliding sound but it is not a fault. Refer to Section 10-3 for the installation orientation of the servo motor with reduction gear.
-
Page 156: Chapter 5 Absolute Position Detection System
CHAPTER 5 ABSOLUTE POSITION DETECTION SYSTEM This chapter provides how to build an absolute position detection system. This servo amplifier will make up an absolute position detection system by merely installing a battery. For more information, refer to the MR-J2-A Absolute Position Detection System Installation Guide (IB(NA)67309). (1) Restrictions on absolute position detection system (2) Specifications (3) Structure... - Page 157 5.ABSOLUTE POSITION DETECTION SYSTEM (1) Restrictions on absolute position detection system An absolute position detection system cannot be built under the following conditions: 1) Speed control or torque control operation 2) Control change mode (position/speed, position/torque) 3) Stroke-less coordinate system, e.g. rotary shaft, infinite positioning. 4) Restart after instantaneous power failure is made valid for operation.
- Page 158 FX–1PG · FX–1GM FX2–32MT FX(E)–20GM · FX–10GM Note: 1. The A0J2CPU cannot be used. 2. For the availability of the units not listed above, consult Mitsubishi. 3. The absolute position detection program is not required for the FX-1GM, FX(E)-20GM and FX-10GM. Configuration...
- Page 159 5.ABSOLUTE POSITION DETECTION SYSTEM 2) Communication sequence Programmable controller Servo amplifier DI/DO is used to transfer ABS data between servo amplifier and Requests ABS transfer Changes DI/DO function for Step 1 programmable controller. mode. ABS transfer I/O signal. Reads ABS data from encoder, Step 2 Receives ready to send.
- Page 160 5.ABSOLUTE POSITION DETECTION SYSTEM (7) Connection example This diagram shows connection between the MELSEC-A1SD75 (AD75) and servo amplifier. CN1B MR–J2–A General-purpose programmable controller A1S62P 600mA INPUT Power supply AC100/200 A1SCPU A1SX40 ABS data bit 0 ABS bit0 ABS data bit 1/zero speed ABS bit1 Readying to send data/limiting torque ABS busy...
- Page 161 5.ABSOLUTE POSITION DETECTION SYSTEM Note: 1. For dog type home position return. Do not connect when homeposition return is of the data set type. 2. If the servo motor provided with the zero point signal is started, the A1SD75 (AD75) will output the deviation counter clear signal.
-
Page 162: Chapter 6 Options And Auxiliary Equipment
CHAPTER 6 OPTIONS AND AUXILIARY EQUIPMENT This chapter offers how to use various options and auxiliary equipment. 6-1 Dedicated Options 6-1-1 Regenerative brake options 6-1-2 Cable connectors 6-1-3 Junction terminal block 6-1-4 Maintenance junction card 6-1-5 Set-up software 6-2 Auxiliary Equipment 6-2-1 Cables 6-2-2 No-fuse breakers, fuses, magnetic contactors 6-2-3 Power factor improving reactors... -
Page 163: Dedicated Options
6. OPTIONS AND AUXILIARY EQUIPMENT Before connecting any option or auxiliary equipment, make sure that the charge lamp is off more than 10 minutes after power-off, then confirm the WARNING voltage with a tester or the like. Otherwise, you may get an electric shock. Use the specified auxiliary equipment and options. - Page 164 6. OPTIONS AND AUXILIARY EQUIPMENT 2) To make selection according to regenerative energy Use the following method when regeneration occurs continuously in vertical motion applica- tions or when it is desired to make an in-depth selection of the regenerative brake option: a.
- Page 165 6. OPTIONS AND AUXILIARY EQUIPMENT (3) Connection of the regenerative brake option Parameter No. 0 When using the regenerative brake option, always remove wiring from across P-D and install the regenerative brake option across P-C. Set parameter No.0 according to the option to be used. The regenerative brake option will generate heat of about 100°C.
- Page 166 6. OPTIONS AND AUXILIARY EQUIPMENT (4) Outline drawing 1) MR-RB032•MR-RB12 [Unit: mm (in)] ø6 (0.24) mounting hole MR-RB 5 (0.20) 1.6 (0.06) 6 (0.23) (0.79) Variable Dimensions Weight Regenerative Resistance Regenerative Power[W] [Ω] Brake Option [kg] [lb] MR – RB032 (1.18) (0.59) (4.69)
- Page 167 6. OPTIONS AND AUXILIARY EQUIPMENT 2) MR-RB32•MR-RB30 [Unit: mm (in)] (7.05) 7(0.28) Terminal 3.2(0.13) block (3.54) (0.39) 318(12.52) (0.67) 100(3.94) Regenerative Resistance Weight Regenerative Power Brake Option [Ω] [kg] [lb] MR–RB32 MR–RB30 3) MR-RB50 [Unit: mm (in)] 7 X 14 slot Terminal block 7(0.28)
-
Page 168: Cable Connectors
6. OPTIONS AND AUXILIARY EQUIPMENT 6-1-2 Cable connectors (1) Cable selection • Use the encoder cable 1) or 2) or 3) or 4) after confirming the required wiring length. To fabricate the encoder cable, use the encoder connector set 5) or 6) and refer to (2) in this section. •... - Page 169 6. OPTIONS AND AUXILIARY EQUIPMENT Product Model Description Servo amplifier side connector (3M or equivalent) Servo motor encoder side connector (AMP) Encoder 0120–3000VE (Connector) 1-172161–9 (Housing) connector set for 10320–52F0-008 (Shell kit) 170359–1 (Connector pin) MR–J2CNM HC–MF/HA–FF MTI-0002 (Clamp) Servo amplifier side connector (3M or equivalent) Servo motor encoder side connector (Japan Aviation Electronics) Encoder 10120–3000VE (Connector)
- Page 170 6. OPTIONS AND AUXILIARY EQUIPMENT (2) Standard encoder cable The specifications and connection of each cable are indicated below. A fabricated cable should be as specified in the following table or equivalent and connected correctly. Core Size Core Insulation Sheath OD x Pair Recommended Cable Model Cable Type...
- Page 171 6. OPTIONS AND AUXILIARY EQUIPMENT 1) Encoder cable connection diagrams If you have fabricated the encoder cable, connect it correctly. CAUTION Otherwise, misoperation or explosion may occur. a. For HC–MF/HA–FF Optional cables MR–JCCBL2M–L MR–JCCBL10M–L MR–JCCBL10M–H MR–JCCBL5M–L MR–JCCBL2M–H MR–JCCBL30M–L MR–JCCBL50M–H MR–JCCBL5M–H Servo amplifier side Encoder side Servo amplifier side...
- Page 172 6. OPTIONS AND AUXILIARY EQUIPMENT b. For HC–SF/HC–RF When fabricating an encoder cable, fabricate it as shown below: MR – JHSCBL2M – L MR – JHSCBL10M – L MR – JHSCBL10M – H MR – JHSCBL5M – L MR – JHSCBL2M – H MR –...
- Page 173 6. OPTIONS AND AUXILIARY EQUIPMENT 2) Junction terminal block cable MR–J2TBL05M Junction terminal block side Servo amplifier side (CN1A, CN1B side) (Note) Terminal Block Label Junction Terminal Block Terminal No. For CN1A For CN2A P15R P15R Plate Note: Label for position control mode. When the parameter setting or control mode is changed, use the accessory signal seals to change the signal symbols.
- Page 174 6. OPTIONS AND AUXILIARY EQUIPMENT 4) Communication cable This cable may not be used with some personal computers. After fully ex- amining the signals of the RS-232C connector, refer to this section and NOTICE fabricate the cable. Select the communication cable according to the shape of the RS-232C connector of the personal computer used.
-
Page 175: Junction Terminal Block
TL P15R COM EMG LSN ZSN DO1 TLC PC SG TLA RES LSP ALM SD NP P15R LA CR SG NG OP LAR INP SD (3) Outline drawing [Unit: mm] 126 (4.96) ([Unit: in.]) 117 (4.61) MITSUBISHI MR-TB20 2-ø4.5 (0.18) 6– 14... -
Page 176: Maintenance Junction Card
6. OPTIONS AND AUXILIARY EQUIPMENT 6-1-4 Maintenance junction card (1) Usage The maintenance junction card (MR-J2CN3TM) is designed for use when a personal computer and analog monitor outputs are used at the same time. Servo amplifier Communication cable Maintenance junction card (MR–J2CN3TM) Bus cable MR –... -
Page 177: Set-Up Software
6. OPTIONS AND AUXILIARY EQUIPMENT 6-1-5 Set-up software (Will be released soon) The setup software (MRZJW3-SETUP31E or later) uses the communication function of the servo amplifier to perform parameter setting changes, graph display, test operation, etc. on a personal computer. (1) Specifications Item Description... -
Page 178: Auxiliary Equipment
6. OPTIONS AND AUXILIARY EQUIPMENT 6-2 Auxiliary Equipment The auxiliary equipment used must be those indicated in this section or equivalent. To comply with the EN Standard or UL/C-UL Standard, use the auxiliary equipment which conform to the corre- sponding standard. 6-2-1 Cables Servo Amplifier (Note 1) Cables... -
Page 179: Power Factor Improving Reactors
6. OPTIONS AND AUXILIARY EQUIPMENT 6-2-3 Power factor improving reactors Outline drawing and connection diagram of the power factor improving reactor Servo amplifier MR – J2 – A FR – BAL Single-phase AC 200~230V F mounting screw Servo amplifier MR – J2 – Terminal block FR –... -
Page 180: Surge Absorbers
6. OPTIONS AND AUXILIARY EQUIPMENT 6-2-5 Surge absorbers A surge absorber is required for the electromagnetic brake. Use the following surge absorber or equivalent. Insulate the wiring as shown in the diagram. Static Maximum Rating Varistor Voltage Capacity Maximum Rating (Range) Permissible circuit Surge Energy... -
Page 181: Noise Reduction Techniques
6. OPTIONS AND AUXILIARY EQUIPMENT 6-2-6 Noise reduction techniques Noises are classified into external noises which enter the servo amplifier to cause it to malfunction and those radiated by the servo amplifier to cause peripheral devices to malfunction. Since the servo amplifier is an electronic device which handles small sig- nals, the following general noise reduction techniques are required. - Page 182 6. OPTIONS AND AUXILIARY EQUIPMENT Sensor power supply Servo amplifier Instrument Receiver Sensor Servo motor Noise Transmission Route Suppression Techniques When measuring instruments, receivers, sensors, etc. which handle weak signals and may malfunction due to noise and/or their signal cables are contained in a control box together with the servo amplifier or run near the servo amplifier, such devices may malfunction due to noises transmitted through the air.
- Page 183 6. OPTIONS AND AUXILIARY EQUIPMENT (1) Data line filter Noise can be prevented by installing a data line filter onto the encoder cable, etc. Example: Data line filter:ZCAT3035-1330 [TDK] ESD-SR-25 [Tokin] Impedance specifications (ZCAT3035-1330) [Unit: mm] ([Unit: in.]) Impedance[Ω] 10 to 100MHZ 100 to 500MHZ 39±1 (1.54±0.04) Loop for fixing the...
- Page 184 6. OPTIONS AND AUXILIARY EQUIPMENT (3) Cable clamp fitting (AERSBAN- SET) Generally, the earth of the shielded cable may Strip the cable sheath of Cutter only be connected to the connector's SD ter- the clamped area. minal. However, the effect can be increased by directly connecting the cable to an earth plate as shown below.
- Page 185 6. OPTIONS AND AUXILIARY EQUIPMENT (4) Line noise filter (FR-BLF, FR-BSF01) This filter is effective in suppressing noises radiated from the power supply side and output side of the servo amplifier and also in suppressing high-frequency leakage current (zero-phase current) especially within 0.5MHz to 5MHz band.
-
Page 186: Leakage Current Breaker
Make the input and output cables as short as possible, and also make the grounding cable as long as possible (about 30cm (11.8 in)) to minimize leakage currents. Rated sensitivity current 10 • {Ig1+Ign+Iga+K • (Ig2+Igm)} [mA] … (6-2) K: Constant considering the harmonic contents Cable Leakage current breaker Mitsubishi Type Noise products filter Cable... -
Page 187: Battery (Mr-Bat, A6Bat)
6. OPTIONS AND AUXILIARY EQUIPMENT (2) Selection example Indicated below is an example of selecting a leakage current breaker under the following condi- tions: x 5m x 5m Servo amplifier HA–FF63 MR–J2–60A Use a leakage current breaker generally available. Find the terms of Equation (6-2) from the diagram: Ig1 = 20 •... -
Page 188: Setting Potentiometers For Analog Inputs
6. OPTIONS AND AUXILIARY EQUIPMENT 6-2-9 Setting potentiometers for analog inputs The following variable resistors are available for use with analog inputs such as analog speed and torque commands: Model: WA2WYA2SEBK2KΩ Connection diagram Model: Wire-wound variable resistor 2W2KΩ B Model: characteristicShaft rotary angle Note: Manufacturer (Japan Resistor) standard Note:... -
Page 189: Inspection
CHAPTER 7 INSPECTION This chapter describes inspection items. CHAPTER 1 INTRODUCTION OPERATION CHAPTER 2 CHAPTER 3 WIRING CHAPTER 4 INSTALLATION CHAPTER 5 ABSOLUTE POSITION DETECTION SYSTEM OPTIONS AND AUXILIARY EQUIPMENT CHAPTER 6 INSPECTION CHAPTER 7 TROUBLESHOOTING CHAPTER 8 CHARACTERISTICS CHAPTER 9 SPECIFICATIONS CHAPTER 10 SELECTION... - Page 190 7.INSPECTION 1. Before starting maintenance and/or inspection, make sure that the charge lamp is off more than 10 minutes after power-off. Then, confirm that the voltage is safe in the tester or the like. Otherwise, you may get an electric shock. WARNING 2.
- Page 191 7.INSPECTION 1) Smoothing capacitor : Affected by ripple currents, etc. and deteriorates in characteristic. The life of the capacitor greatly depends on ambient temperature and operating conditions. The capacitor will reach the end of its life in 10 years of continuous operation in normal air-conditioned environment. 2) Relays : Their contacts will wear due to switching currents and contact faults occur.
-
Page 192: Troubleshooting
CHAPTER 8 TROUBLESHOOTING This chapter gives troubleshooting at start-up and corrective actions for alarms and warnings. When any fault has occurred, refer to this chapter and take the corresponding action. 8-1 Troubleshooting at Start-Up 8-1-1 Position control mode 8-1-2 Speed control mode 8-1-3 Torque control mode 8-2 Alarms and Warnings 8-2-1 Alarm and warning list... - Page 193 8. TROUBLESHOOTING 8-1 Troubleshooting at Start-Up Excessive adjustment or change of parameter setting must not be made as it will CAUTION make operation instable. The following faults may occur at start-up. If any of such faults occurs, take the corresponding action.
- Page 194 8. TROUBLESHOOTING (2) How to find the cause of position shift Positioning unit Servo amplifier a) Output Electronic gear (parameters No. 3, 4) Machine pulse counter Servo motor d) Machine stop position M b) Cumulative command pulses C) Servo on (SON), stroke end Encoder (LSP/LSN) input...
- Page 195 8. TROUBLESHOOTING 8-1-2 Speed control mode No. Start-Up Sequence Fault Investigation Possible Cause Refer To Power on • LED is not lit. Not improved if 1) Power supply voltage • LED flickers. connectors CN1A, CN1B fault and CN2 are disconnected. 2) Servo amplifier faulty.
- Page 196 8. TROUBLESHOOTING 8-1-3 Torque control mode No. Start-Up Sequence Fault Investigation Possible Cause Refer To Power on • LED is not lit. Not improved if connectors 1) Power supply voltage • LED flickers. CN1A, CN1B and CN2 are fault disconnected. 2) Servo amplifier faulty.
- Page 197 8. TROUBLESHOOTING 8-2 Alarms and Warnings 8-2-1 Alarm and warning list When a fault occurs during operation, the corresponding alarm or warning is displayed. If any alarm or warning has occurred, refer to Section 8-2-2 or 8-2-3 and take the appropriate action.Set 1 in parameter No.
-
Page 198: Alarms
8. TROUBLESHOOTING 8-2-2 Alarms When any alarm has occurred, eliminate its cause, ensure safety, then reset WARNING the alarm, and restart operation. Otherwise, injury may occur. When any of the following alarms has occurred, always remove its cause and allow about 30 minutes for cooling before resuming operation. If opera- tion is repeated by switching control circuit power off, then on to reset the alarm, the servo amplifier, servo motor and regenerative brake option may NOTICE... - Page 199 8. TROUBLESHOOTING Alarm Code Display Name Definition Cause Action CN1B- CN1A- CN1A- 19 pin 18 pin 19 pin A. 17 Board error 2 CPU/parts fault Faulty parts in the servo amplifier Change the servo amplifier. Checking method Alarm (A. 17 or A. 18) occurs if A.
- Page 200 8. TROUBLESHOOTING Alarm Code Display Name Definition Cause Action CN1B- CN1A- CN1A- 19 pin 18 pin 19 pin A. 31 Overspeed Speed has 1. Input command pulse frequency Set command pulses correctly. exceeded the exceeded the permissible instantaneous instantaneous speed frequency. permissible 2.
- Page 201 8. TROUBLESHOOTING Alarm Code Display Name Definition Action CN1B- CN1A- CN1A- Cause 19 pin 18 pin 19 pin A. 35 Command Input command 1. Command pulse frequency is Reduce the command pulse alarm pulses are too too high. pulse frequency to high.
- Page 202 8. TROUBLESHOOTING Alarm Code Display Name Definition Cause Action CN1B- CN1A- CN1A- 19 pin 18 pin 19 pin A. 50 Overload 1 4. Wrong connection of servo Connect correctly. motor. Servo amplifier's output terminals U, V, W do not match servo motor's input terminals U, V, W.
- Page 203 8. TROUBLESHOOTING Alarm Code Display Name Definition Cause Action CN1B- CN1A- CN1A- 19 pin 18 pin 19 pin A. 52 Error Droop pulse value 1. Acceleration/deceleration time Increase the acceleration/ excessive of the deviation constant is too small. deceleration time constant. counter exceeded 2.
-
Page 204: Warnings
8. TROUBLESHOOTING 8-2-3 Warnings If a warning occurs, the servo amplifier does not go into a servo off status. However, if operation is continued in the warning status, an alarm may occur or proper operation not performed. Eliminate the cause of the warning according to this section. Use the optional set-up software to refer to the cause of warning. -
Page 205: Characteristics
CHAPTER 9 CHARACTERISTICS This chapter provides various characteristics and data of the servo. 9-1 Overload Protection Characteristics 9-2 Losses Generated in the Servo Amplifier 9-3 Electromagnetic Brake Characteristics 9-4 Dynamic Brake Characteristics 9-5 Vibration Rank CHAPTER 1 INTRODUCTION OPERATION CHAPTER 2 CHAPTER 3 WIRING CHAPTER 4... - Page 206 9.CHARACTERISTICS 9-1 Overload Protection Characteristics An electronic thermal relay is built in the servo amplifier to protect the servo motor and servo amplifier from overloads. The operation characteristics of the electronic thermal relay are shown below.Overload 1 alarm (A. 50) occurs if overload operation performed is above the electronic thermal relay protection curve shown below.
- Page 207 9.CHARACTERISTICS (2) MR—J2—200A and MR—J2—350A HC-SF Series 1000 HC-RF Series HC-UF Series During rotation During stop Load ratio [%] 9– 3...
- Page 208 Table 9-1 Power Supply Capacity and Generated Heat Per Servo Amplifier at Rated Output Servo Amplifier-Generated Heat Area Required for Power Supply Heat Dissipation Servo Amplifier Servo Motor At rated torque With servo off Capacity [kVA] HC-MF053·13 MR-J2-10A(1) HA-FF053·13 HC-UF13 HC-MF23 MR-J2-20A(1) HA-FF23 HC-UF23 HC-MF43 HA-FF33 MR-J2-40A(1)
- Page 209 9.CHARACTERISTICS (2) Heat dissipation area for enclosed servo amplifier An enclosure or control box for the servo amplifier should be designed to operate at the ambi- ent temperature of 40°C (104°F) within a temperature rise of 10°C (50°F). (With a 5°C (41° F) safety margin, the system should operate within a maximum 55°C (131°F) limit.) The necessary enclosure heat dissipation area can be calculated by Equation 9-1: (Outside)
- Page 210 9.CHARACTERISTICS 9-3 Electromagnetic Brake Characteristics The electromagnetic brake is designed to hold a load. Do not use it for CAUTION braking. The characteristics of the electromagnetic brake provided for the servo motor with electromagnetic brake are indicated below: Though the brake lining may rattle during low-speed operation, it poses no functional problem. Though the brake lining may rattle during operation, it poses no functional problem.A leakage magnetic flux will occur at the shaft end of the servo motor equipped with electromagnetic brake.
- Page 211 9.CHARACTERISTICS HC-UF Series Servo Motor 202B 152B Item (Note 1) Type Spring-loaded safety brake (Note 4) Rated voltage -10% 0.26 0.33 0.42 Rated current at 20°C [A] 16.8 Excitation coil resistance at 20°C [Ω] Capacity [W] 0.18 0.18 ON current [A] 0.06 0.11 0.12...
- Page 212 9.CHARACTERISTICS (2) Electromagnetic brake power supply 24VDC of the internal power output for interface (VDD) cannot be used. Prepare the following power supply for use with the electromagnetic brake only.Examples of connection of the brake exciting power supply are shown in Fig. 9-3 (a) to (c). (a) is for AC off, and (b) and (c) for DC off.
- Page 213 9.CHARACTERISTICS • t1 + t2 + ............(9-2) Where, Lmax: Maximum coasting distance [mm] Machine's fast feed speed [mm/min] Delay time of control section Braking delay time of brake (Note) Braking time • 9.55 x 10 + 0.8T • : Load inertia moment converted into equivalent [kg •...
- Page 214 9.CHARACTERISTICS 9-4 Dynamic Brake Characteristics When an alarm, emergency stop or power failure occurs, the dynamic brake is operated to bring the servo motor to a sudden stop. Fig. 9-5 shows the pattern in which the servo motor comes to a stop when the dynamic brake is operated.
- Page 215 9.CHARACTERISTICS 0.045 0.12 0.04 HC-SF203 0.035 HC-SF352 0.03 0.08 HC-SF202 0.025 HC-SF53 0.06 0.02 HC-SF353 HC-SF52 0.015 0.04 HC-SF103 HC-SF152 0.01 0.02 HC-SF102 0.005 HC-SF153 1000 1500 2000 500 1000 1500 2000 2500 3000 Speed [r/min] Speed [r/min] Fig. 9-8 HC-SF2000r/min Dynamic Fig.
-
Page 216: Vibration Rank
If there is MR—J2—200A a possibility that the load inertia moment MR—J2—10A1 may exceed, contact Mitsubishi. MR—J2—40A1 MR—J2—350A 9-5 Vibration Rank The vibration rank of the servo motor is V-10 at the rated speed. Measure vibration in the following position with the servo motor installed as shown below. -
Page 217: Chapter 10 Specifications
CHAPTER 10 SPECIFICATIONS This chapter gives the specifications of the servo. 10-1 Standard Specifications 10-2 Torque Characteristics 10-3 Servo Motors with Reduction Gears 10-4 Servo Motors with Special Shafts 10-5 Outline Dimension Drawings 10-5-1 Servo amplifiers 10-5-2 Servo motors 10-5-3 Servo motors (in inches) 10-5-4 Cable side plugs CHAPTER 1 INTRODUCTION... -
Page 218: Servo Amplifiers
10. SPECIFICATIONS 10-1 Standard Specifications (1) Servo amplifiers Servo Amplifier 100A 200A 350A 10A1 20A1 40A1 MR-J2- Item Three-phase 200 to 230VAC, 50/60Hz V o l t a g e / f r e q u e n c y Three-phase 200 to 230VAC, 50/60Hz Single-phase 100 to 120VAC, 50/60Hz or single-phase 230VAC, 50/60Hz (Note) - Page 219 10. SPECIFICATIONS HC-SF 1000r/min Series Servo Motor HC-SF 2000r/min Series (Middle inertia, middle capacity) (Middle inertia, middle capacity) Item Applicable servo MR–J2– 100A 200A 200A 350A 100A 200A 200A 350A amplifier Rated output [kW] 0.85 (Note 1) [N • m] Rated torque 8.12 11.5...
- Page 220 10. SPECIFICATIONS HC-SF 3000r/min Series Servo Motor HC-RF Series (Middle inertia, middle capacity) (Low inertia, small capacity) Item Applicable servo MR–J2– 100A 200A 200A 350A 200A 200A 350A amplifier [kW] Rated output (Note 1) [N • m] Rated torque 1.59 3.18 4.78 6.37...
- Page 221 10. SPECIFICATIONS HC-UF 2000r/min Series Servo Motor HC-UF 3000r/min Series (Pancake type middle capacity) (Pancake type small capacity) Item Applicable servo MR–J2– 200A 350A amplifier Rated output [kW] 0.75 0.75 (Note 1) [N • m] Rated torque 3.58 7.16 9.55 0.32 0.64 Continuous...
- Page 222 10. SPECIFICATIONS 10-2 Torque Characteristics (1) HC-MF series (HC–MF053) (HC–MF13) (HC–MF23) (HC–MF43) 10.0 Short-duration Short-duration (Note) operation region operation region 0.75 Short-duration operation region Short-duration operation region (Note) (Note) 0.25 Continuous operation region Continuous operation region Continuous operation region Continuous operation region 1000 2000 3000 4000 4500 1000 2000 3000 4000 4500 1000 2000 3000 4000 4500...
- Page 223 10. SPECIFICATIONS (3) HC-SF series (HC–SF81) (HC–SF121) (HC–SF201) Short-duration Short-duration Short-duration operation region operation region operation region Continuous operation region Continuous operation region Continuous operation region 1000 1500 1000 1000 Speed [r/min] Speed [r/min] Speed [r/min] (HC–SF301) 1000 Short-duration operation region Continuous operation region 1000 Speed [r/min]...
- Page 224 10. SPECIFICATIONS (HC–SF53) (HC–SF103) (HC–SF153) Short-duration operation region Short-duration operation region Short-duration operation region Continuous operation region Continuous operation region Continuous operation region 1000 2000 3000 1000 2000 3000 1000 2000 3000 Speed [r/min] Speed [r/min] Speed [r/min] (HC–SF203) (HC–SF353) Short-duration Short-duration operation region...
- Page 225 10. SPECIFICATIONS (5) HC-UF series (HC–UF72) (HC–UF152) (HC–UF202) Short-duration Short-duration Short-duration operation region operation region operation region Continuous operation region Continuous operation region Continuous operation region 1000 2000 3000 1000 2000 3000 1000 2000 3000 Speed [r/min] Speed [r/min] Speed [r/min] (HC–UF13) (HC–UF23) (HC–UF43)
- Page 226 10. SPECIFICATIONS 10-3 Servo Motors with Reduction Gears Servo motors are available with reduction gears designed for: 1) general industrial machines; and 2) precision applications. Servo motors with electromagnetic brakes are also available. (1) Manufacturing range of servo motor with reduction gear Servo motors with reduction gears that may be manufactured are indicated by symbols (G1 (H), G2) in the following table.
- Page 227 10. SPECIFICATIONS (3) HA-FF series For General Industrial Machines For Precision Applications Reduction Gear (HA-FF G1) (HA-FF G2) Mounting Method Flange mounting Mounting direction In any directions Grease lubrication (Already packed) Grease lubrication (Already packed) 50 • 100W 200 to 600W Lubrication Recommended LDR101BJ...
- Page 228 10. SPECIFICATIONS (4) HC-SF series For General Industrial Machines For Precision Applications Reduction Gear Series (HC-SF G1(H)) (HC-SF G2) Mounting method As in 1) in this section Flange mounting Mounting direction As in 1) in this section In any directions As in 1) in this section Grease lubrication (Already packed) Lubrication...
- Page 229 10. SPECIFICATIONS 2) Recommended lubricants a. Grease: (Changing intervals: 20000 hours or 4 to 5 years) b. Lubricating oil Ambient IDEMITSU Showa GENERAL MITSUBISHI Japan Temperature COSMO OIL Japan OIL KOSAN Shell ESSO OIL Mobil OIL Energy °C CO., LTD...
- Page 230 10. SPECIFICATIONS 10-4 Servo Motors with Special Shafts The standard shaft of the servo motor is straight without a keyway. Shafts with keyway and D cut are also available. These shafts are not appropriate for applications where the servo motor is star ted and stopped frequently.
- Page 231 10. SPECIFICATIONS Keyway [Unit: mm] ([Unit: in]) Variable Dimensions Servo Motor Model +0.2 HC — SF81K 24h6 -0.036 HC — SF52K to 152K (0.94) (2.17) (1.97) (0.31) (1.42) (0.20) (0.16) (0.16) HC — SF53K to 153K HC — SF121K to 301K +0.2 -0.036 HC —...
- Page 232 MR – J2 – 10A to MR – J2 – 60A [Unit: mm] MR – J2 – 10A1 to MR – J2 – 40A1 ([Unit:in]) 70(2.76) 135(5.32) ø6(ø0.24) mounting hole Terminal layout (Terminal cover open) MITSUBISHI MITSUBISHI OPEN OPEN Name plate (Note) PE terminal (0.24) Servo Amplifier...
- Page 233 (2)MR – J2 – 70A • MR – J2 – 100A [Unit: mm] 70(2.76) ([Unit:in]) 70(2.76) 190(7.48) ø6 (ø0.24) mounting hole Terminal layout (0.87) (Terminal cover open) MITSUBISHI MITSUBISHI OPEN OPEN Name plate PE terminal 6(0.24) 6(0.24) (0.87) (1.65) Servo Amplifier...
- Page 234 10. SPECIFICATIONS (3)MR – J2 – 200A • MR – J2 – 350A [Unit : mm] ([Unit: in]) ø 6 ( ø 0.24) 90(3.54) 70(2.76) 195(7.68) mounting hole 78(3.07) (0.24) Terminal layout 12-M4 screw 3-M4 screw PE terminal Servo Amplifier Weight Model [kg]([lb])
- Page 235 10. SPECIFICATIONS 10-5-2 Servo motors (1) HC-MF series 1) Standard (Without electromagnetic brake, without reduction gear) [Unit: mm] E–øLZ (Note) Power (Note) supply lead 4–AWG19 0.3m (With end-insulated round 25.2 crimping terminal 1.25-4) : Phase U Encoder cable 0.3m White : Phase V With connector 172169-9 Black...
- Page 236 10. SPECIFICATIONS 3) With reduction gear for general industrial machine [Unit: mm] HC – MF053(B)G1 to HC – MF43(B)G1 4–øLZ Power supply lead 4–AWG19 0.3m 25.2 P screw, depth R (With end-insulated round Encoder cable 0.3m crimping terminal 1.25-4) With connector 172169-9 : Phase U (AMP make) White...
- Page 237 10. SPECIFICATIONS HC – MF43(B)G1 to HC – MF73(B)G1 [Unit: mm] 4–øLZ Motor plate (Opposite side) Bottom Power supply lead 4–AWG19 0.3m 25.2 P screw, depth R (With end-insulated round crimping terminal 1.25-4) : U Phase Encoder cable 0.3m White : V Phase With connector 172169-9 Black...
- Page 238 10. SPECIFICATIONS [Unit: mm] 4) With reduction gear for precision application 4–øLZ Power supply lead 4–AWG19 0.3m 25.2 P screw, depth R (With end-insulated round Encoder cable 0.3m crimping terminal 1.25-4) With connector 172169-9 : Phase U (AMP make) White : Phase V Black : Phase W...
- Page 239 10. SPECIFICATIONS (2) HC-MF-UE series 1) Standard (without electromagnetic brake, without reduction gear) HC – MF053 – UE • HC – MF13 – UE [Unit: mm] ø 2– Motor plate (Opposite side) Bottom Bottom V ring V-10A TUV plate 25.2 Power supply lead 4-AWG19 0.3m (With end-insulated round crimping terminal 1.25-4) Red: Phase U...
- Page 240 10. SPECIFICATIONS HC – MF73 – UE [Unit: mm] TUV plate Motor plate ø 4– (Opposite side) Bottom Bottom V ring V-25A 25.2 Power supply lead 4-AWG19 0.3m (With end-insulated round crimping terminal 1.25-4) Encoder cable Red: Phase U 0.3m White: Phase V Black: Phase W Green/yellow spiral: Earth...
- Page 241 10. SPECIFICATIONS HC – MF23B – UE • HC – MF43B – UE [Unit: mm] Motor plate ø 4– TUV plate (Opposite side) Bottom Bottom V ring A-16A 25.2 Power supply lead 4-AWG19 0.3m (With end-insulated round crimping terminal 1.25-4) Encoder cable 0.3m Red: Phase U White: Phase V...
- Page 242 10. SPECIFICATIONS (3) HA-FF series 1) Standard HA – FF053 • HA – FF13 [Unit: mm] Caution plate Earth terminal M3 screw (Opposite side) Bottom Bottom V ring Bottom Motor plate ø 4– Power supply cable VCTF 3-1.25 0.5m (With end-insulated round crimping terminal 1.25-4) Red: Phase U Encoder cable 0.3m White: Phase V...
- Page 243 10. SPECIFICATIONS 2) With electromagnetic brake HA – FF053B • HA – FF13B [Unit: mm] ø 4– Earth terminal M3 screw Caution plate (Opposite side) Bottom Bottom Bottom Motor plate Brake cable VCTF 2–0.5 0.5m (With end-insulated round crimping terminal 1.25-4) Power supply cable Encoder cable 0.3m VCTF 3-1.25...
- Page 244 10. SPECIFICATIONS 3) With reduction gear for general industrial machine HA – FF053(B)G1 • HA – FF13(B)G1 [Unit: mm] Caution plate Earth terminal M3 screw 27.5 (Opposite side) Bottom Bottom Motor plate Power supply cable ø 4– VCTF 3-1.25 0.5m (With end-insulated round crimping terminal 1.25-4) Red: Phase U Encoder cable 0.3m...
- Page 245 10. SPECIFICATIONS HA – FF33(B)G1 • HA – FF43(B)G1 [Unit: mm] ø 4– 37.5 Earth terminal M3 screw (Opposite side) Caution plate Bottom M6 screw, depth 12 Top Bottom Motor plate ø 19h6 Power supply cable Section AA VCTF 3-1.25 0.5m (With end-insulated round crimping terminal 1.25-4) Encoder cable 0.3m...
- Page 246 10. SPECIFICATIONS [Unit: mm] 4) With reduction gear for precision application Caution plate Earth terminal M3 screw (Opposite side) 200W or more Earth terminal M3 screw (Opposite side) 100W or less ø 4– Bottom Bottom Motor plate Power supply cable VCTF 3-1.25 0.5m (With end-insulated round crimping terminal 1.25-4)
- Page 247 10. SPECIFICATIONS [Unit: mm] ø 4– Earth terminal M3 screw (Opposite side) 200W or more Caution plate Earth terminal M3 screw (Opposite side) 100W or less Bottom Motor plate Power supply cable VCTF 3-1.25 0.5m (With end-insulated round crimping terminal 1.25-4) Red: Phase U Encoder cable 0.3m White: Phase V...
- Page 248 10. SPECIFICATIONS HA – FF63(B)G2 1/45 [Unit: mm] 371(407.5) ø 6– Caution plate Bottom Bottom Earth terminal M3 screw Motor plate (Opposite side) Power supply cable VCTF 3-1.25 0.5m (With end-insulated round crimping terminal 1.25-4) Red: Phase U Encoder cable 0.3m White: Phase V With connector 172169-9 Black: Phase W...
- Page 249 10. SPECIFICATIONS (4) HA-FFC-UE series 1) Standard (without electromagnetic brake, without reduction gear) HA – FF053C – UE [Unit: mm] ø 4– Bottom Caution plate Oil seal (English) Bottom GM10204B Bottom TUV plate Motor plate 49.5 Power supply connector CE05-2A14S-2PD-B(D17) Encoder connector MS3102A20-29P Output...
- Page 250 10. SPECIFICATIONS HA – FF23C – UE • HA – FF33C – UE [Unit: mm] ø 4– 16 4 Bottom Caution plate Bottom (English) Oil seal S15307B Bottom TUV plate Motor plate Encoder connector Power supply connector MS3102A20-29P CE05-2A14S-2PD-B(D17) M4 x 0.7 threads, depth 15 Section AA Note: 1.
- Page 251 10. SPECIFICATIONS 2) With electromagnetic brake HA – FF053CB – UE [Unit: mm] Motor plate Caution plate ø (Opposite side) 4– Bottom Bottom Oil seal GM10204B Bottom TUV plate 35.5 Power supply connector Brake connector Encoder connector CE05-2A14S-2PD-B(D17) MS3102E10SL-4P MS3102A20-29P Note: 1.
- Page 252 10. SPECIFICATIONS HA – FF23CB – UE • HA – FF33CB – UE [Unit: mm] ø 4– 16 4 Bottom Oil seal Bottom Caution plate S15307B (English) Bottom Motor plate TUV plate 38.5 Brake connector Encoder connector Power supply connector MS3102A20-29P MS3102E10SL-4P CE05-2A14S-2PD-B(D17)
- Page 253 10. SPECIFICATIONS (5) HC-SF series 1) Standard (without electromagnetic brake, without reduction gear) Variable Output Inertia Moment Weight Model Dimensions (kW) J( 10 kg•m (kg) HC — SF52 51.5 HC — SF53 HC — SF102 76.5 13.7 HC — SF103 HC —...
- Page 254 10. SPECIFICATIONS Output Inertia Moment Weight Model (kW) J( 10 kg·m (kg) HC — SF301 [Unit: mm] Moter plate 39.5 (Opposite side) 18 Bottom Bottom Oil seal S40608B Motor flange direction 19.5 Encoder connector MS3102A20-29P 131.5 4-ø13.5 mounting hole Power supply connector Earth Use hexagon socket CE05-2A2-10P...
- Page 255 10. SPECIFICATIONS Variable Output Braking Force Inertia Moment Weight Model Dimensions (kW) (N·m) J( 10 kg·m (kg) HC — SF121B 68.5 43.1 52.5 18.0 HC — SF202B HC — SF203B HC — SF201B 110.5 43.1 92.0 25.0 HC — SF352B HC —...
- Page 256 10. SPECIFICATIONS (6) HC-RF series 1) Standard (without electromagnetic brake, without reduction gear) [Unit: mm] ø 9 mounting hole 39.5 Use hexagon socket head cap screw. Motor plate (Opposite side) Bottom Bottom Oil seal S30457B Motor flange directon 19.5 Power supply connector Encoder connector CE05–2A22–23P MS3102A20–29P...
- Page 257 10. SPECIFICATIONS (7) HC-UF series 1) Standard (without electromagnetic brake) Output Inertia Moment Weight Model (kW) J( 10 kg·m (kg) HC – UF72 0.75 10.4 [Unit: mm] 110.5 39.5 Moter plate (Opposite side) 2-M6 screw Bottom Bottom Oil seal S30457B Motor flange direction 19.5 Encoder connector...
- Page 258 10. SPECIFICATIONS Variable Output Inertia Moment Weight Model Dimensions (kW) J( 10 kg·m (kg) HC – UF202 42.5 38.2 [Unit: mm] 39.5 2-M8 screw Bottom Bottom Oil seal S40608B Motor flange direction 19.5 Encoder connector 4-ø13.5 mounting hole MS3102A20-29P Use hexagon socket 19.5 head cap screw.
- Page 259 10. SPECIFICATIONS Variable Output Inertia Moment Weight Model Dimensions (kW) J( 10 kg·m (kg) HC – UF23 0.241 HC – UF43 0.365 [Unit: mm] 4-ø6.6 Motor plate (Opposite side) Bottom Oil seal S15307B 26.9 Power supply lead 4-AWG19 0.3m (With end-insulated round crinping terminal 1.25-4) Red: Phase U White: Phase V Encoder cable 0.3m...
- Page 260 10. SPECIFICATIONS Output Braking Force Inertia Moment Weight Model (kW) (N·m) J( 10 kg·m (kg) HC – UF152B [Unit: mm] 28.9 153.5 39.5 Moter plate (Opposite side) 2-M6 screw Bottom Bottom Oil seal S30457B Motor flange direction 19.5 Brake Encoder connector 47.5 MS3102A20-29P Power supply...
- Page 261 10. SPECIFICATIONS Output Braking Force Inertia Moment Weight Model (kW) (N·m) J( 10 kg·m (kg) HC – UF13B 0.32 0.074 [Unit: mm] 4-ø5.8 Motor plate (Opposite side) Bottom Oil seal S10207B 26.9 Power supply lead 4-AWG19 0.3m (With end-insulated round crinping terminal 1.25-4) Red: Phase U Brake cable White: Phase V...
- Page 262 10. SPECIFICATIONS 10-5-3 Servo motors (in inches) (1) HC-MF series 1) Standard (without electromagnetic brake, without reduction gear) [Unit: in] E–øLZ (Note) Power (Note) supply lead 4–AWG19 11.8in (With end-insulated round 0.99 crimping terminal 0.05-4) : Phase U Encoder cable 11.8in White : Phase V With connector 172169-9...
- Page 263 10. SPECIFICATIONS [Unit: in] 3) With reduction gear for general industrial machine 4–øLZ Power supply lead 4–AWG19 11.8in 0.99 P Screw, Depth R (With end-insulated round Encoder cable 11.8in crimping terminal 0.05-4) With connector 172169-9 : Phase U (AMP make) White : Phase V Black...
- Page 264 10. SPECIFICATIONS HC – MF43(B)G1 to HC – MF73(B)G1 [Unit: in] 4–øLZ Motor plate (Opposite side) Bottom Power supply lead 4–AWG19 11.8in 0.99 P Screw, Depth R (With end-insulated round crimping terminal 0.05-4) : Phase U Encoder cable 11.8in White : Phase V With connector 172169-9 Black...
- Page 265 10. SPECIFICATIONS [Unit: in] 4) With reduction gear for precision application 4–øLZ Power supply lead 4–AWG19 11.8in 0.99 P screw, depth R (With end-insulated round Encoder cable 11.8in crimping terminal 0.05-4) With connector 172169-9 : Phase U (AMP make) White : Phase V Black : Phase W...
- Page 266 10. SPECIFICATIONS (2) HC-MF-UE series 1) Standard (without electromagnetic brake, without reduction gear) HC – MF053 – UE • HC – MF13 – UE [Unit: in] 0.98 1.57 2–ø0.18 0.20 0.10 Motor plate (Opposite side) Bottom Bottom V ring V-10A TUV plate 0.99 Power supply lead 4-AWG19 11.8in...
- Page 267 10. SPECIFICATIONS HC – MF73– UE [Unit: in] 3.15 5.91 1.58 TUV plate 0.32 0.12 Motor plate 4–ø0.26 (Opposite side) Bottom Bottom V ring V-25A 0.99 Power supply lead 4-AWG19 11.8in (With end-insulated round crimping terminal 0.05-4) Encoder cable Red: Phase U 11.8in White: Phase V Black: Phase W...
- Page 268 10. SPECIFICATIONS HC – MF23B – UE • HC – MF43B – UE [Unit: in] 1.18 2.36 Motor plate 4–ø0.23 0.28 0.12 TUV plate (Opposite side) Bottom Bottom V ring A-16A 0.99 Power supply lead 4-AWG19 11.8in (With end-insulated round crimping terminal 0.05-4) Encoder cable 11.8in Red: Phase U White: Phase V...
- Page 269 10. SPECIFICATIONS (3) HA-FF series 1) Standard HA – FF053 • HA – FF13 [Unit: in] 1.18 2.13 Caution plate Earth terminal M3 screw 0.24 (Opposite side) Bottom Bottom V ring Bottom Motor plate 4 – ø0.18 Power supply cable VCTF 3-0.02 19.7in (With end-insulated round crimping terminal0.05-4)
- Page 270 10. SPECIFICATIONS 2) With electromagnetic brake HA – FF053B • HA – FF13B [Unit: in] 4–ø0.18 1.18 2.13 Earth terminal M3 screw 0.24 0.10 Caution plate (Opposite side) Bottom Bottom Bottom Motor plate Brake cable VCTF 2–0.02 19.7in (With end-insulated round crimping terminal 0.05-4) Power supply cable Encoder cable 11.8in VCTF 3-0.05...
- Page 271 10. SPECIFICATIONS 3) With reduction gear for general industrial machine HA – FF053(B)G1 • HA – FF13(B)G1 [Unit: in] 3.54 0.12 Caution plate Earth terminal M3 screw 0.11 (Opposite side) Bottom Bottom Motor plate Power supply cable 4–ø0.26 VCTF 3-0.05 19.7in (With end-insulated round crimping terminal 0.05-4) Red: Phase U...
- Page 272 10. SPECIFICATIONS HA – FF33(B)G1 • HA – FF43(B)G1 [Unit: in] 4–ø0.39 1.48 5.71 0.47 0.12 Earth terminal M3 screw (Opposite side) 0.98 Caution plate 0.24 Bottom M6 screw, depth 0.39 Top Bottom Motor plate ø0.75 Power supply cable Section AA VCTF 3-0.05 19.7in (With end-insulated round crimping terminal 0.05-4)
- Page 273 10. SPECIFICATIONS 4) With reduction gear for precision application Caution plate Earth terminal M3 screw (Opposite side) 200W or more Earth terminal M3 screw (Opposite side) 100W or less 4–øLZ Bottom Bottom Motor plate Power supply cable VCTF 3-0.05 19.7in (With end-insulated round crimping terminal 0.05-4) Encoder cable 11.8in Red: Phase U...
- Page 274 10. SPECIFICATIONS 4–ø0.47 1.69 Earth terminal M3 screw 0.12 (Opposite side) 200W or more Caution plate Earth terminal M3 screw (Opposite side) 100W or less Bottom Motor plate Power supply cable VCTF 3-0.05 19.7 (With end-insulated round crimping terminal 0.05-4) Red: Phase U Encoder cable 11.8 White: Phase V...
- Page 275 10. SPECIFICATIONS HA – FF63(B)G2 1/45 [Unit: in] 14.61(16.04) 5.51 1.54 7.91 6–ø0.47 0.59 0.20 2.95 Caution plate Bottom Bottom Earth terminal M3 screw Motor plate (Opposite side) Power supply cable 2.48 VCTF 3-0.05 19.7 (With end-insulated round crimping terminal 0.05-4) Red: Phase U Encoder cable 11.8...
- Page 276 10. SPECIFICATIONS (4) HA-FFC-UE series 1) Standard (without electromagnetic brake, without reduction gear) HA – FF053C – UE [Unit: in] 4.72 1.18 2.13 1.81 0.42 4–ø0.18 0.98 Bottom Caution plate Oil seal (English) Bottom GM10204B Bottom 1.26 1.61 TUV plate Motor plate 0.79 1.95...
- Page 277 10. SPECIFICATIONS HA – FF23C – UE • HA – FF33C – UE [Unit: in] 1.18 2.99 1.81 0.55 0.12 4–ø0.22 0.98 0.63 0.16 Bottom Caution plate (English) Oil seal Bottom S15307B 1.61 Bottom 1.26 TUV plate Motor plate 0.79 0.10 Encoder connector Power supply connector...
- Page 278 10. SPECIFICATIONS 2) With electromagnetic brake HA – FF053CB – UE [Unit: in] 6.10 1.18 2.13 1.85 Motor plate 0.47 Caution plate (Opposite side) 4–ø0.18 0.98 Bottom Bottom Oil seal GM10204B Bottom 1.26 1.10 1.61 TUV plate 1.40 0.79 3.31 1.73 Power supply connector Brake connector...
- Page 279 10. SPECIFICATIONS HA – FF23CB – UE • HA – FF33CB – UE [Unit: in] 1.18 2.99 1.81 0.55 0.12 4–ø0.22 0.98 0.63 0.16 Oil seal S15307B Caution plate (English) 1.61 Bottom 1.26 1.10 Motor plate TUV plate 1.52 0.79 Brake connector Encoder connector Power supply connector...
- Page 280 10. SPECIFICATIONS (5) HC-SF series 1) Standard (without electromagnetic brake, without reduction gear) Variable Output Inertia Moment Weight Model Dimensions (in) (kW) (oz·in (lb) HC – SF52 2.03 36.22 11.0 HC – SF53 HC – SF102 74.90 15.4 5.71 3.02 HC –...
- Page 281 10. SPECIFICATIONS Output Inertia Moment Weight Model (kW) (oz·in (lb) HC–SF301 552.212 50.7 [Unit: in] 8.189 3.11 6.93 Moter plate 1.56 0.71 0.12 (Opposite side) 2.95 Bottom Bottom Oil seal S40608B Motor flange direction 0.77 Encoder connector MS3102A20-29P 5.157 4-ø0.53 mounting hole 1.81 Power supply connector Earth...
- Page 282 10. SPECIFICATIONS Variable Output Braking Force Inertia Moment Weight Model Dimensions (in) (kW) (oz·in) (oz·in (lb) HC – SF121B 7.60 2.70 6103 287.04 39.683 HC – SF202B HC – SF203B HC – SF201B 9.25 4.35 6103 503.01 55.115 HC – SF352B HC –...
- Page 283 10. SPECIFICATIONS (6) HC-RF series 1) Standard (without electromagnetic brake, without reduction gear) [Unit: in] 1.77 4-ø0.35 mounting hole Use hexagon 1.56 0.39 0.12 3.94 socket head cap screw. Motor plate 1.58 (Opposite side) Bottom Bottom Oil seal S30457B Motor flange directon 0.77 Power supply connector Encoder connector...
- Page 284 10. SPECIFICATIONS (7) HC-UF series 1) Standard (without electromagnetic brake) Output Inertia Moment Weight Model (kW) (oz·in (lb) HC–UF72 0.75 56.861 17.6 [Unit: in] 6.93 4.35 2.165 1.56 0.512 0.12 Moter plate (Opposite side) 2-M6 screw 1.97 Bottom Bottom Oil seal S30457B Motor flange direction 0.77...
- Page 285 10. SPECIFICATIONS Variable Output Inertia Moment Weight Model Dimensions (kW) (oz·in (lb) HC–UF202 4.646 1.673 208.856 35.3 [Unit: in] 8.661 2.559 1.56 0.63 0.157 Motor plate (Opposite side) 2-M8 screw 2.362 Bottom Bottom Oil seal S40608B Motor flange direction 0.77 Encoder connector 4-ø0.53 mounting hole MS3102A20-29P...
- Page 286 10. SPECIFICATIONS Variable Output Inertia Moment Weight Model Dimensions (in) (kW) (oz·in (lb) HC – UF23 2.953 1.318 HC – UF43 3.543 1.996 [Unit: in] 1.181 3.15 0.315 0.12 4-ø0.26 Motor plate 0.138 (Opposite side) Bottom Oil seal S15307B 1.059 Power supply lead 4-AWG19 11.8in (With end-insulated round crinping terminal 0.05-4) Red: Phase U...
- Page 287 10. SPECIFICATIONS Output Braking Force Inertia Moment Weight Model (kW) (oz·in) (oz·in (lb) HC–UF152B 1204 158.009 28.7 [Unit: in] 6.93 2.165 6.043 0.512 0.12 1.56 Moter plate (Opposite side) 2-M6 screw Bottom Bottom Oil seal S30457B Motor flange direction 0.77 Brake Encoder connector 1.87...
- Page 288 10. SPECIFICATIONS Output Braking Force Inertia Moment Weight Model (kW) (oz·in) (oz·in (lb) HC – UF13B 0.405 [Unit: in] 3.937 0.984 2.362 0.20 0.12 4-ø0.228 0.12 Motor plate (Opposite side) Bottom Oil seal S10207B 1.059 Power supply lead 4-AWG19 11.8in (With end-insulated round crinping terminal 0.05-4) Red: Phase U Brake cable...
-
Page 289: Cable Side Plugs
10. SPECIFICATIONS 10-5-4 Cable side plugs (1)Servo amplifier connector Signal connector <Sumitomo 3M make> Model [Unit: mm] Model [Unit: mm] Connector : 10120-3000VE ([Unit: in]) Connector : 10120-6000EL ([Unit: in]) Shell kit : 10320-52F0-008 Shell kit : 10320-3210-000 12.0 (0.47) NOTICE This connector is not optional. - Page 290 10. SPECIFICATIONS (4) Servo motor encoder side plugs 1) Connectors <Daiichi Denshi Kogyo make> CE05-6A14S-2SD-B [Unit: mm] -20UNEF-2B threads — 3 — -20UNEF-2A threads ([Unit: in]) D terminal D D K CE05 5.6 (0.22) 24 (0.94) [Unit: mm] D or less ([Unit: in]) 7.85 (0.31) or more Model...
- Page 291 10. SPECIFICATIONS L or less 9.53 (0.38) [Unit: mm] or more 18.26 (0.72) ([Unit: in]) Model 55.57 37.28 MS3106B20-29S -18UNEF -18UNEF (2.19) (1.47) (1.85) 55.57 40.48 MS3106B22-23S -18UNEF -18UNEF (2.19) (1.59) (1.97) 58.72 43.63 MS3106B24-10S -18UNEF -18UNEF (2.31) (1.72) (2.09) L or less 18.26 [Unit: mm]...
- Page 292 10. SPECIFICATIONS 2) Flexible conduit connectors <Daiwa Dengyo make> 39 (1.54) O ring Knurled diamonds O ring Receptacle (0.59) Plug (1.14) Daiichi Denshi Kogyo MS3106A [Unit: mm] Japan Aviation Electronics Industry JA06A ([Unit: in]) Model 14.8 BOS10-9 • BOL10-9 -24UNEF-2B (0.58) (1.02) (0.83)
- Page 293 10. SPECIFICATIONS (0.59) [Unit: mm] Threads C ([Unit: in]) Jam Nut Nipple Body Model Threads C Width across Width across Number of Width across Width across Number of flats corners corners flats corners corners 11.0 26.4 26.4 RCC-102RL-MS10F -24UNEF-2B (0.24) (0.33) (0.43) (0.94)
- Page 294 10. SPECIFICATIONS 4) Cable clamps <Daiichi Denshi Kogyo make> Effective thread øE (Bushing ID) length 10.3 (0.41) øD (Cable clamp ID) 1.6 (0.06) [Unit: mm] F (Movable range) ([Unit: in]) Model Shell Size Bushing 23.8 35.0 19.0 15.9 37.3 MS3057-12A 20, 22 -18UNEF AN3420-12...
- Page 295 10. SPECIFICATIONS <Nippon Flex make> (0.59) [Unit: mm] Threads C ([Unit: in]) Tightening Nut Nipple Body Applicable Model Threads C Cable Diameter Width across Width across Number of Width across Width across Number of flats corners corners flats corners corners 11.0 22.0 22.0...
-
Page 296: Chapter 11 Selection
CHAPTER 11 SELECTION This chapter describes how to calculate the capacity of the servo motor needed for the machine used. 11-1 Specification Symbol List 11-2 Position Resolution and Electronic Gear Setting 11-3 Speed and Command Pulse Frequency 11-4 Stopping Characteristics 11-5 Capacity Selection 11-6 Load Torque Equations 11-7 Load Inertia Moment Equations... -
Page 297: Specification Symbol List
11.SELECTION 11-1 Specification Symbol List The following symbols are required for selecting the proper servo: µ : Acceleration torque [N • m] : Friction coefficient π : Deceleration torque [N • m] : Circle ratio (3.14) : Servo motor torque necessary for [N •... -
Page 298: Position Resolution And Electronic Gear Setting
11.SELECTION 11-2 Position Resolution and Electronic Gear Setting Position resolution (travel per pulse∆R) is determined by travel per servo motor revolution ∆S and the number of encoder feedback pulses Pt, and is represented by Equation 11-1: ∆S ∆R= ............................(11-1) ∆R : Travel per pulse [mm] ∆S : Travel per servo motor revolution... -
Page 299: Speed And Command Pulse Frequency
11.SELECTION 11-3 Speed and Command Pulse Frequency The servo motor is run at a speed where the command pulses and feedback pulses are equivalent. Therefore, the command pulse frequency and feedback pulse frequency are equivalent. The relation including the parameter settings (CMX, CDV) is as indicated below (refer to the following diagram): ..................... -
Page 300: Stopping Characteristics
11.SELECTION 11-4 Stopping Characteristics 1) Droop pulses (ε) When a pulse train command is used to run the servo motor, there is a relationship between the command pulse frequency and servo motor speed as shown in the figure. The difference between the command pulses and feedback pulses during acceleration are called droop pulses, which are accumulated in the servo amplifier's deviation counter. -
Page 301: Capacity Selection
11.SELECTION 11-5 Capacity Selection As a first step, temporarily select the servo motor capacity by calculating the load conditions. Next, determine the command pattern, calculate required torques according to the following equations, and confirm that the servo motor of the initially selected capacity may be used for operation. (1) Initial selection of servo motor capacity After calculating the load torque (T ) and load inertia moment (J... - Page 302 11.SELECTION Command Nofo Servo motor speed [r/min] [pps] Time Tpsa Tpsd Time (11-11) L ................................... (11-12) L ........................................= - T ........................(11-13) Note: In the regenerative mode, the value found by Equation 11-13 is negative. 4) Continuous effective load torque If the torque required for the servo motor changes with time, the continuous effective load torque should be lower than the rated torque of the servo motor.
-
Page 303: Load Torque Equations
11.SELECTION 11-6 Load Torque Equations Typical load torque equations are indicated below: Load Torque Equations Type Mechanism Equation F • ∆S • • π • η • π • η 2 x 10 2 x 10 .............. (11-15) F : Force in the axial direction of the machine in linear η... -
Page 304: Load Inertia Moment Equations
11.SELECTION 11-7 Load Inertia Moment Equations Typical load inertia moment equations are indicated below: Load Inertia Moment Equations Type Mechanism Equation Axis of rotation is on the cylinder π • ρ • L center ..(11-22) • (D - D ) •... -
Page 305: Precautions For Zeroing
11.SELECTION 11-8 Precautions for Zeroing To return the system to the home position, use a zeroing dog or actuator. The method and precautions for setting the mechanical origin are given below. In the following zeroing, an actuator and the zero pulse signal (encoder Z-phase pulse OP) of a servo motor encoder are used to set the mechanical origin.The state of ON/OFF of encoder Z- phase pulse signal (OP) can be confirmed by using external I/Q signal display function. -
Page 306: Selection Example
11.SELECTION 11-9 Selection Example Speed of moving part during fast feed = 30000mm/min Machine specifications ∆R Travel per pulse = 0.005mm Travel = 400mm Positioning time = within 1s Number of feeds 40 times/min. Servo (Operation cycle = 1.5 s) motor Gear ratio 5:8 Gear ratio... - Page 307 11.SELECTION (4) Operation pattern 3000 Time[s] 0.05 0.05 Tpsa Tpsd 0.15 = 1.0 [r/min] = 1.5 (5) Load torque (converted into equivalent value on servo motor shaft) Travel per servo motor revolution For gravitational system of units ∆S = P •...
- Page 308 11.SELECTION (8) Acceleration and deceleration torques Torque required for servo motor during acceleration ) • N For gravitational system of units = 1.7[N • m] 9.55 x 10 • T (GD + GD ) • N Torque required for servo motor during = 17.2 [kgf •...
- Page 309 REVISIONS *The manual number is given on the bottom left of the back cover. Print Data *Manual Number Revision Nov.,1996 IB(NA)67286-A First edition Mar.,1997 IB(NA)67286-B Addition of servo amplifiers MR-J2-70 to 350A and single-phase 100V power supply models Addition of servo motors HC-MF73, HC-SF series and HC-RF series Section 2-1 Addition of notes on servo motor connection...
- Page 310 *The manual number is given on the bottom left of the back cover. Print Data *Manual Number Revision Oct.,1997 IB(NA)67286-C Instructions added for compliance with the UL/C-UL Standard Addition of single-phase 230VAC input power supply Section 2-2-2, (2) to (4) Deletion of reset-on stop operation Section 2-3-5, (4) Correction made to LSP/LSN signal stop...
Need help?
Do you have a question about the MR-J2-10A and is the answer not in the manual?
Questions and answers