Table of Contents
Advertisement
Quick Links
Advertisement
Table of Contents

Related Manuals for Briteq Pro Beamer RGBW outdoor


Summary of Contents for Briteq Pro Beamer RGBW outdoor
-
Page 2: Table Of Contents
ABLE OF CONTENTS PART 1 PRODUCT (GENERAL)............1. 1.1 TECHNICAL SPECIFICATIONS .............1. 1.2 SAFETY WARNING ..............2. PART 2 INSTALLATION...............3. 2.1--MOUNTING...................3. 2.2--POWER CONNECTION..............3. PART 3 DISPLAY PANEL OPERATION.........4. 3.1--BASIC..................4. 3.2--MENU..................5. 3.3--EDIT STATIC COLOUR..............6 . 3.4--ACTIVATING AUTO PROGRAMS..........6. 3.5--RUN MODE................ -
Page 3: Part 1 Product (General)
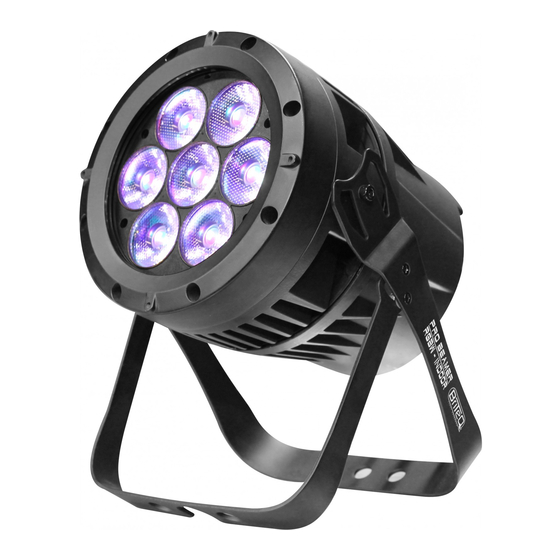
PRODUCT (GENERAL) TECHNICAL SPECIFICATIONS LED MODULE Operation Power Type Weight Dimensions 2 Model Voltage (W) Temperature (mm) RGBW:12Wx7 Ⅰ 191x240x323mm 5.74 INDOOR AC100~240V -20~45 50/60Hz RGBW:12Wx7 191x240x290mm Ⅱ 5.74 OUTDOOR... -
Page 4: 1.2 Safety Warning
1.2 SAFETY WARNING IMPORTANT 【ALWAYS READ THE USER MANUAL BEFORE OPERATION. 】 【PLEASE CONFIRM THAT THE POWER SUPPLY STATED ON THE PRODUCT IS THE SAME AS THE MAINS POWER SUPPLY IN YOUR AREA.】 ● This product must be installed by a qualified professional. ●... -
Page 5: Part 2 Installation
2 INSTALLATION MOUNTING HANGING The fixture can be mounted in a hanging position using the supporting bracket. The bracket should be secured to the mounting truss or structure using a standard mounting clamp. Please note that when hanging the unit a safety cable should also be used. -
Page 6: Part 3 Display Panel Operation
3 DISPLAY PANEL OPERATION BASIC scroll through the main menu or return MENU to the main menu. enter the currently selected menu or ENTER confirm the current function value. scroll 'UP' through the menu list or increase the value of the current function. scroll 'DOWN' through the menu list or MENU ENTER... -
Page 7: Menu
MENU MENU STAT R.(0~255) G.(0~255) GREN B.(0~255) BLUE WHIT W.(0~255) S.(0~20) STRB AUTO AT.01 AT.10 PR.01 PR.10 SLAV D(001~512) PERS TOUR ARC.1 AR1.D ARC.2 AR2.D AR2.S R.(0~255) EDIT PR.01 SC.01 G.(0~255) GREN B.(0~255) BLUE W.(0~20) WHIT T.(0~255) TIME F.(0~255) FADE PR.10 SC.30 UPLD... -
Page 8: Edit Static Colour
EDIT STATIC COLOUR MENU STAT R.(0~255) G.(0~255) GREN B.(0~255) BLUE W.(0~255) WHIT S.(0~20) STRB 【STATIC COLOUR】 ● Combine 【Red】, 【Green】, 【Blue】 and 【White】 to create an infinite range of colors (0-255) ● Set the value of the 【Strobe】 (0-20Hz) ACTIVATING AUTO PROGRAMS MENU AT.01 AUTO... -
Page 9: Dmx512 Settings
DMX512 SETTINGS MENU D(001~512) 【DMX】 ● Enter the【DMX】mode to set the DMX ADDRESS. PERSONALITY MENU PERS TOUR ARC.1 AR1.D ARC.2 AR2.D AR2.S 【PERSONALITY】 ● Enter the【PERSONALITY】mode to select DMX mode:【TOUR】,【ARC.1】, 【AR1.D】,【ARC.2】,【AR2.D】,【AR2.S】,【HSV】. EDITING CUSTOM PROGRAMS MENU R.(0~255) EDIT PR.01 SC.01 G.(0~255) GREN B.(0~255) BLUE... -
Page 10: 3.9 Special Settings
3.9 SPECIAL SETTINGS MENU UPLD SEND REST COLO RGBW DIM1 DIM2 DIM3 DIM4 DERR SAVE BLAK 【SETTING】 ● Select【UPLD】to upload the custom programs from the current MASTER unit to the SLAVE units. ● In order to activate the upload function the password must be entered. ●... -
Page 11: Balance Parameters And Correction Menu Displa
3.11 BALANCE PARAMETERS AND CORRECTION MENU DISPLAY Press 【MENU 】 button to enter the password confirmation, to enter the correct password < UP + DOWN + UP + DOWN > Key, press the 【MENU 】 in, the correct password will enter show submenu (1) WHITES SETTING MENU CAL1... -
Page 12: Part 4 Using A Dmx512 Controller
4 USING A DMX512 CONTROLLER BASIC ADDRESSING ● Connect all of the units in series using standard DMX512 signal cable or the IP65 rated cable provided. ● Set the DMX512 address in the【DMX】menu. ● It is possible to have the same DMX address or independent addresses for each fixture. - Page 13 CHANNEL VALUE FUNCTION WHITE8:7200K WHITE9:8000K WHITE10:8500K WHITE11:10000K STROBE NO FUNCTION 1~20Hz AUTO NO FUNCTION AUTO 1 AUTO 2 AUTO 3 AUTO 4 AUTO 5 AUTO 6 AUTO 7 AUTO 8 AUTO 9 AUTO 10 P R . 0 1 P R . 0 2 P R .
- Page 14 Arc.1 CHANNEL VALUE FUNCTION GREEN BLUE Ar1.d CHANNEL VALUE FUNCTION MASTER DIMMER GREEN BLUE Arc.2 CHANNEL VALUE FUNCTION GREEN BLUE WHITE...
- Page 15 Ar2.d CHANNEL VALUE FUNCTION MASTER DIMMER GREEN BLUE WHITE Ar2.s CHANNEL VALUE FUNCTION MASTER DIMMER GREEN BLUE WHITE STROBE CHANNEL VALUE FUNCTION HUE(0~100%) SATURATION(0~100%) VALUE(0~100%)
-
Page 16: Part 5 Appendix
APPENDIX MAINTENANCE ITEM ITEM LED Prive PCB Head cover Display PCB Rubber seal Button board Clear glass Display lens Capture lens plate Button seal Lens Base lens plate Waterproof button Base plate Waterproof coverboard lamp holder Seal for display metal plate Base waterproof cover Waterproof dustproof film Base board...
Need help?
Do you have a question about the Pro Beamer RGBW outdoor and is the answer not in the manual?
Questions and answers