Table of Contents
Advertisement
Advertisement
Table of Contents

Related Manuals for Brady BradyPrinter i5100


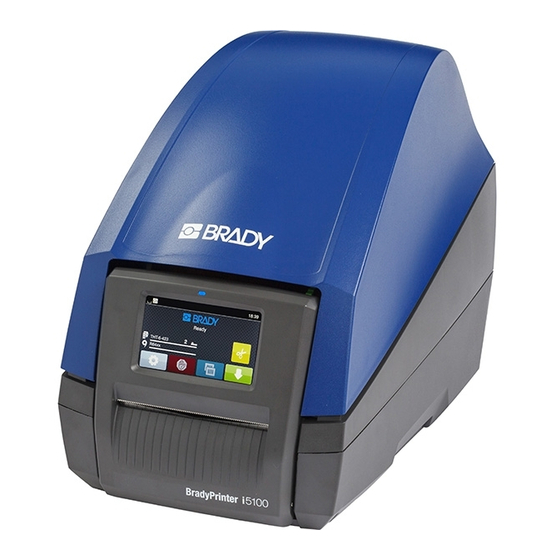
Summary of Contents for Brady BradyPrinter i5100
- Page 1 PRINTER SETTINGS CONFIGURATIONS AND CONNECTIVITY MANUAL...
-
Page 2: Table Of Contents
Table of Contents Introduction ............................5 Connecting Label Printer to Computer ....................6 Print Services Raw-IP and LPR/LPD in MS Windows ................6 Adjusting Windows Printer Setting ......................6 Connecting Label Printer via Ethernet Interface ..................7 Setting Up a Wi-Fi Connection ......................... 7 2.4.1 Connecting Printer to Network...................... - Page 3 Diagnostic Functions ........................... 40 Printhead ..............................40 ASCII Dump Mode ..........................41 8.3 Label Profile ............................42 Event Log ............................... 43 Save Data Stream ..........................44 Save Print Image ............................ 45 Save System Log ........................... 46 Extras ..............................47 Firmware Update ............................ 47 Calibrate Label Sensor ...........................
- Page 4 No portion of this manual may be copied or reproduced by any means without the prior written consent of Brady. While every precaution has been taken in the preparation of this document, Brady assumes no liability to any party for any loss or damage caused by errors or omissions or by statements resulting from negligence, accident, or any other cause.
-
Page 5: Introduction
Introduction Important information and instructions in this documentation are designated as follows: Danger! Draws attention to an exceptionally great, imminent danger to your health or life due to hazardous voltages. Danger! Draws attention to a danger with high risk which, if not avoided, may result in death or serious injury. Warning! Draws attention to a danger with medium risk which, if not avoided, may result in death or serious injury. Caution! Draws attention to a danger with low risk which, if not avoided, may result in minor or moderate injury. Attention! Draws attention to potential risks of property damage or loss of quality. Note! Advices to make work routine easier or on important steps to be carried out. Environment! Gives you tips on protecting the environment. Handling instruction Reference to section, position, illustration number or document. ... -
Page 6: Connecting Label Printer To Computer
Connecting Label Printer to Computer Choose from the following options for connecting a computer to the label printer: • Direct connection to the Ethernet interface (6) 2.3 on page 7. • Connection via a computer network to the Ethernet interface (6) 2.3 on page 7. •... -
Page 7: Connecting Label Printer Via Ethernet Interface
Connecting Label Printer to Computer Connecting Label Printer via Ethernet Interface To connect the label printer to a network jack, a patch cable with an RJ45 plug for 10 Base T or 100 Base T is required. Attention! Use a shielded cable to connect the printer to the network. Connect computer and label printer with a suitable cable. ... -
Page 8: Installing A Hotspot
A printer driver must be installed if a USB interface will be used for connection. The printer driver for the i5100 printer is found on the "Product CD” which is included in the box with the printer or on www.BradyID.com/i5100. For detailed driver installation instructions with screen shot illustrations refer to the Brady Driver Installation Guide which can be downloaded from www.BradyID.com/i5100... -
Page 9: Driver Installation
Connecting Label Printer to Computer Driver Installation If using Brady Workstation for creating labels, the drivers for i5100 will automatically be installed on the computer. If using LabelMark™ or any third party software, the drivers need to be installed manually... - Page 10 Connecting Label Printer to Computer 7. Follow on-screen instructions, then click Next. • The Bonjour program is designed to establish and monitor network printers. The Bonjour installation screens will not display if Bonjour is already installed on your computer. • To learn more about Bonjour print services for Windows, click the link in the Installing Bonjour Print Services screen (and click Back to return to the License Agreement screen).
-
Page 11: Connecting Label Printer Via Rs-232 Interface
Connecting Label Printer to Computer Connecting Label Printer via RS-232 interface Designation Function Carrier Detect Transmit Data Receive Data Data Terminal Ready (not used) Ground Data Set Ready (not used) Request to Send Clear to Send Ring Indication (not used) Table 1 Pin assignment of the RS-232 interface ... -
Page 12: Menu
Menu Structure of the Menu The menu contains setting options on several levels for configuring the label printer. In addition, the menu features test and diagnostic functions for supporting the configuration or checking the function of the label printer. 1st Selection Level 2nd Selection Level 3rd Selection Level Info Storage Setup Printing Labels Ribbon Tearing-off Cutting Peeling-off Interfaces Ethernet Wi-Fi Network services RS-232 Errors Region Time Display Interpreter Test Security Diagnostics Extras Service Table 2 Structure of the menu i5100 Configuration Manual... -
Page 13: Navigating In The Menu
Menu Navigating in the Menu Start level Selection level Parameter/function level Figure 4 Menu levels To open the menu select on the start screen. Select a theme in the selection level. Several themes have substructures again with selection levels. To return from the current level to the upper one select . -
Page 14: Service Key
Menu Service Key A service key is required for accessing special service functions not accessible to the operator. This key switches the printer to service mode and enables: • Access to additional configuration parameters • Resetting of the service counter • Additional information in the status print and in the device list •... -
Page 15: Info
IPv4 address of the printer when connected to a network via Wi-Fi IPv4 172.20.200.43 MAC address of the Wi-Fi adapter MAC e8:4e:06:3e:6f:bc mDNS Zeroconf host name brady-05bb9d.local Hours/no. of labels Operative time and number of printed labels 26h/2924 Thermal/Transfer Previously printed paper lengths with thermal direct printing / thermal transfer printing 0.00m/209.57m... -
Page 16: Security
Security Security menu the access rights for several printer function can be set. In the Start menu. Select Security. Parameter Meaning Default PIN protection Password to protect certain parameters and functions accessible by the 0000 control panel. Password ftpprint print Password for FTP printing ... -
Page 17: Configuration
Configuration Configuration via Control Panel A host of parameters for configuring the printer are found in the Setup menu. Configure the printer via the control panel during initial commissioning and when making major changes to the opera- tional conditions. For changes required for processing different print jobs use software settings. Notice! The Setup menu can be protected from unauthorized access via a code number (PIN). 6.1.1 Printing Start menu. Select Setup > Printing. Parameter Meaning Default Heat level Heating value for compensating for the differing thermal behavior of printheads. - Page 18 Configuration Parameter Meaning Default Backfeed smart Method for backfeeding the label medium. Backfeeding is necessary in the cutting and peel-off modes since a label is pushed out passed the front edge of the next label above the print line when peeling off/cutting. always: Backfeeding occurs independently of label contents.
-
Page 19: Labels
Configuration 6.1.2 Labels Start menu. Select Setup > Labels. Parameter Meaning Default Label sensor Method for detecting the starting end of the label. Gap sensor Gap Sensor: Detection using changes in the transparency between the label and label gap. Bottom-Reflect: Detection using reflex marks on the bottom of the medium. -
Page 20: Tearing-Off
Configuration 6.1.4 Tearing-off Start menu. Select Setup > Tearing-off. Parameter Meaning Default Tear-off mode Positioning the label medium for tearing off at the tear-off plate. On: Additional advancement of the label medium which positions the label gap after the last printed label at the dispense plate. Off: Label advance stops once the last label has fully passed the print line. -
Page 21: Interfaces
Configuration 6.1.7 Interfaces Start menu. Select Setup > Interfaces. Ethernet Parameter Meaning Default Hostname Unique identification of the printer in a network in a human readable generated of OEM name and the last format six digits of the MAC address DHCP Method of issuing IP address On: Dynamic issuing of IP address by the DHCP server Off: Direct issuing of the IP address by the operator >... - Page 22 Configuration Wi-Fi Access only with Wi-Fi stick installed. Parameter Meaning Default Wi-Fi Activation of the Wi-Fi interface > Operation mode Connect to network Selection of the operation mode Connect to network: Connection of the printing to an existing wireless network Hotspot: Installation of an printer-own wireless network to connect mobile devices to the printer Operation mode Connect to network >>...
- Page 23 Configuration Network Services Parameter Meaning Default Activation of the File Transfer Protocol Activation of the network printing service LPD RawIP Activation of the network printing service RawIP and selection of the port address > RawIP Port 9100 Selection of the port address for RawIP >...
-
Page 24: Errors
Configuration 6.1.8 Errors Start menu. Select Setup > Errors. Parameter Meaning Default Error-Reprint On: With a correctable error and corresponding troubleshooting, the label being printed when the error occurs is repeated. Off: Print job is continued with the next label. Syntax error Printer switches to error mode after receipt of an incorrect command. -
Page 25: Time
Configuration 6.1.10 Time Start menu. Select Setup > Time. Parameter Meaning Default Date Setting of the system date. The print output of the date occurs in the format set via the Country parameter. The date can also be changed via software. The change is not saved permanently, however. -
Page 26: Display
Configuration 6.1.11 Display Start menu. Select Setup > Display. Parameter Meaning Default Brightness Brightness of the LCD display. Time powersave Time between the last operation and activation of energy-saving mode. 5 min Parameters of the Setup > Display menu Table 18 6.1.12 Interpreter... -
Page 27: Configuration Via The Web Interface
Configuration Configuration via the Web Interface The parameters accessible via the control panel can also be set via the web interface contained in the firmware of the printer. The printer web interface can be accessed with a browser (e.g. Microsoft Internet Explorer, Mozilla Firefox) with JavaS- cript activated via the Ethernet interface or the optional Wi-Fi interface. Calling Up the Web Interface Attention! Whenever settings are changed via the web interface you are requested to enter the user name "admin" and a password. The default value of the password is also "admin". The password can be changed via the web interface ( “Setup Tab” page 29). ... -
Page 28: Status Tab
Configuration 6.2.1 Status Tab Figure 8 "Status" tab on the printer web interface The following information is contained in the left top section of the "Status" tab: • Printer type • Firmware version • Serial number of the PCB CPU •... -
Page 29: Setup Tab
Configuration 6.2.2 Setup Tab On the "Setup" tab all the configuration parameters can be set which are also accessible via the control panel in the Setup menu. Figure 9 "Setup" tab on the printer web interface To change a parameter: 1. Locate parameter in the tree structure. 2. Set the value of the parameter at the right end of the concerning line. A prompt to enter user name and password appears ... -
Page 30: Security Tab
Configuration 6.2.3 Security Tab On the "Security" tab the access rights for several printer function can be set. The tab contains the same parameters as the Security menu of the Setup page 16. Figure 10 "Security" tab on the printer web interface To change a parameter: 1. -
Page 31: Devices Tab
Configuration 6.2.4 Devices Tab The "Devices" tab provides an overview of the most important hardware components installed in the printer and the optional devices connected. Figure 11 "Devices" tab on the printer web interface The contents of the display correspond with those of the Device list Table 22 on page 36. i5100 Configuration Manual... -
Page 32: Fonts Tab
Configuration 6.2.5 Fonts Tab The most important parameters of the fonts available in the printer are listed on the "Fonts" tab. The table contains both the original fonts in the printer and other fonts loaded into the printer. Figure 12 "Fonts"... -
Page 33: Help Menu
Independent from the chosen tab some help functions can be selected : Figure 13 "Help" menu on the printer web interface Visit the Brady Website. Information about the version and the latest alterations of the web interface. i5100 Configuration Manual... -
Page 34: Test Functions
Start menu. Select Test > Status print. The printout can be canceled with Status print Network services Security Tue Feb 13 10:28:21 2018 Brady i5100-300 PIN protection Firmware V5.14 (Feb 09, 2017) - #164162032326 RawIP RawIP port 9100 Extras... -
Page 35: Font List
If the printout is to occur using thermal transfer printing, insert transfer ribbon with the maximum width. Start menu. Select Test > Font list. The printout can be canceled with Font list Tue Jan 13 10:52:06 2018 Brady i5100-300 Firmware V5.14 (Feb 09, 2018) - #164162032326 Name Type Description _DEF1... -
Page 36: Device List
Start menu. Select Test > Device list. The printout can be canceled with Device list Tue Feb 13 10:56:36 2018 Brady i5100-300 USB [5] Microchip Technology Inc./AR1100 HID-DIGITIZER Firmware V5.14 (Feb 09, 2018) - #164162032326 Full Rev. 1.01 Mfr. -
Page 37: Test Grid
Test Functions Test Grid The Test grid function prints out a geometric pattern on a background grid. This allows you to assess the evenness of the print quality. The printout occurs using the heat level and print speed specified in the Setup > Printing menu. Notice! The printout occurs without taking the label gaps into consideration. This is why endless media are most suitable for this purpose. Insert printable medium (labels, endless paper) which extends across the entire printing width. ... -
Page 38: Wi-Fi Status
If the printout is to occur using thermal transfer printing, insert transfer ribbon with the maximum width. Start menu. Select Test > Wi-Fi status. The printout can be canceled with Wi-Fi status Tue Feb 13 12:47:29 2018 Brady i5100-300 Firmware V5.14 (Feb 09, 2018) - #164162032326 Channel Name/BSS ID Signal level Security ●●●●●... -
Page 39: Diagnostic Functions
Diagnostic Functions Diagnostics menu contains several functions for troubleshooting Printhead The function Printhead provides an overview of important status information concerning the printhead on the display of the printer. Start menu. Select Diagnostics > Printhead. Return with Close. The following parameters are displayed: Line Meaning... -
Page 40: Ascii Dump Mode
Select Example: ASCII Dump Mode Tue Feb 13 13:48:03 2018 Brady i5100-300 Firmware V5.14 (Feb 09, 2018) - #164162032326 Example label printed normally (left) and in ASCII dump mode (right) Figure 19 The control characters (ASCII-Code 00...31) are presented in stylized design. -
Page 41: Label Profile
Start the diagram printout with Continue. The printout can be canceled with Label profile Tue Feb 13 13:51:19 2018 Brady i5100-300 Firmware V5.14 (Feb 09, 2018) - #164162032326 Gap Sensor - 50 mm/s - Brightness 109 71.74mm - σ² 0.014mm²... -
Page 42: Event Log
If the printout is to occur using thermal transfer printing, insert transfer ribbon with the maximum width. Start menu. Select Diagnostics > Event log. Event log Tue Feb 13 14:15:58 2018 Brady i5100-300 Firmware V5.14 (Feb 09, 2018) - #164162032326 Date Description 19.10.17 07:45 New printhead, 300 dpi Ser. -
Page 43: Save Data Stream
Diagnostic Functions Save Data Stream Access only with external storage device! The function Save data stream allows to store data incoming via an interface as an .lbl file to an external storage device (SD card, USB memory module) installed on the printer. Insert SD card or USB memory module. Start menu. Select Diagnostics > Save data stream. Select the external storage device. ... -
Page 44: Save Print Image
Diagnostic Functions Save Print Image Access only with external storage device! The function Save print image allows to store the last print image as a .png file to an external storage device (SD card, USB memory module) installed on the printer. Insert SD card or USB memory module. Start menu. Select Diagnostics > Save print image. Select the external storage device. ... -
Page 45: Save System Log
Diagnostic Functions Save System Log Access only with external storage device! The function Save system log allows to store several system files packed to a .zip file to an external storage device (SD card, USB memory module) installed on the printer. Insert SD card or USB memory module. Start menu. Select Diagnostics > Save system log. Select the external storage device. ... -
Page 46: Extras
Extras Firmware Update Access only with external storage device! Copy the firmware file to the "misc" directory of the storage device. This can be done on a computer or via FTP on the printer. Insert the prepared storage device into the printer. Start menu. Select Extras. If the menu is protected via a PIN a prompt appears in the display. Enter the code number and confirm it. Select Firmware update. The display shows the selection of external storage devices and the firmware files stored on the devices. Select a file and confirm with The selected firmware file is copied. A progress indicator is displayed while the firmware is being copied. After completion the printer will be re-started. Notice! The firmware update also can be done via FTP printer management 11.4 on page 52. Calibrate Label Sensor With the Calibrate label sensor function the printers electronics can be adapted to the label sensor and the used liner material and transfer ribbon. -
Page 47: Load Settings
Extras Load Settings A printer configuration previously saved to a storage device can be loaded with the Load settings function. Start menu. Select Extras. If the menu is protected via a PIN a prompt appears in the display. Enter the code number and confirm it. Select Load settings. Select the desired file. Confirm the selection with . Loading of the configuration data starts. Do not remove the USB flash drive until the loading procedure is complete. The printer returns to the Extras menu. If an error occurs during the loading procedure, an error message appears in the display. Restart the loading procedure in this case. If an error occurs again, the configuration parameters must be entered via the control panel. -
Page 48: Cleaning Interval
Extras Cleaning Interval With the parameter Cleaning interval an interval for the printhead cleaning can be set in steps of 100 m media passage. If the set length of the medium (label strip, transfer ribbon) has passed the printhead and an error occurs in the flow of the medium (e.g. label end, transfer ribbon end), the Clean printhead! message appears in the display. The error message for the error which occurred is not displayed until the Clean printhead! message is acknowledged. -
Page 49: Service Functions
Service Functions 10.1 Reset Service Counter Access only with service key inserted! The printer has total and service counters. • Total counter: The total counter contains the values for the entire service life of the printer up to now. The values of the total counter are displayed in the Info menu and in the Status print. •... -
Page 50: Printer Model
Service Functions 10.4 Printer Model Access only with service key inserted! With the Printer model function the firmware can be adapted to the device type. Start menu. Select Service > Printer Model. Select a model. Following the Info function, all test prints and the web interface show the selected printer model. i5100 Configuration Manual... -
Page 51: Ftp Printer Management
FTP Printer Management The File Transfer Protocol (FTP) allows to manage and transfer files on the network via the Ethernet interface or Wi-Fi adapter. An FTP program (FTP client) is required which supports the "binary" transfer mode to manage the printer. The printer functions as an FTP server. FTP printer management is comprised of four functions: • Direct printing via copying JScript or ZPL files. • Management of the memory media installed in the label printer •... -
Page 52: Ftp Firmware Update
FTP Printer Management 11.4 FTP Firmware Update FTP allows to carry out a firmware update: Establish a FTP connection with the user name ftpadmin and the defined password (Default: admin). An empty folder of the FTP server will be shown. Copy a valid firmware file (e.g. 500_6714.cfw) to the folder. The status of the saving procedure is shown by a progress indicator in the display. The printer resets automatically after the update is carried out successfully. -
Page 53: Storage Devices
Storage Devices Label descriptions, graphics, fonts, and database information can be saved for the long-term on memory media. Notice! Always create a backup copy of external devices in case of a malfunction. 12.1 Suitable Storage Devices External Devices • USB flash drive at USB master interface. • SD cards Internal Device • approx. 50 MB flash memory inside the printer (Internal Flash File System IFFS) 12.2 Installation For external storage devices only! ... -
Page 54: Writing
Storage Devices 12.4 Writing The storage devices can be written to in several ways. The most functionally secure way is writing to the storage device via a data interface. Attention! The device selected as Default storage is written to by default. To write to another device specify the path name of the device in the file name ( Programming Manual). Example: With direct programming, the command sequence for saving a label (file XYZ) has the following form: Ms LBL; XYZ Command for saving the file XYZ H 100,0,T S l1;0,0,68,71,104 | Contents of the file XYZ T 10,10,0,3,pt15;memory card... -
Page 55: Print File List
Storage Devices 12.5.2 Print File List The Print file list function creates a list of the files stored on the default storage device. Insert printable medium (labels, endless paper) which extends across the entire printing width. If the printout is to occur using thermal transfer printing, insert transfer ribbon with the maximum width. ... -
Page 56: Default Storage
Storage Devices 12.5.5 Default Storage With the parameter Default storage Definition the storage device can be defined, which can be operated via interfaces and FTP printer management. At functions started from the printer display all storage devices are accessible, but the default storage will be offered first. Start menu. Select Storage > Default storage. The display shows the selection of storage devices. Select a storage device and confirm the selection with i5100 Configuration Manual... -
Page 57: Remote Access Via Vnc
Remote Access via VNC VNC is a software that allows remote control of a printer's operation control panel (server) via a computer (client) through input devices like keyboard and mouse. VNC ist not platform dependent and enables the use of a Windows computer as well as a mobile Android or iOS system as an external remote control. -
Page 58: External Keyboard
External Keyboard An external keyboard or a compatible input device (e.g. barcode scanner) can be connected directly to the printer. Using an external keyboard facilitates the entry of variable data while processing print jobs and printing from storage devices. Input prompts and the data received from the keyboard are shown in the display. 14.1 Connecting External Keyboard Any HID compatible USB keyboard can be connected to the printer. -
Page 59: Special Key Functions
External Keyboard 14.3 Special Key Functions General : [F1] Executes the Load label storage device function. [F2] Prints an additional label from the last print job. Corresponds to [F3] Repeats the last print job with renewed polling of the variable data and polling of the label quantity. [F8] Functions like [Enter]... -
Page 60: Index
Index ASCII dump mode ......41 Heat level..........17 Save data stream ......44 Save print image.......45 Save settings ........47 Backfeed...........18 IFFS ..........52, 54 Security tab........30 Backfeed position ......18 Important information......5 Service key ........14 Baud rate ..........23 Interfaces ..........21 Setup tab ..........29 Bluetooth ........11, 26 Interpreter .........26 Single print mode......18 Brightness.........26... - Page 61 i5100 Configuration Manual...
- Page 62 Belgium Latin America ........1-414-540-5560 www.bradycorp.com/global Malaysia ..........60-4-646-2700 Tel: +32 (0) 52 45 78 11 Mexico ............525-399-6963 New Zealand ........61-2-8717-2200 Brady Corporation Asia Philippines ..........63-2-658-2077 1 Kaki Bukit Crescent Singapore ..........65-6477-7261 Singapore 416236 Taiwan ..........886-3-327-7788 www.bradycorp.com/global Thailand ..........
Need help?
Do you have a question about the BradyPrinter i5100 and is the answer not in the manual?
Questions and answers