Classeq P500AS Installation And Operation Manual
A - air break with rinse booster pump
ws – water softener
as – dual rinse element
pass through warewashers
Hide thumbs
Also See for P500AS:
- User manual (221 pages) ,
- Engineer's manual (36 pages) ,
- Quick user manual (2 pages)
Table of Contents

Related Manuals for Classeq P500AS


Summary of Contents for Classeq P500AS
- Page 1 Installation and operation manual Pass Through Warewashers P500 P500A/RBP P500AS P500A WS P500AS WS WS – Water Softener AS – Dual Rinse Element A - Air break with rinse booster pump CAUTION: Read these instructions before operating the warewasher...
-
Page 2: Table Of Contents
Dear Customer, Thank you for choosing Classeq, the warewasher you have selected has been designed to give you lasting service. Please read these instructions before installing, commissioning and operating this warewasher. The information contained herein is provided to avoid accidental risks and/or damage to either yourself or your warewasher. -
Page 3: Explanation Of Symbols Used
ZÁLOŽKA NENÍ USEFUL CONTACT DETAILSCHYBA! DEFINOVÁNA. 1. Explanation of symbols used The following symbols have been used in this manual Warning against potential serious or fatal injuries to This symbol refers to ► persons if the described a chapter with more precautionary measures detailed information are not taken. -
Page 4: Warning And Safety Information
3mm must be incorporated in the fixed wiring in accordance with wiring rules (►4.4). If the supply cord is damaged, it must replace by the CLASSEQ recommended, its service agent or similar qualified person in order to avoid a hazard. - Page 5 For water inlet pressure >400 kPa – Pressure reducing valve required. The warewashers are intended for fixed installation only using Classeq tabling fixed with fasteners to the floor surface and sealed to the unit. (►5.67) Any other installations must be agreed with and approved by Classeq.
- Page 6 For safety reasons, minimum two persons are required for the task (►4.1). Only use granulated salt (max. grain size 5 – 7 mm). Salt tablets are not suitable (►6.5) (►8.4.1). If the reservoir cap is not properly secured, water and/or chemicals can leak in or out of the unit causing damage to the warewasher (►6.5) (►8.4.1).
-
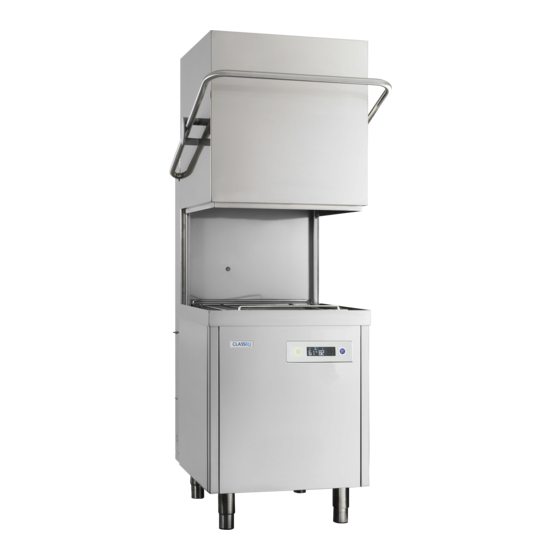
Page 7: Know Your Warewasher
3. Know your Warewasher Before installing your warewasher you should familiarise yourself with the various components shown below. For detailed specification see Appendix D (►14). This warewasher is electrically operated dishwashing machines for washing plates, dishes, glassware, cutlery and similar articles, not intended for household use. - Page 8 3.2 User interface Item Description On/Off button Cycle button Cycle indicator Heating indicator Program select Temperature unit button Program indication Wash temperature Rinse temperature Temperature unit display Error indicator Refill salt indicator Wash water symbol Rinse water symbol Images are for reference only, actual parts may differ Only on gravity drain ware washers Only on drain pump fitted ware washers Only on Internal Water softener fitted ware washer...
- Page 9 3.3 Accessories with your warewasher Items included within warewasher 1 x Installation and 1 x Good practice operation manual guide 1 x Open basket 1 x Plate basket 1 x Cutlery basket 2 x Primary filters 1 x Secondary 1 x Drain plug filter 2 x Bottle weights 1 x Water inlet hose...
- Page 10 Warewasher Specification Warewasher P500 P500A P500A WS P500AS P500AS WS Inc. Handle A=Width Ex. Handle Inc. Handle B=Depth Ex. Handle 1470 - 1520 Hood Closed C=Height 1890 - 1970 Hood Open D=Entry Height Basket Size (mm) (Square Basket) Load Capacity Max. (theoretical) 40 @ Short Cycle Load Capacity Min.
-
Page 11: Pre-Installation
4. Pre-installation After unpacking your warewasher, check it for any possible transport damage. Never install and use a damaged warewasher. If your warewasher is damaged contact your retailer immediately. Make sure water electricity connections of your warewasher are in compliance with these instructions. Remove all outer packaging and the protective film from your warewasher before positioning it. - Page 12 MUST be replaced by a cable or cord assembly Old existing, defective or supplied by Classeq, its service agents or damaged water supply similarly qualified persons in order to avoid hoses are NOT to be used...
- Page 13 55°C maximum Supply water dynamic pressure: 0 to 2 bar (0 to 200 kPa) (External rinse booster pump required) 2 to 4 bar (200 to 400 kPa) (No modifications required) >4 bar (400 kPa) (Pressure reducing valve required) Minimum supply flow rate: ...
-
Page 14: Installation
5.1 Recommended hand tools the rating plate (►3.1). Contact your Classeq recommends that the following distributor, qualified electrician or Classeq if hand tools are used to assist in installing you are unsure how to check this. your warewasher: If the supply cord is damaged, it must ... - Page 15 using your warewasher. These tubes exit the rear of the warewasher and should be routed to the chemical bottle locations, excess tube may be removed. The 5.5 Waste water connection tubes need to be long enough to allow the Fit the waste hose of your warewasher to the bottles to be moved without the risk of falling site plumbing without kinking it.
-
Page 16: Commissioning
6. Commissioning 6.1 Commissioning interface Item Description Exit button Enter button Cycle indicator Heating indicator Up button Down button Display 6.2 Commissioning mode Below is the complete menu list: With the warewasher turned on at the mains Display Description electrical supply but off at the display, press Rinse aid setting (e.g. - Page 17 6.3 Setting chemical dosage The display will stop flashing and return to rP0. Your warewasher will be set to a default Using the up and down keys (5 & chemical dosing setting however since there 6), scroll to the detergent prime are many different chemicals on the market and these each have different concentration menu item (dP0) and press enter...
- Page 18 6.5 Integral water softener (if fitted) warewasher if there is no Commissioning the water salt in the salt reservoir, softener unit as this will allow lime To commission the water softener unit follow scale to build up, also any the instructions below: lime scale will invalidate your warranty Lift the hood up.
-
Page 19: Operation
Before operating the warewasher, ensure 7. Operation that the mains electrical and water supplies Children should be supervised to ensure that are turned on. they do not play with, or operate the warewasher. This warewasher function washing dishes, plates, glassware, cutlery and similar articles only. - Page 20 7.2 Turning on the warewasher 7.3 Warewasher ready to operate To turn on the warewasher ensure the hood Your warewasher operates a pulse fill is closed and press the On/Off button (1) on function, this means that it will fill the rinse the keypad of the warewasher, the boiler, heat this to a pre-set temperature then transfer this water to the wash tank.
- Page 21 Normal Intense 7.7 Loading a basket For dishwashers ONLY Long cutlery, such as ladles and long knives etc., must be placed horizontally on the open basket this will avoid possible collision with wash/rinse arms. 7.8 Starting a cycle Always remove excess food/debris from any dishes/glasses to be washed.
- Page 22 Note! Once empty Classeq recommends the mains water and electricity supplies are turned off and the warewasher is cleaned (►8.2). For hygiene reasons it is recommended that once the warewasher has been drained and cleaned the door is left open to assist in natural drying of the wash chamber.
-
Page 23: Service And Maintenance
As a minimum Classeq recommends the 8. Service and following are checked and cleaned (►3.1): maintenance Remove and clean top and bottom The warewasher MUST rinse and wash arms. be disconnected from its Remove and clean primary filters... - Page 24 Open the salt reservoir cap at the you will need to contact your service front right hand corner of the wash engineer or Classeq. tank. Wear protective clothing, Using the salt funnel supplied fill...
-
Page 25: Troubleshooting
the site fuse board. If the fuse or breaker continues to trip, do not reset and request a 9. Troubleshooting service callout. If you believe the warewasher is not behaving as expected or has gone into error 9.3 Warewasher fills slowly mode (Cycle indicator illuminated red) reset ... - Page 26 9.8 Cycle runs for a long time 9.13 Warewasher will not turn off Cycle runs for a long time but does not rinse, Isolate the warewasher before requesting a you will need to request a service call to service callout. identify the root cause of the problem.
-
Page 27: Decommissioning
Turn off the water supply to the regulations. warewasher and disconnect the water As a minimum Classeq recommends the supply hose from mains water supply, following procedure is followed. ensuring any spillage is dried prior to Prior to removing any chemicals refer to all moving onto next step. -
Page 28: Appendix A - Water Softener Settings
11. Appendix A – Water softener settings Water softener °dH °e / °clark °fH setting Deactivated 10.4 11.2 12.0 12.8 13.6 14.4 10.1 15.2 10.6 16.0 11.2 16.8 11.8 17.6 12.3 18.4 12.9 19.2 13.4 20.0 14.0 20.8 14.6 21.6 15.1 22.4 15.7... -
Page 29: Appendix B - Water Hardness Explained
12. Appendix B – Water hardness explained Water hardness occurs because certain chemicals in the rocks through which it passes on its way to the consumer are slowly dissolved into the water. The problem shows itself in two forms. First, when hard water is heated the chemicals come out of solution and appear as solid particles (lime scale) that are carried round the warewasher. -
Page 30: Appendix C - Water Hardness Map
Appendix C Page 29... -
Page 31: Appendix D - Warewasher Specifications
14. Appendix D – Warewasher specifications Page 30... - Page 32 Page 31...
Need help?
Do you have a question about the P500AS and is the answer not in the manual?
Questions and answers