Classeq G 350 Installation And Operation Manual
Under counter machines
Hide thumbs
Also See for G 350:
- Engineer's manual (41 pages) ,
- User manual (224 pages) ,
- Quick user manual (2 pages)

Related Manuals for Classeq G 350


Summary of Contents for Classeq G 350
- Page 1 Installation and operation manual Under counter machines CAUTION: Read these instructions before operating the machine...
- Page 2 Dear Customer, Thank you for choosing Classeq, the machine you have selected has been designed to give you lasting service. Please read these instructions before installing, commissioning and operating this machine. The information contained herein is provided to avoid accidental risks and/or damage to either yourself or your machine.
-
Page 3: Table Of Contents
TABLE OF CONTENTS EXPLANATION OF SYMBOLS USED ..........3 WARNING AND SAFETY INFORMATION ......... 4 KNOW YOUR MACHINE ..............6 PRE-INSTALLATION ................9 INSTALLATION ................. 11 COMMISSIONING ................13 OPERATION ..................15 SERVICE AND MAINTENANCE ............17 TROUBLESHOOTING ............... 19 DECOMMISSIONING ................ -
Page 4: Explanation Of Symbols Used
1. Explanation of symbols used The following symbols have been used in this manual Warning against potentially serious or fatal injuries to This symbol refers to a ► persons if the described chapter with more detailed precautionary measures are not information taken. -
Page 5: Warning And Safety Information
2. Warning and safety information Danger warnings For safety reasons your machine MUST be bonded to adjacent metalwork or earthed so that it is at the same potential (i.e. voltage) (►4.1). A means for disconnection that has an all pole seperation of more than 3mm must be incorporated in the fixed wiring in accordance with wiring rules (►4.2). - Page 6 goggles when handling chemicals and observe all safety notes and dosing recommendations printed on their packaging (►5.5) (►8.4). If the machine is being drained immediately after use, water draining from the ‘Boiler drainage hose’ may reach over 85°C (►10). Cautions Only use commercial grade detergents and rinse-aids within your machine (►5.5).
-
Page 7: Know Your Machine
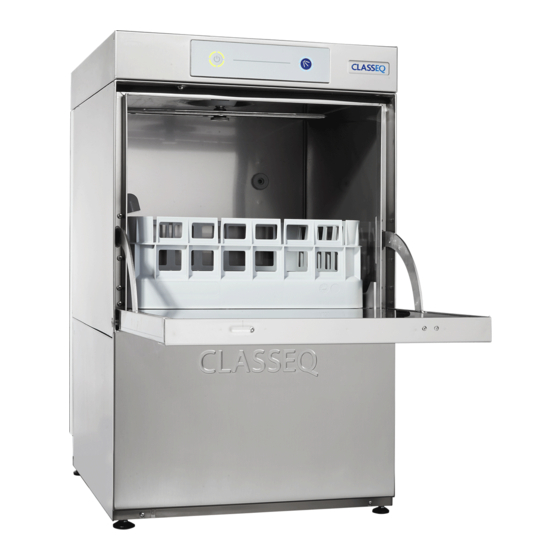
3. Know your machine Before installing your machine you should familiarise yourself with the various components shown below. For detailed machine specifications see Appendix C (►11) 3.1 Machine layout Item Description Door Primary filters Bottom wash and rinse arms Top wash and rinse arms User interface Anti-syphon device Basket ramp... - Page 8 3.2 User interface Item Description On/Off button Cycle button Cycle indicator Heating indicator Hidden until lit display Commissioning button B Commissioning button C Page 7...
- Page 9 3.3 Accessories with your machine Items included within machine Installation and Good practice guide operation manual Open basket Plate basket x2 Glass washer x1 Dishwasher only x1 Dishwasher Right hand primary Cutlery basket filter x1 Dishwasher only Left hand primary Secondary filters filter Drain plug...
-
Page 10: Pre-Installation
MUST be G¾” (¾” BSP) male threaded connection at replaced by a cable or cord assembly the mains water outlet. supplied by Classeq, its service agents or similarly qualified persons to avoid hazards, Old existing, defective or following... - Page 11 Gravity drain machines: 4.3.2 Water supply restrictions If your machine has a drain plug fitted in the wash sump the waste hose will fit into Ø40mm plumbing or over a Ø20mm spigot. IMPORTANT - Install in accordance with The hose for this machine has to lead away all applicable national water regulations.
-
Page 12: Installation
(►3.1). Contact your distributor, qualified electrician or Classeq Your machine should be installed on the if you are unsure how to check this. stable surface that is capable of holding the full weight of the machine (►11) and All mains electrical work withstand the vibration of regular use. - Page 13 5.4 Waste water connection These tubes exit the rear of the machine and should be routed to the chemical bottle Fit the waste hose of your machine to the locations, excess tube may be removed. site plumbing without kinking it. The tubes need to be long enough to allow Ensure that your hose is fitted to the the bottles to be moved without the risk of...
-
Page 14: Commissioning
6. Commissioning 6.1 Commissioning interface IMPORTANT – Only use Classeq appointed engineers Item Description Exit button Enter button Cycle indicator Heating indicator Hidden until lit display Up button Down button 6.2 Commissioning mode Below is the complete menu list. With the machine turned on at the mains... - Page 15 again to stop the pump. 6.3 Setting chemical dosage The display will stop flashing and return to Your machine will be set to a default Using the up and down keys (6 & chemical dosing setting however since 7), scroll to the detergent prime there are many different chemicals on the menu item ( ) and press enter...
-
Page 16: Operation
7. Operation Before operating the machine, ensure that Children should be supervised to ensure the mains electrical and water supplies are that they do not play with, or operate the turned on. machine. 7.1 Operation interface Item Description On/Off button Cycle button Cycle indicator Heating indicator... - Page 17 During Note! the cycle the blue cycle indicator Once empty Classeq recommends the (3) will be illuminated blue. mains water and electricity supplies are Do NOT open the door during a cycle.
-
Page 18: Service And Maintenance
The interior of the machine should be maintenance cleaned after each service when the The machine MUST machine is drained down. disconnected from its power As a minimum Classeq recommends the source during cleaning, following are checked and cleaned (►3.1): servicing or replacing parts. ... - Page 19 8.4 Descaling You can de-scale the wash tank of your machine yourself with the help of the following notes; to de-scale the rinse boiler you will need to contact your service engineer or Classeq. Wear protective clothing, protective gloves protective...
-
Page 20: Troubleshooting
9. Troubleshooting 9.3 Machine fills slowly If you believe the machine is not behaving Check water supply is turned fully as expected or has gone into error mode (Cycle indicator illuminated red) reset the Check water supply hose has not machine, by pressing the on/off button, then been trapped or kinked. - Page 21 9.13 Machine will not turn off 9.8 Cycle runs for a long time Isolate the machine before requesting a Your machine has a heat interlock to service callout. ensure that the rinse is in accordance with environmental health requirements. This will extend the wash cycle if the rinse boiler has not achieved the required temperature.
-
Page 22: Decommissioning
RECYCLING If you are As a minimum Classeq recommends the recycling or disposing of following procedure is followed. your machine, you must Prior to removing any chemicals refer to all ensure this... -
Page 23: Appendix C - Machine Specifications
11. Appendix A – Machine specifications Page 22... - Page 24 11.1 Legend Item Description 90000287 G350 90000288 D400; G400 90000289 D400 DUO; G400 DUO; D400 DUO WS; G400 DUO WS 90000290 D500; G500 90000291 D500 DUO; G500 DUO; D500 DUO WS; G500 DUO WS Height of machine Width of machine Depth of machine Foot dimension to side Door opening height...
-
Page 25: Parts And Labour Warranty
12. Parts and Labour warranty This will not include faults or conditions caused by Operator misuse, including (but not exclusively): Incorrect Installation. No fault found. Problems with electricity supply or plumbing e.g. water and waste. Failure to follow instructions in the User Handbook. ... -
Page 26: Notes
13. Notes Page 25... -
Page 27: Useful Contact Details
Istanbul Ersin and ersin.akturk@winterhalter.com +90 212 447 29 99 / yasin.akturk@winterhalter.com Yasin Akturk +90 533 7646805 WIHA / CLASSEQ Turkey +90 212 447 29 99 +90 532 416 1234 Middle East Sean Moore sean.moore@winterhalter.ae +971 67447401 +971 6 7447401 WIHA United Arab Emirates... - Page 28 To help when contacting please quote the serial number and model of machine Classeq Ltd. Classeq house Airfield Industrial estate Hixon Staffordshire ST18 0PF United Kingdom Page 27...
Need help?
Do you have a question about the G 350 and is the answer not in the manual?
Questions and answers