Table of Contents
Advertisement
Advertisement
Table of Contents

Subscribe to Our Youtube Channel
Related Manuals for Classeq CST 100


Summary of Contents for Classeq CST 100
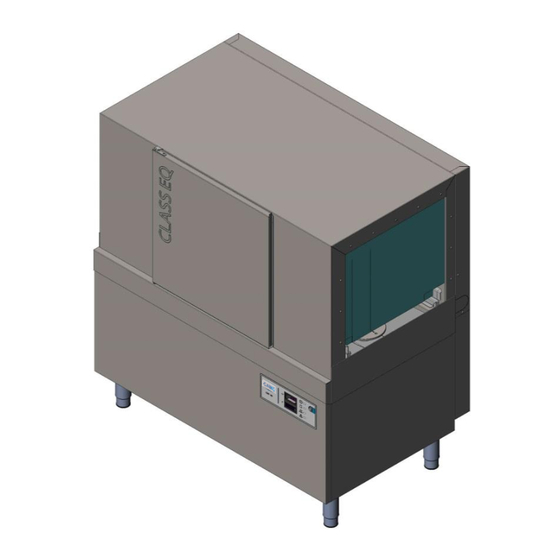
- Page 1 Installation & Operation Instructions CST 100 CST 130 www.classeq.net...
- Page 2 For hot water installations 99-32-001 Service and Maintenance Contracts Enjoy complete peace of mind with Classeq’s range of tailored service contracts. We will be happy to discuss your requirements and provide a proposal which will cater for all your warewashing service needs.
-
Page 3: Table Of Contents
Dear Customer Thank you for choosing Classeq, the machine you have selected has been designed to give you lasting service. Please read these instructions before installing, commissioning and operating this machine. The information contained herein is provided to avoid accidental risks and/or damage to either yourself or your machine. - Page 4 EXPLANATION OF SYMBOLS USED The following symbols have been used in this manual Warning against potential serious or fatal injuries to This symbol refers to a ► persons if the described chapter with more detailed precautionary measures are information not taken. Danger Warning against potential minor injuries to persons or...
-
Page 5: Know Your Machine
Know Your Machine Wash arms and Rinse arms Wash tunnel* fitting tubes Filter Curtain bracket Curtains Cassette assembly* Gear box & Drive motor Wash pump Rinse boiler Rinse pump Fascia and controls Thermostats Control panel Serial number / Electric rating plate * Take note of safety information regarding these components (►2) Page 4... - Page 6 Fascia and Controls Wash temperature On / Off lamp thermometer On / Off button Pump running lamp Machine heating lamp Machine error Rinse temperature lamp thermometer Contents of Your Machine Items included within machine 1 x Installation and Operation Instructions 1 x Good Practice Guide 1 x Coil of Mains cable 2 x Splash guard...
- Page 7 Machine specification Dishwashers A = width 1300 Closed B = depth Open 1490 C = height 1380-1440 Basket size (mm) (square basket) Load capacity (dishes) Load capacity (pint glass) Basket rate (Baskets/hour) 100/130 Rinse running water temperature 82°C Rinse standby water temperature 60°C Wash water temperature 55°C...
- Page 8 1.4 Machine orientation In the CST basket is moved from the entry to the exit during the cleaning process. The entry is considered the opening closest to the wash arms, while the exit will be closest to the rinse arms. The machine and tabling must be installed to match. Refer Appendix B for changing the orientation of the machine so that the entry is fixed to the table with the soiled items.
-
Page 9: Warning And Safety Information
Machines hard wired (i.e. no plug), this must be disconnected in accordance with local and national regulations; Classeq recommends this is performed by a qualified electrician. Always remove excess food from the dishes before loading. DO NOT use your machine as a waste disposal unit. -
Page 10: Pre - Installation
Pre - Installation After unpacking your machine, check it for any possible transport damage. Never install and use a damaged machine. If your machine is damaged contact your retailer immediately. Make sure the water and electricity connections of your machine are in compliance with these instructions. - Page 11 (i.e. voltage). A = Earth bonding / Equi-potential stud Please consult your distributor, Classeq or a qualified electrician if you are unsure how B = Water supply hose connection to do this. C = Drain / waste water hose exit...
- Page 12 Warning! your machine. replaced by a cable or cord assembly supplied by Classeq, or its service agent, 3.6.2 Water supply restrictions: and is to the following minimum specification. Incoming water temperature For electrical rating of your machine refer to ...
-
Page 13: Installation
/ fuse. For the electrical rating of your machine refer to the rating plate (►1). Contact your distributor, qualified electrician or Classeq if you are unsure how to check this. Feed the mains cable through the... - Page 14 3mm hex key. Water supply hose connection (►3.6.1) Classeq recommend installing a shut off valve in the mains water supply line near the machine such that it is easily accessible. Ensure the rubber seals within the ends of the hose are in place.
- Page 15 4.6 Table end limit switch Fit rinse aid tube onto the rinse aid inlet and detergent tube onto the detergent inlet. Tighten the tubes It is very important that the table end limit with cable ties and ensure they switch be installed at the end of the exit are water tight.
- Page 16 4.7 Installing the splash guard Once the machine has been installed and all tabling has been aligned the splash guards should be fitted to the exit of the machine. Remove the 3x M5 screws on either side of the exit and use these to fasten the splash guard in place.
-
Page 17: Commissioning
Rinse & wash tank Commissioning temperatures: Installing curtain Water temperatures are pre-set (►1.3), however Classeq recommends these are checked / calibrated to ensure compliance Remove the curtains from the packing to local and national regulations. and fit them into the curtain brackets as... -
Page 18: Operation
Operation will illuminate. Once the machine achieves the correct temperatures machine heating lamp will go out and machine is 6.1 Controls: ready for the first cycle. Prior to turning the machine ON, ensure that you are familiar with the controls on the Required front fascia of the machine and the location Machine rating... - Page 19 . Once the clean baskets have been removed the machine will continue to run. Note! Once empty Classeq recommends the Left hand CST mains electricity supply is turned off and the machine is cleaned.
-
Page 20: Servicing & Maintenance
Servicing & Maintenance DO NOT spray the exterior or interior of the machine and the surrounding area (panels, base) using a water hose, steam-jet air Remove and clean ejector or high-pressure cleaner. Open the door. curtains. Ensure the base of the machine is never submerged or standing in water when operating the machine. - Page 21 Exterior cleaning: Wipe the exterior of the machine with a damp (NOT WET) sponge. Once dry, clean Your local water board should be able to using a tell you if the water in your area is hard or STAINLESS soft. As a guide refer to the map in STEEL cleaning Appendix B (►11).
-
Page 22: Trouble Shooting
Machine fills slowly: Trouble Shooting Check water supply tap is fully open. Before placing a service call, please check Check water supply pressure (►3.7.2) the following: and remove any pressure regulator or Machine is connected to the mains reducer. - Page 23 Wash water foaming: Check chemicals are manufactured for use in commercial dishwashers. Check wash water is up to temperature. Check chemical dosing is set according to the chemical manufacturers requirements. Drain, refill and allow re-heating. Will not turn ON: ...
-
Page 24: Decommission
Decommission If for any reason you require removing or, decommissioning your machine, and then do so in accordance with local and national regulations. As a minimum Classeq recommends the following procedure is followed. Boiler drain hose Remove chemical tubes from the... -
Page 25: Appendix A
You can de-scale the wash tank of your machine yourself with the help of the following notes; to de-scale the rinse boiler you will need to contact your service engineer or Classeq: Drain the machine (►6.5). Remove the PVC hoses from the chemical bottles. -
Page 26: Appendix B
Appendix B For more detailed information regarding your water hardness, please contact your water supplier. Map correct at time of going to print Page 25... -
Page 27: Parts And Labour Warranty Terms
Use of incompatible chemicals or chemical set at incorrect concentration. Warranty Terms Drain system blocked or damaged by foreign bodies. Classeq Glass & Dishwashing Systems Ltd. Wash pumps damaged due to foreign bodies entering the wash system. Parts and Labour Warranty Terms ... - Page 28 National approval requirements Australia WaterMark This appliance complies with WMTS-101 Certificate number WM-021982 Installation Installation shall be in accordance with AS/NZS3500.1 Installation shall include the supplied backflow prevention device (dual check valve) Page 27...
-
Page 29: Useful Contact Details / Notes
Useful Contact Details / Notes Page 28... - Page 30 Page 29...
- Page 31 Page 30...
- Page 32 To help when contacting please quote the serial number and model of machine Warranty: To register your machine visit: www.classeq.co.uk. Classeq Ltd Classeq House Beacon Way Beacon Business Park Stafford ST18 0DG Page 31...
Need help?
Do you have a question about the CST 100 and is the answer not in the manual?
Questions and answers