Smartbox Grid Pad Manual
Hide thumbs
Also See for Grid Pad:
- Installation manual (17 pages) ,
- Manual (8 pages) ,
- Getting started (13 pages)
Table of Contents
Advertisement
Advertisement
Table of Contents

Related Manuals for Smartbox Grid Pad


Summary of Contents for Smartbox Grid Pad
- Page 1 Manual Created by...
- Page 2 Grid Pad Manual (Version 1.0) English (UK) Copyright 2018 Smartbox Assistive Technology thinksmartbox.com...
- Page 3 Welcome to Grid Pad, your complete communication and access solution...
-
Page 4: Table Of Contents
Contents 1. Introducing Grid Pad What is included with your Grid Pad Grid Pad setup Features 2. Quick start guide Turning on your Grid Pad Creating your user account Choosing your grid sets Introducing Grid Explorer Configuring your access method 3. - Page 5 Introduction to Environment Control Transmitters Servus Environment Control grid sets Infrared controls Setting up a radio device Connecting a smart phone to your Grid Pad 6. Grid 3 Introducing Grid 3 Adding grid sets Useful commands to control your Grid Pad from...
- Page 6 In this section What is included with your Grid Pad Grid Pad setup Features...
-
Page 7: Introducing Grid Pad
Introducing Grid Pad... -
Page 8: What Is Included With Your Grid Pad
Grid 3 training pack Cleaning cloth 2x AAA batteries Optional port labels Your Grid Pad may also be supplied with an eye gaze unit. Included Software Grid 3 If supplied with eye gaze, additional drivers and software will be pre-installed. -
Page 9: Grid Pad Setup
When unlocked the Grid Pad gives you full access to the accessible apps as well as Windows desktop and applications. Changing your set up If you would like to change the way your Grid Pad has been set up, please contact your Grid Pad supplier. -
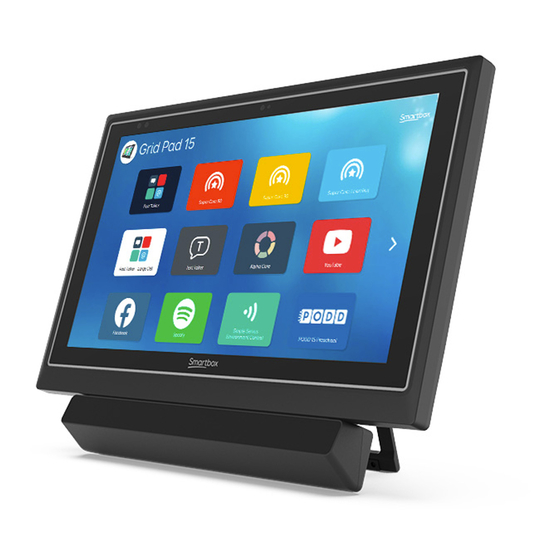
Page 10: Features
Features Grid Pad Infrared receiver Front camera 2 x switch ports HDMI out Touch screen Volume up and down Power USB 3.0... - Page 11 Charging port Infrared transmitter Rear camera Speakers USB 2.0 Headphone / Mounting plate Desk stand microphone port Radio control...
- Page 12 Grid Pad with eye gaze unit When the Grid Pad is supplied with an eye gaze unit, it comes with a longer desk stand to accommodate the camera. The USB 3.0 socket will be used for the camera connection. Eye gaze camera...
- Page 13 For more information on attaching and removing the eye gaze unit see section 4.6. Elongated desk stand...
- Page 14 In this section Turning on your Grid Pad Creating your user account Choosing your grid sets Introducing Grid Explorer Configuring your access method...
-
Page 15: Quick Start Guide
Quick start guide... -
Page 16: Turning On Your Grid Pad
Turning on your Grid Pad Before switching on your Grid Pad for the first time, it is best to plug in the power lead and charge the battery. Press the power to turn the device on, the LED will light up to signal the device is starting. -
Page 17: Creating Your User Account
On the next screen you can create a Smartbox Account. This enables you to use features such as remote editing and syncing between devices. Tip: If you already have a Smartbox account you can log in and restore your account. -
Page 18: Choosing Your Grid Sets
Choosing your grid sets A grid set is like an app within Grid 3. Some grid sets may contain a complete symbol vocabulary for starting out with communication. Others may be designed for literate users to communicate as efficiently as possible. Grid sets are organised into categories. -
Page 19: Introducing Grid Explorer
Introducing Grid Explorer Grid Explorer is your Grid 3 home screen. From here you can browse and arrange your grid sets, add new grid sets and access your settings. Tapping on a grid set will open it. To return to Grid Explorer, tap the menu then select Grid Explorer. -
Page 20: Configuring Your Access Method
You will need the suitable hardware to configure your chosen access method. Tip: Remember you can use multiple access methods together. Both Grid 3 and your Grid Pad are designed to be flexible. If you want to use a head pointer with a switch to activate, you can! - Page 22 Your Grid Pad desktop Power The remote power button Charging your Grid Pad Mounting your Grid Pad Audio and speech Using headphones and audio feedback Screen brightness Using another screen with your Grid Pad 3.10 Internet and network settings 3.11 Bluetooth...
-
Page 23: Using Your Grid Pad
Using your Grid Pad... -
Page 24: Your Grid Pad Desktop
Your Grid Pad desktop Grid Explorer Close Grid 3 User icon Menu Maximise Grid 3 Minimise Grid 3 Grid sets Next page Grid 3 menu Add grid sets Grid 3 settings Share grid sets Remote editing options Open user screen... - Page 25 Windows desktop Desktop Recycle bin Search Wi-fi and Taskbar internet Start menu Windows audio settings Notifications...
-
Page 26: Power
Shutting down your Grid Pad When not in use, it is good practice to shut down your Grid Pad completely. This will give any automatic updates a chance to be applied. We also recommend that your device is shut down before it is stored for transit. - Page 27 Force shut down If you press and hold the power button for five seconds, your Grid Pad will shut down. Please note that this is only recommended in emergencies, and that any unsaved work will be lost.
-
Page 28: The Remote Power Button
The remote power button Your Grid Pad comes supplied with a remote power button. This is designed to enable anyone to turn on their device either using the built in button or a separate switch. Setup The remote power button will already be paired with your Grid Pad. - Page 29 Using the remote power button Press the power button once to turn your Grid Pad on or wake it from sleep. Press and hold the button for 5 seconds to force the Grid Pad to shut down. Note you may lose work and unsaved changes! Attaching an additional switch The remote power button has a built in 3.5mm jack.
-
Page 30: Charging Your Grid Pad
Charging your Grid Pad To charge your Grid Pad, plug the power lead into the charging port on the left side of the device. A full charge will take up to 8 hours. See section 7.2 for more information on looking after your battery. -
Page 31: Mounting Your Grid Pad
Mounting your Grid Pad Adjustable stand Your Grid Pad has an adjustable stand that can be folded out, to position your device on a desk or table comfortably. Pull the stand from the bottom and adjust the angle to suit you. - Page 32 Changing the mounting plate To change the mounting plate, lay your Grid Pad with the screen facing down on a flat surface. To prevent damage to the screen, place the device on something soft like a towel, cloth or newspaper. Use the supplied screwdriver to remove the four screws that secure the mounting plate to your Grid Pad.
- Page 33 With the correct mounting plate attached, you can fit the Grid Pad to your wheelchair mount, floor stand or desk stand. As you attach the device to the stand, be sure to hold the Grid Pad securely until the head of the stand is firmly docked with the mounting plate.
-
Page 34: Audio And Speech
Audio and speech Your Grid Pad has two main speakers, designed to make your sure your voice can be heard in any environment. The device also has a headphone port, which can be used for personal audio. This is called audio feedback and can help you navigate Grid 3 by reading out labels, words, and actions while you communicate. - Page 35 with Grid 3, or available to download. You can also adjust the pitch, speed, and volume of your voice. Audio feedback Under Audio feedback you can choose and adjust the voice that Grid 3 will use for audio highlights, reading out labels and giving notifications.
-
Page 36: Using Headphones And Audio Feedback
Speaker icon in your Windows taskbar. Then select your headphones. Tip: You can also use Bluetooth headphones or headsets with your Grid Pad. Once connected, these will be listed when you tap Configure under the Speakers heading. -
Page 37: Screen Brightness
Screen brightness The Grid Pad has a full HD screen that supports a range of brightness levels, so it is easy to find a setting that suits you. The brightness of the screen can be adjusted both within Grid 3 and through your Windows settings. -
Page 38: Using Another Screen With Your Grid Pad
Using another screen with your Grid Pad The HDMI socket enables you to connect your Grid Pad to a second screen, or even a projector. When you attach the device to a second screen, the default setting will mirror the screen of your Grid Pad. -
Page 39: Internet And Network Settings
Internet and network settings 3.10 Wi-Fi Your Grid Pad connects to the internet using Wi-Fi. This is accessible from your Windows taskbar. Tap the Wi-Fi icon to bring up the list of nearby wireless networks. Select your network and enter the network password if applicable. You can also choose whether you want your device to remember this connection. -
Page 40: Bluetooth
3.11 Bluetooth You can connect many types of Bluetooth device to your Grid Pad – from headphones and headsets to smart phones, printers, and access methods. Bluetooth is switched off by default. Open the settings cog from the Start menu and go to Settings – Devices to turn on Windows Bluetooth features. - Page 42 In this section Switch access Pointer access Touch access Keyboard and mouse access Voice activation and access Eye gaze...
-
Page 43: Access
Access... -
Page 44: Switch Access
Grid 3, using one or two switches. Connection To connect a switch to your Grid Pad, plug its 3.5mm jack into one of the switch sockets on your Grid Pad. (These are labelled S1 and S2 respectively). - Page 45 Bluetooth switches To connect a Bluetooth switch to your Grid Pad, follow the pairing instructions provided with your switch. Make sure you have Bluetooth enabled on your Grid Pad. You can then configure the switch as normal. Switch options Activation When your switches are connected to your Grid Pad, you can decide how they act within Grid 3.
- Page 46 You can adjust the direction of scanning, the speed, and the way you want to activate cells. You can also configure highlighting options and how scanning will work with multiple switches. Switch elimination Switch elimination splits your grid into groups of cells, using two or four switches.
-
Page 47: Pointer Access
Grid Pad. Follow the instructions provided with your pointing device to connect it to your Grid Pad. You may need to install additional drivers and software for the device to work correctly. -
Page 48: Touch Access
Touch access The screen of your Grid Pad is fully touch accessible. You can access the touch screen settings in Grid 3 under Settings – Access – Touch. Here you select your highlighting preferences and can choose how you want to activate cells in Grid 3. -
Page 49: Keyboard And Mouse Access
Keyboard and mouse You can connect a keyboard and mouse to your Grid Pad using either the USB ports or via Bluetooth. To use a wired device, simply plug it in to one of the USB ports found on the side of the Grid Pad. -
Page 50: Voice Activation And Access
Voice activation and access You can use your voice to access Grid 3. This requires an additional microphone or headset to be connected to your Grid Pad. We recommend a USB or Bluetooth microphone or headset. Once configured, voice commands are activated by speaking the wake-up phrase “Hey Grid 3...”... -
Page 51: Eye Gaze
Eye Gaze The Grid Pad camera unit Your Grid Pad can support eye gaze access. Attach the camera unit to your Grid Pad to access the device with a range of cameras. Attaching the Grid Pad camera unit The camera module attaches to the bottom of your Grid Pad. - Page 52 Plug the camera’s USB connection into the USB 3.0 port on the right side of the Grid Pad. Do not use a USB hub or an extender cable as this may cause the camera to perform poorly. Place the longer eye gaze stand where the Grid Pad stand used to be and use the four screws to firmly fix the stand to the Grid Pad.
- Page 53 Setting up your Grid Pad for eye gaze access It is important to have your Grid Pad set up securely for eye gaze access. Position the device between 40cm and 75cm from your eyes, using either the built-in stand or mounted on a stand that suits you.
- Page 54 Different eye gaze cameras have their own optimal distance. Ideally the camera should be placed so it is between 50cm and 70cm from your eyes. Use the Grid 3 eye gaze monitor window to help you find the right distance and angle. This is found in Settings – Access – Eye Gaze –...
- Page 55 Calibration Calibrating the eye gaze camera helps it focus on how your eyes move around the screen. During a calibration you will be asked to follow targets around the screen, and the camera will score how accurate you are in holding your gaze in each location. In Grid 3 open Settings –...
- Page 56 Improving your calibration Once you have completed your first calibration, you can use the Improve calibration option to focus on any problem areas. This is a good opportunity to check the position of the device, and your surroundings for any potential interference such as reflections or strong daylight.
- Page 57 Press switch to click Press switch to click allows you to attach an additional switch to your Grid Pad to activate a cell that has been highlighted with your gaze. You will need to set up your switch connection under...
- Page 58 Highlighting You can select the options around the highlighting of cells with eye gaze. You can also choose to show a dot that represents how your gaze appear on the screen. Computer control Under Computer control you can specify how you would like to interact with Windows.
- Page 59 Computer control options. Other eye gaze cameras If you want to use the Grid Pad with a camera you already own, mounting plates are available for a range of popular devices. Refer to you local dealer and supplied instructions to mount...
- Page 60 In this section Introduction to Environment Control Transmitters Servus Environment Control grid sets Infrared controls Setting up a radio device Connecting a smart phone to your Grid Pad...
-
Page 61: Environment Control
Environment control... -
Page 62: Introduction To Environment Control
Introduction to Environment Control Your Grid Pad can control a range of devices to give you more independence. With infrared technology your Grid Pad can learn to control your TV, set-top boxes, or other devices around your home. Your Grid Pad also includes a radio transmitter that can be used to control lights, doors, windows and more. -
Page 63: Transmitters
The infrared transmitter and its broadcast angle Changing the radio transmitter Your Grid Pad is supplied with either an EasyWave or Z-Wave transmitter. If you need to swap the transmitter, you can access the port by unscrewing the panel on the back of your device. -
Page 64: Servus Environment Control Grid Sets
Servus Environment Control grid sets Grid 3 comes with two ready-made grid sets for Environment Control: Servus Environment Control and Simple Servus Environment Control. Simple Servus environment Servus environment control Tip: More Environment Control resources are available through Online Grids. Try using voice activated devices such as Amazon Alexa to control your home. -
Page 65: Infrared Controls
Infrared controls Setting up an infrared remote The Servus Environment Control grid sets are ready for variety of devices and appliances. You will need to teach your Grid Pad the correct infrared codes. Using Infrared remote files We keep a list of different IR remote codes for many home entertainment devices. - Page 66 Setting up an infrared remote manually To set up a remote manually, open Grid 3 and go to Settings – Environment control. Under Accessories select Add. You will see a list of accessories. Select the type you would like to configure, and you will be taken to the learning screen.
- Page 67 Select the action you wish to learn, for example Power, then tap the Learn button on the right side of the window. The Learn infrared window will appear and you will be asked to follow the instructions on the screen. Remember to point your remote directly at the front of your Grid Pad.
- Page 68 Controlling multiple accessories If you are controlling more than one of the same type of accessory, you can use auto content cells in your Environment Control grid sets. If you have a TV in the bedroom and in the living room for example, you can create two Television auto content cells to choose which TV you are sending commands to.
-
Page 69: Setting Up A Radio Device
Setting up a radio device To use an EasyWave or Z-Wave radio device, you must first pair it with your Grid Pad and then configure how it behaves. In the following example we are using an EasyWave socket, however the same instructions apply for Z-Wave devices. - Page 70 In Grid 3 highlight your newly named button and select Transmit A. On your EasyWave socket, press the button three times. This will return the device to operating mode. You can tap now Transmit A to toggle the switch on and Transmit B to switch it off. Adding the paired socket to an accessory Once your socket has been paired, you can assign it to an accessory and use it in the Servus Environment Control grid sets.
- Page 71 Under actions, select On and choose the name of your button from the drop-down menu (Desk fan A for example). Next select the Off action and assign this to the name of your button followed by the letter B. Tap OK to save your settings and return to the Environment control window.
-
Page 72: Connecting A Smartphone To Your Grid Pad
On Desktop You can install the Remote Phone desktop app from the Support folder on your Grid Pad. Open the Start menu and select Support Documents. Run the CallCentre.exe installer. Once complete, the software will open and will be ready to pair with your phone. - Page 73 Setting up Grid 3 Make sure CallCenter is running on your Grid Pad. In Grid 3 open Settings – Phone. At this point Grid 3 will request access to CallCenter. Tick the ‘remember answer’ box in the pop-up window and tap Grant.
- Page 74 In this section Introducing Grid 3 Adding grid sets Useful commands to control your Grid Pad from Grid 3 Grid 3 accounts...
-
Page 75: Grid 3
Grid 3... -
Page 76: Introducing Grid
Introducing Grid 3 Grid 3 is installed and ready to use on your Grid Pad. This complete AAC software package is designed to help you communicate and connect with the world around you. Everything in Grid 3 can be tailored to suit you and how you want to access your Grid Pad. -
Page 77: Adding Grid Sets
Adding grid sets To add a grid set to your Grid Explorer (the home screen of Grid 3), tap the menu and select Add grid set. Explore the different categories to choose your grid sets. Each grid set has a description to help you find the right one for your needs. - Page 78 Online Grids Online Grids service enables you to share grid sets and download them to your Grid Pad. Selecting Online Grids from the Add Grid set window you can search and browse shared grids from Smartbox and other users. Editing grid sets Grid 3 comes with a complete set of tools designed to make editing and creating grids simple.
- Page 79 For more information on editing grid sets, see the Grid 3 training materials supplied with your Grid Pad.
-
Page 80: Useful Commands To Control Your Grid Pad From Grid
Grid Pad from Grid 3 These commands can be added to cells in your grid sets to control various functions of your Grid Pad directly from Grid 3. Turn off computer Shuts down the Grid Pad including all open... -
Page 81: Grid 3 Accounts
Connecting to Dropbox lets remote editors connect to Grid 3 to modify your grid sets from other devices. Remote editors From the accounts window you can also list other Smartbox accounts that can remotely edit the grid sets on your device. - Page 82 In this section Software updates Getting the most out of your battery Cleaning and storing your Grid Pad...
-
Page 83: Looking After Your Grid Pad
Looking after your Grid... -
Page 84: Software Updates
You will find the Smartbox update software in your Start menu by default. Open the program and click Next to begin an automated internet update for all Smartbox software installed on your device. Your Grid Pad will need to be connected to the internet to check for any updates. Windows updates Windows update settings are found under Settings –... - Page 85 Note that this does not stop Microsoft delivering security updates. Microsoft will roll out larger Windows updates roughly once a year. At Smartbox we will test these internally before we advise when the update is ready for Grid Pad.
-
Page 86: Getting The Most Out Of Your Battery
Sleep screen You may wish to take some time away from your device, or turn off the screen to watch TV for example. Sleep screen enables you to turn the Grid Pad screen off when you choose, and wake it up... - Page 87 Use the Set brightness commands in Grid 3 to increase or decrease the brightness of the screen. If you are looking to conserve battery, having the brightness set to low can help. Smartbox recommends the brightness of the screen be set to 70%.
-
Page 88: Cleaning And Storing Your Grid Pad
Grid Pad, or immerse the device in water. Storing your Grid Pad When not in use, your Grid Pad should be stored safely. Do not rest or press hard objects against the screen. Disconnect any devices plugged into the ports of the Grid Pad, including USB ports, switch ports and the power lead. - Page 90 In this section Smartbox support Grid Pad specification Safety notices Statement of compliance Battery warnings...
-
Page 91: Appendices
Appendices... -
Page 92: Smartbox Support
Smartbox support Online support The Smartbox team is here to help you make the most of your Grid Pad and Grid 3. You can raise a support ticket over email, use our online chat box or search our knowledge base of support articles. - Page 93 You can reach our UK support team between 9am – 5:30pm (5pm Friday) by phone: +44 (0) 1684 578868 If your Grid Pad was supplied outside of the UK, please contact your local Smartbox Partner. You can find our list of international partners at: thinksmartbox.com/where-to-buy...
-
Page 94: Grid Pad Specification
2 x 3.5mm switch ports 3.5mm Headphone / microphone combo port 1 x USB 2.0 port 1 x USB 3.0 port Eye Gaze Optional Grid Pad Eye Gaze Camera (sold separately) Environment control GEWA Infrared EasyWave or Z-Wave radio Mounting... - Page 95 Connectivity Dual band wireless AC 8265 Bluetooth 4.2 LE Other information Front camera: Rear camera: Battery life: 15 hours Battery life with eye gaze: 10 hours Charge time: 8 hours Dimensions: 335 x 223 x 45mm Weight: 2.7Kg...
-
Page 96: Safety Notices
Safety notices Your Grid Pad is not to be used as a life supporting device in case of loss of function due to power loss or technical issues. IP rating The front screen of your Grid Pad is rated IP54.8 Drop test Grid Pads have been drop tested to a distance of one metre. - Page 97 Only charge your Grid Pad with the supplied power lead. Using unofficial power supplies may cause severe damage to your Grid Pad and cause fire. If your Grid Pad’s power lead is lost or damaged, contact your supplier. Your Grid Pad is not a user serviceable device. Beyond the...
- Page 98 Temperature If used in hot temperatures or direct sunlight, your Grid Pad may reach temperatures that can trigger an automatic shut down. This is a safety feature to prevent lasting damage to the device. If this occurs, please wait until your device has cooled before restarting.
- Page 99 Emergencies Your Grid Pad should not be your only way of making an emergency call or raising an alarm. Safety If damaged, small parts may detach from your Grid Pad. These can present a choking hazard. Young children should be supervised when using the device.
- Page 100 Your Grid Pad is covered under the standard 2-year warranty from the time of purchase. Repairs Your Grid Pad is not a user serviceable device. If your device requires a repair, please contact your local Smartbox dealer. For more information visit thinksmartbox.com.
-
Page 101: Statement Of Compliance
2004/108/EC (EMC) – Electromagnetic Compatibility Directive 2006/95/EC (LVD) – Low Voltage Directive Grid Pad complies to 2011/65/EU (RoHS 2) – Restriction of hazardous substances Directives WEEE FCC Statement Grid Pad complies with Part 15 of the FCC’s Rules for transmission regulations. -
Page 102: Battery Warnings
Do not use any other battery with the equipment unless approved by Smartbox. Battery usage by children should be supervised. Keep the battery clean and dry. - Page 103 After extended periods of storage, it may be necessary to charge and discharge the battery several times to obtain maximum performance. Retain the original product literature for future reference. Only use the battery in the application for which it was intended. When possible, remove the battery from the equipment when not in use.
- Page 104 thinksmartbox.com GP12-MAN-A...
Need help?
Do you have a question about the Grid Pad and is the answer not in the manual?
Questions and answers