
Related Manuals for PIONEER DJ TORAIZ SP-16


Summary of Contents for PIONEER DJ TORAIZ SP-16
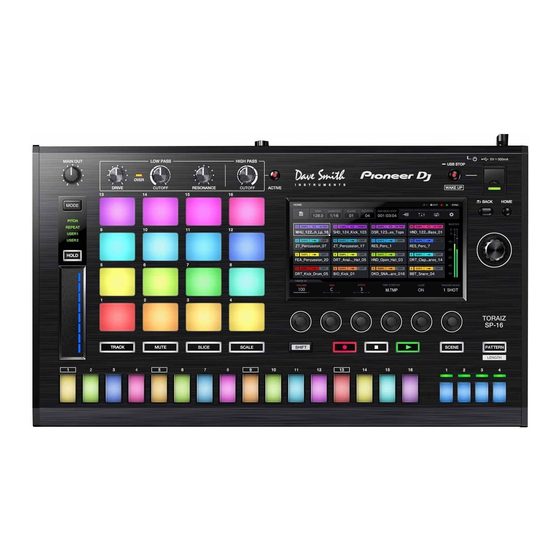
- Page 1 Professional Sampler TORAIZ SP-16 TSP-16 Firmware Version.1.5 Operating Instructions Addendum...
-
Page 2: Table Of Contents
Contents Before Start ..................... 7 Check Your Firmware Version ................. 8 Firmware Ver.1.5 ..................... 9 LIVE SAMPLING ............................9 1.1. Open the LIVE SAMPLING screen ....................9 1.2. Start sampling ............................9 1.3. Adjusting the playback start position of a sample ................10 1.4. - Page 3 Scale Setting (SET SCALE) ........................21 1.1. Opening the SET SCALE screen ....................23 1.2. Selection of scale ..........................23 1.3. Area settings ........................... 24 1.4. Changing ROOT NOTE (for MIDI tracks/TORAIZ AS-1 tracks) ............. 24 1.5. Changing KEY SHIFT (for SAMPLE tracks) ................... 24 1.6.
- Page 4 Others ..............................40 Selection of LFO parameters ......................40 Parameters assignable to Touch Strip ................... 43 Zoom in/out of the enlarged waveforms ..................44 Programing triggers when performing in SLICE mode ..............44 FIRMWARE Ver.1.2 ..................45 MIDI IN ..............................45 1.1.
- Page 5 5.1. Selection of target parameters ....................... 62 5.2. Selection of LFO shape ........................63 5.3. Detailed setting of LFO behavior ....................63 5.4. LFO parameter settings ........................63 NEW MASTER/SEND FX ........................65 6.1. COMPRESSOR (MASTER/SEND) ....................66 Audio Rendering (RENDER AUDIO) ..................... 67 7.1.
- Page 6 UNLOAD ............................80 Sequence Edit Feature........................... 81 Removing triggers ........................... 81 Quantizing Triggers ........................81 PITCH mode range setting for the TOUCH STRIP ................82 List of Corrections for Operating Instructions ..........83 Appendix 1. MIDI implementation Chart ............85 NOTE ................................
-
Page 7: Before Start
Before Start The Operating Instructions for the TORAIZ SP-16 was written based on firmware version 1.0. This document describes added features when firmware version 1.1, 1.2, 1.3, 1.4 and 1.5 were released and the list of corrections for the Operating Instructions. -
Page 8: Check Your Firmware Version
・ Programing triggers when performing in SLICE mode Here is a list of additions for firmware version 1.2: ・ MIDI IN ・ MIDI OUT ・ SET SLICE ・ LFO ・ INSERT EFFECT (1 expanded feature and 4 new features) ・ MASTER /SEND EFFECT (toggle feature, new types of FX have been added) ・... -
Page 9: Firmware Ver.1.5
Firmware Ver.1.5 1. LIVE SAMPLING You can immediately start sampling of the sound coming from the [INPUT] terminals for your performances. Open the LIVE SAMPLING screen 1.1. Press [SHIFT] + [TRACK] to open the LIVE SAMPLING screen. Adjust the level of sound using the [INPUT LEVEL] control before sampling. Turn on the INPUT MONITOR to output the sound to the headphones. -
Page 10: Adjusting The Playback Start Position Of A Sample
If a sample is already loaded in the performance pad for which you wish sampling, unload the sample as described below. Tap the track you want to unload the sample. Multiple tracks can be selected by tapping tracks while pressing the [SHIFT] button. Tap UNLOAD to start unloading. -
Page 11: Close The Live Sampling Screen
2 Tap SAVE to start saving. The [SAVING...] message is shown during saving. When the saving completes, the sample name shown in red turns white. The samples are saved under PIONEER DJ SAMPLER/Samples/Saved/[Project name]. Some functions are restricted during sampling. -
Page 12: Audio Input Bpm
2. AUDIO INPUT BPM AUDIO INPUT BPM The BPM of the sound from the [INPUT] terminals is automatically analyzed and displayed. The measurement range of the BPM: 70 ~ 180. For some tracks, correct measurement may not be possible. When the BPM cannot be detected, the previously detected BPM value is displayed and flashes. -
Page 13: Firmware Ver.1.4
Firmware Ver.1.4 1. Copying and deleting sequences Sequence display area Turn the rotary selector to select a sequence. You can switch between the horizontal and vertical direction by pressing the rotary selector. BAR LENGTH Selects 1 bar or 4 bars of the sequence to copy or delete. TRACK No. -
Page 14: Opening The Sequence Edit Screen
PASTE Pastes the copied sequence to the selected location. This cannot be pressed if nothing is copied. In that case, the [PASTE] button is grayed out. PATTERN No. Selects the pattern. COPY Copies the selected sequence. The sequence that is copied has an indicator (dotted-line frame) to indicate that it is copied. SCENE No. -
Page 15: Copying And Deleting Tracks
2. Copying and deleting tracks Scene display area Turn the rotary selector to select a scene. Press the rotary selector to move the focus to the track display area. You can tap the touch key on the touch display to select a scene. The indicator at the top of the touch key is lit in white for the selected scene. -
Page 16: Opening The Track Edit Screen
PASTE Pastes the copied track to the selected location. This cannot be pressed if nothing is copied. In that case, [PASTE] is grayed out. Also, [PASTE] cannot be tapped when the focus is on a scene while a track is copied. In that case, [PASTE] is grayed out. DELETE Deletes the selected track. -
Page 17: Deleting Scene Files
3. Deleting scene files To delete a file with the .scn extension in the scene folder of an internal flash memory or USB memory device: 1 Open the SCENE MANAGER screen and tap [PATTERN]. 2 Select a scene and tap [FILE]. A pop-up window appears. -
Page 18: Swapping Tracks
4. Swapping tracks 1 On the track setting screen, turn the rotary selector to select a track you wish to swap and then press it. [SWAP FROM] appears. 2 Turn the rotary selector to move [SWAP TO] to the track of the swap destination and then press it. The tracks are swapped. -
Page 19: Others
5. Others Zoom in/out of the enlarged waveforms The function to zoom in/out the waveform in the PLAYBACK screen and the SAMPLING/EDIT screen has been improved. In addition to [S] (START) and [E] (END) buttons, [L] (LOOP START) button will be at the center of the screen when zooming in/out the enlarged waveform. -
Page 20: Folder Structure
5.7 Folder structure For the shared use of projects, samples and scene files among TORAIZ SP-16, DJS-1000 and DJS TSP Project Creator, the names of folders to store projects, samples and scene files have been changed as follows. Project: /PIONEER DJ SAMPLER/Projects/... -
Page 21: Firmware Ver.1.3
FIRMWARE Ver.1.3 1. Scale Setting (SET SCALE) Detailed settings for SCALE mode have been added. For SAMPLE tracks... - Page 22 For MIDI tracks/TORAIZ AS-1 tracks SCALE button You can set a scale. Pad area Area assigned to the performance pads is displayed. Root key Root key is displayed with a dog-ear icon. Selected key The key you last selected by pressing a pad lights in white. Press a 16-step key to program a trigger with pitch variation of the selected key.
-
Page 23: Opening The Set Scale Screen
KEY SHIFT (for sample tracks) / ROOT NOTE (for MIDI tracks/TORAIZ AS-1 tracks) You can adjust the key of the scale (keynote). 1.1. Opening the SET SCALE screen For SAMPLE tracks, tap the [SET SCALE] button in the PLAYBACK screen to move to the SET SCALE screen. -
Page 24: Area Settings
1.3. Area settings Turn the parameter 1 adjustment knob to set the area assigned to the performance pads. You can check the area at the Pad Area. 1.4. Changing ROOT NOTE (for MIDI tracks/TORAIZ AS-1 tracks) Turn the parameter 3 adjustment knob to change the ROOT NOTE. The new keynote is displayed above the parameter 3 adjustment knob. -
Page 25: Export/Import Of Scene Files(Scene Manager
2. Export/Import of scene files(SCENE MANAGER) You can export your created patterns as a SCENE file and use it in other projects. You can also set the BPM when the scene is played individually. SCENE name The name of a scene file is displayed. SCENE BPM button You can set BPM of a scene. -
Page 26: Import Of Scene Files
The files are saved in the Scenes folder located under PIONEER DJ SAMPLER/Scenes/… . 2.2. Import of scene files You can import .scn files in the Scenes folder in the TSP-16 or a USB flash device. Tap the scene you wish to import on the SCENE MANAGER screen. When you tap the [FILE] button, a pop- up window appears. - Page 27 Tap the [SCENE BPM] button on the SCENE MANAGER screen. SCENE BPM setting Turn the rotary selector to change scene BPM. CLEAR button Tap the button to reset the scene BPM. The display changes to “---“. When a pattern of this scene is played, its BPM is the BPM you set on the BPM/QUANTIZE screen.
-
Page 28: Analog Filter Setting (Mixer)
3. ANALOG FILTER SETTING (MIXER) You can insert the analog filter to a track. You can use it only once: Pre FX, Post FX or master output. When rendering, you cannot apply analog filter effect. 3.1. Settings Tap the [ANALOG FILTER SETTING] button at the MIXER screen. Turn the rotary selector to select an INSERT TRACK and push it. -
Page 29: New Fx
4. New FX (FX1, MASTER/SEND FX) Three new effects have been added: PHASER and DUCKER for INSERT FX and PHASER for MASTER/SEND FX. 4.1. PHASER RATE You can set LFO rate depending on the SYNC status. SYNC OFF: The range is from 0.01 Hz to 10 Hz. SYNC ON: The range is from 1/16BEAT to 64/1BEAT. -
Page 30: Ducker
You can change feedback value. The range is from 0 % to 99 %. MIX RATIO You can change mix ratio of the original sound and sound with effects. The range is from 0 % to 99 %. 4.2. DUCKER Selection of trigger source You can select trigger source from Track 1 through Track 16. - Page 31 SYNC OFF: You can set the time from when the volume is down to when the volume returns to maximum. The range is from 0. 1 ms to 2000 ms. SYNC ON: You can set the number of steps from when the volume is down to when the volume returns to maximum.
-
Page 32: Bypass(Track Menu
5. BYPASS(TRACK MENU) 5.1. BYPASS settings BYPASS behavior has been changed in Ver.1.3. Tap the BYPASS button to start BYPASS setting mode. You can individually bypass modules in TRACK MENU. ・ TRACK MENU screen for SAMPLE tracks ・ TRACK MENU screen for THRU tracks... - Page 33 ・ TRACK MENU screen for MIDI tracks/TORAIZ AS-1 tracks BYPASS button The behavior of this button has been changed when it is turned ON/OFF. ON: You can select whether bypassing modules described below (2 ~ 6) or not. OFF: When you tap one of the buttons described below (2 ~ 6), the screen will switch to the setting screen of the module.
- Page 34 SAMPLE tracks AMP ENVELOPE MIDI tracks/AS-1 tracks THRU tracks When the thumbnail icon on the button is not displayed, the process is bypassed. Tap to toggle to bypass or not.
-
Page 35: Bank Select / Program Change (Track Menu)
6. BANK SELECT / PROGRAM CHANGE (TRACK MENU) When using MIDI tracks (or TORAIZ AS-1 tracks), you can send messages for bank selection and program change. Connect to DIN MIDI terminal Connect the MIDI IN terminal of an external MIDI device with the MIDI OUT/THRU terminal of this unit using a MIDI cable. -
Page 36: Sending Program Change
If you wish to change MSB, tap MSB area. To change LSB, tap LSB area. Turn the rotary selector to select the value you wish. Tap the [OK] button to finalize the value and the popup screen will close. The value you set is displayed at the [BANK SELECT] button. 6.2. -
Page 37: Track Attribute When Using With Toraiz As-1
7. Track Attribute when using with TORAIZ AS-1 Dedicated track attribute for TORAIZ AS-1 has been added. It is useful when using the analog synthesizer TORAIZ AS-1 connected via MIDI OUT. 1. Connect the MIDI IN terminal of a TORAIZ AS-1 with the MIDI OUT/THRU terminal of this unit using a MIDI cable. -
Page 38: Preset Switch
PROG CHANGE button You can change Program Change value to send. 7.1. Preset switch You can select AS-1 program using Bank Select and Program Change. Tap the [BANK SELECT] button. Turn the rotary selector to select a Bank with Preset you wish to call and push it to fix the Bank. - Page 39 ・You cannot change PARAMETER1 (Pitch Bend) and PARAMETER2 (After Touch) in the CC1 setting screen. ACTIVE button You can toggle ACTIVE of PARAMETER 1 through PARAMETER 6 on and off. CC value You can set CC value from PARAMETER 1 to PARAMETER 6.
-
Page 40: Others
8. Others 8.1 Selection of LFO parameters Parameters for DUCKER and PHASER in FX1 category and those for MIXER category have been added... - Page 41 Category Parameter DISTORTION DYNAMICS PLAYBACK PITCH DISTORTION TONE START DISTORTION MIX RATIO LOOP START DUCKER ATTACK LENGTH DUCKER CURVE (ATTACK) VELOCITY DUCKER RELEASE ENVELOPE ATTACK DUCKER CURVE (RELEASE) HOLD DUCKER DEPTH RELEASE FLANGER RATE 2 BAND EQ B1 Q FLANGER WIDTH 2 BAND EQ B1 FREQUENCY FLANGER PHASE 2 BAND EQ B1 GAIN...
- Page 42 MIDI NOTE VELOCITY PARAMETER 2 LENGTH PARAMETER 3 MIDI CC1 PARAMETER 1 PITCH BEND PARAMETER 4 PARAMETER 2 AFTER TOUCH PARAMETER 5 PARAMETER 3 PARAMETER 6 PARAMETER 4 MIXER VOLUME PARAMETER 5 PARAMETER 6 SEND AMOUNT MIDI CC2 PARAMETER 1...
-
Page 43: Parameters Assignable To Touch Strip
8.2 Parameters assignable to Touch Strip DUCKER parameters for FX1 category and PHASER parameters for MIXER category have been added as assignable parameters. PLAYBACK AMP ENVELOPE PITCH VELOCITY 2BAND EQ B1 Q DUCKER ATTACK ATTACK 2BAND EQ B1 FREQUENCY DUCKER RELEASE HOLD 2BAND EQ B1 GAIN"... -
Page 44: Zoom In/Out Of The Enlarged Waveforms
MIDI NOTE MIDI CC1 MIDI CC2 MIXER SEQUENCE VELOCITY PARAMETER1 PARAMETER1 VOLUME SPEED RETRIGGER PITCH BEND LENGTH PARAMETER2 PARAMETER2 DEPTH RETRIGGER AFTER TOUCH PARAMETER3 PARAMETER3 SEND AMOUNT PARAMETER4 PARAMETER4 PARAMETER5 PARAMETER5 PARAMETER6 PARAMETER6 8.3 Zoom in/out of the enlarged waveforms The function to zoom in/out the waveform in the PLAYBACK screen and the SAMPLING/EDIT screen has been improved. -
Page 45: Firmware Ver.1.2
FIRMWARE Ver.1.2 MIDI IN A new feature MIDI IN has been added: MIDI messages can be received from an external MIDI device. You can use sound sources and manipulate various parameters on this unit through the use of external MIDI hardware including sequences. -
Page 46: Midi Channel Settings (Midi In)
ENABLE : Playback position will be determined by song position pointer (SPP) from an external MIDI device. DISABLE : TSP-16 will not receive SPP messages from an external MIDI device. 1.2. MIDI channel settings (MIDI IN) Open [UTILITY] -> [PROJECT SETTING (MIDI IN)] category] to set MIDI channel (MIDI IN). Item Values CHANNEL MAPPING... -
Page 47: Midi Out
MIDI OUT A new feature MIDI OUT has been added: MIDI messages can be transmitted to an external MIDI device. You can control the external device using its sound sources by playing this unit or using MIDI sequences on this unit. -
Page 48: Midi Out Channel Settings
ENABLE : NOTE/CC (including Pitch Bend) will be transmitted to an external MIDI device. DISABLE : NOTE/CC (including Pitch Bend) will not be transmitted to an external MIDI device. Item Values SONG POSITION ENABLE/DISABLE ENABLE : Song position pointer (SPP) will be transmitted to an external MIDI device. DISABLE : Song position pointer (SPP) will NOT be transmitted to an external MIDI device. -
Page 49: Midi Note Settings (Midi Note, Sequence)
2.3. MIDI NOTE settings (MIDI NOTE, SEQUENCE) You can set a MIDI NOTE to output when pressing pads of a MIDI track or triggered by a sequence. Up to 4 MIDI NOTES can be triggered by setting harmony in addition to a base NOTE. In the same manner as a SAMPLE TRACK, you can input MIDI NOTE Triggers to the step sequencer or you can enjoy dynamic recording of your performance using the pads. - Page 50 Using TRANSPOSE feature (HOME > TRACK MENU > SEQUENCE >TRANSPOSE), you can shift the entire NOTE outputted from a MIDI track in semitones. Turn the parameter 6 adjustment knob to change TRANSPOSE value on the SEQUENCE screen. TRANSPOSE You can change the TRANSPOSE value from -24 to +24.
-
Page 51: Midi Cc Settings (Midi Cc1/Cc2)
2.4. MIDI CC settings (MIDI CC1/CC2) You can set MIDI control change (CC) sent when pressing pads of a MIDI track or triggered by a sequence. CC number select button You can set CC number from PARAMETER 1 to PARAMETER 6. ・... -
Page 52: Slice (Set Slice)
SLICE (SET SLICE) In this version, precise setting is available when you play in the SLICE mode: ・ Adding and deleting slices ・ Equally slice a sample into set number of slices. ・ Individually set the start and end of each slice. ・... -
Page 53: Opening The Set Slice Screen
POSITION You can move the position of slice points. START You can set the starting point of the slice you selected. You can set the ending point of the slice you selected. AREA You can set the area of the slices assigned to the performance pads. 3.1. -
Page 54: Assignment Of Slices To Performance Pads
Turn the parameter 4 adjustment knob to adjust an ending point. You cannot adjust it in the last slice. 3.7. Assignment of slices to performance pads Turn the parameter 5 adjustment knob to set the range of the slice assigned to the performance pads. The colors of the slices reflect those of correspondent performance pads. -
Page 55: New Insert Fx (Fx1)
New Insert FX (FX1) Four new effects have been added: DELAY, LO-FI, COMPRESSOR and DISTORTION for INSERT FX. MULTI MODE FILTER has been improved. -
Page 56: Multi Mode Filter
4.1. MULTI MODE FILTER TYPE button You can select a filter type from HPF, LPF and BPF. SLOPE button You can select cutoff characteristics of a filter. You can select 12 dB/Oct or 24 dB/Oct. CUT OFF You can change cutoff frequency of a filter from 20 Hz to 20000 Hz. GAIN You can change GAIN of a filter from -30 dB to 15 dB. -
Page 57: Delay (Insert)
4.2. DELAY (INSERT) TIME You can change delay time. SYNC OFF: 10 ms ~ 1000 ms SYNC ON: 1/8 BEAT ~ 2/1 BEAT FEEDBACK You can change delay feedback (0 % ~ 100 %). HI CUT You can change Feedback Hi-Cut. (0 to 100). MIX RATIO You can change mix ratio of the original sound and effect sound (0 % to 100 %). -
Page 58: Lo-Fi
4.3. LO-FI FILTER TYPE button You can select a filter type from HPF, LPF, BPF and OFF. PRE/POST button You can choose where to apply effect you selected at [FILTER TYPE]: before or after REDUCTION and BIT DEPTH. PREAMP You can change audio volume before REDUCTION and BIT DEPTH (0 dB ~ 42 dB). REDUCTION You can change sampling frequency when resampling (44 Hz ~ 44100 Hz). -
Page 59: Compressor (Insert)
4.4. COMPRESSOR (INSERT) RATIO You can change RATIO (1:1 ~ 30:1). ATTACK You can change ATTACK (0.05 ms ~ 1000 ms). RELEASE You can change RELEASE (10 ms ~ 4000 ms). THRESHOLD You can change THRESHOLD (-52 dB ~ 0 dB). GAIN You can change OUTPUT GAIN (0 dB ~ 50 dB). -
Page 60: Distortion
4.5. DISTORTION DRIVE You can change the DRIVE (distortion amount) from 3 dB to 40dB. LO FREQ You can change cut off frequency of the high pass filter (20 Hz ~ 20000 Hz). HI FREQ You can change cut off frequency of the low pass filter (20 Hz ~ 20000 Hz). DYNAMICS You can change DYNAMICS (volume of distorted sound) from 0 % to 100 %. -
Page 61: Lfo Settings (Lfo)
LFO settings (LFO) LFO (Low Frequency Oscillator: LFO) has been added for track modulation for various parameters. DESTINATION button You can choose the parameter used for LFO modulation. SHAPE button You can choose an LFO shape. SETTING button You can set LFO behavior in detail. SYNC button You can set ON/OFF to sync SPEED parameter of each STEP. -
Page 62: Selection Of Target Parameters
5.1. Selection of target parameters Tap the [DESTINATION] button to select parameters for LFO modulation. You can select 1 parameter per track. Category Parameter DISTORTION TONE PLAYBACK PITCH DISTORTION MIX RATIO START FLANGER RATE LOOP START FLANGER WIDTH LENGTH FLANGER PHASE VELOCITY FLANGER DELAY ENVELOPE... -
Page 63: Selection Of Lfo Shape
5.2. Selection of LFO shape Tap the [SHAPE] button to select an LFO shape from the following 7 types: SINE, TRIANGLE, SAW, SQUARE, PULSE 25, PULSE 12 and RANDOM. The selected waveform will be shown on the LFO waveform display unit. When you select [RANDOM], a new RANDOM shape will be created each time you switch shapes. - Page 64 Turn the parameter 1 adjustment knob to set LFO cycle. The setting range will be changed as follows depending on the [SYNC] button status. [SYNC] button OFF : 0 ~ 127 [SYNC] button ON : 1/2, 1, 2, 3, 4, 8, 12, 16, 32, 48, 64, 128 (unit: STEP) DEPTH Turn the parameter 2 adjustment knob to set amount of LFO to be applied to the parameter selected at the DESTINATION button.
-
Page 65: New Master/Send Fx
NEW MASTER/SEND FX In addition to SEND FX, MASTER FX has been added. In MASTER/SEND FX, one FX can be used either as a MASTER FX or a SEND FX. Now, all INSERT FX can also be used either as MASTER FX or SEND FX. -
Page 66: Compressor (Master/Send)
6.1. COMPRESSOR (MASTER/SEND) The LOOK AHEAD setting can be used when using a COMPRESSOR as a MASTER/SEND FX. MASTER/SEND selection button You can select MASTER or SEND for FX. LOOK AHEAD button Select ON/OFF for LOOK AHEAD. When it is ON, A look-ahead buffer is added to analyze the waveform beforehand, enabling compression for sharp, powerful transient. -
Page 67: Audio Rendering (Render Audio)
Audio Rendering (RENDER AUDIO) RENDER AUDIO feature has been added to render PROJECTs into .WAV (44.1 kHz, 24 bit) as separate tracks/groups/mix. Tap the [PROJECT] button at HOME screen and select [RENDER AUDIO] in the PROJECT menu. Sequences or audio output from this unit will stop during audio rendering. RENDERED TARGET button You can select tracks/mix for rendering. -
Page 68: Selection Of Reverberation Process
EXTERNAL MEM : The files are saved in an external USB flash device of this unit. (If an USB flash device is not inserted into this unit, it is not displayed.) ・ Destination of WAV files: When RENDER MODE is PATTERN : /PIONEER DJ SAMPLER/RenderedAudio/[project name]/Pattern/….. When it is ARRANGEMENT : /PIONEER DJ SAMPLER/RenderedAudio/[project name]/Arrangement/…. ・ File name: When RENDER MODE is PATTERN : [Scene No.][Pattern No.]_[Rendering name].wav... - Page 69 When audio rendering failed due to lack of memory capacity or exceeded file size limit, another popup screen will open to let you know that file saving failed. ・ You cannot access audio files after rendering from the sample browse screen of this unit. Save them in your computer for edit and mastering.
-
Page 70: Arrangement (Arranger)
Arrangement (ARRANGER) More detailed information has been added to the arrangement display area in the ARRANGER screen. The added items are POSITION and LENGTH. The arrangement display area Various information for arrangement is shown in the area. : Arrangement row number is indicated. POSITION : Arrangement position from the beginning (BAR.STEP) is indicated. -
Page 71: Others
Others PAD / BUTTON BRIGHTNESS setting has been added to the UTILITY screen as a dimmer for LED pads and buttons for the performance pads and step sequencer. PRO DJ LINK and MIDI CLOCK can be used at the same time to sync DJ equipment and connected external MIDI device using MIDI OUT. -
Page 72: Firmware Ver.1.1
1. PRO DJ LINK (BPM/QUANTIZE, UTILITY) You can SYNC the TORAIZ SP-16 to PRO DJ LINK compatible DJ players. By connecting the unit to a CDJ/XDJ with a LAN cable, you will be able to playback sequences in synchronization with tempo, beat and bar. -
Page 73: Synchronizing Sequences Using Pro Dj Link
1.1 Synchronizing Sequences using PRO DJ LINK 1. Setting the UTILITY Change the settings as below in the UTILITY screen. SYNC : PRO DJ LINK SYNC TYPE : You can choose from, BPM SYNC, BEAT SYNC and BAR SYNC. 2. Select the MASTER Player Tap [BPM/QUANTIZE] and open the BPM/QUANTIZE popup. -
Page 74: Project Related Features
PACKAGE, making it easier to exchange projects between other TORAIZ SP-16 users. You can also copy the current SCENE to an open SCENE slot in a different project. -
Page 75: Copying Current Scene To Other Projects
If you save an imported package as a project, the samples included in the package will be copied to PIONEER DJ SAMPLER /Samples/[Imported]/[Project Name]/ 2.2 Copying Current SCENE to Other Projects 1. Make sure you are currently selecting the SCENE you wish to copy. - Page 76 3. Select the PROJECT you wish to copy the current SCENE to. The Current SCENE will be copied to the selected PROJECT and popup will appear telling you that the SCENE was copied successfully. The SCENE will be copied to the youngest numbered SCENE slot. ...
-
Page 77: New Insert Fx
3 New Insert FX 2 BAND EQ and MULTI MODE FILTER has been added to insert FX. 3.1 2 BAND EQ BAND TYPE Button You can choose which filter type to use in BAND1 and BAND2. There are five filter types you can choose from. -
Page 78: Multi Mode Filter
3.2 MULTI MODE FILTER TYPE Button You can choose which filter type to use. There are three filter types you can choose from, HPF, LPF and BPF. CUT OFF You can set the cut off frequency of the filter. The cut off frequency can be set from 20 to 20000 Hz. GAIN You can set the gain value for the filter. -
Page 79: Metronome / Count-In Feature
4 Metronome / Count-in Feature A Metronome and count-in feature has been added. METRONOME Button Toggles METRONOME on and off. 4.1 METRONOME Setting Tap the [METRONOME] button and turn the metronome on. When the metronome is turned on, the indicator on the button will light up in white. -
Page 80: Browse Related Function
5 BROWSE Related Function A PREVIEW setting popup and UNLOAD function has been added to the BROWSE screen. SETTING Button A popup will appear for the setting of PREVIEW options. UNLOAD Button Tap to unload a sample from the TRACK you have assigned it to. 5.1 PREVIEW Setting Tap the [SETTING] button and open the SETTING popup. -
Page 81: Sequence Edit Feature
6 Sequence Edit Feature A CLEAR TRIGGER function and QUANTIZE function for the current TRACK has been added to the SEQUENCE screen. CLEAR TRIGGERS Button You can remove all the triggers from the current PATTERN sequenced in the step sequencer. QUANTIZE Button You can quantize all the triggers in the current PATTERN sequenced in the step sequencer to 16th notes. -
Page 82: Pitch Mode Range Setting For The Touch Strip
7 PITCH mode range setting for the TOUCH STRIP PITCH mode range setting for the TOUCH STRIP can be changed in the utility menu. Item Value TOUCH STRIP SETTING 2 Bipolar Semitones, 4 Bipolar Semitones, 12 Bipolar Semitones (PITCH RANGE) ... -
Page 83: List Of Corrections For Operating Instructions
32 seconds are exceeded after the start of are exceeded after the start of recording. recording. REC LENGTH OFF / 1 to 4 (BAR level) OFF / 1 to 8 (BAR level) PIONEER DJ SAMPLER/ SAVE SELECTION TORAIZ/Samples/ Samples/Saved/[Project name]/... - Page 84 When a USB device is inserted When a USB device is inserted sound sources into this unit, the [TORAIZ] folder is into this unit, the [PIONEER DJ from a USB device created automatically. Only sound SAMPLER] folder is created sources placed in the [Samples] automatically.
-
Page 85: Appendix 1. Midi Implementation Chart
Appendix 1. MIDI implementation Chart A list of the functions the TSP-16 can recognize by the MIDI messages from an external device. NOTE Trigger sample in each track. Samples can be triggered at any MIDI channel. Function NOTE No. Remarks TRACK1 Trigger TRACK2 Trigger TRACK3 Trigger... - Page 86 Sample Trigger (PITCH: -14) In case of M.TMP, PITCH: -12 Sample Trigger (PITCH: -13) In case of M.TMP, PITCH: -12 Sample Trigger (PITCH: -12) Sample Trigger (PITCH: -11) Sample Trigger (PITCH: -10) Sample Trigger (PITCH: -9) Sample Trigger (PITCH: -8) Sample Trigger (PITCH: -7) Sample Trigger (PITCH: -6) Sample Trigger (PITCH: -5)
-
Page 87: Cc (Control Change)
Sample Trigger (PITCH: +23) In case of M.TMP, PITCH: +12 Sample Trigger (PITCH: +24) In case of M.TMP, PITCH: +12 CC (Control Change) Receives MIDI CC from an external device to control this unit. Item CC No. Remarks [TRACK] VOLUME TIME STRETCH LOOP TRIGGER MODE... -
Page 88: Pitch Bend
Function CC No. Remarks CC value ≧ 16, SCENE 16 Select SCENE CC value ≧ 16, PATTERN 16 Select PATTERN Pitch Bend Pitch bend is available for a sample of a track corresponding to the MIDI channel set at [CHANNNEL MAPPING] at the UTILITY. -
Page 89: Appendix 2. List Of Features Using Shift Key
During playback: reserves jump of the playback position to the selected line. (The jump will be executed when the playback of the current line ended.) [SHIFT] + [REC] After dynamic recording Undo the recording © 2017 Pioneer DJ Corporation. All rights reserved.
Need help?
Do you have a question about the TORAIZ SP-16 and is the answer not in the manual?
Questions and answers