Table of Contents
Advertisement
Quick Links
Installation Instructions
9500/9600 Series Electric Strike
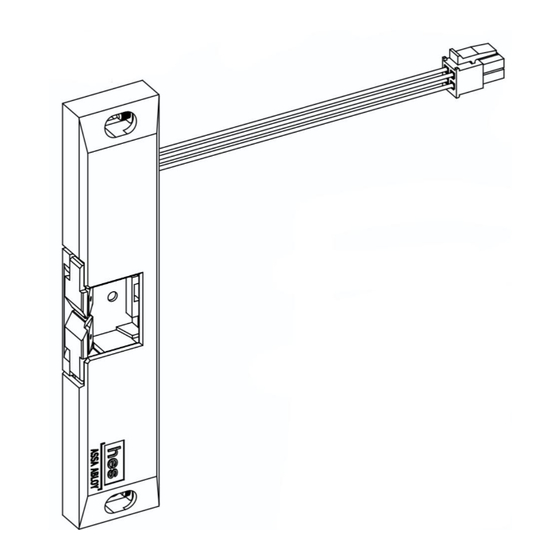
Product Components
9500/9600 Electric Strike Body
1
1/4"-20 x 1" Mounting Screws
2
1
Diagram 1: Electrical Specifications
ELECTRICAL RATINGS FOR SOLENOID
CONTINUOUS DUTY
Resistance in Ohms
Amps
Solenoid voltage is rated at +/- 10% indicated value.
ASSA ABLOY, the global leader
in door opening solutions
24VDC
12VDC
26.6
106.6
.225
.45
#10-32 Final Lockdown Screw
3
12 & 24 Volt Pigtails
4
2
3
4
MINIMUM WIRE GAUGE REQUIREMENTS
200 feet or less
200 - 300 feet
300 - 400 feet
HES, Inc.
22630 N. 17th Ave.
Phoenix, AZ 85027
800-626-7590
www.hesinnovations.com
SOLENOID VOLTAGE
12VDC
24VDC
14 gauge
18 gauge
12 gauge
18 gauge
14 gauge
16 gauge
1
Advertisement
Table of Contents

Related Manuals for HES 9500 Series


Summary of Contents for HES 9500 Series
- Page 1 HES, Inc. Installation Instructions 22630 N. 17th Ave. Phoenix, AZ 85027 800-626-7590 9500/9600 Series Electric Strike www.hesinnovations.com Product Components 9500/9600 Electric Strike Body #10-32 Final Lockdown Screw 1/4”-20 x 1” Mounting Screws 12 & 24 Volt Pigtails Diagram 1: Electrical Specifications...
- Page 2 Installation Directions CAUTION! Before connecting any device at the installation site, verify input voltage using a multimeter. Many power supplies and low voltage transformers operate at higher levels than listed. Any input voltage exceeding 10% of the solenoid rating may cause severe damage to the unit and will void the warranty. Prepare Strike Prepare Frame 1.
- Page 3 Fail Safe Operation position. Figure 2: FAIL SAFE OPERATION* 4. For 9500 series strikes, remove the “Listed Fire Rated Hardware” label if the strike is used in the fail safe operation. Using the 9500 in Fail Safe operation negates the fire rating.
- Page 4 SETSCREW LOCATION MOUNTING SCREWS 1. Loosen the two #1/4-20 mounting screws. 2. Adjust strike to appropriate horizontal position. 3. Tighten the two #1/4-20 mounting screws. 4. Lock down adjustment by tightening the setscrews. © 2009 HES, Inc. 3055006.002 rev A...
Need help?
Do you have a question about the 9500 Series and is the answer not in the manual?
Questions and answers