Drill Master 500X User Manual
The drill bit sharpener
Hide thumbs
Also See for 500X:
- User manual (112 pages) ,
- User manual (31 pages) ,
- User manual (94 pages)

Related Manuals for Drill Master 500X


Summary of Contents for Drill Master 500X
- Page 1 THE DRILL BIT SHARPENER USER GUIDE GET SHARP BACK TO WORK AND GET ⚠ Caution! To reduce risk of injury, the user must read and understand this instruction manual before using product. Save these instructions for future reference.
- Page 2 Drill Doctor Drill Bit Sharpener ® Class I - Consumer Product DD500X and DD750X Transportable motor-operated electric drill bit sharpener Manufactured by Darex, LLC Maker of Drill Doctor®, Work Sharp®, Work Sharp Culinary® and DAREX® Designed, constructed and certified in accordance with: IEC 61029-1: 1990 First Edition EN 61029-1:2009+A11:2010 EN ISO 12100:2010...
- Page 3 Thank you, Drill Doctor ® for purchasing a . It is sure to become a valuable tool because you will always have sharp drill bits before a project, during a project, and after a project. As president of this company, I am very proud of the quality of our products—and I am equally proud of Darex ®...
-
Page 4: Table Of Contents
Contents English ....................4 General Safety Rules ............... Drill Doctor ® Getting to Know Your ........14 Identifying Basic Drill Bits ............15 Anatomy of a Drill Bit ..............15 Drill Doctor ® Sharpening Process .......15 Choosing Your Drill Bit Point Angle on the Model DD500X ................16 Model DD750X... -
Page 5: General Safety Rules
General Safety Rules ⚠ WARNING! When using electric tools, basic safety precautions should always be followed to reduce the risk of fire, electric shock and personal injury. Read all these instructions before attempting to operate this product and save these instructions. ⚠... - Page 6 a) Power tool plugs must match the outlet. Never modify the plug in any way. Do not use any adapter plugs with earthed (grounded) power tools. Unmodified plugs and matching outlets will reduce risk of electric shock. b) Avoid body contact with earthed or grounded surfaces, such as pipes, radiators, ranges and refrigerators.
- Page 7 USA Only This tool is intended for use on a circuit that has an outlet that looks like the one illustrated in Fig. A. It has a grounding plug that looks like the one in Fig. B. A temporary adapter, which looks like the adapter illustrated in Fig.
- Page 8 e) Remove any adjusting key or wrench before turning the power tool on. A wrench or a key left attached to a rotating part of the power tool may result in personal injury. f) Do not overreach. Keep proper footing and balance at all times.
- Page 9 e) Disconnect the plug from the power source and/or the battery pack from the power tool before making any adjustments, changing accessories, or storing power tools. Such preventative safety measures reduce the risk of starting the power tool accidentally. f) Store idle power tools out of reach of children and do not allow persons unfamiliar with the power tool or these instructions to operate the power tool.
- Page 10 5. Service a) Have your tool serviced by a qualified repair person using only identical replacement parts. This will ensure that the safety of the power tool is maintained. For Service in the USA, Contact: Darex, LLC PO Box 730 Phone: (800) 418-1439 210 E Hersey St Fax: (541) 552-1377...
-
Page 11: Extension Cords
Motor Be sure your power supply agrees with the nameplate marking. 115 Volts means your tool will only operate on standard 60HZ household power. 230 Volts means your tool will only operate on standard 50 HZ household power. Do not operate AC tools on DC. - Page 12 Safety Guidelines – Definitions It is important for you to read and understand this manual. The information it contains relates to protecting YOUR SAFETY and PREVENTING PROBLEMS. The symbols below are used to help you recognize this information: ⚠ DANGER! Indicates an imminently hazardous situation which, if not avoided, will result in death or serious injury.
- Page 13 Noise and Vibration Emissions Values Manufacturer: Darex, LLC Model: DD500X/DD750X Noise Emissions: L d =L+K, where the maximum K = 3.0dB (per ISO 11201) Declared value according to ISO 4817 at operator’s position: No load Lpa = 76.9 Loaded Lpa = 89.7 Measured Value according to ISO 3744 (half-sphere): No load Lpa = 72.0 Loaded Lpa = 75.0...
-
Page 14: Getting To Know Your Drill Doctor
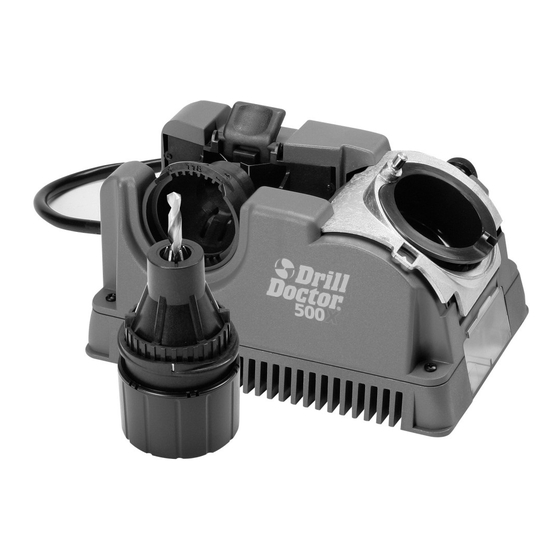
Getting to Know Your Drill Doctor ® www.drilldoctor.com You can also watch a User Video on become a sharpening expert in minutes! Drill Stop Bit Clamp Arms Power Switch and Cord Alignment Alignment Button Cam Pin Port Point Angle Adjustment Plate On 750X Sharpening... -
Page 15: Identifying Basic Drill Bits
Identifying Basic Drill Bits Drill Doctor® is most efficient when used to resharpen a drill bit’s original point angle. With its standard 180° Grit Diamond Sharpening Wheel it will sharpen high-speed steel, Drill cobalt, TiN-coated, carbide and masonry drill bits. Your Doctor®... -
Page 16: Choosing Your Drill Bit Point Angle On The Model Dd500X
Choosing Your Drill Bit Point Angle Your Drill Doctor® allows you to sharpen bits with either the standard 118° or the flatter 135° point angle. You can also adjust the chisel and relief angle. (Refer to section “Adjust Chisel and Relief Angles”.) Depending on what you are drilling in, you may choose to increase or decrease these angles. -
Page 17: Model Dd750X
On The Model DD750X Choose the angle The Model DD750X has additional Point Angle advanced features that enable you Adjustment Knob to fine-tune your bit geometry. Loosen the Point Angle Adjustment Knob to the right of the Sharpening Port and slide the metal Point Angle Adjustment Plate... - Page 18 2. Insert Chuck into Alignment Port Alignment Button Press the Alignment Button down that opens the bit clamp arms. Insert either of the Alignment Guides (raised fins) on the Chuck into the 118° notch on the Alignment Port. With the clamp arms held open, slide the drill bit forward until it touches the 118°...
- Page 19 4. Lightly Tighten Chuck Hold onto the Chuck and tighten the Chuck Knob until it is snug. (Avoid over-tightening the Chuck in the Alignment Port as this could damage the alignment teeth in the port.) Press the Alignment Button and remove the Chuck from the Alignment Port.
- Page 20 1. Sharpening Guides Insert Chuck into Sharpening Port with either of the Sharpening Guides (white lines) lined up with the Cam Pin on the machine. Sharpening Guide (white lines) Cam Pin 2. Sharpen Your Bit Rotate Chuck in a clockwise direction (from white line to white line) until there is no more grinding noise.
-
Page 21: Identifying Correctly Sharpened Drill Bits
Identifying Correctly Sharpened Drill Bits (and what to do with those that aren’t!) Correctly Sharpened Bits The entire surface from the Cutting Edge Heel Chisel Cutting to the Heel will have a finely ground Edge surface without indentations. The Heel will always be lower than the Cutting Edge (positive relief ). -
Page 22: Split Points
Split Points Split point drill bits prevent “walking” on the material before they begin to cut. This feature is described as self-centering. The need to center punch is effectively eliminated. Split point drill bits have secondary cutting lips along the chisel edge. -
Page 23: Identifying Correctly Split Drill Bits
Identifying Correctly Split Drill Bits (And what to do with those that are Correctly Split Solution Split lines are nearly straight across. Undersplit Solution Split lines do not meet in the center but More grinding is needed for Chisel Edge remains. larger drill bits. -
Page 24: Grit Tube
Grit Tube Attachment The Grit Tube attachment is designed to keep any sparks caused by sharpening safely inside the machine and away from you. In addition, the Grit Tube reduces the sharpening dust in the air and on your workbench. Simply insert the Grit Tube into the Splitting Port of your... -
Page 25: Masonry Drill Bits
Short Drill Bits & Bits Smaller than 1/8” Sharpen the small bit as usual, but use very light pressure and an even number of turns. The bit should only briefly contact the wheel. Masonry Drill Bits To sharpen a masonry bit, you do NOT make rotations in the Sharpening Port. - Page 26 Set the Depth Set the depth by lining up one of the Sharpening Guides with the Cam Pin. push the Chuck into the Sharpening Port until it stops and tighten the Chuck. Remove the Chuck to ensure the insert is aligned with the Masonry Sharpening Marks and tighten again.
- Page 27 Chuck bit as usual To prepare your bit for this fine adjustment, follow all the Steps for chucking your bit given previously in this User’s Guide. Insert Chuck into Alignment Port To adjust the Chisel and Relief Angles, simply align the bit as usual with the following adjustment: To increase Relief—Insert the...
-
Page 28: Questions And Answers
Using the Variable Material Take-Off (MTO) The Model DD750X enables Variable Material Take-Off Knob you to remove more or less material from the tip of your bit when you sharpen. If your bit is only slightly dull and you simply wish to “touch up”... - Page 29 Answer: Your sharpening tube may not be fully seated. Make sure the small, black sharpening cup is sitting flush in the Sharpening Port. 3. Question: I sharpened the bit. Why will it not cut? Answer: This happens when the Heel on the bit is higher than the Cutting Edge (negative relief ).
- Page 30 6. Question: Why is the Chisel Edge on my drill bit flat or rounded? Answer: • You may have aligned using the white Sharpening lines instead of the raised Alignment Guides. Make sure to insert either of the raised fins into the correct alignment slot. •...
-
Page 31: Drill Doctor Maintenance
10. Question: Can I change a 135° drill bit into a 118° drill bit? Answer: While you can change the degree angle of any drill bit, they will perform best when sharpened at the same angle they were manufactured at. Drill Doctor Maintenance ®... - Page 32 The Sharpening Wheel will need to be changed if: • Your drill bit has a shiny, mirror finish. • Your drill bits burn or turn blue on the tip. Drill Contact the store or dealer where you purchased the Doctor Drill Doctor ®...
- Page 33 Reversing or Replacing Your Diamond Sharpening Wheel 1. Unplug your Drill Doctor, make sure machine is cool, then remove wheel access cover. 2. Use wrench supplied with your Drill Doctor to hold sharpening wheel in place. 3. With #3 Phillips head screwdriver, remove one left-handed screw (clockwise to loosen) and remove the wheel retainer.
-
Page 34: Warranty
Accessories Order accessories by contacting us at the phone number listed on the back cover, or at the retailer where you purchased your Drill Doctor. 3/32” to 3/4” Large Bit Chuck Part # DA70100PF 3/32” to 1/2” Left-handed Bit Chuck (for 3/32”-1/2”... - Page 35 www.drilldoctor.com...
- Page 36 THE DRILL BIT SHARPENER DAREX, LLC P.O. BOX 730 210 E. Hersey St. Ashland, OR 97520 Phone 1-800-597-6170 541-552-1377 www.DrillDoctor.com Drill Doctor ® is a registered trademark of DAREX, LLC PP50122KF Rev 0 7/18...
Need help?
Do you have a question about the 500X and is the answer not in the manual?
Questions and answers