Drill Master 750X User Manual
Hide thumbs
Also See for 750X:
- User manual (48 pages) ,
- User manual (94 pages) ,
- User manual (112 pages)

Related Manuals for Drill Master 750X


Summary of Contents for Drill Master 750X
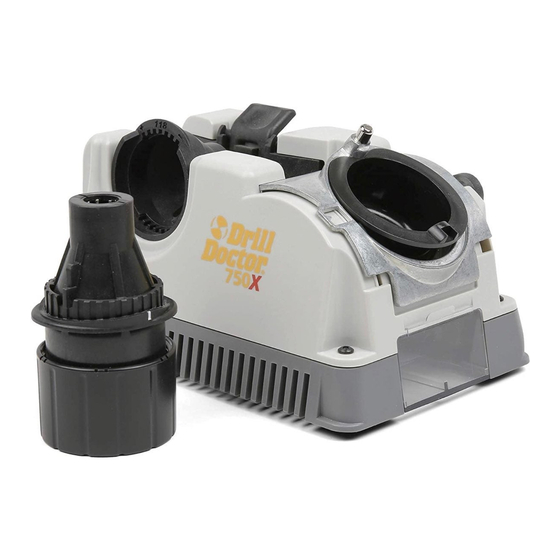
- Page 1 Model 750X Model 500X 500X & 750X 500X & 750X User’s Guide Guía del Usuario Mode d’emploi...
- Page 2 Thank you Drill Doctor ...for purchasing a . It is sure to become a ® Engl valuable tool because you will always have sharp drill bits before a project, during a project, and after a project. As president of this company, I am very proud of the qual- ity of our products—and I am equally proud of the great Drill Doctor people at...
-
Page 3: Table Of Contents
Sharpening Process ....7 ® Choosing Your Drill Bit Point Angle on the oper- Model 500X ............7 ike to r.com. Model 750X ............8 Aligning the Drill Bit..........8 ts and Sharpening the Drill Bit ..........10 Identifying Correctly Sharpened Drill Bits ....12 Split Points..............13... -
Page 4: Important Safety Instructions
• IMPORTANT SAFETY INSTRUCTIONS For your own safety, please read this User’s Guide before • Drill Doctor operating the ® Installation • Drill Doctor • Carefully unpack the drill bit sharpener ® and set it on a table. Check to see that no damage has occurred in shipment. - Page 5 • DRESS PROPERLY. Do not wear loose clothing or jew- elry; they can be caught in moving parts. Wear protec- tive hair covering to contain long hair. Guide before • USE PROTECTIVE EQUIPMENT. Use safety glasses. Use face or dust mask if working operations create dust.
- Page 6 Gett • WARNING. The use of any accessory or attachment other than one recommended in the instruction manual Watch may present a risk of personal injury. and b • HAVE YOUR TOOL REPAIRED BY A QUALIFIED PERSON. This electric tool complies with the relevant Drill Sto safety rules.
-
Page 7: Getting To Know Your Drill Doctor
Settings and Cord Alignment Alignment Button Cam Guide Port Sharpening Port Point Angle Adjustment Plate On 750X MTO is here Splitting Guide Split Point Port Wheel Access Cover Split Point Guide Rails Quick Change Diamond Sharpening Point Angle Wheel (Inside) -
Page 8: Identifying Basic Drill
Identifying Basic Drill Bits The Drill Doctor is most efficient when used to sharpen a The s drill bit’s original point angle. With its standard Diamond Sharpening Wheel it will sharpen high-speed steel, cobalt, TiN-coated, carbide and masonry drill bits. It has been designed and engineered to sharpen three of the most common drill bit types and offer you an ability to customize your point:... -
Page 9: Drill Doctor
The Drill Doctor Sharpening Process ® to sharpen a The sharpening process includes 4 easy procedures: ard Diamond Determine the type and angle of the drill bit. steel, cobalt, Align the bit in the Chuck. Sharpen the bit. rpen three of Split the point (if you choose). -
Page 10: Model 750X
135° point angle. Then re-tighten the Knob. On the Model 750X Point Angle Choose the angle Adjustment Knob The Model 750X has addi- tional advanced features that enable you to fine-tune your bit geometry. Loosen the Point Angle Adjustment... - Page 11 Chuck; the bit needs to be ngle Adjust- able to move in and out until te to either Step 4. (Model 750X users dard 118° or refer to “Using the Variable r 135° point 1” Material Take-Off (MTO)” on en re-tighten page 20.)
-
Page 12: Sharpening The Drill Bit
• Adjust Bit Position Look at your bit and make sure the Clamp Arms are in • the bit’s narrowest spot. If they aren’t, turn the bit in the chuck so that it is held by the Bit Clamp Arms at the nar- rowest width. - Page 13 z) as • You will hear a grinding noise ition complete each half-turn and each side of the bit face is it and make ground. Arms are in • The Chuck will rock as you turn it and the Cam rides west spot.
-
Page 14: Identifying Correctly Sharpened Drill Bits
If split p the machine quits removing mate- thrus rial before the chisel is clean, re- point) align and sharpen again. (Model 750X users can increase or decrease MTO (material take-off) to speed up this process. www.drilldoctor.com... - Page 15 pened Problem Cause with Drill bit alignment. Insuffecient (Negative) relief or a slow cutting Solution drill bit. Cutting Edge Re-align the drill using the Heel Adjustable Alignment proce- dure on page 19. To increase ace from the relief, insert the alignment the Heel will guide on the chuck closer to ound surface...
-
Page 16: Creating Or Replacing A Split
Creating or Replacing a Split Point Iden (And Leave bit in Chuck after Corr sharpening Always align and sharpen a bit before splitting it. To split the point, do not remove the bit from the Chuck after sharpening. Split lin Align Guides Splitting Guide the cen... -
Page 17: Identifying Correctly Split Bits
it Point Identifying Correctly Split Drill Bits (And What to Do With Those That Aren’t!) huck after Correctly Split Split lines are nearly straight across. nd sharpen a ng it. To split t remove the Chuck after Split line Undersplit Solution More grinding is needed for Split lines do not meet in... -
Page 18: Grit Tube Attachment
The Model 500X sharpens bits from 3/32” to 1/2”. (You can also purchase a Large Bit Chuck that sharpens bits up to 3/4”.) The Model 750X comes equipped with that Large-Bit Chuck. It sharpens bits from 3/32 to 3/4 inches. -
Page 19: Short Drill Bits And Bits Smaller Than 1/8
Bits 1/2” or larger will need a minimum of 40 half turns. A 3/4” bit may require up to 60 half turns. It may take two or three complete sharpenings (repeat all steps) to re- e attachment sharpen a very dull or chipped large drill bit. to keep any d by sharpen- Your Drill Doctor is delivered with a 180-grit Diamond... - Page 20 Usin Align the bit with the Masonry Carbide Insert Sharpening Marks Insert the bit into the Chuck and line up the carbide insert on the tip of the Both bit so that it is parallel to the Mason- Chise ry Sharpening Marks on the end of Relief the chuck.
-
Page 21: Using The Variable Alignment To Adjust Chisel
Chisel and Relief Angles huck and line the tip of the Both Models 500X and 750X enable you to adjust the to the Mason- Chisel and Relief Angles of your drill bit. The Chisel and on the end of Relief Angles have a direct effect on the performance of . -
Page 22: Using The Variable Material Take-Off On The Questions And Answers
Key c 1. Chu 2. Dri Using the Variable Material Take-Off (MTO) 3. Th Variable Material The Model 750X enables Take-Off Knob you to remove more or less material from the tip of your bit when you 4. Ch sharpen. If your bit is only slightly dull and you 5. - Page 23 2. Drill not aligned in the Chuck Jaws correctly. Off (MTO) 3. The type of drill requires an angle adjustment to 750X enables achieve the desired Chisel and Relief Angles. Try using ove more or the Variable Alignment to adjust the Chisel and Relief l from the tip Angle (see page 19).
- Page 24 Answer: 6. Q This happens when the Heel on the bit is higher than the Why i Cutting Edge (negative relief). To correct this problem, follow the instructions in “Using the Variable Alignment to Adjust the Chisel and Relief Angle” on page 19. Durin You may have a specialty drill bit.
- Page 25 6. Question: her than the Why is the chisel edge on my drill bit flat? his problem, Answer: Alignment to During the alignment process the Bit Clamps were grip- Fast Spiral, ping the high points of the drill bit. Realign the drill bit bits are con- making sure that the Bit Clamps are located in the nar- insufficient...
-
Page 26: Drill Doctor Maintenance
9. Question: Clea Why does the drill bit back up into the Chuck during With the sharpening procedure? drill b dispos Answer: wheel Make sure the bit is tight in the Chuck before sharpening. and d Your Chuck may be dirty. Follow the steps for cleaning the mann Chuck on page 25. - Page 27 Cleaning Your Drill Doctor huck during With the Drill Doctor unplugged, shake accumulated drill bit grinding dust from behind the Wheel Cover into a disposable container. Remove dust particles around the wheel with a small, dry brush. Dispose of the container e sharpening.
- Page 28 Reversing or Replacing Your Diamond Sharpening Wheel Order www. numb Unplug your Drill retaile Doctor, make sure machine is cool, then remove wheel cover. Wheel Access Cover Turn Quick Change Knob clock- wise while holding the Sharpening Wheel to keep it from turn- ing.
- Page 29 Accessories amond Order accessories through website: www.DrillDoctor.com, or by contacting us at the phone number listed on the Warranty page (page 28), or at the your Drill retailer where you purchased your Drill Doctor. make sure is cool, then wheel cover. 3/32”...
-
Page 30: Accessories And User-Replaceable Warranty
USA and Canada Only See Warranty Card insert for countries outside the USA and Canada. Your Drill Doctor is warranted to be free of defects due to work- manship or design for 3 years from the purchase date. If your Drill Doctor fails to operate, or if any operating problem occurs, contact Drill Doctor Technical Service at: 1-888-693-7455 (toll-free USA and Canada only) -
Page 31: Español
DRILL DOCTOR MODEL 500X USER REPLACEMENT PARTS ITEM MANUFACTURER DESCRIPTION PART NUMBER DA02100PF 1/2" CHUCK ASSEMBLY DA70100PF 3/4" CHUCK ASSEMBLY PP02142PF ACCESS COVER STANDARD DIAMOND SHARPENING DA31320GF WHEEL (180 GRIT) COARSE DIAMOND SHARPENING DA31325GF WHEEL (100 GRIT) PP02342CF QUICK RELEASE WHEEL RETAINER PP02344RF TAPERED QR SPRING PP50120TF...
Need help?
Do you have a question about the 750X and is the answer not in the manual?
Questions and answers