Table of Contents
Advertisement
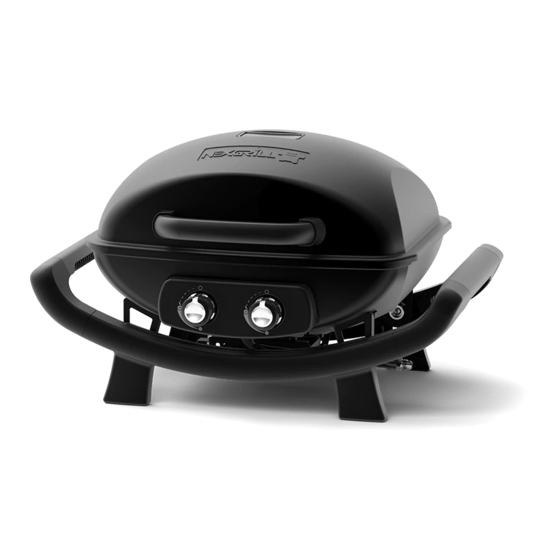
FORTRESS
2 BURNER CAST ALUMINUM
TM
TABLE TOP GAS GRILL
FOR OUTDOOR USE ONLY. NOT FOR COMMERCIAL USE.
This instruction manual contains important information necessary for the proper
assembly and safe use of the appliance.
Read and follow all warnings and instructions before assembling and using the
appliance.
Follow all warnings and instructions when using the appliance.
Keep this manual for future reference.
Servicing shall be carried out only by authorised personnel, and the appliance shall not
be modified.
OWNER'S MANUAL
®
Code: NEXFOR2G
Model Number: 820-0062H
Part Number: 19000694A0
Advertisement
Table of Contents

Related Manuals for Nexgrill 820-0062H


Summary of Contents for Nexgrill 820-0062H
- Page 1 TABLE TOP GAS GRILL Code: NEXFOR2G FOR OUTDOOR USE ONLY. NOT FOR COMMERCIAL USE. Model Number: 820-0062H This instruction manual contains important information necessary for the proper assembly and safe use of the appliance. Read and follow all warnings and instructions before assembling and using the appliance.
-
Page 2: Table Of Contents
TABLE OF CONTENTS Important Safety Information ..........................1 Parts List ..................................3 Assembly Instructions ..............................4 Diagrammatical Representations Of “Outdoor Areas” ................8 Connection Instructions .............................10 Operating Instructions ............................... 13 Care and Maintenance ..............................15 Warranty ..................................18 Replacement Parts ..............................20 Troubleshooting ................................22 IMPORTANT SAFETY INFORMATION DANGER: If you smell gas: Shut off gas to the appliance. -
Page 3: Outdoor Grill Safety
IMPORTANT SAFETY INFORMATION Read the following instructions carefully before attempting to assemble, operate or install the product. Failure to follow these instructions may result in serious bodily injury and/or property damage. If you have questions regarding the product or need after sales service or support, please call your Barbeques Galore nearest store on 1300 301 392. -
Page 4: Parts List
PARTS LIST... -
Page 5: Assembly Instructions
PREPARATION Before beginning assembly, installation or operation of product, make sure all parts are present and undamaged. Compare parts with package contents list and diagram above. If any part is missing or damaged, do not attempt to assemble, install or operate the product. Contact customer service for replacement parts. READ ALL SAFETY WARNINGS, ASSEMBLY AND INSTALLATION INSTRUCTIONS CAREFULLY BEFORE ATTEMPTING TO ASSEMBLE. - Page 8 Conduct a leak test as outlined on page 11 before use.
-
Page 9: Diagrammatical Representations Of "Outdoor Areas
DIAGRAMMATICAL REPRESENTATIONS OF “OUTDOOR AREAS” This appliance shall only be used in an above ground open-air situation with natural ventilation, without stagnant areas, where gas leakage and products of combustion are rapidly dispersed by wind and natural convection. Any enclosure in which the appliance is used shall comply with one of the following: An enclosure with walls on all sides, but at least one permanent opening at ground level and no overhead cover (Figure 1). - Page 10 Within a partial enclosure that includes an overhead cover and more than two walls (Figures 4 & 5), the following shall apply: a) at least 25% of the total wall area is completely open; and b) at least 30% of the remaining wall area is open and unrestricted.
-
Page 11: Connection Instructions
CONNECTION INSTRUCTIONS GAS HOOK-UP Only the pressure regulator and hose assembly supplied with the grill should be used. Any replacement pressure regulator and hose assembly must be specified by the grill manufacturer. This grill is configured for liquid propane. Do not use a natural gas supply. -
Page 12: Leak Test
LEAK TEST WARNING: CHECK ALL GAS SUPPLY FITTINGS FOR LEAKS BEFORE EACH USE. DO NOT USE THE GRILL UNTIL ALL CONNECTIONS HAVE BEEN CHECKED AND DO NOT LEAK. DO NOT SMOKE WHILE LEAK-TESTING. NEVER LEAK-TEST WITH AN OPEN FLAME. GENERAL Although gas connections on the grill are leak-tested prior to shipment, a complete leak test must be performed at the installation site. - Page 13 STEP 3 TO TEST 1. Make sure the burner valves in the “OFF” () position. 2. Turn the liquid propane cylinder valve counterclockwise to open the valve. 3. Apply the soap solution to all gas fittings. Soap bubbles will appear where a leak is present. 4.
-
Page 14: Operating Instructions
OPERATING INSTRUCTIONS THIS COOKING APPLIANCE IS FOR OUTDOOR USE ONLY AND SHALL NOT BE USED IN A BUILDING, GARAGE OR ANY OTHER ENCLOSED AREA. PREPARING TO LIGHT YOUR GRILL STEP 1 FIND A LEVEL SURFACE ON WHICH TO PLACE THE GRILL . MOVING INSTRUCTIONS Caution: Never move the grill with burners lit or still hot. -
Page 15: Lighting Your Grill
LIGHTING YOUR GRILL IMPORTANT - FIRST TIME USE: It is important that the grill be lit and allowed to heat up for at least 15 minutes before any food is placed on the cooking surface. It is normal for some smoke to appear during the initial operation of the grill. After initial heating, the grill is ready for use. -
Page 16: Care And Maintenance
TURNING OFF YOUR GRILL 1. Turn knob to “OFF” () position. 2. Turn the propane cylinder control valve to the CLOSED position. 3. Detach the regulator assembly from the cylinder valve by turning the connection clockwise. CAUTION: Do not attempt to re-light the grill without following all the lighting instructions. - Page 17 WHEN TO LOOK FOR SPIDERS You should inspect the burners at least twice a year or immediately after any of the following conditions occur: 1. Gas can be smelled in conjunction with burner flames appearing yellow. 2. The grill does not reach temperature. 3.
- Page 18 STEP 3 To reinstall the burners and cross channel: 1. Assemble ignitors to the cross channel. Insert ignitor pin screws and tighten. 2. Insert the burners onto the main burner gas valves. 3. Make sure the orifice tip (A) is inside the burner venturi (B). 4.
-
Page 19: Warranty
WARRANTY AND CONSUMER GUARANTEE Barbeques Galore Warranty is provided in addition to other rights and remedies as set out below under ‘Consumer Guarantees’. Warranty Term Subject to the conditions set out below, this product is warranted to the purchaser to be free from defects in workmanship and materials from the date of purchase for the terms specified below. - Page 20 Warranty Exclusions 1. This warranty will be void and accordingly no claim of any nature will be enforceable if the product has not been assembled, installed or operated according to the instructions, or has been subject to abuse, improperly treated, neglected and/or if any repairs, maintenance or service has been done by an unauthorised person.
-
Page 21: Replacement Parts
REPLACEMENT PARTS LIST... - Page 22 QTY IN PART SPARE PARTS QTY IN BARBEQUE PART NUMBER (DESCRIPTION) PACK Temperature gauge NX820-0062H01 Main lid NX820-0062H02 Main lid screw NX820-0062H03 Main lid handle NX820-0062H04 Cooking grill NX820-0062H05 Main burner left NX820-0062H06 Main burner right NX820-0062H07 Main burner igniter wire NX820-0062H08 Firebox NX820-0062H09...
-
Page 23: Troubleshooting
TROUBLESHOOTING PROBLEMS WHAT TO DO 1. Check to see if the liquid propane cylinder is empty. 2. Check burner ports for any blockage. Use a paper clip to clear plugged ports. Grill will not light 3. Check the gas orifice on the burner for an obstruction. If orifice is blocked, clean with a needle. 1. - Page 24 NEXFOR2G_0518...
Need help?
Do you have a question about the 820-0062H and is the answer not in the manual?
Questions and answers