Sena R1 Getting Started
Smart cycling helmet
Hide thumbs
Also See for R1:
- Quick start manual ,
- Quick start manual (23 pages) ,
- Quick start manual (25 pages)
Table of Contents
Advertisement
Advertisement
Table of Contents

Subscribe to Our Youtube Channel
Related Manuals for Sena R1


Summary of Contents for Sena R1
- Page 1 Smart CyCling Helmet menU...
- Page 2 CLICK SECTION ABOUT THE GETTING BEGIN HELMET STARTED PAIRING WITH MOBILE STEREO DEVICES PHONE USAGE MUSIC INTERCOM USING THE GENERAL SETUP FM RADIO SETTINGS REMOTE TROUBLE- MAINTENANCE CONTROL SHOOTING AND CARE...
- Page 3 LEGEND: HOLD Function = Button(s) to tap or Hold Press and Hold button button the specified HOLD for the specified amount number of times of time audible prompt “Hello”...
-
Page 4: Table Of Contents
TABLE OF CONTENTS Safety PrecautionS aBout tHe r1 SMart cycLinG HeLMet 1.1 General Information 1.2 Product Details 1.3 Package Contents 1.4 Wearing the Helmet 1.4.1 How to Wear The Helmet 1.4.2 Helmet Fitment Check GettinG StarteD: BuiLt-in BLuetootH SySteM 2.1 Button Function 2.2 Powering On and Off... - Page 5 TABLE OF CONTENTS CONTINUED MoBiLe PHone uSaGe 4.1 Making and Answering Calls 4.2 Speed Dialing 4.2.1 Assigning Speed Dial Presets 4.2.2 Using Speed Dial Presets Stereo MuSic 5.1 Playing Music with Bluetooth Devices 5.2 Music Sharing intercoM SetuP 6.1 Intercom Pairing 6.2 Two-Way Intercom 6.3 Multi-Way Intercom 6.3.1 Starting a Three-Way Intercom Conference...
- Page 6 TABLE OF CONTENTS CONTINUED 7.6 Region Selection (Default: Worldwide) 7.7 Radio Data System(RDS) Alternative(AF) Setting (Default: Enable) 7.8 FM Station Guide (Default: Enable) HeaDSet confiGuration SettinGS 8.1 Function Priority 8.2 Firmware Upgrades 8.3 Voice Prompts 8.4 Deleting All Bluetooth Pairing Information reMote controL 9.1 Pairing with the Remote Control 10.
-
Page 7: Safety Precautions
• Position the helmet on your head with the front covering your forehead. If the helmet is tipped back and is not covering your forehead then the helmet is not in the proper position. R1 Smart Cycling Helmet | 7... - Page 8 • The protective capability of your helmet will diminish over time, dependent upon many factors such as physical damage, exposure to pollution, harmful chemicals and long term exposure to the sun. Sena recommends that the helmet be replaced after five years. Although the shell is in principle capable of a longer...
- Page 9 Your product has a built-in battery. Be careful to heed all safety information in this guide. Failure to carefully observe the safety precautions can cause battery heat generation, bursting, fire and serious personal injury. R1 Smart Cycling Helmet | 9...
-
Page 10: Product Storage And Management
• Do not disassemble, repair or modify the product as this may damage the product and invalidate the product warranty. • Do not store the product in humid environments, especially for long periods of time. It may damage the internal electronic circuits. R1 Smart Cycling Helmet | 10... - Page 11 (1) When there are fingerprints on the lens surface. (2) When the lens is used in hot or humid environments, such as near oceans or rivers. • Store the product in a well-ventilated room to protect the lens from dirt and dust. R1 Smart Cycling Helmet | 11...
-
Page 12: About The R1 Smart Cycling Helmet
It is important for you to understand everything communicated in them before your first ride. If you do not, please contact your authorized Sena Retailer with any questions you may have. Failure to follow any of the provided instructions or warnings could void your warranty, and most importantly, could result in severe personal injury or death. - Page 13 • The contents of this helmet User’s Guide are subject to change without notice. Its illustrations may differ from the actual product. The copyrights for the User’s Guide belong to Sena Technologies, Inc. Reproduction or copying of the User’s Guide without permission is strictly prohibited.
-
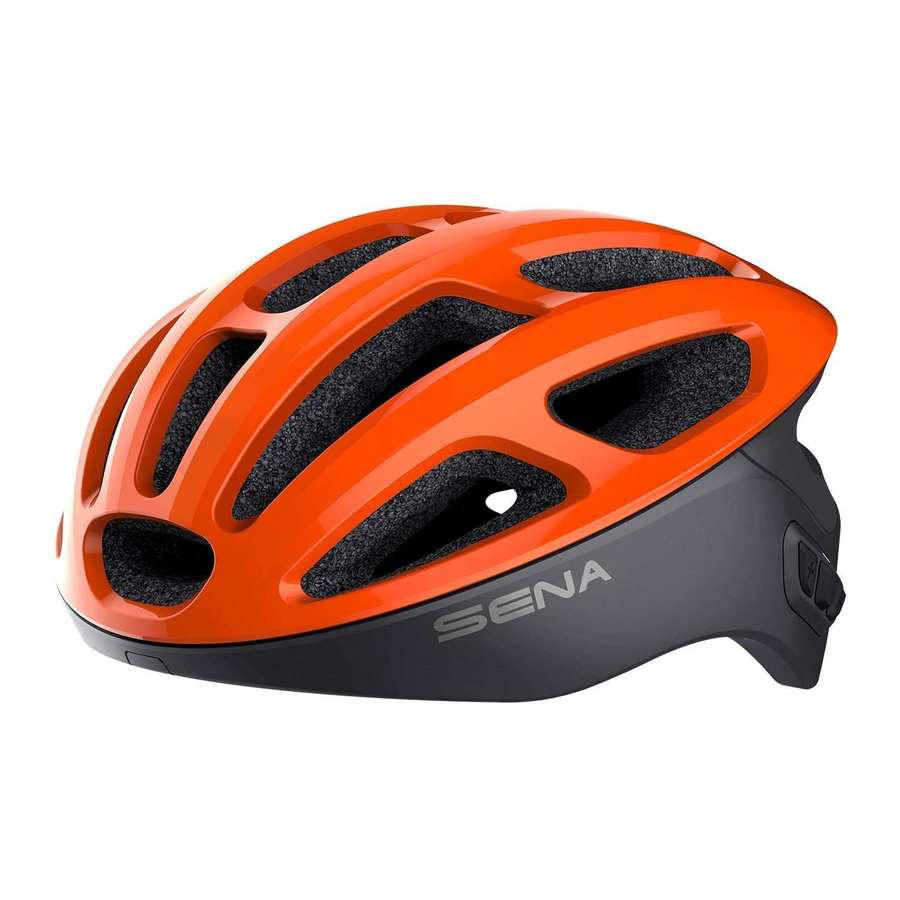
Page 14: Product Details
1 ABOUT THE R1 SMART CYCLING HELMET MENU 1.2 Product Details No. Name Microphone Speakers Bluetooth System’s Button 1.3 Package Contents R1 Helmet USB Power & Data Cable (Straight Micro USB type) R1 Pouch R1 Smart Cycling Helmet | 14... -
Page 15: Wearing The Helmet
1.4.1 How to Wear The Helmet For proper use, the helmet must sit level on the head and low on the forehead. The Sena helmet uses a simple, quick-release buckle system that, once adjusted, can be buckled and unbuckled without changing the adjustment. - Page 16 1 ABOUT THE R1 SMART CYCLING HELMET MENU 3. Position the helmet low on your forehead with the buckle under the chin and back against the throat. The straps should fit comfortably around both ears. No. Name Buckle Strap Adjuster...
- Page 17 1 ABOUT THE R1 SMART CYCLING HELMET MENU 4. With the strap adjuster in the proper position, adjust the chinstrap tension at the buckle. Adjust the tension so the chinstrap is tight and comfortable by pulling the chinstrap end through the buckle to either tighten or loosen as needed.
- Page 18 If after adjustment the helmet does not fit properly, do not use the helmet. Return it to the retailer or Sena. R1 Smart Cycling Helmet | 18...
-
Page 19: Helmet Fitment Check
1 ABOUT THE R1 SMART CYCLING HELMET MENU 1.4.2 Helmet Fitment Check With the retention system knob turned clockwise until comfortably tight and the chinstrap buckled under the chin and back against the throat, grab the helmet with both hands and try to remove it by rolling the helmet forward and backward as far as you can. -
Page 20: Getting Started: Built-In Bluetooth System
LED Lights • Increase Volume • Track Forward (+) Button • Scan Radio Stations • Speed Dial • Answer/End Phone Call • Reject an Incoming Phone Call • Start/End Intercom Conversation Center Button • Play/Pause Music • Enter Intercom Pairing Mode • Enter Voice Configuration Settings • Decrease Volume • Track Back (-) Button • FM Tuner On/Off R1 Smart Cycling Helmet | 20... -
Page 21: Powering On And Off
2.2 Powering On and Off Press and hold the Center Button and the (+) Button at the same time for 1 second to turn the Bluetooth system on or off. Powering On/Off HOLD POwEr ON/OFF dEviCE 2.3 Charging wArNiNG: When charging the battery, use only the approved charger provided by the manufacturer. Use of a non-approved charger may cause fire, explosion, leakage, and other hazards which may also reduce the life time or performance of the battery. The Bluetooth system can be charged using many common methods via the supplied USB power & data cable: 1. Plugged into a computer’s USB port. 2. With a USB-equipped AC adapter via a wall-outlet charger. Note: • Please make sure to take off your helmet while charging. The Bluetooth system automatically turns off during charging. • Any 3rd party USB charger can be used with Sena products if the charger is approved by either the FCC, CE, IC or other locally approved agencies that Sena accepts. R1 Smart Cycling Helmet | 21... -
Page 22: Checking The Battery Level
2 GETTING STARTED: BUILT-IN BLUETOOTH SYSTEM MENU Charging the Bluetooth System Depending upon the charging method, the Bluetooth system will be fully charged in about 2.5 hours. 2.4 Checking the Battery Level There are two ways to check battery level: 1. Visually, with LEDs when powering on. Battery Level - visual Method HOLD viSUAL MEthOd hiGh MEdiUM R1 Smart Cycling Helmet | 22... - Page 23 2 GETTING STARTED: BUILT-IN BLUETOOTH SYSTEM MENU Note: 1. T he battery performance may be reduced over time with usage. 2. B attery life may vary depending on conditions, environmental factors, functions of the product in use, and devices used with it. 2. Audible method: press and hold the Center Button and the (+) Button for 3 more seconds as the Bluetooth system powers on. A prompt will announce the remaining battery level. Audible Method HOLD AUdiBLE MEthOd “Battery level high/medium/low” Note: • Blinking LEDs alternate from blue to red when battery power is low. • When the battery is low while in use, you will hear a voice prompt saying “Low battery”. R1 Smart Cycling Helmet | 23...
-
Page 24: Volume Adjustment
2 GETTING STARTED: BUILT-IN BLUETOOTH SYSTEM MENU 2.5 volume Adjustment You can raise or lower the volume by tapping the (+) Button or the (-) Button. Volume is set and maintained independently at different levels for each audio source (i.e. phone, intercom), even when the Bluetooth system is rebooted. volume up vOLUME UP volume down vOLUME dOwN wArNiNG: Use of the product at a high volume for a long period of time may damage your eardrums or hearing ability. Keep the volume at a modest level to prevent damage. R1 Smart Cycling Helmet | 24... -
Page 25: Downloadable Sena Software
Click here to visit sena.com 2.6.2 Sena Smartphone App The Sena Smartphone App allows you to configure the Bluetooth system’s settings, as well as access the User’s and Quick Start Guides. To do so, pair your mobile phone with your Bluetooth system (please refer to Section 3: “Pairing the Bluetooth System with other Bluetooth devices” for more details). Run the Sena Smartphone App and configure the settings directly from your smartphone. You can download the Sena Smartphone App for Android and Apple operating systems. R1 Smart Cycling Helmet | 25... -
Page 26: Configuration Menu
Button for 10 seconds until you hear the voice prompt, “Configuration menu”. Accessing the Bluetooth System Configuration Menu HOLD ACCESS CONFiG. MENU “Configuration menu” 2. Tap the (+) Button or the (-) Button to navigate between the menus. You will hear voice prompts for each menu item. The list of functions is shown in the Bluetooth System Configuration Menu on page Navigating Forward through the Menu NAviGAtE FOrwArd “[Menu prompt]” R1 Smart Cycling Helmet | 26... - Page 27 ExECUtE Bluetooth System Configuration Menu tap the (+) Button or (-) Button the specified number of times tap the Center Button Phone Pairing Execute Second Mobile Phone Pairing Execute Execute Phone Selective Pairing R1 Smart Cycling Helmet | 27...
- Page 28 Speed Dial Voice Prompt Enable/Disable RDS AF Setting Enable/Disable FM Station Guide Enable/Disable Advanced Noise Control Enable/Disable Delete All Pairings Execute Remote Control Pairing Execute Execute Universal Intercom Pairing Execute Factory Reset Exit Configuration Execute R1 Smart Cycling Helmet | 28...
-
Page 29: Pairing The Bluetooth System With Other Bluetooth Devices
The Bluetooth system can pair with multiple Bluetooth devices such as mobile phone, MP3 player, GPS or Sena SR10 Two-Way Radio Adapter via Mobile Phone Pairing, Second Mobile Phone Pairing and GPS Pairing. - Page 30 BLUEtootH LED StAtUS 2. With your mobile phone in Bluetooth-pairing mode, select Sena R1 in the list of devices detected. 3. If your mobile phone asks for a PIN, enter 0000. PiN NUMBER...
-
Page 31: Additional Mobile Phones Or Mp3 Player
Access Second Mobile Phone Pairing in the Bluetooth System Configuration Menu HOLD ACCESS CoNfiG. MENU “Configuration menu” NAviGAtE foRwARD “Second mobile phone pairing” Blue flashing lights indicates device is now discoverable. BLUEtootH LED StAtUS R1 Smart Cycling Helmet | 31... -
Page 32: Advanced Selective Pairing: Hands-Free Or A2Dp Stereo
3 PaiRing tHe BluetootH SyStem witH otHeR BluetootH DeviCeS MENU 2. With your mobile phone in Bluetooth-pairing mode, select Sena R1 in the list of devices detected. 3. If your mobile phone asks for a PIN, enter 0000. PiN NUMBER 3.3 Advanced Selective Pairing: Hands-free or A2DP... -
Page 33: Media Selective Pairing - A2Dp Profile
Blue flashing lights indicate device is now discoverable. BLUEtootH LED StAtUS 2. With your hands-free device in Bluetooth-pairing mode, select Sena R1 in the list of devices detected. 3. If it asks for a PIN, enter 0000. PiN NUMBER 3.3.2 Media Selective Pairing — A2DP Profile 1. - Page 34 Red flashing lights indicate device is now discoverable. BLUEtootH LED StAtUS 2. With your A2DP device in Bluetooth-pairing mode, select Sena R1 in the list of devices detected. 3. If it asks for a PIN, enter 0000. PiN NUMBER R1 Smart Cycling Helmet | 34...
-
Page 35: Mobile Phone Usage
1. Execute speed Dial in the Bluetooth system Configuration Menu by holding down the Center Button for 10 seconds, then using the (+) and (-) Buttons to scroll through the menu. Please refer to section 2.7: “Configuration Menu” for more details. R1 Smart Cycling Helmet | 35... - Page 36 2. Tap the (+) Button or the (-) Button to set up the three available speed Dial Presets. You will hear the voice prompt, “speed dial” followed by the preset number. Navigate forward through Preset Numbers NAVIgATE fOrwArD “Speed dial (#)” R1 Smart Cycling Helmet | 36...
- Page 37 4. Use this procedure to save other speed Dial Presets. 5. To exit the menu, tap the (+) Button or the (-) Button until you hear the voice prompt, “Cancel”, then tap the Center Button to confirm. Exit Menu ExIT MENU “Cancel” R1 Smart Cycling Helmet | 37...
-
Page 38: Using Speed Dial Presets
2. Tap the (+) Button or the (-) Button to navigate between the speed Dial Presets. Navigate forward through speed Dial Preset Numbers NAVIgATE fOrwArD Navigate Backward through speed Dial Preset Numbers NAVIgATE BACKwArD R1 Smart Cycling Helmet | 38... - Page 39 “Last number redial” 4. To call one of your speed Dial Presets, tap the Center Button when you hear the prompt, “speed dial (#)”. Call a speed Dial Preset Number sPEED DIAL “Speed dial (#)” R1 Smart Cycling Helmet | 39...
-
Page 40: Stereo Music
2. To adjust the volume, tap the (+) Button or the (-) Button. Volume Up VOlUME UP Volume Down VOlUME DOWN 3. To track forward or back, press and hold the (+) Button or the (-) Button for 1 second. Next Track HOLD skiP TraCk fOrWarD R1 Smart Cycling Helmet | 40... -
Page 41: Music Sharing
Center Button for 1 second during an intercom conversation until you hear a double beep. Both you and your intercom friend can control music playback. sharing Music with an intercom friend during intercom Conversation HOLD sHarE MUsiC “[Beep, Beep]” R1 Smart Cycling Helmet | 41... -
Page 42: Intercom Setup
1. Press and hold the Center Button on two Bluetooth systems for 5 seconds until you hear the voice prompt, “Intercom pairing”. Pairing with Intercom B HOLD & Intercom Friend B “Intercom Pairing” Red flashing lights indicate device is now discoverable. BlUEtOOth lED StAtUS R1 Smart Cycling Helmet | 42... - Page 43 3. Repeat steps 1 and 2 to pair with Intercom Friends C & D. last-Come, First-Served Intercom Friend 1 Intercom Intercom Friend 1 Friend 2 Intercom Intercom Intercom Friend 1 Friend 2 Friend 3 R1 Smart Cycling Helmet | 43...
-
Page 44: Two-Way Intercom
2. Tap twice for Intercom Friend 2. Start/End two-Way Intercom with Intercom Friend 2 Intercom Friend 2 3. Tap three times for Intercom Friend 3. Start/End two-Way Intercom with Intercom Friend 3 Intercom Friend 3 R1 Smart Cycling Helmet | 44... -
Page 45: Multi-Way Intercom
For example, you (A) may start an intercom conversation with the Intercom Friend (B). Or, Intercom Friend (B) may start an intercom call with you (A). Starting an Intercom Conversation with Intercom Friend B Intercom Intercom Friend B Friend C R1 Smart Cycling Helmet | 45... - Page 46 Starting an Intercom Conversation with Intercom Friend C Intercom Intercom Friend B Friend C 4. Now you (A) and two Intercom Friends (B & C) are having a three- Way Intercom Conference. three-Way Intercom Intercom Intercom Friend B Friend C R1 Smart Cycling Helmet | 46...
-
Page 47: Starting A Four-Way Intercom Conference
Intercom Friend to the mobile phone conversation. 1. During a mobile phone call, tap the Center Button to invite one of your Intercom Friends to the conversation. Invite an Intercom Friend into Phone Conference ADD AN INtERCOM FRIEND tO CAll R1 Smart Cycling Helmet | 47... -
Page 48: Group Intercom
2. Tap the (+) Button and the (-) Button simultaneously to begin Group Intercom. The alternating blue and red flashing lights indicate that the device is now in Group Intercom mode and you will hear a voice prompt, “Group intercom”. Start Group Intercom StARt GROUP INtERCOM R1 Smart Cycling Helmet | 48... - Page 49 4. To terminate Group Intercom, press the Center Button for 1 second during Group Intercom. You will hear a voice prompt, “Group intercom terminated”. End Group Intercom HOLD END GROUP INtERCOM “Group intercom terminated” R1 Smart Cycling Helmet | 49...
-
Page 50: Universal Intercom
Universal Intercom allows you to have intercom conversations with users of non-Sena Bluetooth headsets. You can pair the Bluetooth system with only one non-Sena headset at a time. The intercom distance depends on the performance of the Bluetooth headset to which it’s connected. - Page 51 6 INTERCOM SETUP MENU 2. Put the non-Sena Bluetooth headset in Pairing Mode. The Bluetooth system will automatically pair with a non-Sena Bluetooth headset. 3. You can have two-Way Intercom or Multi-Way Intercom communication with up to three Intercom Friends using non-Sena headsets by following the procedures described below.
-
Page 52: Advanced Noise Control™ (Default: Enable)
If Advanced Noise Control is disabled, the background noise is mixed with your voice while using the intercom. Access Advanced Noise Control in the Bluetooth System Configuration Menu HOLD ACCESS CONFIG. MENU “Configuration menu” NAvIGAtE BACkWARD “Noise control” ENABlE OR DISABlE R1 Smart Cycling Helmet | 52... -
Page 53: Using The Fm Radio
“[Beep, Beep]” 7.2 Seek and Save Radio Stations The “Seek” feature searches for radio stations. 1. Double tap the (+) Button or the (-) Button to search for radio stations. Seek Stations Forward SEEk FORwaRd R1 Smart Cycling Helmet | 53... - Page 54 3. Tap the (+) Button or the (-) Button to navigate through the preset numbers that you want to store. Navigate Forward through Preset Stations NavigaTE FORwaRd Navigate Backward through Preset Stations NavigaTE BackwaRd R1 Smart Cycling Helmet | 54...
-
Page 55: Scan And Save Radio Stations
HOLD STaRT ScaNNiNg 2. The Sena tuner pauses at each station it finds for 8 seconds before moving to the next. 3. To save the current station, tap the center Button. The station will be saved as the next preset number. -
Page 56: Temporary Station Preset
10 radio stations without changing your existing preset stations. 1. Tap the (+) Button three times to automatically find and save 10 stations. Temporary Stations TEMPORaRy STaTiONS 2. The temporary preset stations will be cleared when the Bluetooth system reboots. R1 Smart Cycling Helmet | 56... -
Page 57: Navigating Preset Stations
Navigate through Preset Stations HOLD NavigaTE FORwaRd Note: You can use the Sena device Manager or the Sena Smartphone app to save the preset stations. 7.6 Region Selection (default: worldwide) You can select the proper FM frequency range for your location from the Sena device Manager or the Sena Smartphone app. -
Page 58: Radio Data System(Rds) Alternative(Af)
Menu” for more details. When radio station signals get too weak for good reception, with RdS aF enabled, the Sena radio receiver re-tunes to a station with better reception. If RdS aF is disabled, you’ll have to find stronger stations manually. -
Page 59: Fm Station Guide (Default: Enable)
FM station frequencies will not be given as you select preset stations. access FM Station guide in the Bluetooth System configuration Menu HOLD accESS cONFig. MENU “Configuration menu” NavigaTE FORwaRd “FM station guide” ENaBlE OR diSaBlE R1 Smart Cycling Helmet | 59... -
Page 60: Headset Configuration Settings
8.2 Firmware Upgrades The Bluetooth system supports firmware upgrades. You can upgrade the firmware using the Sena Device Manager. Please refer to Section 2.6.1: “Sena Device Manager” for more details. Please visit sena.com to check for the latest software downloads. - Page 61 8 HEADSET CONFIGURATION SETTINGS MENU Access Voice Prompt in the Bluetooth System Configuration Menu HOLD ACCESS CoNFIg. MENU “Configuration menu” NAVIgAtE ForwArD “Voice prompt” ENABlE or DISABlE R1 Smart Cycling Helmet | 61...
-
Page 62: Deleting All Bluetooth Pairing Information
Tap the Center Button when in this menu to Delete All Bluetooth Pairing Information stored in the headset. Access Delete All Pairings in the Bluetooth System Configuration Menu HOLD ACCESS CoNFIg. MENU “Configuration menu” NAVIgAtE BACkwArD “Delete all pairings” ExECUtE R1 Smart Cycling Helmet | 62... -
Page 63: Remote Control
MENU 9. REMOTE CONTROL You can remotely control the Bluetooth system using Sena Remote Control devices (sold separately) such as a Handlebar Remote or a Wristband Remote. This eliminates the need to remove your hands from the handlebars for button operations. - Page 64 Remote Control device in pairing mode. You will hear a voice prompt, “Remote control connected”, when they are successfully paired. Enter Pairing Mode Enter Pairing Mode on Remote Control. REMotE CoNtRol “Remote control connected” R1 Smart Cycling Helmet | 64...
-
Page 65: Troubleshooting
When the Bluetooth system is not working properly, you can easily reset the unit: 1. Locate the pinhole reset button below Sena logo at the back side of the helmet. 2. Gently insert a paper clip into the hole and press and Fault Reset Button for 1 second with light pressure. -
Page 66: Factory Reset
Bluetooth System Configuration Menu. Please refer to Section 2.7: “Configuration Menu” for more details. Access Factory Reset in the Bluetooth System Configuration Menu HOLD ACCESS CoNFig. MENU “Configuration menu” NAVigATE BACkwARd “Factory reset” ExECUTE R1 Smart Cycling Helmet | 66... -
Page 67: Maintenance And Care
The protective capability of your helmet will diminish over time, dependent upon many factors such as dents, dings, and exposure to pollution, harmful chemicals and long term exposure to the sun. Sena recommends that helmets be replaced after five years. -
Page 68: Certification And Safety Approvals
CE Declaration of Conformity This product is CE marked according to the provisions of the R&TTE Directive (2014/53/EU). Hereby, Sena declares that the radio equipment type SP55 is in compliance with Directive 2014/53/EU. For further information, please consult www.sena.com. Please note that this product uses radio frequency bands not harmonized within EU. -
Page 69: Industry Canada Statement
Bluetooth SIG, Inc. and any ® use of such marks by Sena is under license. Other trademarks and trade names are those of their respective owners. The product is compliant with and adopts the Bluetooth Specification 4.1 and has... - Page 70 It is against the law to affix counterfeit labels to helmets. If you are in any doubt over the origin of the approval label affixed to your helmet contact Sena directly, and not your dealer. R1 Smart Cycling Helmet | 70...
-
Page 71: Limited Product Warranty Disclaimers, And Limitations
Here, product warranty extends to the product only. Warranty Period Sena warrants that this product shall conform to and perform in accordance with published technical specifications and the accompanying written materials, and shall be free of defects in materials and workmanship, for a period of two (2) years from the date of purchase by the first consumer purchaser of the Product. -
Page 72: Warranty Exclusions
Further, Sena will not be liable for any substantial damage not related to the condition, environment, or malfunction of the product. -
Page 73: Warranty Service
PRODUCT BY THE PURCHASER. Liabilities Disclaimer In addition to damages which may occur due to the use of the product, Sena will not be liable for damages of the product which occur due to the following events. • In the event the product is misused or used for purposes other than its intended purposes. - Page 74 Hero3 and Hero4 ® allowing for Bluetooth capabilities. The Bluetooth word mark and logos are owned by the ® Bluetooth SIG, Inc. and any use of such marks by Sena is under license. iPhone and iPod touch are registered ® ®...
Need help?
Do you have a question about the R1 and is the answer not in the manual?
Questions and answers