Table of Contents
Advertisement
Advertisement
Table of Contents

Subscribe to Our Youtube Channel
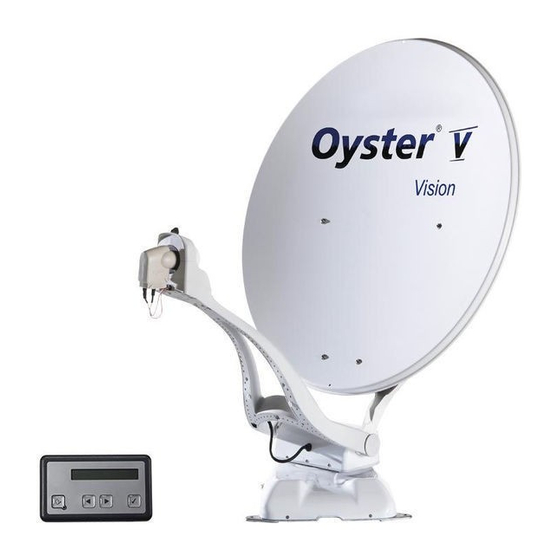
Related Manuals for Ten-Haaft Oyster V Vision


Summary of Contents for Ten-Haaft Oyster V Vision
- Page 1 OPERATOR MANUAL www.ten-haaft.com...
-
Page 2: Table Of Contents
1.3 Intended use 1.4 Safety precautions 2. Control elements 2.1 Control panel 2.2 FeatureBox (front face) 2.3 FeatureBox (rear face) 2.4 ten Haaft® app 3. Menu guidance 3.1 Main levels 3.2 Settings 4. Automatic satellite swap 4.1 Automatic satellite swap via DiSEqC™... -
Page 3: General Information
1. GENERAL INFORMATION 1.1 Introduction This operator manual describes the functions of the automatic satellite system and how to operate it. Please observe the installation instructions provided in the installation manual supplied with the system. Correct and safe operation of the system can only be ensured if both the installation manual and the operator manual are observed. - Page 4 1. GENERAL INFORMATION The manufacturer has designed your satellite system to be connected to standard on-board electrical systems with a rated voltage of 12 V / 24 V DC. The manufacturer accepts no liability for direct or indirect damages or for consequential damages to the system itself, to battery systems, motor vehicles or other equipment or goods resulting from installation or wiring errors.
-
Page 5: Safety Precautions
1. GENERAL INFORMATION 1.4 Safety precautions To ensure that your satellite system works properly, it is essential that it is correctly connected to the ignition of your vehicle (see installation manual). When correctly installed, the antenna automatically returns to and locks into its parking position when the ignition is switched on. -
Page 6: Control Elements
2. CONTROL ELEMENTS 2.1 Control panel All controls are handled via the control device. Vision On / Off You may choose any location you like to install the control panel, but please bear in mind that it is not water- proof. - Page 7 2. CONTROL ELEMENTS Vision On / Off - System starts the search from the last position There are two ways of switching the Vision antenna system on and off: With the button on the control device or by switching the receiver on and off. If you want the system to respond when switching the receiver on or off, then the menu item "Receiver control"...
- Page 8 2. CONTROL ELEMENTS Vision On / Off Selection button On / Off The arrow keys are used to navigate through all levels of the menu. With the aid of these keys you can select a desired submenu, function or setting. Press to activate the displayed menu item.
-
Page 9: Featurebox (Front Face)
2. CONTROL ELEMENTS 2.2 FeatureBox (front face) Control buttons 1. Power button This button switches the entire antenna system on and off, and it also stops the antenna motion. It may therefore also be used as emergency stop button. 2. "i" button This button has various functions that are indicated by the colour of the LED (see separate instructions). -
Page 10: Featurebox (Rear Face)
2. CONTROL ELEMENTS 2.3 FeatureBox (rear face) Inputs/outputs 3. Ant Antenna SAT IN of external unit 4. TV set Receiver SAT OUT to TV set 5. Mode SAT mode rotary switch 6. USB USB port 7. CTRL Control panel connection 8. -
Page 11: Ten Haaft® App
2. CONTROL ELEMENTS 2.4 ten Haaft® app 1) Load the ten Haaft® app onto your mobile device (smartphone or tablet). You can download this app free of charge from the Google Play Store or iTunes Store. 2) Once you have downloaded and installed the app, open it. - Page 12 2. CONTROL ELEMENTS 4) Scan the QR code on the sticker. Note that your FeatureBox is provided with three identical stickers when leaving the factory. These stickers specify the Wi-Fi name/SSID and the Wi-Fi password for your FeatureBox. Each FeatureBox has a unique name and password! One of the stickers is attached at the factory to the FeatureBox, another one is on the manual.
- Page 13 2. CONTROL ELEMENTS 5) In an Android system, the FeatureBox will automatically connect to the app via WiFi. In an Apple system, the WiFi connection of the FeatureBox must be selected in the device settings. The app indicates its connection to the WiFi system.
-
Page 14: Menu Guidance
3. MENU GUIDANCE 3.1 Main levels The menu guidance of the Oyster V systems adjusts itself to individual status of the external unit, showing only the steps that the system allows to be performed. Searching ASTRA1 = Display of the current operating status = Stop antenna motion = Displays current search transponder, timeout, return to display = Scroll through the control level... - Page 15 3. MENU GUIDANCE Retract? = Retract the antenna = Retract = Retract Open Sleep = Remains unfolded when the system is switched off = Back = System switches into Open-Sleep mode = Scroll through the control level Continue retraction? = Option to continue the preceding action, i.e. retraction = Antenna retracts = Antenna retracts = Scroll through the control level...
-
Page 16: Settings
3. MENU GUIDANCE 3.2 Settings These settings can be made at the control panel or via the app. Settings Satellite settings Manual search Azimuth Elevation SKEW option Manual Transponder Frequency Polarization Symbol rate FEC-rate Modulation type ONID Active Receiver Control Switch-on delay Switch-off delay DiSEqC allocation... - Page 17 Delay until the next check of the LNB voltage for power-down (1 – 30 sec.) Selection of four presets: „ten Haaft“ (® default), „manual“ (® Sat 1 - 4 ), „NL Canal Digitaal“ and „NL Joyne“ (® two fasctscan presets) „Off“...
- Page 18 3. MENU GUIDANCE General settings Language Display Brightness Color Fade-Out time Antenna Light Active Brightness Wi-Fi Active Channel Info Antenna Type UF Version LNB offset Signal information Error messages...
- Page 19 3. MENU GUIDANCE Left / right changes the language (languages list) Brightness 20% – 100% Colour 0% – 100% Fade-out time 2 – 60 sec. "Yes" or "No" Brightness 20% – 100% "Yes" or "No" Channel number Display of corresponding data Display of corresponding data Display of corresponding data Signal level, BER, ONID/TSID, ...
-
Page 20: Automatic Satellite Swap
4. AUTOMATIC SATELLITE SWAP 4.1 Automatic satellite swap via DiSEqC™ In most cases you will aim your automatic satellite system at one specific satellite only. Of course, your system can also receive many other satellites, allowing you to watch e.g. Dutch, Swiss, French, Spanish or other chan- nels. - Page 21 4. AUTOMATIC SATELLITE SWAP Sat ID Rotary switch Satellite name DiSEqC™ ID Astra 1 19.2° East Astra 2 28.2° East Astra 3 23.5° East Hotbird 13.0° East Eutelsat W5 5.0° West Thor / Intelsat 10 0.8° West Astra 4 4.8° East Eutelsat 16 16.0°...
-
Page 22: Service
5. SERVICE 5.1 Reception in practice – aiming the satellite system Satellite antennas are aimed at a satellite along three adjustment planes: 1. AZIMUTH ANGLE (COMPASS HEADING) The azimuth angle defines the horizontal setting of the antenna, specifying the angle between North and anten- na heading. -
Page 23: Reception In Remote Areas
5. SERVICE 5.2 Reception in remote areas LNB SETTINGS IN DIFFERENT REGIONS: This setting is done automatically at the Oyster® V Premium with SKEW option. This section describes how to fine-tune the LNB to optimise reception in the fringe of a TV satellite's footprint. This requires loosening the LNB or antenna bolts and turning the LNB or complete flat-panel antenna by a specific angle. - Page 24 5. SERVICE The following definitions apply to the tables and specified angles below: To determine the direction of rotation, the viewer must look at the front face of the antenna as does the LNB, i.e. the viewer must be standing in front of the antenna.
- Page 25 5. SERVICE LNB settings in different regions: Country Eutelsat Thor Astra 4 Hotbird Astra 1 Astra 3 Astra 2 0.8° West 4.8° East 13° East 19.2° East 23.5° East 28.2° East 5° West Germany, Austria, -23° -16° -12° -6° 0° 4°...
-
Page 26: Troubleshooting
5. SERVICE 5.3 Troubleshooting Stop function It must be possible to stop the antenna motion at any time. To stop or interrupt a satellite search, press the OK button (stop function) of the control panel, the power button of the remote of the Oyster TV or the power button of the FeatureBox (only at the Oyster®... -
Page 27: Featurebox Update Via Usb Stick
5. SERVICE 5.4 FeatureBox update via USB stick Further to automatic updates via the app, which is the option preferred for end customers, updates can also be performed manually using a USB stick. You will need a USB stick formatted as FAT/FAT32 with the file tenhaaft.uf loaded into its root directory (top level). The UF-file is available from our website. - Page 28 5. SERVICE BLUE LED Once the data have been uploaded into the internal update memory, they can be distributed to the hardware components connected to the FeatureBox. This may happen automatically. However, it is often not possible to update all components at once because the FeatureBox cannot know which state a component is in (e.g.
- Page 29 5. SERVICE Update sequence Description Device is switched off (standby) --> Switch device on Device is switched on --> Plug in the USB stick Data are being transmitted or updated --> Do not touch – wait! After the right red LED has turned off permanently, you can remove the USB stick -->...
-
Page 30: Appendix
6. APPENDIX 6.1 Declaration of conformity... -
Page 31: Notes On The Protection Of The Environment
End-of-Life Vehicle Directive ELV, 2000/53/EC. The antenna system does not contain any materials rated as hazardous to the environment according to the directive. We hope your satellite system brings you lots of joyful entertainment hours. Your ten Haaft team... - Page 32 CAUTION! The sticker on the operating manual must be identical to the one on the FeatureBox! ten Haaft GmbH Office hours: Neureutstraße 9 Monday – Friday 8:00 a.m. – 12:00 a.m. 75210 Keltern 12:30 a.m. – 4:30 p.m. Germany Telephone: +49 (0) 7231 / 58588-0...
Need help?
Do you have a question about the Oyster V Vision and is the answer not in the manual?
Questions and answers