
Related Manuals for Arcam CR 9000

Summary of Contents for Arcam CR 9000
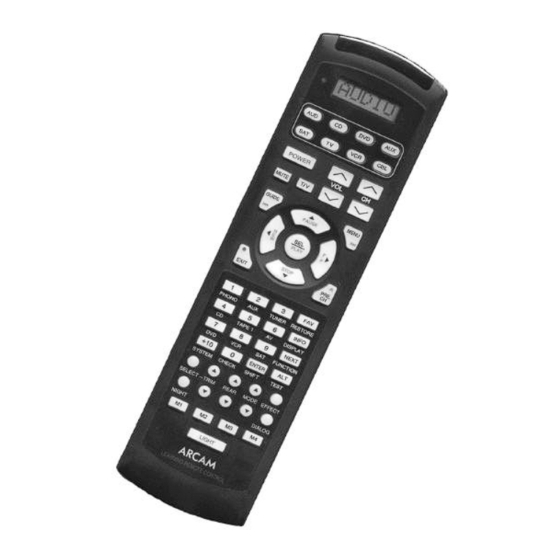
- Page 1 23425 Program Programmed & Learning med & Learning Remote Control Remote Control CR 9000 Operating Manual cr9000.wpd...
-
Page 2: Table Of Contents
Recalling the Set Up Code Number ..... 12 The Arcam CR9000 remote control operates up to eight different audio and video devices Learning Set Up . -
Page 3: Battery Installation
Battery Installation Using Your Remote A: Function Table Reference To Open and Close the Battery Compartment Cover To open the battery cover, push the latch forward toward the top of the remote control, and lift the latch up. To close the battery cover, slide the battery cover straight back in (toward the top of the remote) and push down until it "Clicks"... -
Page 4: Function Tables
Using Your Remote Using Your Remote Function Table Button Name VCR Functions Cable Functions Device Name VCR (ON) Cable (ON) Button Name Audio Functions SAT Functions TV Functions Power On / Off (OFF) On / Off (OFF) Device Name Audio (ON) SAT (ON) TV (ON) Power... -
Page 5: Preprogrammed Set Up
Using Your Remote Button Name CD Functions DVD Functions AUX Functions The Arcam universal remote control can operate up to eight separate audio and video Device Name CD (ON) DVD (ON) TAPE (ON) devices (equipment). To program the remote control for your devices, please use the... -
Page 6: Auto Search Method
Using Your Remote Using Your Remote Auto Search Method Note: SET appears in the LCD for 20 seconds to indicate that the remote control is ready to be programmed. The following steps must be entered Please use this method if none of the Set-Up Code numbers worked for your device while SET appears in the LCD. -
Page 7: Recalling The Set Up Code Number
Using Your Remote Using Your Remote Recalling the Set-Up Code Number If you pass the correct Set-Up Code number, you can return to it by pressing the CHANNEL DOWN button, one Set-Up Code number at a time, until your device turns back on. To display the three digit Set-Up Code number that was stored for a device. -
Page 8: Learning Set Up
Press and hold both the Device button selected in Step 1 and the SEL/PLAY button for about three seconds, until the LCD on the CR9000 shows The Arcam CR9000 has the ability to learn new functions from your original LEARN. The CR9000 is now in the learning mode. -
Page 9: Learning New Functions On Device Buttons
Using Your Remote Using Your Remote Repeat Steps 4 through 7 for any other buttons you wish to learn new functions. Learning New Functions on Device Buttons Once you have completed the learning for all the desired buttons in a Device The eight Device buttons at the top of the remote control can also learn new mode, store the learned functions by pressing the Device and SEL/PLAY functions. -
Page 10: Erasing Learned Functions
Using Your Remote Using Your Remote Repeat steps 3 through 6 for any other Device buttons you wish to teach new Erasing All Buttons in One Device Mode: functions. Press the Device button for the mode to be erased. Press and hold the Device and SEL/PLAY buttons simultaneously, for about Once you have completed the learning for all the desired Device buttons, 3 seconds, until the LCD shows LEARN. -
Page 11: Operation
Using Your Remote Using Your Remote D: Operation Device Buttons Pressing a Device button at the top of the remote performs the following functions: After you have programmed the remote control for your equipment, use the following procedures to operate your home entertainment system: Changes the Device mode on the CR9000 remote control. -
Page 12: Backlighting
Using Your Remote Advanced Features Example: Pressing the SAT Device button a second time will change the LCD program advanced features on the remote control. The advanced features are from SAT to A-SAT. designed to enhance the use of the remote control with your home entertainment system. - Page 13 Advanced Features Advanced Features To Return to the Original Setting: Press either the VCR Device Button to set-up for VCR Channel Control or the CBL Device Button to set-up for Cable Channel Control. Either VCR or Select the mode that you want to turn off the Volume Control Punch CBL will flash in the LCD, depending on the Device Button selected.
-
Page 14: Transport "Punch Through
Advanced Features Advanced Features Transport Control "Punch Through" The VCR or CD Transport Controls (Play, Stop, Fast Forward, Rewind, Pause, and Record) will now override the original functions of the buttons in this mode. You can set-up your remote control so that VCR or CD Transport Controls (PLAY, STOP, FAST FORWARD, REWIND, PAUSE, and RECORD) will also operate in other modes on the remote control. -
Page 15: Memory Buttons
Advanced Features Advanced Features B: Memory Buttons Macro Commands: Memory Buttons can store multiple selections including Power On/Off sequences. The buttons labelled M1, M2, M3, M4, and POWER are Memory Buttons. The M1-M4 buttons can store your favourite channels, create macro commands, or be used to "relocate"... -
Page 16: Programming Memory Buttons
Advanced Features Advanced Features Programming Memory Buttons: Press the Audio Device Button and the MUTE button, simultaneously. SET will appear in the LCD. Select the mode that you wish to program the Memory Button in by pressing Press Memory Button M2. M2_ # # will appear in the LCD. the corresponding Device Button (TV, VCR, CBL, SAT, or AUD) and MUTE button, simultaneously. -
Page 17: Changing The Lcd Display
Advanced Features Advanced Features C. Changing the LCD Display LCD Displays in the Automatic Audio Mode A-SAT A-TV A-VCR A-CAB AUDIO A-CD A-DVD A-AUX Four different LCD displays can be selected for each Device mode of the remote A-V4 A-TV3 A-V1 A-V2 AUD1... -
Page 18: Specifications
Your device will turn off when the correct Set-Up Code number has been selected. The Arcam CR9000 remote control comes with a one-year warranty from the date If it does not turn off, select the next Set-Up Code number from the table, and press of purchase. -
Page 19: Glossary
Glossary Glossary Cursor Control Punch Through Buttons that correspond to the UP, DOWN, LEFT, RIGHT, SELECT, GUIDE, Advanced feature that enables you to operate Volume, Channel or Transport MENU and EXIT functions of your audio/video equipment. Control functions of one device while in another mode. Device Example: Audio Volume Control Punch Through, gives you the ability to raise, lower and mute your Audio receiver volume while operating... -
Page 20: Appendix
Appendix Set-Up Code Tables Audio Audio A: Assignment of Audio/Video Equipment Please use the following listing to locate the correct Set-Up Code Tables for your Manufacturer/Brand Set-Up Code Number equipment: ADCOM 082 092 225 161 AIWA 018 104 170 188 202 203 211 213 AUDIO Set-Up Code Table: AKAI 138 189... -
Page 21: Satellite
Set-Up Code Tables Set-Up Code Tables Audio Audio Satellite Satellite MCINTOSH Manufacturer/Brand Set-Up Code Number 009 076 079 AMPLICA MERIDIAN 012 013 100 BIRDVIEW 051 113 126 129 MITSUBISHI 021 204 242 243 MONDIAL 042 043 112 157 158 CAPETRONICS 113 186 CHANNEL MASTER 013 014 015 018 036 055... - Page 22 Set-Up Code Tables Set-Up Code Tables Satellite Satellite REALISTIC 043 074 Manufacturer/Brand Set-Up Code Number SAMSUNG ADMIRAL 072 081 160 161 SATELLITE SERVICE 028 035 047 085 AKAI001 SCIENTIFIC ATLANTA 032 138 AMARK 112 143 SONY AMPRO 073 167 STARCAST AMSTRAD SUPERGUIDE ANAM...
- Page 23 Set-Up Code Tables Set-Up Code Tables 034 038 070 083 145 SANYO 166 007 020 053 057 082 SCOTT 004 028 043 048 143 KENWOOD 001 070 SEARS 015 030 004 007 028 057 143 094 160 082 165 KLOSS 002 059 SHARP 170 081 019 028 029 014 004 022 143 175...
-
Page 24: Vcr
Set-Up Code Tables Set-Up Code Tables 045 046 059 Manufacturer/Brand Set-Up Code Number MINOLTA 013 020 AIWA MITSUBISHI 013 020 045 046 051 059 061 142 151 AKAI 016 043 046 124 125 142 146 034 040 AMPRO MULTITECH 024 034 ANAM 012 023 039 043 048 AUDIO DYNAMICS... -
Page 25: Cable
Set-Up Code Tables Set-Up Code Tables Cable Cable TECHNICS 031 070 Manufacturer/Brand Set-Up Code Number TEKNIKA 019 031 034 101 001 003 004 039 042 046 053 THOMAS AMERICAST ANTRONIX TOSHIBA 008 013 042 047 059 079 082 112 131 ARCHER 005 007 014 024 TOTEVISION... - Page 26 AIWA 059 065 088 089 105 122 170 187 REGENCY AKAI 074 195 202 REMBRANT 231 232 ARCAM (ALPHA ONE CD ONLY) SAMSUNG 030 068 AUDIO Access 119 147 SCIENTIFIC ATLANTA 003 011 041 042 043 045 046 AUDIO EASE...
- Page 27 Set-Up Code Tables Set-Up Code Tables 059 180 SIGNATURE MAGNAVOX 032 044 107 121 SONY 048 053 081 097 110 126 133 164 177 225 226 MARANTZ 027 041 044 051 077 107 209 211 SOUNDESIGN MCINTOSH SUMO 014 073 092 SYLVANIA 044 107 MEMOREX...
-
Page 28: Dvd
Set-Up Code Number Manufacturer/Brand Set-Up Code Number AIWA AKAI AIWA 015 071 100 114 CALIFORNIA AUDIO AKAI DAEWOO ARCAM (D150 TV TUNER) DENON 007 206 207 ARCAM (D100 CASSETTE DECK) 026 027 ARCHER GOLDSTAR 057 223 CARVER 006 008 027 024... - Page 29 Set-Up Code Tables Notes SONY 020 022 052 084 089 164 165 166 TAEKWANG TEAC 009 059 212 TECHNICS 007 010 076 088 109 122 193 TOSHIBA TURBOSCAN VICTOR X-10 XANTECH 168 169 170 171 172 188 189 YAMAHA 021 026 031 067...
- Page 30 Notes Notes...
- Page 31 Notes...
Need help?
Do you have a question about the CR 9000 and is the answer not in the manual?
Questions and answers