Table of Contents
Advertisement
Quick Links
Advertisement
Table of Contents

Related Manuals for Zte MAVEN 3


Summary of Contents for Zte MAVEN 3
-
Page 1: User Guide
User Guide... -
Page 2: Table Of Contents
Copyright © 2017 ZTE CORPORATION. All rights reserved. ZTE, Z835, and Installing the nano-SIM Card and microSDHC Card ......7 the ZTE logos are trademarks of the ZTE Corporation. AT&T, the AT&T Charging the Battery ..................8 logo and all other AT&T marks contained herein are trademarks of AT&T Extending the Battery Life ................9... - Page 3 Changing the Screen Brightness ............23 Working With the Call History ..............61 Protecting Your Phone With Screen Locks ........23 Calling Your Contacts ..................62 Protecting Your Phone With Encryption ..........24 Checking Voicemail ..................62 Knowing the Basics ..................26 Using Options During a Call ................62 Managing Multi-party Calls .................63 Monitoring the Phone Status ..............26 Adjusting Your Call Settings ...............65...
- Page 4 Adding, Editing, or Deleting an Email Account.......85 Using Other Camera Modes ..............100 Changing General Email Settings ............86 Recording a Video .................... 101 Messaging ......................87 Customizing Camera and Video Settings ........102 Music ........................ 104 Opening the Messaging Screen ............... 87 Sending a Message ...................
-
Page 5: Getting Started
Getting Started Personal ........................122 System ........................127 Upgrading the Phone Software ............128 Installing the nano-SIM Card and Troubleshooting ..................129 microSDHC Card For Your Safety .................... 136 You can use one nano-SIM card and one microSDHC card General Safety ....................136 (optional, not included). -
Page 6: Charging The Battery
GPS satellites battery level on the Status Bar. for your current location; each query drains your battery. WARNING! Use only ZTE-approved chargers • Use the battery saver feature. and cables. The use of unapproved accessories... -
Page 7: Setting Up Your Phone For The First Time
Setting Up Your Phone for the First Time Unlocking the Screen and Keys 1. Press the Power key to turn the screen on. When you first power on your phone after you purchase it or 2. Touch and hold a blank area of the screen or to unlock the reset it to factory settings (see Settings –... -
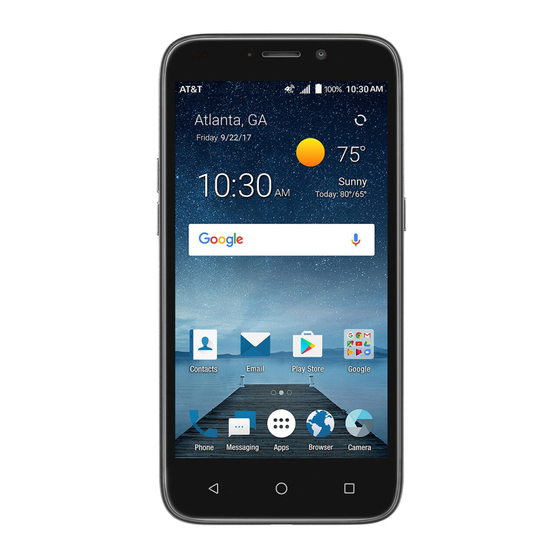
Page 8: Getting To Know Your Phone
Getting to Know Your Phone dragging, do not release your finger until you have reached the target position. • Pinch – In some apps (such as Maps and Browser), you can zoom in and out by placing two fingers on the screen at once and pinching them together (to zoom out) or spreading Headset jack Earpiece... -
Page 9: Key Functions
Back key Touch to go to the previous screen. Back camera Recent apps key Touch to see recently used applications. Flash Volume up key / Press or hold to turn the volume up/down. Volume down key Getting to Know the Home Screen Back cover The home screen is the starting point for your phone’s applications, functions, and menus. - Page 10 Extending Home Screen Adjusting the Order of a Home Screen Panel: Your home screen is extendable, providing more space for 1. Touch and hold an empty area of the home screen and slide shortcuts, widgets, and more. Simply swipe your finger to the left or right to view the home screen thumbnails.
-
Page 11: Personalizing
Personalizing Changing the Ringtone and Notification Sound Changing the System Language You can customize the default ringtone for incoming calls, the > Settings > Languages & default notification sound, and the default alarm ringtone. 1. From the home screen, touch >... -
Page 12: Adjusting Volumes
Adjusting Volumes Using Do Not Disturb Mode You can limit interruptions with Do not disturb mode. This mode 1. From the home screen, touch > Settings > Sound. silences your phone so that it doesn’t make sounds or vibrate 2. Drag the sliders below Media volume, Alarm volume, Ring when you don’t want it to. -
Page 13: Applying New Wallpapers
Setting the Theme If you have selected Priority only, you can customize the types of allowed sounds or vibrations under Priority 1. Touch and hold an empty place on the home screen. interruptions. Touch the switches next to the items you 2. -
Page 14: Protecting Your Phone With Encryption
Touch Pattern to create a pattern that you must draw to • Set a screen lock pattern, PIN or password. unlock the screen. • Charge the battery. Touch PIN or Password to set a numeric PIN or a password • Keep the phone connected to the charger. that you must enter to unlock your screen. -
Page 15: Knowing The Basics
Knowing the Basics Managing Notifications The Status Bar at the top of the home screen provides Monitoring the Phone Status notification icons on the left side. Below are some of the icons you may see. The Status Bar at the top of the home screen provides phone Indicator What it means Indicator What it means... - Page 16 • To open the Notification Panel, swipe your finger down on Use Quick Settings the home screen or from the top of the screen. The Quick Settings in the Notification Panel make it convenient • To close the Notification Panel, swipe your finger up on the to view or change the most common settings for your phone.
-
Page 17: Managing Shortcuts And Widgets
Managing Shortcuts and Widgets • Hotspot: Touch to turn the Mobile hotspot feature on or off. Touch and hold to access the Mobile hotspot menu. (See Connecting to Networks and Devices – Sharing Your Mobile Adding Shortcuts and Widgets Data Connection – Sharing Your Mobile Data Connection as a 1. -
Page 18: Organizing With Folders
Organizing With Folders Rearranging the Primary Shortcuts You can create folders on the home screen and add shortcuts The home screen includes a customizable primary shortcuts to them. You can move or remove folders in the same way that area at the bottom of all home screens. You can keep up to four you move or remove shortcuts. - Page 19 Google Keyboard • Touch to use uppercase. Double-tap to lock uppercase. This key also changes to indicate the current case you are The Google keyboard provides a layout similar to a desktop using: for lowercase, for uppercase, and when locked computer keyboard.
- Page 20 The FULL Layout • Pre-defined texts: Touch to enter digits, symbols, and more. You can touch the arrow keys to turn pages, or touch The FULL layout offers an input experience similar to a computer keyboard. to go back to the alphabetic keys. Slide up on the space key or touch to enter emojis and emoticons.
- Page 21 If word prediction is enabled, just touch the keys once and To enable and use Curve - Word gesture: choose the right word. 1. On the TouchPal keyboard, touch > Settings > Smart input and check Curve® - Word gesture. The T+ Layout 2.
- Page 22 Wave - Sentence Gesture NOTES: • If none of the suggested words are correct, type the word as Wave - Sentence geature allows you to enter words by dragging you normally would. candidate words to the space key. • Wave - Sentence gesture is only available in the Full layout. To enable and use Wave - Sentence gesture: Google Voice Typing 1.
-
Page 23: Editing Text
Editing Text Opening and Switching Apps • Move the insertion point: Touch where you want to type. The Opening an App cursor blinks in the new position, and a tab appears below it. 1. From the home screen, touch Drag the tab to move the cursor. 2. -
Page 24: Connecting To Networks And Devices
Connecting to Networks and Devices NOTE: To set the APN to default settings, touch > Reset to default. Select Network Type Connecting to Mobile Networks 1. From the home screen, touch > Settings > Mobile Controlling Mobile Data Use networks > Preferred network type. 2. - Page 25 NOTE: Your phone automatically connects to previously used Forgetting a Wi-Fi Network Wi-Fi networks when they are in range. You can make your phone forget the details of a Wi-Fi network Getting Notified of Open Networks that you’ve connected to previously – for example, if you don’t want the phone to connect to it automatically or you no longer >...
-
Page 26: Using Wi-Fi Direct
Using Wi-Fi Direct® 4. The WPS PIN number displays on the screen. Enter the PIN into the access point's setup page. Wi-Fi Direct allows Wi-Fi devices to connect to each other After entering the PIN, your phone automatically finds the without the need for wireless access points (hotspots). - Page 27 Turning Bluetooth On/Off NOTE: The Bluetooth passkey may be fixed for certain devices, such as headsets and hands-free car kits. You can try entering > Settings > Bluetooth. 1. From the home screen, touch 0000 or 1234 (the most common passkeys), or refer to the 2.
-
Page 28: Connecting To Your Computer Via Usb
Receiving Data via Bluetooth NOTE: You can also install the driver on the PC from the CD-ROM drive. 1. Turn Bluetooth on before trying to receive data via Media device (MTP): Transfer files on Windows® or Mac®. Bluetooth. NOTE: For Windows XP, please install the drivers and Media 2. -
Page 29: Sharing Your Mobile Data Connection
Sharing Your Mobile Data Connection 3. From the home screen, touch > Settings > More. 4. Touch Bluetooth tethering. You computer will begin sharing You can share your phone’s data capabilities through tethering your phone’s data connection. or by activating the Mobile hotspot feature to create a Wi-Fi NOTE: To stop sharing your data connection, touch Bluetooth hotspot. -
Page 30: Connecting To Virtual Private Networks
Connecting to Virtual Private Networks Setting Up Your Wi-Fi Hotspot You can change the name of your phone's Wi-Fi network (SSID), Virtual private networks (VPNs) allow you to connect to the secure your portable Wi-Fi hotspot, and set other options. resources inside a secured local network. -
Page 31: Phone Calls
Phone Calls Connecting to a VPN > Settings > More > VPN. 1. From the home screen, touch You can place calls from the Phone app, the Contacts app, 2. Touch the VPN that you want to connect to. or other apps or widgets that display contact information. 3. -
Page 32: Answering Or Rejecting Calls
• To redial the last call you made, touch when the phone • If the phone screen is active, touch number field is empty to enter the number automatically. • If the phone screen is locked, touch MESSAGE REJECT. NOTE: To edit the preset text responses from within the Phone Then touch again. -
Page 33: Calling Your Contacts
Calling Your Contacts • Touch to open the dialpad when you need to enter a code (for example, the PIN for your voicemail or bank account) 1. From the home screen, touch > CONTACTS during the call. 2. Touch beside a contact to make a call. •... -
Page 34: Adjusting Your Call Settings
Adjusting Your Call Settings To respond to an incoming call while you’re on a call: • Touch to answer the call. This places the first Setting Contact Display Options caller on hold and answers the second caller. • Touch to answer the call. This ends the first You can set the order of the contacts displayed in the CONTACTS tab of the Phone app. - Page 35 Setting Answer and End Calls Setting Voicemail > > Settings > Answer and > > Settings > Call 1. From the home screen, touch 1. From the home screen, touch end calls. settings. 2. Touch Voicemail to configure voicemail settings. 2.
- Page 36 Forwarding Incoming Calls Blocking Certain Calls Call forwarding allows you to forward your incoming calls to Call blocking allows you to block calls and texts from certain another phone number. numbers. 1. From the home screen, touch > > Settings > Call 1.
-
Page 37: Contacts
Contacts TTY VCO: Users who can talk, but cannot hear, may use this mode to talk through the phone and receive You can add contacts on your phone and synchronize them with responses via text messages. the contacts in your Google account or other accounts that Setting Hearing Aid Compatibility support contact syncing. -
Page 38: Setting Up Your Own Profile
Setting Up Your Own Profile Importing Contacts From the microSDHC Card or Phone Storage You can create your own name card in your phone. 1. From the home screen, touch 1. From the home screen, touch > CONTACTS. 2. Touch > Import/Export > Import from storage. 2. -
Page 39: Working With Favorite Contacts
Sharing Contacts 3. Touch a group to view its members. NOTE: To send a message or an email to all or some of a group’s > CONTACTS. 1. From the home screen, touch members, you can touch beside the group’s name in the list. 2. -
Page 40: Searching For A Contact
Editing a Group Setting a Ringtone for a Contact > GROUPS. Assign a special ringtone to a contact, so you know who is 1. From the home screen, touch calling when you hear the ringtone. 2. Touch a group. You can add or remove group members, 1. -
Page 41: Web Accounts
Web Accounts The information from the second contact is added to the first, and the second contact is no longer displayed in the contacts list. Adding or Removing Accounts You can repeat these steps to link another contact to the main contact. -
Page 42: Configuring Account Sync
Removing an Account Syncing Manually Removing an account will delete it and all information When auto-sync is turned off, you can sync account data associated with it, such as emails and contacts, from your manually. phone. 1. From the home screen, touch >... -
Page 43: Email
Email 5. Touch at the top of the screen to send the message. NOTES: From the home screen, touch . Use it to receive and send • If you have more than one email account added on the emails from Exchange ActiveSync, Gmail, Hotmail, Yahoo!®, and phone, touch the From field to select the account you want more. -
Page 44: Adding, Editing, Or Deleting An Email Account
Adding, Editing, or Deleting an Email To reply to the sender and all recipients of the original message, touch Account To forward the message, touch After setting up your first email account (see Email – Setting Up 3. Edit your message and touch the First Email Account), you can add more email accounts and Marking or Flagging an Email manage them separately. -
Page 45: Changing General Email Settings
Changing General Email Settings Messaging General settings apply to all email accounts you add. You can use Messaging to exchange text messages (SMS) and 1. From the Email inbox , touch > Settings > General multimedia messages (MMS). settings. Opening the Messaging Screen 2. -
Page 46: Adding An Attachment
3. Touch the Send message field and enter the content of your Number Function text message. 4. If you want to send a multimedia message, touch Touch to select a focus area. attach a file to the message (see Messaging – Adding an Touch to start recording a video. -
Page 47: Replying To A Message
Replying to a Message Forwarding a Message Messages you receive are appended to existing threads of the 1. On the Messaging screen, touch the thread that has the same number. If the new message comes from a new number, a message you want to forward. -
Page 48: Calendar
Calendar • When you are viewing past or future days, weeks, or months, touch at the top to quickly switch to today. The number in Calendar on the phone works with the web-based Google the icon changes with the actual date. Calendar™... -
Page 49: Editing, Deleting, Or Sharing An Event
Editing, Deleting, or Sharing an Event Browser 1. Find the event you want to edit, delete, or share. Use Browser to view web pages and search for information. 2. Open its details screen (see Calendar – Viewing Your Opening the Browser Calendars and Events –... -
Page 50: Downloading Files
Camera To switch between tabs: 1. Touch ( the number shows how many tabs you have You can take photos and record videos. Photos and videos are opened). stored to the phone’s microSDHC card or to the phone internal 2. Titles of opened tabs appear as a list. Touch a thumbnail to storage. - Page 51 Select a filter. Capture a photo. View pictures and videos you have taken. Use special photo or video camera modes: PANORAMA, MULTI EXPOSURE, and TIMELAPSE. Adjust the focus point and exposure. Switch between the front and back cameras. Set a time delay before the camera takes a picture after you touch the shutter icon.
-
Page 52: Using Manual Camera Mode
Using Manual Camera Mode • TIMELAPSE: Record time-lapse videos (back camera only); you can set the time interval between each frame. You can use manual camera mode to adjust more camera Recording a Video options for your photo, such as ISO, white balance, and exposure. -
Page 53: Customizing Camera And Video Settings
Customizing Camera and Video Settings Options in Video Mode (Front or Back Camera) • Video quality: Set the quality for your video. Before capturing a photo or video, you can touch to open the Options in Manual Mode (Back Camera) following camera setting options. -
Page 54: Music
Music Viewing Your Music Library From the home screen, touch > Music to open the Music From the home screen, touch > Music to play audio files app. There you can touch All songs to view all your audio files stored on your phone. -
Page 55: Playing Music
Playing Music Playback control. Skip songs or pause and resume playback. Drag the slider to jump to any part of Touch a song in the music library to listen to it. Touch the bar the song. at the bottom of the screen to open the following playback Touch to play the current playlist in shuffle mode, screen. -
Page 56: Video Player
Video Player Number Function Return to the video library list. Use the Video Player to manage your video library and watch videos. Save the frame as a separate photo. Change the video ratio (fit to screen). Opening the Video Library Pause and resume playback. -
Page 57: Managing Video Files
Managing Video Files More Apps Deleting Videos Calculator 1. Touch and hold a video in the video library. > Calculator to use the 2. Touch any other videos you want to delete. From the home screen, touch > OK. phone’s convenient built-in calculator for some basic as well as 3. -
Page 58: Downloads
File Manager NOTES: • To enable or disable existing alarms directly, just slide the Quickly access all of your images, videos, audio clips, and other switches on the right side of each alarm. types of files on your phone and the microSDHC card. •... -
Page 59: Google Apps
Playing a Voice Memo • Chrome™: Use the Chrome app to browse the Internet and get your bookmarks, browsing history, and more synced with To play a memo you just recorded: your Google account. Touch at the bottom of the screen. •... -
Page 60: Settings
Settings Data Usage Touch the Cellular data switch to turn mobile data on or off. From the home screen, touch > Settings. Settings contains You can check how much data has been used during the time most of the tools for customizing and configuring your phone. cycle you set, set mobile data limit and warning, see what apps have been using mobile data, or restrict background data for Wireless &... -
Page 61: Device
Bluetooth Tethering • Press power button twice for camera: Touch to enable/ disable this feature, which allows you to quickly open the In the Settings app, touch More > Bluetooth tethering to access Camera app without unlocking your screen. the Internet on your computer via the Bluetooth tethering •... - Page 62 NOTE: The notifications of some apps cannot be turned off. • Data usage: Check data used by the app during a specified Content hiding is available only if you have set a pattern, a PIN time cycle and change background data restriction settings. or a password screen lock.
-
Page 63: Personal
Memory Battery saving: Use only Wi-Fi, Bluetooth, and mobile networks to get your approximate location. This will drain View average memory use and monitor which apps use the less power from your battery than using GPS. most memory. Device only: Use GPS to pinpoint your location. Call Settings In the Location menu, touch Accelerated Location to use Configure the call options (see Phone Calls –... - Page 64 NOTE: Put all your confidential passwords in a safe place for Accounts future use. If you enter the wrong SIM PIN more times than Manage your accounts and synchronization. Touch Add account allowed, your nano-SIM card will be locked and you cannot to sign in to or create accounts on your phone.
-
Page 65: System
System Pitch: Adjust the tone of spoken text. Reset speech rate: Reset the speed at which the text is spoken to normal. Date & Time Reset speech pitch: Reset the pitch at which the text is Set date, time, time zone, and time format, or use network- spoken to default. -
Page 66: Upgrading The Phone Software
Possible solution microSDHC card and install it to your phone from the card. The network signal is NOTE: Visit the ZTE official handset service support website too weak at your current (http://www.ztedevice.com/support) and click your country or Move to a location... -
Page 67: Troubleshooting
Problem Possible causes Possible solution Problem Possible causes Possible solution End the call and The battery or battery Contact the dealer. dial again. You charger is damaged. Poor network link quality may be switched Adjust the on the part of your service to a better-quality The phone’s temperature battery charging... - Page 68 Problem Possible causes Possible solution Problem Possible causes Possible solution The standby time is Cannot turn Battery power has been Recharge the related to your service your phone depleted. phone’s battery. provider system If you are located configuration. The same in an area where Take the nano- The nano-SIM card has...
- Page 69 Problem Possible causes Possible solution Problem Possible causes Possible solution The nano-SIM card is Contact your Uninstall the Phone invalid. service provider. software that may crashes, be causing the Check the service Some third-party You are not within the reboots, problem.
-
Page 70: For Your Safety
For Your Safety Don’t use at gas stations. General Safety Your phone may produce a bright or flashing light. Don’t make or receive handheld calls while driving. Don’t dispose of your phone in fire. Never text while driving. Keep your phone at least 10 mm away from your ear To prevent possible hearing damage, do not listen at or body while making calls. -
Page 71: Fcc Rf Exposure Information (Sar)
FCC RF Exposure Information (SAR) model phone is on file with the FCC and can be found under the Display Grant section of www.fcc.gov/oet/ea/fccid after This phone is designed and manufactured not to exceed the searching on FCC ID: SRQ-Z835. emission limits for exposure to radio frequency (RF) energy set by For this device, the highest reported SAR value for usage the Federal Communications Commission of the United States. -
Page 72: Hearing Aid Compatibility (Hac) Regulations For Mobile
Hearing Aid Compatibility (HAC) regulations This mobile phone has been tested and found to comply with the limits for a Class B digital device, pursuant to Part for Mobile Phones 15 of the FCC Rules. These limits are designed to provide reasonable protection against harmful interference in a In 2003, the FCC adopted rules to make digital wireless residential installation. -
Page 73: Distraction
Distraction This phone has been tested and rated for use with hearing aids for some of the wireless technologies that it uses. However, Driving there may be some newer wireless technologies used in this phone that have not been tested yet for use with hearing Full attention must be given to driving at all times in order to aids. - Page 74 • Clean your phone and its accessories with a soft material Small Children such as cleaning cloth for eyeglass lenses. Do not use alcohol Do not leave your phone and its accessories within the reach of or other corrosive substances for cleaning or allow them to small children or allow them to play with it.
-
Page 75: Electrical Safety
Seizures/Blackouts Loud Noise The phone can produce a bright or flashing light. A small This phone is capable of producing loud noises, which may percentage of people may be susceptible to blackouts or damage your hearing. Turn down the volume before using seizures (even if they have never had one before) when exposed headphones, Bluetooth stereo headsets or other audio devices. -
Page 76: Ctia Requirements
If your phone or its accessory has been submerged in water, • Avoid dropping the phone or battery. If the phone or battery punctured, or subjected to a severe fall, do not use it until you is dropped, especially on a hard surface, and the user have taken it to be checked at an authorized service center. -
Page 77: Explosive Environments
Hearing Aids Interference in Vehicles People with hearing aids or other cochlear implants may Please note that because of possible interference to electronic experience interfering noises when using wireless devices or equipment, some vehicle manufacturers forbid the use of when one is nearby. mobile phones in their vehicles unless a hands-free kit with an external antenna is included in the installation. -
Page 78: Warranty
Defects or damages from abnormal use, abnormal conditions, improper storage, exposure to moisture, ZTE offers you a limited warranty that the enclosed subscriber dampness or corrosive environments, unauthorized unit and its enclosed accessories will be free from defects in... -
Page 79: How To Get Warranty Service
COSTS OR EXPENSES OR FOR ANY INDIRECT, OR SPECIAL Handset specifications are shown in the following table. OR CONSEQUENTIAL LOSS OR DAMAGE. TO THE EXTENT PERMITTED BY APPLICABLE LAW, ZTE’S LIABILITY SHALL BE Operating system Android 7.1.1 (Nougat) LIMITED TO THE PURCHASE VALUE OF THE PRODUCT. -
Page 80: Specifications
NOTE: The phone’s talk time and idle time are based on ideal working environments. The use of extended backlighting, browser, and network conditions can reduce battery life and talk/idle time. SPECIFICATIONS...
Need help?
Do you have a question about the MAVEN 3 and is the answer not in the manual?
Questions and answers