Table of Contents
Advertisement
Quick Links
Advertisement
Table of Contents

Related Manuals for THORLABS SC10


Summary of Contents for THORLABS SC10
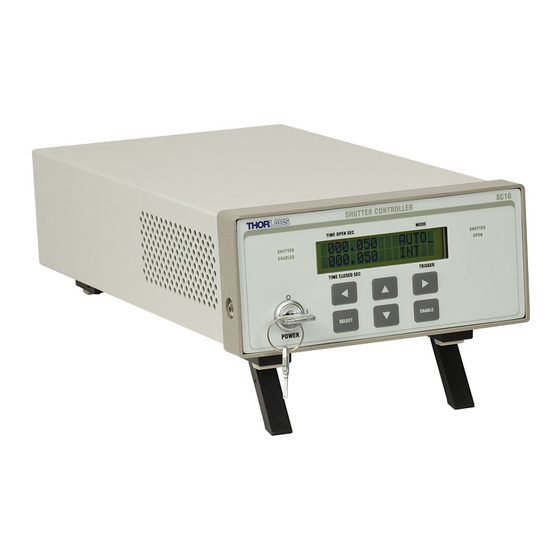
- Page 1 SC10 Shutter Controller Operating Manual SHUTTER CONTROLLER SC1 0 TI M E OPEN SEC M ODE SHUTTER EN ABLED OPEN TRI GGER TI M E CLOSED SEC SELECT EN ABLE POWER THORLABS, Inc. Ph: (973) 579-7227 435 Route 206N Fax: (973) 383-8406...
-
Page 2: Table Of Contents
In addition the SC10 also provides a TTL output trigger to control other devices used in concert with the SHO5. Both outputs are under direct control of the user interface. The SC10 8654-D02 Rev. B 8/15/05... -
Page 3: Sc10 Specifications
A key lock and an interlock function are also provided on the SC10. The SC10 provides drive/output pulses that have 0.001Second resolution and 0.0001 Second accuracy for both the ON (OPEN) and OFF (CLOSE) time. Though the controller has this accuracy the resulting operation of a shutter differs due the mechanical and electrical properties of the shutter. -
Page 4: Physical Characteristics And Interface
NEWTON, NJ USA TRIGGER OUT TRIGGER IN RS23 2C 1 00 - 24 0 VAC 50 -60HZ S.N. POWER 1 1 VA M AX SC10 REAR PANEL SHUTTER CONTROLLER SC10 TIM E OPEN SEC M ODE ENAB LED SHUTTER OPEN... -
Page 5: Front Panel Keys And Indictors
Front Panel Keys and Indictors: SELECT Selects the window or function to be operated on. The Main LCD display screen contains four display windows, each is located in a quadrant of the display. The windows are TIME OPEN, TIME CLOSED, MODE, and TRIGGER. The SELECT key is used to move between the four windows (quadrants) of the display. -
Page 6: Main Display
Main Display The front panel contains six keypads that can be used for various functions and navigating through the display. The Main display screen contains four display windows, each is located in a quadrant of the display. The windows are MODE, TRIGGER, TIME OPEN, and TIME CLOSED. The keypads will modify (edit) the active quadrant which is indicated by a “_”... -
Page 7: Time Closed (Off)
ALARM The SC10 has an Alarm feature when used in conjunction with an SH05 shutter. In the event that the shutter does not close within 30 ms of the deactivation voltage (Shutter Closed State) the display will indicate an “ALARM”... -
Page 8: Sh05 Interface
Application Software operation The SC10 comes with a CD-ROM containing application software to control the unit from a PC. After installing the software (see software installation), apply power to the unit. Connect a 9 pin (DSUB) serial cable between the SC10 and the PC. -
Page 9: Establishing Communications With Sc10
Establishing communications with SC10 To communicate with the SC10 you must first establish a connection with the SC10 and the PC, the COM port and BAUD rate for the PC connection are set in the “Options->Serial Connection” menu. Note the SC10 defaults to 9.6K Baud and can only be changed using the command line interface (see “command line interface”). -
Page 10: Command Line Interface
The command language is described below. Prior to running the command line interface the unit should be powered and a 9 pin (DSUB) serial cable should be connected between the SC10 and the host. The terminal emulator should be set as follows: Baud Rate = 9.6K Bits Per Second... -
Page 11: Software Installation
If the keyword, format, or argument are incorrect or out of range the unit will return an error string. Software Installation Insert the SC10 CD into the CD ROM drive. The program should automatically start installing. The install begins by opening install instructions to assist you with the automated installation. -
Page 12: Weee (Waste Electrical And Electronic Equipment Directive)
Waste treatment on your own responsibility If you do not return an “end of life” unit to Thorlabs, you must hand it to a company specialized in waste recovery. Do not dispose of the unit in a litter bin or at a public waste disposal site.
Need help?
Do you have a question about the SC10 and is the answer not in the manual?
Questions and answers