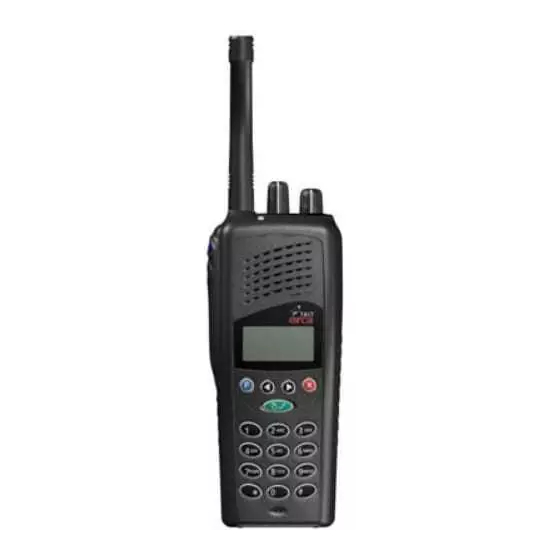
Tait Orca 5020 Manual
Hide thumbs
Also See for Orca 5020:
- User manual (2 pages) ,
- Service manual (125 pages) ,
- Servicing manual (13 pages)
Table of Contents
Advertisement
Quick Links
D
Servicing the radio
This part describes the disassembly and reassembly of Tait Orca
5000 handportables and the servicing of some key mechanical
and ancillary devices.
Information is also provided on ordering spare parts for servicing
handportables.
Contents
Servicing the radio .........................................................................................
Servicing the radio
Servicing the radio
Servicing the radio
Screw head types ................................................................................................... D-3
Disassembling the radio
Disassembling the radio ................................................................................
Removing the front panel from the chassis ........................................................... D-4
Removing the shield from the chassis ................................................................... D-5
Removing the PCB from the chassis ...................................................................... D-6
Removing the rear panel ....................................................................................... D-7
Replacing key mechanical and ancillary devices ............................................
Replacing key mechanical and ancillary devices
Replacing key mechanical and ancillary devices
Replacing key mechanical and ancillary devices
Replacing the lens (Orca 5020, Orca 5035 and Orca 5040) ................................... D-8
Replacing the PTT keypad ..................................................................................... D-8
Replacing the speaker ............................................................................................ D-9
Replacing the LCD display (Orca 5020, Orca 5035 and Orca 5040) ...................... D-9
Replacing the microphone .................................................................................. D-12
Replacing the battery and speaker contacts ........................................................ D-12
Replacing the tact switch ..................................................................................... D-12
Reassembling the radio
Reassembling the radio ................................................................................
Rear panel reassembly and replacing the auxiliary flexible PCB ......................... D-13
Fitting the PCB to the chassis and replacing the RF out assembly ....................... D-14
.........................................................................................D-3
.........................................................................................
.........................................................................................
................................................................................
................................................................................
................................................................................
................................................................................
............................................D-8
............................................
............................................
D-3
D-3
D-3
D-4
D-4
D-4
D-8
D-8
D-8
D-13
D-13
D-13
Advertisement
Table of Contents

Related Manuals for Tait Orca 5020


Summary of Contents for Tait Orca 5020
-
Page 1: Table Of Contents
Replacing the PTT keypad ..................D-8 Replacing the speaker .................... D-9 Replacing the LCD display (Orca 5020, Orca 5035 and Orca 5040) ...... D-9 Replacing the shield, user interface PCB assembly and polyester dome (Orca 5020, Orca 5035 and Orca 5040) ............... D-12 Replacing the antenna connector, channel selector switch and volume control switch..D-12... - Page 2 Orca 5020/5040 spares kit (TOPA-SP-403) ............D-19 Orca 5010/5030 Re-skinning kit (TOPA-SP-404) ..........D-20 Orca 5035 Re-skinning kit (TOPA-SP-405) ............D-20 Orca 5020/5040 Re-skinning kit (TOPA-SP-406) ..........D-20 Orca 5020/5035/5040 User Interface PCB and Shield (TOPA-SP-407) ....D-20 D - 2 09/01 IPN: M5000-00-102...
-
Page 3: Screw Head Types
Servicing the radio The manufacturing process does not allow A list of spares kits available for servicing Tait direct servicing access to components on the Orca 5000 handportables is shown in Table main PCB. Service repairs of Tait Orca 5000 D-1 on page D-16. -
Page 4: Disassembling The Radio
Discard the knobs. chassis screws Some earlier Tait Orca 5000 handportables have the knobs glued on. If so, the knob’s metal insert will remain on the switch shaft. Remove the insert using a sharp scalpel blade. - Page 5 Figure D-3: Removing the front panel from the chassis, using the battery as leverage battery pack microphone grommet protruding from the shield front panel grip battery here, gently pull away from the front panel chassis pull radio out and away from the front panel at this point shield the chassis.
-
Page 6: Removing The Pcb From The Chassis
Figures D-8 and D-9. Refer to these diagrams the volume control switch; for the placement of parts. the microphone; Note that on Orca 5020, Orca 5035 and Orca 5040 radios, the user interface loom must be the speaker contacts; detached from the main PCB before the shield the battery contacts;... -
Page 7: Removing The Rear Panel
Removing the rear panel Follow the disassembly instructions and disas- semble the radio to the PCB level. Refer to Figure D-10 for the details of the rear panel assembly. Insert a small flat bladed screw driver under the auxiliary dummy rear cover and apply pressure to push the dummy rear cover lugs free of the holes in the rear panel. -
Page 8: Replacing The Lens (Orca 5020, Orca 5035 And Orca 5040
PCB. These include: Figure D-6: Replacing the lens lens (Orca 5020, Orca 5035 and Orca 5040); PTT keypad; speaker; LCD display (Orca 5020, Orca 5035 and Orca 5040);... -
Page 9: Replacing The Speaker
slightly so that the top tab slots easily into the Replacing the LCD display (Orca hole at the top of the PTT recess. Be sure not to 5020, Orca 5035 and Orca 5040) split or otherwise damage it. Following the disassembly instructions, remove the shield from the front panel and unplug the Replacing the speaker user interface loom from the main PCB. - Page 10 Figure D-8: Bottom surface of the PCB, which is visible when the shield has been removed from the chassis antenna connector channel selector switch on/off/volume control switch antenna connector pin placement (5 pins) speaker contact pin placement channel selector pin placement (6 pins) on/off/volume control pin placement (5 pins)
- Page 11 Figure D-9: Top surface of PCB, which is visible only when the PCB has been removed from the chassis antenna connector channel selector switch on/off/volume control switch RF assembly placement auxiliary flex socket PTT tact pin placement (4 pins) battery contact placement battery contact seal placement microphone pin placement (2 pins) Replacing key mechanical and ancillary devices D - 11...
-
Page 12: Replacing The Shield, User Interface Pcb Assembly And Polyester Dome (Orca 5020, Orca 5035 And Orca 5040
(e.g. Weller PTR7 tip). (Orca 5020, Orca 5035 and Orca 5040) Replacing the battery and speaker On Orca 5020, Orca 5035 and Orca 5040 radios contacts the shield, user interface PCB and polyester Following the disassembly instructions, disas- dome are replaced as one complete assembly. -
Page 13: Reassembling The Radio
Reassembling the radio This section describes the reassembly of the The rubber must sit flush with the back of the radio once the required units have been chassis or the rear panel will not sit properly serviced. Additional instructions for replacing and the battery will not fit correctly. -
Page 14: Fitting The Pcb To The Chassis And Replacing The Rf Out Assembly
ed correctly before using an 8 mm long reach Fitting the PCB to the chassis and socket driver set to 10 inch pounds. Then tight- replacing the RF out assembly en the PA screw to 2 inch pounds. Put the battery contact seal over the battery Using a heavy-tip soldering iron (e.g. -
Page 15: Fitting The Front Panel To The Chassis
Figure D-12: Assembly of the switches shield chassis antenna connector channel selector switch on/off/volume control switch ribbed lock washer (M6*10*0.7 mm) SMA connector nut (¼*7.9*3 mm) channel/volume control nut (M6*7.9*3 mm) knob seal Fitting the front panel to the chassis Place the radio into the front panel top first, inserting the antenna connector and knob switches through the holes. - Page 16 Spares kits The following table shows a list of spares kits Tait Orca 5000 main PCBs are available on an which are currently available for servicing Tait exchange basis from the Customer Services Orca 5000 handportables. Spares kits are Division of Tait Electronics Ltd. When order-...
-
Page 17: Orca 5010/5030 Spares Kit (Topa-Sp-401)
Table D-2: Orca 5010/5030 spares kit (TOPA-SP-401) Description Quantity Reference 040-05500-08 Volume Control Switch D-8 (3), D-9 (3) 219-50029-00 RF out assembly D-11 (1) 220-01414-03 Aux Flex Connector PCB D-10 (1) 231-00010-45 Channel Selector Switch D-8 (2), D-9 (2) 232-00010-42 Switch PTT (Low Profile) D-8 (8), D-9 (6) 240-02156-01... -
Page 18: Orca 5035 Spares Kit (Topa-Sp-402)
Table D-3: Orca 5035 spares kit (TOPA-SP-402) Description Quantity Reference 040-05500-08 Volume Control Switch D-8 (3), D-9 (3) 219-50029-00 RF out assembly D-11 (1) 220-01414-03 Aux Flex Connector PCB D-10 (1) 231-00010-45 Channel Selector Switch D-8 (2), D-9 (2) 232-00010-42 Switch PTT (Low Profile) D-8 (8), D-9 (6) 240-02156-01... -
Page 19: Orca 5020/5040 Spares Kit (Topa-Sp-403)
Table D-4: Orca 5020/5040 spares kit (TOPA-SP-403) Description Quantity Reference 040-05500-08 Volume Control Switch D-8 (3), D-9 (3) 219-50029-00 RF out assembly D-11 (1) 220-01414-03 Aux Flex Connector PCB D-10 (1) 231-00010-45 Channel Selector Switch D-8 (2), D-9 (2) 232-00010-42... -
Page 20: Orca 5010/5030 Re-Skinning Kit (Topa-Sp-404)
362-01106-00 Rear Cover Seal 362-01091-01 Knob Seal 362-01092-02 Main Seal OPP601 PHA Front Panel Assembly Table D-8: Orca 5020/5035/5040 User Interface PCB and Shield (TOPA-SP-407) Description Quantity OPF200-B UI PCB SMT Subassembly 311-04005-00 Ins Poly Dome for 5020/5040 319-01026-00 Main Shield RF...
Need help?
Do you have a question about the Orca 5020 and is the answer not in the manual?
Questions and answers