Advertisement
Quick Links
66460-001
Rev 02
GED2350
Z-Wave® Plus
Installation and User Guide
Required tools
Ruler
Phillips head screwdriver
Additional Tools (depending on application)
Hammer
Wood block
1
Prepare the door and check dimensions
If drilling a new door, use the supplied template and the complete
door drilling instructions available at www.weiserlock.com/doorprep.
Measure to confirm that the hole in
A
the door is either 2-1/8" (54 mm) or
1-1/2" (38 mm).
2-1/8"
54 mm
or
1-1/2"
38 mm
Note: Additional door preparation may be
required for doors with 1-1/2" (38 mm) holes.
Consult the deadbolt drilling instructions at
www.weiserlock.com/doorprep.
2
Install the latch and strike
A
Is the door edge chiseled?
YES
or
chiseled
Use latch "A". If the
latch bolt is not already
extended, extend the
latch bolt as shown.
A
Weiser
Technical Support
1-800-501-9471
www.weiserlock.com
Measure to confirm that the backset is
B
either 2-3/8" or 2-3/4" (60 or 70 mm).
b a
2-3/8" or 2-3/4"
60 or 70 mm
B
Hold the latch in front of the door hole, with the latch
face flush against the door edge.
NO
not
chiseled
Use latch "B". If the
latch bolt is not already
extended, extend the
latch bolt as shown.
B
C
Is the D-shaped hole centered in the door hole?
D-shaped hole
No adjustment is required.
Proceed to next step.
Parts in the box
Latches
A
B
Strike
C
Adapter
Ring
D
C
Measure to confirm that the hole in
the door edge is 1" (25 mm).
c k
s e
t
actual
size
K
A
B
YES
NO
or
D-shaped hole
Rotate latch face as
shown to extend latch.
A
B
1 / 4
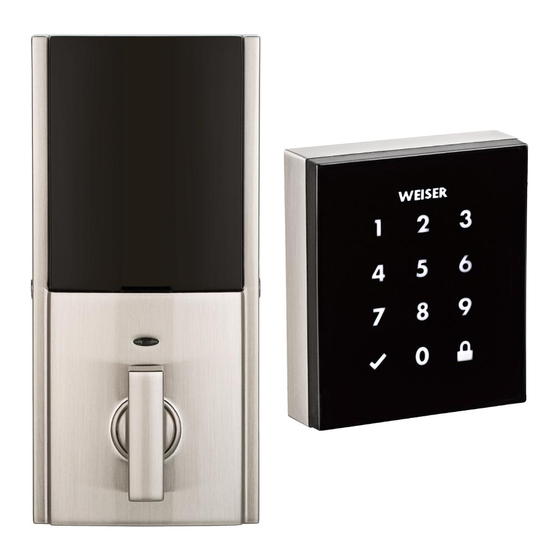
Interior Assembly
Exterior Touchscreen
G
Fasteners
03809
K
H
J
L
64843
Batteries
Q
V
(1-3/8" • 35 mm)
Mounting
Plate
64845
S
E
(2" • 51 mm)
Measure to confirm that the door is
D
between 1-3/8" and 2" (35 mm and
51 mm) thick.
1"
25 mm
L
M
P
D
Which latch are you installing?
Latch "A"
or
A
K or L
(2x)
E
Install strike on the door frame.
Make sure the hole in the door frame is drilled a
minimum of 1" (25 mm) deep.
Longer screws
install closest to
the door jamb.
P (2x)
M or N (2x)
F
SL03031011
M
N
P
64844
R
(1-3/4" • 44 mm)
49191
64109
T
U
1-3/8" –2"
35 – 51 mm
N
Latch "B"
B
wood
block
C
door frame
Advertisement

Subscribe to Our Youtube Channel
Related Manuals for Weiser Obsidian


Summary of Contents for Weiser Obsidian
- Page 1 Interior Assembly Exterior Touchscreen Z-Wave® Plus Fasteners 03809 SL03031011 Installation and User Guide Strike 64843 64844 Required tools Batteries Weiser (1-3/8" • 35 mm) (1-3/4" • 44 mm) Technical Support Ruler Phillips head screwdriver Mounting Adapter Plate 64845 49191 64109...
- Page 2 (2" / 51 mm) Install the exterior touchscreen actual size (1-3/4" / 44 mm) (1-3/8" / 35 mm) What is the diameter of the hole in the door? Install exterior touchscreen and mounting plate. Diameter is 2-1/8" Diameter is 1-1/2" Support exterior (54 mm) (38 mm)
- Page 3 “A” on the lock one time. Perform steps 6A-6C again. If still unsuccessful, consult the Programming and Troubleshooting Guide on the Obsidian page at www.weiserlock.com. Please allow time for the controller to add the lock. Add user codes (30 max)
- Page 4 Kwikset/Weiser/Baldwin products. locksmith or other security professional. Z-Wave Configuration and Association Parameters are available on the Obsidian page at www.weiserlock.com. © 2017 Spectrum Brands, Inc. 4 / 4...
Need help?
Do you have a question about the Obsidian and is the answer not in the manual?
Questions and answers
How do I remove autolock
To remove the auto-lock feature on a Weiser Obsidian lock, follow the steps in the Programming and Troubleshooting Guide. While the exact steps are not fully shown in the provided context, auto-lock settings are typically managed through the lock's programming menu using the touchscreen. If the manual or touchscreen options do not clearly show this setting, performing a factory reset may restore default settings and disable auto-lock.
To perform a factory reset:
1. Keep the door open.
2. Remove the battery pack.
3. Press and hold the Program button while reinserting the battery pack.
4. Continue holding the Program button for 30 seconds until the lock beeps and the status LED flashes red.
5. The lock will initiate the door handing process, extending and retracting the latch bolt.
After the reset, reprogram the lock without enabling auto-lock.
This answer is automatically generated