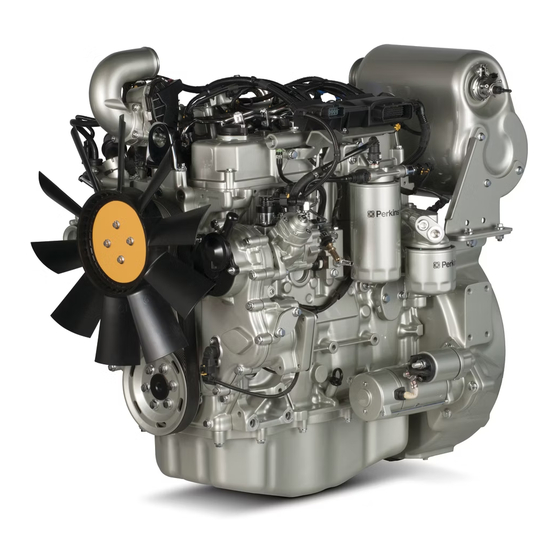
Perkins 854F-E34TA Disassembly And Assembly
Industrial engine
Hide thumbs
Also See for 854F-E34TA:
- Operation and maintenance manual (119 pages) ,
- Systems operation testing and adjusting (92 pages)

Related Manuals for Perkins 854F-E34TA


Summary of Contents for Perkins 854F-E34TA
-
Page 1: Disassembly And Assembly
UENR4503 July 2015 Disassembly and Assembly 854F-E34TA Industrial Engine This document has been printed from SPI2. NOT FOR RESALE... -
Page 2: Important Safety Information
These changes can affect the service that is given to the product. Obtain the complete and most current information before you start any job. Perkins dealers or Perkins distributors have the most current information available. When replacement parts are required for this product Perkins recommends using Perkins replacement parts. -
Page 3: Table Of Contents
UENR4503 Table of Contents Table of Contents Manifold (DEF Heater) - Remove and Install. . 70 Solenoid Valve (DEF Heater Coolant) - Remove and Install............74 Disassembly and Assembly Section Flexible Exhaust Pipe - Remove and Install (Flexible Exhaust Pipe from the Turbocharger Fuel Priming Pump - Remove and Install .. -
Page 4: Table Of Contents
UENR4503 Table of Contents Crankcase Breather - Remove ..... 138 Temperature Sensor (Exhaust) - Remove and Crankcase Breather - Install ......139 Install (Temperature Sensor Exhaust After Valve Mechanism Cover - Remove and SCR) ............194 Install............140 Temperature Sensor (Exhaust) - Remove and Rocker Shaft and Pushrod - Remove.. -
Page 5: Disassembly And Assembly Section
UENR4503 Disassembly and Assembly Section Disassembly and Assembly Section i06213355 Fuel Priming Pump - Remove and Install Removal Procedure Table 1 Required Tools Part Description Tool Part Number Capping Kit T412504 NOTICE Ensure that all adjustments and repairs that are Illustration 1 g02988817 carried out to the fuel system are performed by... - Page 6 Hello Thank very much your download. last page this document. There is a link. Please click on that link and return to our website. Then you can get the complete manual immediately. No need to wait. Thanks for continuing to read the documentation.
-
Page 7: Flow Control Valve - Remove And Install
UENR4503 Disassembly and Assembly Section d. Remove O-ring seals (3) from connectors (2) d. Install connectors (2) to fuel priming pump (4). and plugs (5). e. Install plugs (5) to fuel priming pump (4). Installation Procedure (Mechanical f. Tighten the plugs and the connectors to a Priming Pump) torque of 20 N·m (14 lb ft). - Page 8 UENR4503 Disassembly and Assembly Section 8. Use Tooling (A) in order to plug the fuel injection NOTICE pump. Ensure that all adjustments and repairs that are carried out to the fuel system are performed by 9. Remove O-ring seal (4) (not shown). authorized personnel that have the correct training.
-
Page 9: Fuel Filter Base - Remove And Install
UENR4503 Disassembly and Assembly Section Note: Ensure that the Allen screws are tightened NOTICE equally. Failure to ensure that the Allen screws are Ensure that all adjustments and repairs that are tightened equally will result in damage to the fuel carried out to the fuel system are performed by injection pump. - Page 10 UENR4503 Disassembly and Assembly Section Illustration 5 g03011036 4. Make temporary identification marks on plastic tube assembly (1) and plastic tube assembly (2) in order to show the correct position of the plastic tube assemblies. Illustration 6 g03011037 5. Place a suitable container below the fuel filter base in order to catch any fuel that might be spilled.
- Page 11 UENR4503 Disassembly and Assembly Section Illustration 7 g03011038 Illustration 8 g03011038 12. If necessary, follow Step 1.c. through Step 12.c. in 1. If necessary, follow Step 1.a. through Step 1.c. in order to remove the bracket for secondary fuel order to install the bracket for secondary fuel filter. filter.
- Page 12 UENR4503 Disassembly and Assembly Section Illustration 10 g03011036 5. Remove the plugs from the plastic tube assemblies. Remove the caps from the ports in the fuel filter base. Illustration 9 g03011037 NOTICE Ensure that the plastic tube assemblies are installed 2.
-
Page 13: Water Separator And Fuel Filter (Primary) - Remove And Install
UENR4503 Disassembly and Assembly Section i06214222 Water Separator and Fuel Filter (Primary) - Remove and Install Removal Procedure Table 4 Required Tools Part Description Tool Part Number Capping Kit T412504 NOTICE Ensure that all adjustments and repairs that are carried out to the fuel system are performed by authorized personnel that have the correct training. - Page 14 UENR4503 Disassembly and Assembly Section Installation Procedure NOTICE Ensure that all adjustments and repairs that are carried out to the fuel system are performed by authorized personnel that have the correct training. Before beginning ANY work on the fuel system, refer to Operation and Maintenance Manual, “Gen- eral Hazard Information and High Pressure Fuel Lines”...
-
Page 15: Fuel Manifold (Rail) - Remove And Install
UENR4503 Disassembly and Assembly Section NOTICE d. Remove cap from connection (2). Install a new Ensure that the plastic tube assemblies are installed O-ring seal (13) to connection (2). in the original positions. Failure to connect the plastic tube assemblies to the correct ports will allow contam- e. - Page 16 UENR4503 Disassembly and Assembly Section NOTICE Ensure that all adjustments and repairs that are carried out to the fuel system are performed by authorized personnel that have the correct training. Before beginning ANY work on the fuel system, refer to Operation and Maintenance Manual, “Gen- eral Hazard Information and High Pressure Fuel Lines”...
-
Page 17: Install
UENR4503 Disassembly and Assembly Section a. Release hose clamp (10) on plastic tube assembly (7). b. Disconnect plastic tube assembly (7) from the fuel manifold (2). c. Use Tooling (A) to cap the open port in fuel manifold (2) with a new cap. d. - Page 18 UENR4503 Disassembly and Assembly Section b. Install new seal (11) into plastic tube assembly (7). Contact with high pressure fuel may cause fluid penetration and burn hazards. High pressure fuel c. Install plastic tube assembly (7) to fuel spray may cause a fire hazard. Failure to follow manifold (2).
- Page 19 UENR4503 Disassembly and Assembly Section 8. If necessary, cut cable straps in order to remove the wiring harness assemblies. 9. Slide the locking tab for wiring harness assembly (15) into the unlocked position. Disconnect wiring harness assembly (15) from crankshaft position sensor (16).
- Page 20 UENR4503 Disassembly and Assembly Section 19. Clean the area around the nuts for fuel injection lines (12). Ensure that the area is free from contamination before beginning disassembly. 20. Use Tooling (B) in order to disconnect fuel injection line (12) from the electronic unit injector (27).
-
Page 21: Install
UENR4503 Disassembly and Assembly Section 30. Use Tooling (A) in order to cap all open ports immediately in fuel manifold (24) and in fuel injection pump (29). i06213346 Fuel Injection Lines - Install Installation Procedure Table 7 Required Tools Part Description Tool Part Number LASER 4920... -
Page 22: And Install
UENR4503 Disassembly and Assembly Section Note: Ensure that fuel injection lines do not contact any other engine component. 6. Tighten bolt (32) to a torque of 25 N·m (221 lb in). 7. Remove the caps from the port of the electronic unit injector and from the appropriate port in fuel manifold (16). -
Page 23: Remove And Install
UENR4503 Disassembly and Assembly Section 25. Connect wiring harness assembly (17) to camshaft position sensor (18). Slide the locking tab for wiring harness assembly (17) into the locked position. 26. Install cable straps to the wiring harness assembly in the relevant positions. Ensure that the cable straps meet the OEM specifications. -
Page 24: Install
UENR4503 Disassembly and Assembly Section Note: Plug or cap all open ports with new plugs or Note: Remove plugs and caps that were previously caps. installed prior to assembly. 1. If necessary, remove the diesel particulate filter mounting bracket. Refer to Disassembly and Assembly, “Support and Mounting (CEM) - Remove and Install”... -
Page 25: Install (Flywheel Housing Mounted Cem)
UENR4503 Disassembly and Assembly Section 9. Connect hose (4) to exhaust cooler assembly (2) in Position (A). Position hose clamp (3) onto the coolant inlet. 10. Install hose assembly (8) to exhaust cooler assembly (2). Position hose clamp (7) and position hose clamp (10) and tighten securely. -
Page 26: Install
UENR4503 Disassembly and Assembly Section 7. Remove throttle valve (8) from studs (9). 8. Remove gasket (6) (not shown). 9. If necessary, remove studs (9). Refer to Disassembly and Assembly, “Inlet Manifold - Remove and Install” for the correct procedure. Illustration 34 g02906404 Illustration 33... - Page 27 Thank very much foryour reading. Please click here and go back to our website. Then, you can download complete manual instantly. No waiting. Have questions. Please write to me. All the problems will be answered within 12 hours. aservicemanuapdf@yahoo.com...
Need help?
Do you have a question about the 854F-E34TA and is the answer not in the manual?
Questions and answers