Table of Contents
Advertisement
Advertisement
Table of Contents

Related Manuals for Perkins 1106 Series


Summary of Contents for Perkins 1106 Series
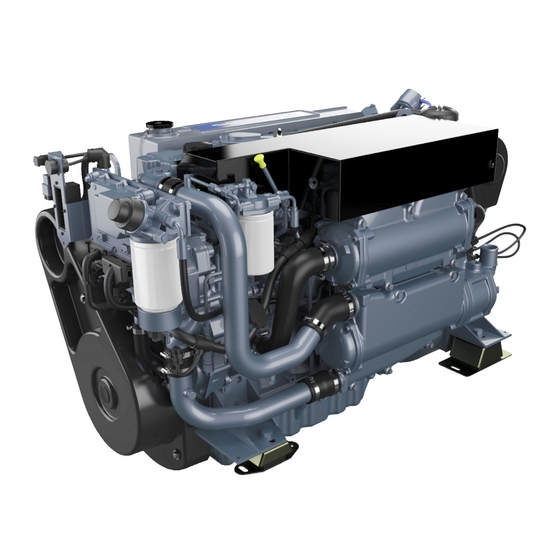
- Page 1 Part No N40475 ® Installation Manual 1106 Series Marine Propulsion Engines...
- Page 3 © Proprietary information of Wimborne Marine Power Centre, all rights reserved. The information is correct at the time of print. Published in December 2013 by Wimborne Marine Power Centre, Wimborne Marine Power Centre, Wimborne, Dorset, England BH21 7PW Tel:+44(0)1202 796000 Fax: +44(0)1202 796001 E-mail: Marine@Perkins.com www.perkins.com/Marine...
- Page 4 N40475 Foreword Thank you purchasing the Perkins M300C, M250C, M216C & M190C marine diesel engine. This manual contains information for the correct installation of your Perkins engine. Information contained in this manual is correct at the time of printing. Wimborne Marine Power Centre reserves the right to make changes at any time.
-
Page 5: General Safety Precautions
• General safety precautions If your skin comes into contact with high-pressure fuel, obtain medical assistance immediately. These safety precautions are important. You must refer • Diesel fuel and lubricating oil (especially used also to the local regulations in the country of use. Some lubricating oil) can damage the skin of certain items only refer to specific applications. -
Page 7: Table Of Contents
N40475 Contents Chapter ............................Page 1 Location of engine installation points .........1 2 Engine mounting ................3 Installation angles ................... 3 Nose down capability ................3 Engine mounting brackets ................4 Flexible engine mounts ................... 5 Engine bearers....................6 3 Propeller shafts and couplings ............7 Propeller shafts .................... - Page 8 Contents N40475 Interconnecting cables .................. 25 Instrument panels ................... 26 Main panel .................... 26 Auxiliary panel ..................27 Mini Marine Power Display (MMPD) digital panel ......28 Keyswitch panel .................. 28 Throttle synchronization / slow vessel mode panel ......29 Possible panel configurations.
- Page 9 N40475 Contents 9 Engine controls ................61 10 Provision for power take-off ............63 For axial drives ....................63 For belt drives ....................63 Polar diagram....................64 11 Calorifier and block heater connections ........65 Calorifier ......................65 Block heater connection points ..............65 12 Options ..................67 Gearbox oil temperature sensor ..............
- Page 10 Contents N40475...
-
Page 11: Location Of Engine Installation Points
N40475 Chapter 1 Location of engine installation points Exhaust Systems (See chapter 4) Starter Cables (See chapter 8) Bonding Stud (See chapter 8) Front Lifting Eye Warning! Ventilation (See Use spreader bar. chapter 5) Fuel Feed (See chapter 7) Cooling Systems (See chapter 6) Mounting Brackets Engine Mounting Point... - Page 12 Chapter 1 N40475 Rear Lifting Eye Warning! Use spreader bar. Exhaust Systems (See chapter 4) Electrical Systems (See chapter 8) Fuel Return (See chapter 7) Mounting Brackets Engine Mounting Points (See chapter 2) (See chapter 2) Engine end views Page 2...
-
Page 13: Engine Mounting
N40475 Chapter 2 Engine mounting Installation angles These engines are intended to be mounted so that the cylinders are vertical, when viewed from ahead or astern as in figure 1. The operational angles that are permissible in service are a static installation angle of nose up, adding 3 for planing craft, with a heel angle of 25... -
Page 14: Engine Mounting Brackets
Chapter 2 N40475 Engine mounting brackets The standard brackets, provide mounting points which are 76mm (3”) below, and parallel with, the crankshaft centre line. The brackets may be used to mount the engine directly on the engine bearers, but for all applications it is recommended that flexible engine mounts are used. -
Page 15: Flexible Engine Mounts
N40475 Chapter 2 Flexible engine mounts It is recommended that flexible engine mounts should be used for all applications. The principal purpose of the mounts is to reduce the transmission of vibration from the engine to the hull, but another valuable advantage is that the mountings reduce the shock transmitted from the hull to the engine under adverse weather conditions and also prevent the engine being... -
Page 16: Engine Bearers
Chapter 2 N40475 Engine bearers The materials and methods of construction of engine bearers which have proved to be satisfactory in service vary to such an extent that it is difficult to lay down universal guide lines. However, as a rough guide it can be said the engine bearers should be capable of supporting a static load of about eight times the weight of the engine, to cater for the effects of rough seas. -
Page 17: Propeller Shafts And Couplings
N40475 Chapter 3 Propeller shafts and couplings Propeller shafts It is recommended that all engines are mounted on flexible mountings (1), which will reduce noise and vibration, and will prevent hull movements resulting in forces being applied to the engine. The responsibility for the design and installation of the transmission system connected to the gearbox lies with the boat designer, the boat builder, the naval architect or... - Page 18 Chapter 3 N40475 Page 8...
-
Page 19: Exhaust Systems
N40475 Chapter 4 Exhaust systems A range of exhaust components are available for use with all types of exhaust system. The components are designed to connect together, allowing complex systems to be built from stock items, to suit most installations. Caution: In all types of exhaust system the exhaust back pressure must not exceed 15kPa, when measured within 305mm (12 inches) of the exhaust... - Page 20 Chapter 4 N40475 Figure 2 shows the exhaust elbow (1) with water injection and insulating blanket (3) & (4). The elbow can be rotated (2) to achieve the optimal position. Note: The exhaust elbow must have a fall of 10 downwards.
-
Page 21: Dry Systems
N40475 Chapter 4 Dry systems Dry exhaust systems for marine installations need careful design to minimize the disadvantages of enclosing components that are at a high temperature in confined spaces. The first part of a dry system should include a flexible connection so that excessive weight is not carried by the connection to the engine. -
Page 22: Part Dry, Part Wet Systems
Chapter 4 N40475 Part dry, part wet systems Even where the engine is mounted well below the waterline the advantages of a wet system can still be gained, providing that water injection takes place at a point sufficiently above the waterline. In these circumstances the part dry, part wet system shown in figure 5 can be utilised. -
Page 23: Silencers
N40475 Chapter 4 Silencers In some applications a reduction in noise levels from the exhaust would be desirable and to that extent, a silencer can be fitted. The exhaust system ejects the cooling water as well as silencing the engine’s combustion noise and removing the exhaust gases. - Page 24 Chapter 4 N40475 Page 14...
-
Page 25: Engine Room Ventilation
N40475 Chapter 5 Engine room ventilation The engine room must be ventilated for two reasons: 1. To supply the engine with air for combustion. 2. To provide a flow of air through the engine room to prevent an excessive temperature build up, which may cause components such as the alternator to overheat. - Page 26 Chapter 5 N40475 Page 16...
-
Page 27: Engine Cooling Systems
N40475 Chapter 6 Engine cooling systems Auxiliary water systems A completely separate sea water system should be provided for each engine to prevent a blockage resulting in the need to shut down more than one engine and a typical system is shown in figure 1. The water intake fitting (4) should not project appreciably below the bottom of the hull and it should be situated well clear of other components such as... -
Page 28: Keel Cooling System
Chapter 6 N40475 Keel cooling system This engine may be purchased in a form suitable for keel cooling, using two separate coolers, one for the cylinder jacket circuit and one for the aftercooler circuit. Figure 2 shows the connections provided for the coolers. -
Page 29: Fuel Systems
The sealing plugs should only be removed when the component is reconnected. The sealing plugs must not be reused. Dispose of the sealing plugs immediately after use. Contact your nearest Perkins distributor in order to obtain the correct sealing plugs. -
Page 30: Thread Details Of The Connections On The Engines For Fuel Pipes
Chapter 7 N40475 Thread details of the connections on the engines for fuel pipes • Fuel feed - 11/16” ORFS • Fuel return - 11/16” ORFS It is strongly recommended that the flexible fuel pipes, available as an option with the engine are used, which are as follows: Fuel feed The free end of the flexible pipe has a 11/16”... -
Page 31: Typical Fuel Systems
N40475 Chapter 7 Typical fuel systems The more simple the fuel system, the better it will perform in service. Figure 1 shows an ideal system. 1. Fuel tank. 2. Fuel return pipe. 3. Manual fuel feed. 4. Stop cock. 5. Vent. Figure 1 6. -
Page 32: Alarm Tank
Chapter 7 N40475 In some cases it is necessary to have a number of fuel tanks in order to achieve the required operating range. In such cases, where possible, one tank should be regarded as the main tank for each engine and the other tanks should be arranged so that they will drain into the main tank by gravity. -
Page 33: Engine Electrical Systems
N40475 Chapter 8 Engine electrical systems A plug-together electrical system is available with the engine, providing the following choices from the engine connection:- • Interconnecting cables of 12m lengths are standard. 3, 6, and 9m lengths are available as options. •... -
Page 34: Breakers
Chapter 8 N40475 Breakers Note: Breakers are provided to protect the electrical system against accidental short circuits. The risk is highest when the engine is being installed, or when additional equipment is wired in, and is negligible during normal operation. The breakers may be found on the right hand side above the oil filter, see figure 1. -
Page 35: Interconnecting Cables
N40475 Chapter 8 Interconnecting cables Interconnecting cables (figure 3) are used to join the engine (1), throttle (3), battery (4), via the marine junction box (2), to the instrument panel(s) (5). Cables are made in a 12m length as standard, 3, 6 & 9 lengths are optional. -
Page 36: Instrument Panels
Chapter 8 N40475 Instrument panels Three types of panel are available, providing different levels of instrumentation. Main panel • 12 or 24 volt operation from same panel. • IP 65 rated from front facia, switches/gauges IP67 rated. The ‘Main Panel’ shown in Figure 4 is 250mm x 175mm and includes:- 1. -
Page 37: Auxiliary Panel
N40475 Chapter 8 Auxiliary panel • 12 or 24 volt operation from same panel. • IP 65 rated from front facia, switches/gauges IP67 rated. The ‘Auxiliary panel’ shown in figure 5 is 180mm x 140mm and includes:- 1. Tachometer 2. Engine hours/fault code display 3. -
Page 38: Mini Marine Power Display (Mmpd) Digital Panel
Chapter 8 N40475 Mini Marine Power Display (MMPD) digital panel • Single engine support. • Displays engine parameters and fault codes with audible alarm. • 5 display screens. • High resolution display 320 X 240 DPI. • Transflective screen improves readability by reflecting more or less light conditions as ambient light changes. -
Page 39: Throttle Synchronization / Slow Vessel Mode Panel
N40475 Chapter 8 Throttle synchronization / slow vessel mode panel The function of the synchronization switch, figure 8, designates one of the throttles in a dual engine installation as the master throttle. When the switch (1) is activated each engine will respond to this master throttle. -
Page 40: Possible Panel Configurations
Chapter 8 N40475 Possible panel configurations. A variety of panels may be run simultaneously, in any of the combinations as shown in figure 9. 1. Power supply. 2. Cable or electronic throttle and gearbox control options. 3. Main panel. 4. Auxiliary panel. 5. -
Page 41: Mini Marine Power Display (Mmpd) Instructions
N40475 Chapter 8 Mini Marine Power Dispaly (MMPD) instructions The Mini Marine Power Display (MMPD) provides current engine and transmission operating data. The screen can be customized to display various engine parameters. Information screens There are two information screens available, the System Information screen and the Control System Information screen (figure 10). - Page 42 Chapter 8 N40475 Change screen Pressing the alarm button will cause the Control System Information screen to be displayed. This option is only available if the MMPD has detected a Powertrain Control Processor (PCP) on the CAN data link. Change user Figure 12 Pressing the alarm button will cause the displayed User Name text to scroll through the available user...
- Page 43 N40475 Chapter 8 Change screen Pressing the alarm button will cause the System Information screen to be displayed. Change troll mode Pressing the alarm button will cause the displayed Troll Mode to scroll through the available troll modes (Traditional and Intelli-Troll). Change troll speed Figure 13 Selecting Change Troll Set Speed (as figure 13) will...
- Page 44 Chapter 8 N40475 Vessel status bar The status indicators are shown across the top of the screen in reverse video and are only available on parameter screens, except for the diagnostic icon, which is shown on all screens. Status items (figure 14) 1.
-
Page 45: Can Data Link
N40475 Chapter 8 Cables required Where Used: Connects the PCP and MMPD displays into the J1939 data link. The J1939 data link (item 1 figure 15) can not exceed 40 meters (131ft.). Requires: MMPD drop cable Tee to Tee cable 6-pin Tee Termination resistor Termination resistor (figure 16) -
Page 46: For Engines Without An Mjb (Marine Junction Box)
Chapter 8 N40475 For engines without an MJB (Marine Junction Box) The customer connect harness (figure 18) can be used as a connection point for the various control panel options for both single engine applications and twin engine applications and is intended as a direct replacement for the MJB whilst maintaining the same functionality. -
Page 47: For Engines Fitted With The Marine Junction Box (Mjb)
N40475 Chapter 8 For engines fitted with the Marine Junction Box (MJB) • Provides circuit protection for the ECM and other components connected to the on board monitoring and control systems. • Stand alone junction box for any marine application. •... -
Page 48: Single Engine Mjb Features And Mounting Details
Chapter 8 N40475 Single engine MJB features and mounting details 1. Breakers. 2. Throttle. 3. Expansion. 4. ECM. 5. J1939. 6. Key/alarm. 7. Custom. 8. Throttle synchronization panel. 9. PDL connector. 10. Power for the power train control processor (not used). -
Page 49: Twin Engine Mjb Features And Mounting Details
N40475 Chapter 8 Twin engine MJB features and mounting details 1. Breakers. 2. Custom (port side). 3. Key/alarm (port side). 4. J1939 (port side). 5. ECM (port side). 6. Expansion (port side). 7. Throttle (port side). 8. Throttle (starboard side). 9. -
Page 50: Power Connections
*Refer to ABYC rules E-11 for AC & DC electrical systems on boats for more details. Figure 23 Note: Perkins recommends installing two +battery and two -battery cables from the reverse isolator to the MJB and from the reverse isolator to the batteries. -
Page 51: Port Or Starboard Expansion Connectors
N40475 Chapter 8 Port or starboard expansion connectors The MJB provides two connectors, one for port and one for starboard, which will be used for future expansion. The pin out is the same for both the port and starboard connectors. Starter Interlock (Pins 1 &... -
Page 52: Diagnostic Lamp (Pin 2)
Chapter 8 N40475 Diagnostic lamp (Pin 2) The diagnostic lamp, figure 27 alerts the operator to the presence of an active diagnostic code. A diagnostic code indicates a fault condition in the electronic control system. The operator uses this indication to help diagnose component failures in the electronic control system. -
Page 53: Cold Start System
Starter type C 15W40 Iskra AZF Iskra AZF Battery minimum performance Commercial reference number Perkins code BS EN 50342 SAE J537 (BCI) DIN 43539 (1) Voltage no less that 7,5V after 10 seconds, 6V after 90 seconds at -18 C (0 F) across each 12V battery. -
Page 54: Battery Isolator Switches
Chapter 8 N40475 Battery isolator switches A switch should be fitted in the positive lead to the starter, as close to the battery as is convenient. The switch should be suitable for a momentary current of at least 950 Amps. Zinc Anode bonding system Caution: The engine may be damaged by electrolytic corrosion if the correct... -
Page 55: Typical System In Common Use
N40475 Chapter 8 Typical system in common use The bonding system in the boat should provide a low resistance connection between all metals in contact with sea water, together with a connection to a Zinc sacrificial anode which is fixed to the outside of the hull below sea level. - Page 56 Chapter 8 N40475 Page 46...
-
Page 57: Wiring Diagrams
N40475 Chapter 8 Wiring diagrams *Engine wiring harness overview, without MJB *See the CD for PC compatible version of this diagram. Page 47... -
Page 58: Engine Wiring Harness, Wiring Description, Without Mjb
Chapter 8 N40475 *Engine wiring harness, wiring description, without MJB *See the CD for PC compatible version of this diagram. Page 48... -
Page 59: Engine Wiring Harness Overview
N40475 Chapter 8 *Engine wiring harness overview *See the CD for PC compatible version of this diagram. Page 49... -
Page 60: Panel Harness Overview
Chapter 8 N40475 *Panel harness overview *See the CD for PC compatible version of this diagram. Page 50... -
Page 61: Engine Wiring Harness 1
N40475 Chapter 8 *Engine wiring harness 1 *See the CD for PC compatible version of this diagram. Page 51... -
Page 62: Engine Wiring Harness 2
Chapter 8 N40475 *Engine wiring harness 2 *See the CD for PC compatible version of this diagram. Page 52... -
Page 63: Engine Panels 1
N40475 Chapter 8 *Engine panels 1 *See the CD for PC compatible version of this diagram. Page 53... -
Page 64: Interconnecting Leads 1
Chapter 8 N40475 *Interconnecting leads 1 *See the CD for PC compatible version of this diagram. Page 54... -
Page 65: Master/Slave Option, Port
N40475 Chapter 8 *Master/slave option, port *See the CD for PC compatible version of this diagram. Page 55... -
Page 66: Marine Junction Box
Chapter 8 N40475 *Marine junction box *See the CD for PC compatible version of this diagram. Page 56... -
Page 67: Master/Slave Option, Starboard
N40475 Chapter 8 *Master/slave option, starboard *See the CD for PC compatible version of this diagram. Page 57... -
Page 68: Interconnecting Leads 2
Chapter 8 N40475 *Interconnecting leads 2 *See the CD for PC compatible version of this diagram. Page 58... -
Page 69: Engine Panels 2
N40475 Chapter 8 *Engine panels 2 *See the CD for PC compatible version of this diagram. Page 59... - Page 70 Chapter 8 N40475 Page 60...
-
Page 71: Engine Controls
N40475 Chapter 9 Engine controls It is recommended that a Morse single lever system is used to control engine speed and gearbox engagement. 1. Throttle lever. 2. Anchor for Morse 33C cable. 3. Morse 33C cable. 4. Idle position. 5. Run position Figure 1 Page 61... - Page 72 Chapter 9 N40475 Page 62...
-
Page 73: Provision For Power Take-Off
N40475 Chapter 10 Provision for power take-off Warning! Remove all paint traces from the mating faces before assembly. Fit the power take-off shaft, (figure 1 item 1) using bolts (figure 1 item 2) and tighten to a final torque of 84 lb.ft. -
Page 74: Polar Diagram
Chapter 10 N40475 Polar diagram This diagram shows the loading capability of the front of the crankshaft. The load angle, when viewed from the front of the engine, is measured clockwise, with 0° aligned to TDC. Overhung load (Newtons) is directed radially outwards from the centre of the diagram. -
Page 75: Calorifier And Block Heater Connections
N40475 Chapter 11 Calorifier and block heater connections Calorifier Fittings are available to allow a calorifier to be connected to the engine, as shown in figure 1. The fittings may be ordered as part of the engine assembly, or as loose parts to be fitted later. The hose connections to the calorifier must be of a radiator or heater hose quality and 1/2”... - Page 76 Chapter 11 N40475 Page 66...
-
Page 77: Options
N40475 Chapter 12 Options Gearbox oil temperature sensor Gearbox sensors are available as an option. Please refer to the gearbox manufacturers handbook for installation requirements. Use the M12 tapping as shown in figure 1 for the transmission temperature sensor or refer to the gearbox manufactures handbook. - Page 78 Chapter 12 N40475 Page 68...
-
Page 79: Reference Data
N40475 Chapter 13 Reference data Basic data M300C M250C M216C M190C Rated power ......300hp (225kW) ..250hp (186kW) ..216hp (161kW) ..190hp (142kW) Rated engine speed .....2400rpm ....2400rpm ....2400rpm ....2100rpm Number of cylinders................. 6. Cylinder arrangement ..............In-line. Cycle...................4 Stroke. -
Page 80: Fuel System
Chapter 13 N40475 Fuel system Recommended fuel ..........DIN E 590 DERV (class A-F & 0-4) BS2869 Class A2 (Off highway, gas oil, red diesel) ASTM D975-91 Class 1-1DA & Class 2-2DA JIS K2204 (1997) Grades 1, 2, 3 & Special grade 3 Fuel injection pump .............. -
Page 81: Lubricating System
N40475 Chapter 13 Lubricating system Recommended lubricating oil ..........API / CH4 / CI-4 Sump capacity maximum ..........15 litres (3.3 gallons) Maximum operational angle .......20 nose up. Heel 25 constant, 35 intermittent Oil pressure in operating ............. 3.6 bar speed range (steady state) Electrical system Alternator .......... - Page 82 Chapter 13 N40475 Page 72...
- Page 83 Index Absorbent material ......15 Battery voltage.......43 Common bonding wire....45 Activate station button status..33 Bellows ..........10 Component failures .......42 Activate station lamp status ...33 Belt drives ........63 Compression fittings ....19, 21 Active diagnostic code ....42 Bilge..........15 Condensate ........11 Active diagnostic status ....34 Blanking plugs .......23 Configuration screen .....29 Active station lamp status ....32...
- Page 84 Drain tap ........20, 21 Expansion ........38 G.R.P ..........21 Dry riser .........12 Expansion connectors ....41 Gun-metal ........17 Dry systems ........11 Expansion (port side).....39 Dual engine installation ....29 Expansion (starboard side)....39 Duplex fuel pipes ......22 Harness ......23, 25, 50 Heat ..........23 Fault codes ........28 Heat blanket ........
- Page 85 Key ..........63 Rubbish .........19 Key/alarm ........38 Rudders .........17 Oil ..........43 Key/alarm (port side) .....39 Run position........61 Oil filter ..........24 Key/alarm (starboard side) ....39 Oil pressure gauge ......26 Keyswitch ......36, 37, 42 Open cockpits ........15 Keyswitch on/off ......26, 28 Sae j1939-15 .........35 Operating range......22 Keyswitch panel...23, 25, 28, 30 Safety switch .........41...
- Page 86 Stop cock ........21 User name .......31, 32 Storage tanks ........22 Users handbook ......19 Strainer ..........17 Stud ..........44 Sump ..........20 Valves ........20, 21, 22 Switched circuit......41 ‘V’ drives ..........5 Synchronization switch ....29 Vent ..........21 Syphon break ........7 Vent area ........15 Siphoning........21 Ventilation ........1, 15 System information ....31, 33 Ventilation fans ......15...
- Page 87 California Proposition 65 Warning Diesel engine exhaust and some of its constituents are known to the State of California to cause cancer, birth defects, and other reproductive harm.
- Page 88 Wimborne Marine Power Centre subsequently. 22 Cobham Road, Part No. N40475 issue 3 Ferndown Industrial Estate, Produced in England ©2013 by Wimborne Wimborne, Dorset, BH21 7PW, England. Marine Power Centre Tel: +44 (0)1202 796000, Fax: +44 (0)1202 796001 E-mail: Marine@Perkins.com Web: www.perkins.com/Marine...
Need help?
Do you have a question about the 1106 Series and is the answer not in the manual?
Questions and answers