Table of Contents
Advertisement
Quick Links
Advertisement
Table of Contents
Troubleshooting

Subscribe to Our Youtube Channel
Related Manuals for Frymaster FilterQuick Version 2


Summary of Contents for Frymaster FilterQuick Version 2
- Page 1 ™ FilterQuick Controller Version 2 ™ (For push button FilterQuick fryers) Operation Manual This manual is updated as new information and models are released. Visit our website for the latest manual. *8197206* Part Number: FRY_IOM_8197206 01/2018 Original Instructions ...
- Page 2 NOTICE IF, DURING THE WARRANTY PERIOD, THE CUSTOMER USES A PART FOR THIS FRYMASTER FOOD SERVICE EQUIPMENT OTHER THAN AN UNMODIFIED NEW OR RECYCLED PART PURCHASED DIRECTLY FROM FRYMASTER, OR ANY OF ITS AUTHORIZED SERVICE CENTERS, AND/OR PART BEING USED...
- Page 3 WARNING Do not add HOT or USED oil to a JIB. WARNING NEVER drain boil out or cleaning solution into a shortening disposal unit (SDU), a built-in filtration unit, a portable filter unit, or an OQS (Oil Quality Sensor). These units are not intended for this purpose, and will be damaged by the solution and void the warranty.
- Page 4 DANGER DO NOT drain more than one full frypot or two split frypots into the SDU at one time to avoid overflow and spillage of hot oil that may cause severe burns, slipping and falling. WARNING Never operate the filter system without oil in the system. WARNING Never use the filter pan to transport old oil to the disposal area.
-
Page 5: Table Of Contents
™ FilterQuick Controller Manual TABLE OF CONTENTS ™ CHAPTER 1: FilterQuick Controller Instructions Using the FilterQuick ......................1-1 Menu Trees ..........................1-2 1.2.1 FilterQuick™ Controller Menu Setup Tree ..............1-2 1.2.2 FilterQuick™ Filter and Info Mode Menu Tree ............1-3 Setup Main Menu ........................ -
Page 6: Chapter 1: Filterquick
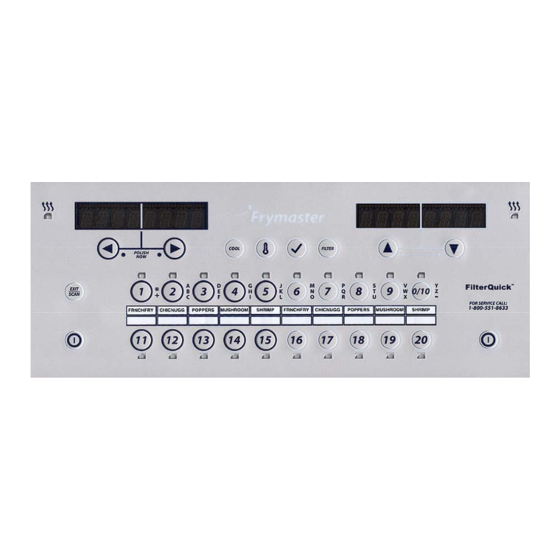
CHAPTER 1: FILTERQUICK™ CONTROLLER INSTRUCTIONS ™ Using the FilterQuick Controller ON/OFF Press ON/OFF button. Fryer begins melt cycle to slowly heat solid shortening to programmed temperature before switching to full temperature and heating to setpoint or idle temperature and displays: READY. ... -
Page 7: Menu Trees
1.2 Menu Trees 1.2.1 FilterQuick™ Controller Menu Setup Tree... -
Page 8: Filterquick™ Filter And Info Mode Menu Tree
1.2.2 FilterQuick™ Filter and Info Mode Menu Tree... -
Page 9: Setup Main Menu
1.3 Setup: Main Menu Pressing and holding the checkmark key for 10 seconds produces the setup mode, which first displays Product Setup. Turn the controller off and follow the steps below to navigate the options. Left Display Right Display Action Start with the far left controller. -
Page 10: Product Setup (Single Setpoint)
Left Display Right Display Action RECOVERY Press to scroll choices DISABLED and ENABLED. Press . (This is a DISABLED ALARM recovery alarm that locks out the fryer if it does not heat properly. Default is disabled. BASKET Press to scroll choices DISABLED and ENABLED. Press . Default is DISABLED LIFT disabled. -
Page 11: Filter
Left Display Right Display Action Enter VAT SETUP Enter 1656. code Press to scroll to FILTER. SYSTEM FILTER Press . Cooks (This is the total number of cooks that occur before a filter prompt. The default is 0.) till Enter the number of cooks before a filter prompt is desired. -
Page 12: Clean And Filter
Left Display Right Display Action CLEAN Use numbered keys to change time (use 10 for 0). (This is the amount of time which an FILTER 01:00 operator can delay the start of a clean and filter delay timer.) If the delay time = 0, no delay is allowed. -
Page 13: Dispose (Sdu Or Alternate Container/Fill From Jib)
1.5 INFO MODE: Viewing Operational Stats The FilterQuick™ collects and stores information on cook and filter cycles. This data is in the info mode, and is accessed by pressing the checkmark key with the controller off or on. The steps to view the data are detailed below. Left Display Right Display Action... - Page 14 Left Display Right Display Action Number Press to scroll number of times the vat was filtered on that day of the prior Filters week. Press . and day Press to scroll number of daily filter cycles in the prior week. Press . Filters –...
- Page 15 Left Display Right Display Action Press to scroll to TPM values for the previous week. Press to view dates. Date Exit Exit Press the Scan button twice to return the controller to OFF. 1.6 Main Menu: Product Setup (Single Setpoint Cooking) Programming food items is shown below.
- Page 16 Left Display Right Display Action Select For additional programming refer back to Product Setup above. To exit Product press the EXIT SCAN button twice to OFF. To access menu strip, remove screws attaching bezel. Lower bezel and remove strip from back of controller. Once the menu strip is updated, reverse the steps to reassemble.
- Page 17 Left Display Right Display Action 0:00 or previously entered Enter total cook time for segmented item and press . 1 Time time 350F or previously Enter initial cooking temperature and press . 1 TEMPR entered temperature Enter the level of sensitivity, 0-9, for the product. Press . 1 sensitivity Number Default is 0.
- Page 18 Left Display Right Display Action 0 or previously entered Enter number of cook cycles before a filter prompt and press Filter PROMPT . number. This is the time, in seconds, the fryer heats at 100%, after the Instant ON product button is pressed, before the controller adjusts the temperature.
- Page 19 Left Display Right Display Action Skim the vat and press arrow under CONFIRM. If the oil level is too low, the controller displays “OIL LEVEL TOO SKIM VAT or OIL CONFIRM LOW”. Press either arrow under CONFIRM. The controller displays LEVEL TOO LOW.
- Page 20 1.9.3 Dispose (to SDU or alternate container / Manually fill vat from JIB) For safe, convenient draining and disposal of used oil or shortening, Frymaster recommends using the Frymaster Shortening Disposal Unit (SDU). The SDU is available through your local distributor.
- Page 21 Left Display Right Display Action REMOVE FILTER Open the door and pull filter pan out of the cabinet. IS PAN EMPTY? YES / NO Ensure the pan is empty and press (YES), otherwise press (NO) and follow the prompts (returns to DISPOSING). INSERT FILTER Insert the pan.
-
Page 22: Drain To Pan
1.9.6 Drain to Pan Left Display Right Display Action Follow steps to Entering Filter Menu Mode on page 1-11. LEFT (Split vats only) RIGHT (Split vats only) Press appropriate arrow to select side. DRAIN TO PAN Press . Press (YES) arrow to continue. Press (NO) arrow to DRAIN NOW? YES / NO cancel and return to previous state. -
Page 23: Fill Vat From Bulk (Bulk Only)
1.9.8 Fill Vat from Bulk (Bulk only) Left Display Right Display Action Follow steps to Entering Filter Menu Mode on page 1-11. LEFT (Split vats only) RIGHT (Split vats only) Press appropriate arrow to select side. FILL VAT FROM Press . BULK FILL VAT FROM Press (YES) arrow to continue. -
Page 24: Clean
1.9.10 Clean (Hot [Boil Out] or Cold [Cold Clean (Soak)]) (Dispose to SDU or Alternate container / Manually Fill Vat from JIB) Left Display Right Display Action Follow steps to Entering Filter Menu Mode on page 1-11. WARNING: To prevent injury, ensure adjacent vats that contain oil are OFF and covered prior to performing a Clean (Hot [Boil Out] or Cold [Cold Soak]). -
Page 25: Clean (Hot [Boil Out] Or Cold [Cold Soak] (Dispose To Bulk Or Front / Manually Fill Vat From Jib)
1.9.11 Clean (Hot [Boil Out] or Cold [Cold Clean (Soak)]) (Dispose to Bulk or Front / Manually Fill Vat from JIB) Left Display Right Display Action Follow steps to Entering Filter Menu Mode on page 1-11. WARNING: To prevent injury, ensure adjacent vats that contain oil are OFF and covered prior to performing a Clean (Hot [Boil Out] or Cold [Cold Soak]). -
Page 26: Clean (Hot [Boil Out] Or Cold [Cold Soak] (Dispose To Bulk /Fill Vat From Bulk)
Left Display Right Display Action IS SOLUTION CONFIRM Press arrow under CONFIRM. REMOVED? RINSE CONFIRM Rinse the vat with water and press arrow under CONFIRM. COMPLETE? VAT AND PAN Ensure the vat and filter pan are completely dry and press CONFIRM DRY? arrow under CONFIRM. -
Page 27: Polishing
Left Display Right Display Action BOIL OUT DONE or COLD CLEAN CONFIRM Press arrow under CONFIRM to cancel the alarm. DONE REMOVE FILTER Open the door and pull filter pan out of the cabinet. Insert disposal pan large enough to contain FOUR gallons (15 INSERT liters) or more for FQE30 or FQG30 fryers, or EIGHT gallons CONFIRM... -
Page 28: Scan Mode
Left Display Right Display Action press either arrow under CONFIRM. START POLISH Press button with blinking LED. DRAINING None required. None required. The oil flows from the filter pan to the frypot and POLISHING 15:00 countdown timer back to the filter pan for 15 minutes. Default is 15 minutes. FILLING None required. - Page 29 Left Display Right Display Explanation/Action long short, none The number of cook cycles before a filter prompt occurs. Press . FILTER Number PROMPT INSTANT ON 0 This is the time, in seconds, the fryer heats before the controller checks the temperature. NOTE: An incorrect entry may cause the fryer to overshoot temperature and over cook some products.
-
Page 30: Chapter 2: Operator Troubleshooting
If you are in doubt as to the proper action to take, do not hesitate to call the Frymaster Technical Service Department or your local Frymaster Authorized Servicer for assistance. -
Page 31: Troubleshooting
Troubleshooting Fryers 2.2.1 Error Messages and Display Problems PROBLEM PROBABLE CAUSES CORRECTIVE ACTION A. Press the ON/OFF switch to turn the controller A. Controller not turned on. No display on the B. No power to fryer. B. Verify that the fryer is plugged in and that the C. -
Page 32: Filtration Problems
PROBLEM PROBABLE CAUSES CORRECTIVE ACTION It is normal for this message to appear during Contactor issue, gas valve off, Controller displays startup if a gas fryer’s lines have air in them. failed controller, failed HEATING Check that the gas valve is on. If it continues, transformer, open high-limit FAILURE. - Page 33 PROBLEM PROBABLE CAUSES CORRECTIVE ACTION engaged. inserted into the fryer and “A” is displayed on the MIB board. Controller displays WAIT A. Another function is still in A. Wait until the previous function ends to Filter, FILTER process. start another filtration cycle. BUSY, CLEAN AND B.
-
Page 34: Using Tech Modes
2.2.3 Using Tech Modes The FilterQuick™ controller has a Tech Mode menu accessed with Code 3000, which allows clearing of E-log, password reset, lane count, hold mode and high limit test. Left Display Right Display Action Start with the far LEFT controller. Press until the controller scrolls Info Mode, changing to Main and then PRODUCT SETUP. -
Page 35: Oqs (Oil Quality Sensor) Troubleshooting
Code ERROR MESSAGE EXPLANATION ERROR AIF BOARD MIB detects AIF missing; AIF board failure ERROR MIB BOARD Cooking computer detects MIB connections lost; MIB board failure ERROR AIF PROBE AIF RTD reading out of range ERROR ATO PROBE ATO RTD reading out of range INVALID CODE LOCATION SD card removed during update FILTER PAPER PROCEDURE... - Page 36 Problem Corrective Action Check the following items and perform another OQS filter. Ensure the vat is at setpoint temperature. Inspect the pre-screen filter and ensure it is screwed in tightly. No TPM results Inspect the O-rings on the filter pan and ensure they are both present and displayed.
-
Page 37: Chapter 3: Filterquick Oil Quality Sensor (Oqs)
CHAPTER 3: FILTERQUICK™ OIL QUALITY SENSOR (OQS) OQS Filter Setup With the controller OFF, follow the steps below. *NOTE: This should only be done on the far left (Master) controller. Left Display Right Display Action Press until the controller scrolls INFO MODE, changing to MAIN and then PRODUCT SETUP. -
Page 38: Oqs Filter Menus
Left Display Right Display Action With the desired stats displayed, press . Press to view TPM. Current Day Current Date Press to scroll for last measured TPM value that day. Press . Number/– – NOTE: If OQS is not installed; or invalid or no reading is taken, dashed lines are Current Day shown. -
Page 39: Clean And Filter With Oqs (Set To Text)
Left Display Right Display Action POLISHING None required. The oil flows from the filter pan to the frypot and 5:00 TIMER back to the filter pan for 5 minutes. CLOSE DRAIN CONFIRM Press arrow under CONFIRM. FILLING None required. None required. The pump stops and the OQS sensor calculates X–... -
Page 40: Oqs Filter With Oqs (Set To Number)
Left Display Right Display Action FILLING None required. None required. The pump stops and the OQS sensor calculates X– – X alternating the TPM value of the oil. FILLING None required. The pump continues filling the frypot. Press (YES) if the vat is full. If TPM reading is below OQS SETUP –... -
Page 41: Oqs Filter With Oqs (Set To Text)
Left Display Right Display Action attained. Press (YES) arrow to continue to DISCARD NOW function. Press (NO) arrow to return to normal operation and advance to next step. -------- or LOW -------- or LOW TEMP alternating with TEMP alternating None required. Fryer starts heating back to setpoint. the temperature. - Page 42 FRYMASTER 8700 LINE AVENUE, SHREVEPORT, LA 71106‐6800 800‐551‐8633 318‐865‐1711 WWW.FRYMASTER.COM EMAIL: FRYSERVICE@WELBILT.COM *8197423* WWW.WELBILT.COM Welbilt provides the world’s top chefs, and premier chain operators or growing independents with industry leading equipment and solutions. Our cutting‐edge designs and lean manufacturing tactics are powered by deep knowledge, operator insights, and culinary expertise. All of our products are backed by KitchenCare® – our aftermarket, repair, and parts service. CLEVELAND DELFIELD® FRYMASTER® KOLPAK® MANITOWOC® MERRYCHEF® CONVOTHERM® FITKITCHEN™ GARLAND LINCOLN MERCO® MULTIPLEX® ©2017 Welbilt Inc. except where explicitly stated otherwise. All rights reserved. Continuing product improvement may necessitate change of specifications without notice.
Need help?
Do you have a question about the FilterQuick Version 2 and is the answer not in the manual?
Questions and answers