Table of Contents
Advertisement
Advertisement
Table of Contents
Troubleshooting

Related Manuals for Nespresso CREATISTA UNO


Summary of Contents for Nespresso CREATISTA UNO
- Page 1 CREATISTA UNO MY MACHINE...
- Page 2 User manual...
-
Page 3: Nespresso Creatista Uno
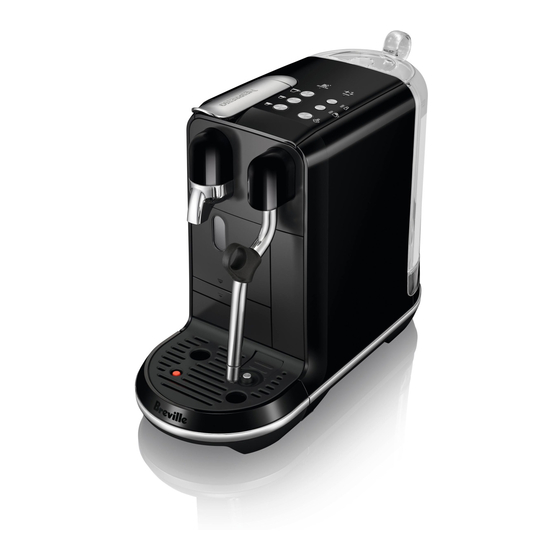
• Nespresso Breville Creatista Uno Congratulations on your purchase of the Nespresso Breville Creatista Uno, the machine that allows you to make cafe quality milk coffees. -
Page 4: Packaging Content
Packaging Content Creatista Uno USER MANUAL Nespresso is an exclusive system creating the perfect Espresso, time after time. ❶ Creatista Uno Coffee Machine Each parameter has been calculated with great precision to ensure that all the aromas from each capsule can be extracted, to give the coffee body and create an exceptionally thick and smooth crema. -
Page 5: Table Of Contents
Content Nespresso Creatista Uno Packaging Content Creatista Uno Specifications Safety Precautions Machine Overview First Use 9-10 Regular Coffee Preparation Milk Coffee Preparation 12-13 Latte Macchiato Preparation 14-15 Adjusting Regular Coffee Drinks Reset to Factory Settings Emptying the System Energy Saving... -
Page 6: Safety Precautions
The use of accessory attachments • This User Manual is also instructed by an adult on how to use appliance to the Nespresso Club or to a not recommended by the appliance available as a PDF file at the appliance safely, and fully informed Nespresso authorised representative. - Page 7 Other Safeguards When using electrical appliances, Avoid risk of fatal electrical shock Disconnect the appliance from the Contact the Nespresso Club or • • basic Important Safeguards should and fire power outlet when not in use for a Nespresso authorised representative...
- Page 8 • • only parts and appliance accessories be provided to reduce risks resulting any way. from Nespresso that are designed for from becoming entangled in or Do not pour water or other liquids into • your appliance. tripping over a longer cord.
-
Page 9: Machine Overview
Machine Overview Control panel Water tank & lid Lever for capsule insertion Capsule container Removable pin cleaning tool Pop out cup support Removable drip grid Removable drip tray with full indicator Control Panel Descale alert LED Steam wand clean alert LED Lungo button Milk temperature button Easy clean steam... -
Page 10: First Use
First Use Read the important safeguards first to avoid risks of fatal electrical shock and fire. Rinse the water tank Fill the water tank Place the water tank, insert before filling it with with potable water. the drip tray and the capsule potable water. -
Page 11: First Use
First Use Setting your water hardness, dip the Water Hardness Test Strip in and out of the < 1 minute water tank. Wait 1 minute. Press and hold the temperature button and the milk froth level button for 5 seconds to set the water hardness level. Pressing temperature button increases the level and pressing milk froth button decreases the level. -
Page 12: Regular Coffee Preparation
Regular Coffee Preparation Fill the water tank Turn the machine ON Place a cup under the with potable water. pressing Ristretto, Espresso, coffee outlet. Use the cup Lungo, or Steam button. The support if required. PUSH buttons will flash while the the cup support to unlock. -
Page 13: Milk Coffee Preparation
Milk Coffee Preparation TIP: This machine is optimised for pasteurised whole or semi skimmed milk, refrigerated & freshly opened. Only use the milk jug provided. Milk Temperature and Milk Froth may be adjusted to suit different milk types. Fill the water tank To accommodate smaller Fill the milk... - Page 14 Milk Coffee Preparation Press one of the coffee When the coffee extraction is complete, Start milk frothing buttons to start the coffee select milk setting for your preferred drink. pressing steam button. extraction. Milk Temperature Setting 1 = cool 2 = ideal / idéal 3 = hot / chaud Milk Froth Level Setting 1 = Flat White...
-
Page 15: Latte Macchiato Preparation
Latte Macchiato Preparation Fill the water tank To accommodate Fill the milk a Latte jug to the marked maximum with fresh potable Macchiato glass, push the level with fresh cold milk from the fridge. water. cup support in until it locks. CAUTION: Do not fill milk jug above the maximum level marked on the inside &... -
Page 16: Latte Macchiato Preparation
Latte Macchiato Preparation When milk frothing Allow steam wand to return to Pour milk into the Latte completed, lift the steam its down position & it will auto Macchiato glass. wand, wipe with a clean purge to rinse itself. Rinse the jug. damp cloth. -
Page 17: Adjusting Regular Coffee Drinks
Adjusting Regular Coffee Drinks Lift the Lever & insert Release the button after Adjusted coffee volume will be saved for your capsule. Press desirable shot duration. next use. and hold one coffee button you want to adjust among Ristretto, Any coffee can be programmed Espresso, and Lungo. -
Page 18: Emptying The System
Emptying the System before a period of non-use or for frost protection Turn off the machine Remove the water tank. Press and hold by pressing and holding Place the empty Milk Jug Espresso button and the Ristretto button and under the coffee outlet. Lungo button together for Steam button together for 5 seconds. -
Page 19: Energy Saving
Energy Saving Daily Cleaning To ensure hygienic conditions, it is highly recommended emptying and cleaning the capsule container every day. Energy efficient: Machine minimises power Empty the drip tray and the capsule container every day. Remove cup support use when not making a drink. After 10 mins by first removing the capsule bucket, then unlocking the cup support, pulling the of no use, the machine enters sleep mode. - Page 20 Daily Cleaning Do not use any strong or Dry all the parts with a soft Never immerse abrasive solvent, sponge or clean cloth and reassemble appliance or part of it in cream cleaner. Do not put the all parts. Clean the coffee water or any other liquid.
-
Page 21: Steam Wand Cleaning
Steam Wand Cleaning It is recommended that you perform this monthly to prevent steam tip blockages or when the steam wand clean alert LED is on. When it flashes, do manual steaming by pressing and holding the Steam button for 3 seconds. Remove the pin Unscrew and remove Use the pin cleaning tool... -
Page 22: Descaling
Avoid contact with eyes, skin and surfaces. Never use any product other than the Nespresso descaling kit available at the Nespresso Club to avoid damage to your machine. The following table will indicate the descaling frequency required for the optimum performance of your machine, based on water hardness. -
Page 23: Descaling
Descaling Make sure the machine is off. Press Milk froth level Once finished, Fill water tank and hold the Ristretto button and the will indicate discard liquid MAX with potable Steam button together for 5 seconds to the progress of the from the water. -
Page 24: Water Hardness
Water Hardness Turn the machine ON Setting your water hardness, dip the Water Hardness Test Strip in and out the water tank. by pressing the Lungo, Espresso, Ristretto, or Wait 1 minute. Press and hold the temperature button and the milk froth button for 5 Steam button. -
Page 25: Troubleshooting
Machine is ON but ceases to operate - Turn off the machine. - Visit Nespresso.com or call the Nespresso Club to contact your local service - Wait 60 minutes and press the Ristretto, Espresso, or Lungo button to turn to centre. -
Page 26: Troubleshooting Milk Froth Preparation
Troubleshooting Milk Froth Preparation Milk steam cycle does not start - Check if the water tank is correctly positioned, if empty, fill with potable water. - Check steam tip for any blockages and ensure wand is lowered. Quality of froth not up to standard - Be sure to use pasteurised whole or semi-skimmed milk at refrigerated - Use the Breville milk jug provided. -
Page 27: Contact Nespresso Club
Nespresso Club or your Nespresso authorised representative. Contact details for your Nespresso Club or your Nespresso authorised representative can be found in the «Welcome to Nespresso» folder in your machine box or at nespresso.com Disposal and Environmental Protection... -
Page 28: Limited Guarantee
New Zealand: 0800 234 579 auclub@nespresso.com. This product is imported and distributed by Breville and this warranty is provided by Breville. To the extent permitted by law, Nespresso has no liability for the product and all guarantees, warranties and conditions by Nespresso are excluded. - Page 29 Notes...
- Page 30 Notes...
- Page 31 Notes...
- Page 32 CREATISTA UNO by Nespresso...
Need help?
Do you have a question about the CREATISTA UNO and is the answer not in the manual?
Questions and answers