Table of Contents
Advertisement
Quick Links
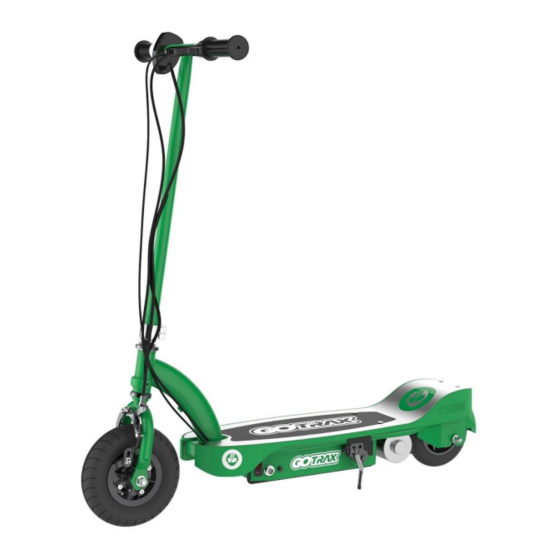
ET100 SERIES
NOTE:
T he ET100 must be traveling up to 3 mph before motor will
e ngage. Kick
start up to 3 mph while applying the throttle to engage motor.
OWNER'S MANUAL
Read and understand this entire manual before riding!
DO NOT RETURN TO STORE!
NOTE: Manual illustrations are for demonstration purposes only. Illustrations may not reflect
exact appearance of actual product. Specifications subject to change without notice.
Please have your 19 digit product I.D. code ready before contacting Taomotor for
warranty
assistance and/or replacement parts.
Advertisement
Table of Contents

Related Manuals for Gotrax ET100 SERIES


Summary of Contents for Gotrax ET100 SERIES
- Page 1 ET100 SERIES NOTE: T he ET100 must be traveling up to 3 mph before motor will e ngage. Kick start up to 3 mph while applying the throttle to engage motor. OWNER’S MANUAL Read and understand this entire manual before riding! DO NOT RETURN TO STORE! NOTE: Manual illustrations are for demonstration purposes only.
- Page 2 Product I.D. Code: _____________ - ____________ - ____________ v1_06_12...
-
Page 3: Safety Warnings
CONTENTS ACCEPTABLE RIDING PRACTICES AND CONDITIONS Safety Warnings Always check and obey any local laws or regulations, which Before You Begin may affect the locations where the electric scooter may be used. Keep safely away from cars and motor vehicle traffic at Assembly and Set-Up/Charging Battery all times, and only use where allowed and with caution. -
Page 4: Repair And Maintenance
Repair and Maintenance Do not ride at night or when visibility is limited. Never use near steps or swimming pools. Troubleshooting Guide Do not allow hands, feet, hair, body parts, clothing, or similar articles to come in contact with moving parts, Electric Scooter Parts wheels, or drivetrain, chain while the motor is running. - Page 5 BEFORE YOU BEGIN Remove contents from box. Remove the foam separators that protect the components from damage during shipping. Inspect the contents of the box for scratches in the paint, dents or kinked cables that may have occurred during shipping. Because the scooter was 95 percent assembled and packed at the factory, there should not be any problems, even if the box has a few scars or dents.
- Page 6 Product ID Locations: See locations to the left Note: E lectric scooter must b e moving at 3 mph/4.8 kph while Handlebar Stem applying the throttle to engage motor. Underneath Battery Tray Charger Box - Side of UPC (not shown) (Included) 3 mm Allen Wrench 3 mm...
-
Page 7: Charging The Battery
CHARGING BATTERY WARNING: Charging the Battery Rechargeable batteries are only to be charged under adult To ensure long battery life, never store the Charge the battery prior to use. product in freezing or below freezing supervision. Always disconnect temperatures! Freezing will permanently Initial charge time: 12 hours damage the battery. - Page 8 Note: M ake sure the cables/ w ires are out WARNING: F ailure to p roperly tighten WARNING: B attery c harge can the collar clamp may allow the handlebars to of the way before inserting the stem in the deplete over time.
-
Page 9: Starting The Scooter
PRE-RIDE CHECKLIST ❑ ❑ H ardware B rake Check all parts such as nuts, bolts, cables, fasteners, Check the brakes for proper function. When you etc. to ensure they are secure and assembled correctly. squeeze the lever, the brake should provide positive If the unit is damaged do not ride. -
Page 11: Adjusting The Brakes
REPAIR AND MAINTENANCE Turn power switch “OFF” before conducting any maintenance procedures. Adjusting the Brakes Tools required: 1 0 mm open wrench If brake is too tight or has too much slack, use Insp a 10 mm open wrench to loosen the brake 1 ... - Page 12 ridin brak g the need scoo funct ter. Verif prior prop Note: F ront wheel hardware s equence Front Wheel Replacement Tools required: 1 0 mm open wrench and two (2) 16 mm open wrenches. 8-2 Right Side (Throttle) 8-3 Spacer 8-2 Washer...
- Page 14 REPAIR AND MAINTENANCE Note: R ear wheel hardware sequence 18-2 18-3 18-4 5 6 P ush the chain tensioner W ith two 13 mm Remove wheel and install down to install the chain on open w renches, 18-8 replacement wheel.
- Page 15 Right Side (Throttle) 1 8-1 13 mm Locknut 18-7 Spring Washer 18-2 Washer Frame 18-3 Washer (Plate Cut) 18-4 Spacer (Short) WARNING: I f a battery l eak develops, avoid any contact with leaking acid and place the damaged battery in a plastic bag. Refer to the disposal instructions at left.
- Page 16 *Unit(s) should be turned off and f ully charged p rior to doing any Troubleshooting NOTE: A ll troubleshooting steps should be performed by an adult o nly TROUBLESHOOTING GUIDE Problem Possible Cause Solution Does Not Work Out Of The Box Unit must be traveling up to 3 mph Kickstart to 3 mph while applying the before...
- Page 17 the motor. If motor engages - Replace Battery Charge battery periodically when not in Tire will lose some pressure over time. Verify Tire is not properly inflated correct tire pressure Do not store unit in freezing or below freezing Improper battery maintenance temperatures.
- Page 18 ET100 PARTS Maintain your scooter with genuine Taomotor parts. 01 Handlebar grip (right/left) 10 Front wheel complete 18 Rear wheel complete 02 Single speed twist grip throttle (See pg. 5 for hardware (See pg. 6 for hardware sequence) sequence) 02-1 Sleeve 11 Battery tray 19 Chain Tensioner 03 Handlebar stem...
Need help?
Do you have a question about the ET100 SERIES and is the answer not in the manual?
Questions and answers