Advertisement
Advertisement
Table of Contents

Related Manuals for Gotrax EBE2


Summary of Contents for Gotrax EBE2
- Page 1 EBE2 E L E C T R I C B I K E USER MANUAL...
-
Page 3: Congratulations On Your Purchase
Congratulations on your purchase! This user manual will help you assemble and operate your new electric scooter. Be sure to read ALL OF THE INFORMATION in this manual before riding. NOTE TO ALL RIDERS UNDER 18 YEARS OF AGE: It’s very important that you get parental permission before riding your electric scooter. - Page 4 Don’t Ride Until You Read This: ALWAYS wear a helmet when riding your electric bike. Make sure your electric bike has a full battery before taking it out to ride. Always be aware of local road laws, and follow them. Do not ride the bike under the influence of drugs or alcohol.
-
Page 5: Warning Message
Abuse - We do not cover physical damage due to negligent care and extreme riding. Whenever you ride the GOTRAX Electric Bike, you risk severe injury or even death from loss of control, collisions, and falls. Use caution and ride at your own risk. - Page 6 13. Never exceed the 264 lb (120 kg) maximum load rating. 14. The electric bike should never be used by children under the age of 16. 15. Maximum Speed - Your electric bike goes the maximum speed of 20 mph. 16.
- Page 7 ELECTRIC BIKE TOOLS: (1) LARGE WRENCH, (3) BATTERY CHARGER ALLEN WRENCHES, (1) SCREWDRIVER ITEM SPECIFICATIONS Model EBE2 Product Dimensions 173x63x107 (cm) Package Dimensions 139x24x72 (cm) Max Load 264 lbs (120 kg) Package Weight 62 lbs (28 kg) E Bike Weight...
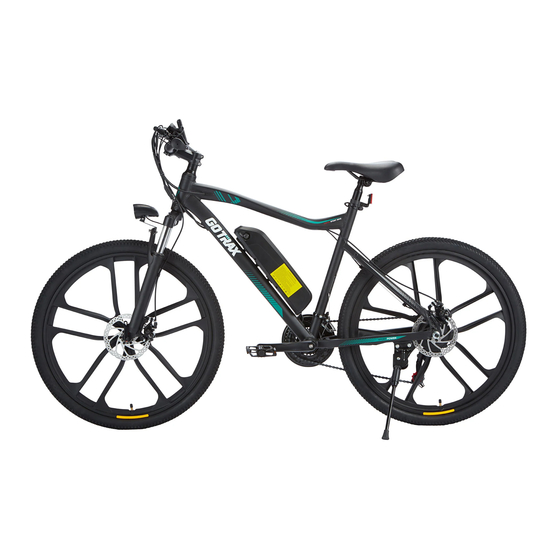
- Page 8 Get To Know Your E-Bike LCD Display Stem Saddle Seat Post Front Light Suspension Front Battery Crankset Disc Brake Tire Motor Pedals Wheel Chain...
-
Page 9: Installing The Handlebar
Installing the Handlebar Use tools to loosen screws from Adjust the position of the handlebar fasteners Fasten the handlebar Tighten the screws... - Page 10 Adjusting the Seat Tube Push the saddle down Open the folder of the seat tube Adjust and rotate the seat Finally lock the folding mechanism...
- Page 11 Mounting Pedal Please check the L and R marks on Take the wrench from the tool box pedals R means it should be installed on the Tighten the nuts counterclockwise right side, L means it should be installed on the left side...
-
Page 12: Installing The Front Wheel
Installing the front wheel Fixed well front fork The front fork is aligned to both ends of the bearing. The disc brake is on the left Install the quick release and nut then Twist the wrench upward and check the tighten well operation of the wheel... -
Page 13: Removing The Battery
Removing the Battery Open the battery key Remove the battery... - Page 14 Charge Your E-Bike: Method 1 Before using the electric bike, you must fully charge the battery. Charging Port 1. Locate the charging port on the left side of the frame on the removable battery 2. Plug the charger into a power supply 3.
- Page 15 Charge Your E-Bike: Method 2 Remove the battery charger from the e-bike (as detailed on page 13) Locate the charging port near the top of the battery. A red light indicates the battery is charging, green indicates the battery is full...
- Page 16 E-Bike Console Functions Display Includes: Speed, battery, error indication and mileage Control and Settings: Power switch, wheel diameter, idle time for auto-hibernation, backlight brightness setting, start mode setting, drive mode setting, voltage level setting, controller current limit setting Communications Protocol: UART Max Speed/ Average Speed Battery Level...
- Page 17 6 KM/H Booster Assist Constant Speed Service Electric Assisted Mode Battery LED Brake Indicator Controller Failure Motor Failure Throttle Failure OVERVIEW OF KEYS Long press "M" to turn off the panel when it's on. Short press the up key + to increase the PAS level, short press the down key - to decrease the PAS level.
-
Page 18: Troubleshooting & Warranty
Troubleshooting & Warranty We frequently update our user manuals at GOTRAX.com, and reserve the rights to update and change manuals online. Please contact our customer service team if you are experiencing problems or need more detailed information. They can be reached at GOTRAX.com Users should operate in accordance with the product manual. - Page 19 W W W . G O T R A X . C O M #RideGOTRAX LVHL26A (EO2)| EN15194 | FCC-PART15 This product has passed the CE certification...
- Page 20 GOLABS, INC GOTRAX.com 2201 Luna Rd. Carrollton, TX 75006...
Need help?
Do you have a question about the EBE2 and is the answer not in the manual?
Questions and answers
where is serial and model number on go trax bike
where is model and serial number
The serial and model number on a Gotrax EBE2 bike can typically be found on the frame of the bike, often near the bottom bracket or rear wheel area. If it's not visible there, refer to the manual or contact customer service at GOTRAX.com for specific instructions.
This answer is automatically generated
how much air in the tires
The recommended tire pressure for Gotrax EBE2 is 45–65 PSI.
This answer is automatically generated