Tektronix WFM4000 Service Manual
Waveform monitors
Hide thumbs
Also See for WFM4000:
- User manual (79 pages) ,
- System integration technical reference (36 pages) ,
- Instructions manual (13 pages)

Related Manuals for Tektronix WFM4000


Summary of Contents for Tektronix WFM4000
- Page 1 WFM4000 and WFM5000 Waveform Monitors Service Manual *P077244201* 077-2442-01...
- Page 3 WFM4000 and WFM5000 Waveform Monitors Service Manual Revision B Warning The servicing instructions are for use by qualified personnel only. To avoid personal injury, do not perform any servicing unless you are qualified to do so. Refer to all safety summaries prior to performing service.
- Page 4 Copyright © Tektronix. All rights reserved. Licensed software products are owned by Tektronix or its subsidiaries or suppliers, and are protected by national copyright laws and international treaty provisions. Tektronix products are covered by U.S. and foreign patents, issued and pending. Information in this publication supersedes that in all previously published material.
- Page 5 Tektronix, with shipping charges prepaid. Tektronix shall pay for the return of the product to Customer if the shipment is to a location within the country in which the Tektronix service center is located. Customer shall be responsible for paying all shipping charges, duties, taxes, and any other charges for products returned to any other locations.
-
Page 7: Table Of Contents
Detailed Troubleshooting Procedures ..............Repackaging Instructions ..................Packaging ...................... Shipping to the Service Center ................Removal and Replacement Procedures ................. Preparation..................... Module Removal....................Replaceable Parts ....................Parts Ordering Information .................. Using the Replaceable Parts Lists................WFM4000 and WFM5000 Service Manual... - Page 8 Figure 12: Backlight driver board removal ..............Figure 13: Front panel assembly removal ..............Figure 14: Front panel board and backlight removal ............Figure 15: Removing the LCD assembly bracket.............. Figure 16: Backlight removal ..................WFM4000 and WFM5000 Service Manual...
- Page 9 Table 18: Figure 11 replaceable parts list ............... Table 19: Figure 12 replaceable parts list............... Table 20: Figure 13 replaceable parts list............... Table 21: Figure 14, Figure 15, and Figure 16 replaceable parts list ........Table 22: Accessories ..................... WFM4000 and WFM5000 Service Manual...
-
Page 10: General Safety Summary
Replace batteries properly. Replace batteries only with the specified type and rating. Recharge batteries properly. Recharge batteries for the recommended charge cycle only. Use proper AC adapter. Use only the AC adapter specified for this product. WFM4000 and WFM5000 Service Manual... - Page 11 DANGER indicates an injury hazard immediately accessible as you read the marking. WARNING indicates an injury hazard not immediately accessible as you read the marking. CAUTION indicates a hazard to property including the product. The following symbol(s) may appear on the product: WFM4000 and WFM5000 Service Manual...
-
Page 12: Service Safety Summary
Use Care When Servicing With Power On. Dangerous voltages or currents may exist in this product. Disconnect power, remove battery (if applicable), and disconnect test leads before removing protective panels, soldering, or replacing components. To avoid electric shock, do not touch exposed connections. WFM4000 and WFM5000 Service Manual... -
Page 13: Preface
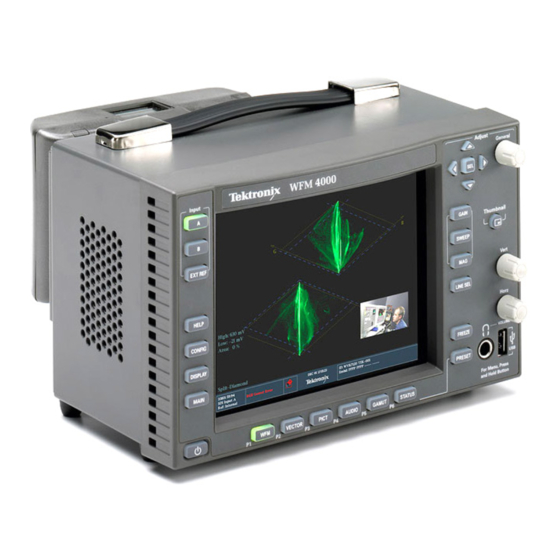
Preface This manual supports servicing to the module level of the WFM4000 and WFM5000 Waveform Monitors, which process video signals for display on an internal XGA LCD. These instruments are used in video and television broadcasting, production, and post-production environments. -
Page 14: Related Manuals
This manual assumes you have access to the following manuals and documentation when servicing this product. The manuals ship with the product on the Product Documentation CD and are also downloadable from the Tektronix Web site. The Online Help comes pre-installed on the instrument. -
Page 15: Introduction
(See page viii, Related Manuals.) Options and Accessories The lists of options and accessories for this product are found in the WFM4000 and WFM5000 Waveform Monitors User Manual provided in the WFM4000 and WFM5000 Product Documentation CD that ships with the product. (See page viii, Related Manuals.) -
Page 16: Hardware Installation
EMI shell. It can be used as-is or installed into a hard carry case, soft carry case (requires hard carry case), or rack mount cabinet. For installation instructions into a rack mount or cabinet, refer to the WFM4000 and WFM5000 Waveform Monitors and WVR4000 and WVR5000 Waveform Rasterizers System Integration Technical Reference. -
Page 17: Theory Of Operation
Theory of Operation The WFM4000 and WFM5000 are modular waveform monitors. They are configured to accept serial SD digital or HD digital inputs, and digital audio inputs. All models use an internal XGA monitor for the display. This theory of operation is mainly based on the High-level Block diagram. (See Figure 1.) -
Page 18: Figure 1: Block Diagram
Theory of Operation Figure 1: Block diagram WFM4000 and WFM5000 Service Manual... -
Page 19: Sdi I/O Board
The data stream from the SDI video input is applied to the waveform processing FPGA. This block deformats, up-samples, interpolates, demodulates, and Processing Engine otherwise processes the data to generate the signals needed to create the displays. WFM4000 and WFM5000 Service Manual... -
Page 20: Front Panel
The front panel contains a small processor which communicates with the control processor through SPI signaling. Reprogramming can be done through SPI as well, if the front panel processor flash code needs to be updated. WFM4000 and WFM5000 Service Manual... -
Page 21: Audio
A 4 amp Polyswitch (self resetting thermal fuse) provides input overcurrent fault protection. Failure of this fuse usually indicates a serious fault within the instrument. The secondary supplies, their tolerances and locations are specified in the General Maintenance section. WFM4000 and WFM5000 Service Manual... - Page 22 Theory of Operation WFM4000 and WFM5000 Service Manual...
-
Page 23: General Maintenance
5. Handle circuit boards by the edges when possible. 6. Do not slide the circuit boards over any surface. 7. Avoid handling circuit boards in areas that have a floor or work-surface covering capable of generating a static charge. WFM4000 and WFM5000 Service Manual... -
Page 24: Inspection And Cleaning
Use a glass cleaner to clean the LCD. For the rest of the instrument, use a 75% isopropyl alcohol solution as a cleaner and rinse with deionized water. Before using any other type of cleaner, consult your Tektronix Service Center or representative. -
Page 25: Table 1: External Inspection Check List
Solder connections Cold solder or rosin joints. Resolder joint and clean with isopropyl alcohol. Capacitors Damaged or leaking cases. Remove and replace Corroded solder on leads or damaged circuit board. terminals. WFM4000 and WFM5000 Service Manual... -
Page 26: Troubleshooting
Before performing this or any other procedure in this manual, read the General Safety Summary and Service Safety Summary found at the beginning of this manual. To prevent possible injury to service personnel or damage to electrical components, refer to Preventing ESD. (See page 9.) WFM4000 and WFM5000 Service Manual... -
Page 27: Table 3: Required Test Equipment
10 bit shallow ramp SDI Matrix Pathological Signal H 100% sweep AES Audio Signal Generator 48 kHz, 24 bit word length signals Rohde & Schwarz UPL06, Tektronix AM700 and AM70. Voltmeter Fluke 87 or equivalent WFM4000 and WFM5000 Service Manual... -
Page 28: Table 4: Symptoms And Causes
No text or traces on LCD Perform LCD troubleshooting test Dim region on LCD (roughly 1/6 or Perform the Backlight Driver board replacement procedure. If that does not resolve the a multiple thereof) problem, perform the Backlight replacement procedure. WFM4000 and WFM5000 Service Manual... -
Page 29: Detailed Troubleshooting Procedures
final recommendation identifying a root cause might be suspect. List of detailed troubleshooting procedures: General Checks Fan Failures Power Up/Power Down Troubleshooting Secondary Power Supply Check Front Panel Button Troubleshooting LCD Problems Isolating Audio Problems WFM4000 and WFM5000 Service Manual... - Page 30 If J11 pin 3 is static 5 V, replace the fan. If J11 pin 3 is static 0 V, unplug the fan connector and measure J11 pin 3 on the board (without any fan connection). If the voltage is now 5 V, replace the fan. WFM4000 and WFM5000 Service Manual...
-
Page 31: Table 5: Backplane Board Secondary Supplies
Allowed range (V) Measure at VBULK Input V (anywhere in 10 V to TP20 18 V range) with up to 0.2 V drop 5 to 13.5 TP11 4.75 to 5.25 3.2 to 3.4 2.4 to 2.6 WFM4000 and WFM5000 Service Manual... -
Page 32: Figure 2: Backplane Board Power Supply Test Points
Check the Audio supplies on the Audio board (if an Audio board is installed). The test points are available, with the board installed, at the location specified. (See Figure 2.) Figure 2: Backplane board power supply test points WFM4000 and WFM5000 Service Manual... - Page 33 It may help to be in a low light area to see the backlight. 2. If the backlight is fully lit, replace the front panel assembly. 3. If the backlight is partially lit, meaning a region of the display is dim, replace the Backlight Driver board. WFM4000 and WFM5000 Service Manual...
- Page 34 The results are shown on screen and also saved to the Diagnostics Log, where they can viewed at a later time. If any failures are indicted, reload the unit software. If that does not resolve the problem, replace the Main board. WFM4000 and WFM5000 Service Manual...
-
Page 35: Repackaging Instructions
Type and serial number of the instrument. Reason for returning. A complete description of the service required. Mark the address of the Tektronix Service Center and the return address on the shipping carton in two prominent locations. WFM4000 and WFM5000 Service Manual... -
Page 36: Removal And Replacement Procedures
Lead Free Soldering Lead-free manufacturing processes and components were used to make this product. The Tektronix Worldwide Service Organization uses lead-free solder in all repairs. Lead-free solder joints have a satin finish and are not shiny like lead-based solder joints. -
Page 37: Table 6: Lead-Free Solder And Paste
If you are using syringe paste, a hot air gun capable of providing temperatures slightly higher than 700 ºF. Component Level Repairs Lead free soldering. Tektronix, Inc. has used Lead Free Manufacturing processes and components in the making of this product and our Worldwide Service (Lead Free Environment) Organization has transitioned to using Lead Free solder in all component level repairs. -
Page 38: Module Removal
(See Table 8.) Table 8: Module removal To remove Front Front Backlight panel Main panel Backplane driver Main You must first remove assembly board board board board board board chassis Rear panel cover WFM4000 and WFM5000 Service Manual... -
Page 39: Figure 3: Wfm Overview View 1
Main You must first remove assembly board board board board board board chassis I/O bracket Fan assembly Main board Front panel board Backplane board Backlight driver board Main chassis Figure 3: WFM overview view 1 WFM4000 and WFM5000 Service Manual... -
Page 40: Figure 4: Wfm Overview View 2
Removal and Replacement Procedures Figure 4: WFM overview view 2 WFM4000 and WFM5000 Service Manual... -
Page 41: Figure 5: Rear Panel Cover Removal
1. Remove the nine T-10 screws and the five T-15 screws from the sides, top, and rear of the rear panel cover. 2. Lift the cover straight up and remove. Figure 5: Rear panel cover removal WFM4000 and WFM5000 Service Manual... - Page 42 4. With your hand on the top of the bracket, pull it gently up and back, bringing it partly away from the rest of the instrument. 5. Detach J5 and J11 from the backplane board. 6. Detach J6 and J7 from the main board. 7. Remove the bracket. WFM4000 and WFM5000 Service Manual...
-
Page 43: Figure 6: I/O Bracket Removal
Removal and Replacement Procedures Figure 6: I/O bracket removal WFM4000 and WFM5000 Service Manual... -
Page 44: Figure 7: Main Board Removal
4. Lift the main board up until you are able to reach the J3 and J6 connectors that attach the main board to the backplane board. 5. Detach the J3 and J6 connectors and remove the main board. Figure 7: Main board removal WFM4000 and WFM5000 Service Manual... -
Page 45: Figure 8: Sdi And Ref Connectors
4. Pull the BNCs and the 15-pin DSUB connector through the holes in the bracket and remove the SDI board. NOTE. If you need to, remove the power connector by removing the two nuts and Torx-8 screws. Figure 8: SDI and REF connectors WFM4000 and WFM5000 Service Manual... -
Page 46: Figure 9: Sdi And Ref Board Removal
Removal and Replacement Procedures Figure 9: SDI and Ref board removal WFM4000 and WFM5000 Service Manual... -
Page 47: Figure 10: Backplane Board View 1
2. Remove the six T-15 screws that attach the board to the main chassis. 3. Detach J1 (attached to the front panel board) and J9 (attached to the backlight driver board). 4. Remove the backplane board. Figure 10: Backplane board view 1 WFM4000 and WFM5000 Service Manual... -
Page 48: Figure 11: Backplane Board View 2
Removal and Replacement Procedures Figure 11: Backplane board view 2 WFM4000 and WFM5000 Service Manual... -
Page 49: Figure 12: Backlight Driver Board Removal
1. Remove the two T-10 screws securing the backlight driver board to the main chassis. 2. Remove J1 and J2, which connect the backlight driver board to the backplane board. 3. Remove the backlight driver board. Figure 12: Backlight driver board removal WFM4000 and WFM5000 Service Manual... -
Page 50: Figure 13: Front Panel Assembly Removal
As you separate the main chassis from the front panel, make sure that you pull the J1 cable that is attached to the front panel board through the hole in the main chassis. Figure 13: Front panel assembly removal WFM4000 and WFM5000 Service Manual... -
Page 51: Figure 14: Front Panel Board And Backlight Removal
6. Remove the two spacer posts and the one T-10 screw that hold the front panel board to the front bezel. 7. Remove the front panel board. Figure 14: Front panel board and backlight removal WFM4000 and WFM5000 Service Manual... - Page 52 (See Figure 16.) 12. Carefully remove the flex circuit from the metal guides. 13. Pull the backlight straight out (to the right) from the assembly. 14. To remove the other backlight, repeat the previous four steps. WFM4000 and WFM5000 Service Manual...
-
Page 53: Figure 15: Removing The Lcd Assembly Bracket
Removal and Replacement Procedures Figure 15: Removing the LCD assembly bracket WFM4000 and WFM5000 Service Manual... -
Page 54: Figure 16: Backlight Removal
Removal and Replacement Procedures Figure 16: Backlight removal WFM4000 and WFM5000 Service Manual... -
Page 55: Replaceable Parts
For more information about the module exchange program, call 1-800-833-9200. Outside North America, contact a Tektronix sales office or distributor; see the Tektronix Web site for a list of offices: www.tektronix.com. Module Repair and Return. You may ship your module to us for repair, after which we will return it to you. -
Page 56: Using The Replaceable Parts Lists
Using the Replaceable Parts Lists This section contains lists of the mechanical and/or electrical components that are replaceable for the WFM4000 and WFM5000 Waveform Monitors. Use this list to identify and order replacement parts. The following table describes each column in the parts list. -
Page 57: Table 11: Figure 4 Replaceable Parts List
2PIN WFM 2.5, J5; SAFETY CONTROLLED 211-0734-00 SCREW, MACHINE; 6-32 X 0.250, FLH100, 410 SS PASSIVATED, T-10 TORX DR 174-5441-00 CABLE ASSEMBLY;20 PIN, MAIN PCB TO SDI PCB WFM J6 174-4586-00 CA ASSY; RIBBON,2.0 L,DOUBLE ENDED,IDC,FEMALE,2 X 20,0.050 CTR,PLZ WFM4000 and WFM5000 Service Manual... -
Page 58: Table 14: Figure 7 Replaceable Parts List
BRACKET, SUPPORT; REAR I/O 119-7036-00 FAN ASSEMBLY; DC,12V;0.105A,8.6 CFM,30DBA,3 LEAD, TACH OUTPUT, WITH CONN & HOUSING,SAFETY CONTROLLED 174-5445-00 CABLE ASSEMBLY;POWER 2 PIN, CABLE, PWR XLR RPAN TO BP PCB 2PIN WFM 2.5, J5; SAFETY CONTROLLED WFM4000 and WFM5000 Service Manual... -
Page 59: Table 17: Figure 10 Replaceable Parts List
25%,0.75A,0.675 OHM, SERIES RATING:1200UH 25%,0.37A,2.70 OHM,2 WINDINGS,TOROID CORE;SMT45A-303,SMD 159-0450-00 FUSE, THERMAL; 4.0A HOLD, 8.0A TRIP, 30V MAX, SELF RESETTING, UL REC; RUE400, RADIAL LEAD, SAFETY CONTROLLED 159-0412-00 FUSE,THRM,CHIP; SELF RESETTING FUSE,0.5A HOLD,1.0A TRIP,60V MAX,SMD050,T,SAFETY CONTROLLED WFM4000 and WFM5000 Service Manual... -
Page 60: Table 19: Figure 12 Replaceable Parts List
Name & description Figure Figure 15, and Figure 16 870-0209-00 CIRCUIT BD SUBASSY; 389410200; FP; WFM5000, WFM4000, ROHS COMPLIA 441-2504-00 CHASSIS,MAIN; 0.050 AL,SAFETY CONTROLLED 850-0060-00 FINAL ASSEMBLY; BEZEL ASSEMBLY; 850-0061-00 FINAL ASSEMBLY; BEZEL AND FRONT PANEL CONTROLLER; TESTED 850-0059-00 FINAL ASSEMBLY;... - Page 61 DISPLAY,WFM5000,WFM4000 131-6521-00 CONTACT,ELEC; EMI,CLIP-ON,0.38 L X 0.460 W (2 CONTACTS) X 0.45 HIGH,ELECTROLESS NICKEL PLATE 260-2872-00 SWITCH,KEYPAD;ELASTOMERIC,SILICONE RUBBER;FRONT PANEL, WFM5000 407-5303-00 BRACKET, CRADLE, WFM 211-0950-00 SCREW,MACHINE; M2X.4X3L,PHL, PNH, 410 SS, PASSIVATE 337-4419-00 PORON FOAM SHIELD WFM4000 and WFM5000 Service Manual...
-
Page 62: Table 22: Accessories
DOCUMENTATION;PRODUCT CD, WFM4000 & WFM5000 NOTE. This document is packaged with the Quick Start Reference as part number 020-2918-xx. The following documents are included as PDFs on the WFM4000 and WFM5000 Product Documentation CD: 077-2438-xx MANUAL,TECH; USER,ENGLISH, NOT PRINTED, PDF ONLY;WFM4000,WFM5000 077-2440-xx MANUAL, TECH;... - Page 63 Sony / IDX Battery Adapter (V - Mount) Battery & Charger NOT included WFM50FGM Anton Bauer Battery Adapter (Gold - Mount) Battery & Charger NOT included WFM50FSC Soft carrying case for WFM5000 or WFM4000 (WFM50F01 is required) WFM4000 and WFM5000 Service Manual...
Need help?
Do you have a question about the WFM4000 and is the answer not in the manual?
Questions and answers