Table of Contents
Advertisement
Quick Links
Advertisement
Table of Contents

Subscribe to Our Youtube Channel
Related Manuals for Ideal Boilers Concord CXSD 40/H


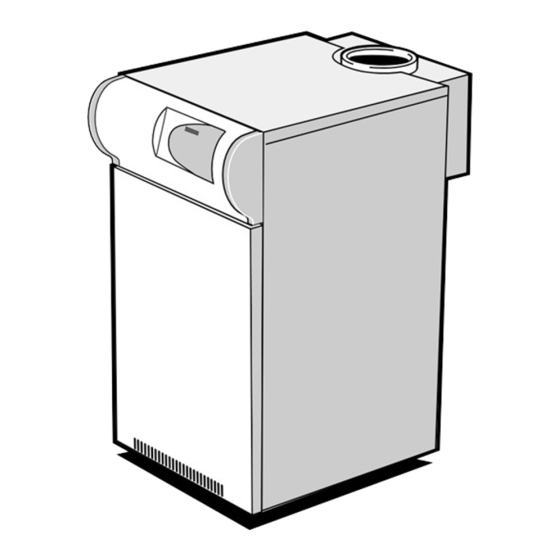
Summary of Contents for Ideal Boilers Concord CXSD 40/H
- Page 2 GENERAL Table 1- Performance Data Boiler CXSD 40/H CXSD 50/H CXSD 60/H CXSD 70/H CXSD 80/H CXSD 90/H CXSD 100/H CXSD 110/H CXSD 120/H Boiler Input Gross 33.8 42.2 50.7 59.1 67.6 76.0 84.5 92.9 101.3 Low Rate Btu/hr x 1000 115.3 144.1 172.9 201.7...
-
Page 3: Table Of Contents
GENERAL Concord CXSD 40/H - 120/H (Natural gas) B.G. Certified - P.I. No. 87/AQ/103 Destination Countries: GB & IE INTRODUCTION CONTENTS CONSTRUCTION Air Supply................8 Boiler body Boiler Assembly - exploded view........9 The sectional boiler body is of cast iron and is supplied assembled on a sheet steel combustion chamber with an integral draught Boiler Clearances. -
Page 4: Controls
GENERAL Fully pumped systems may be open vented or sealed. GAS CONTROLS The gas controls consist of a high / low arrangement with The range of boilers is NOT suitable for: direct burner ignition. 1. Gravity DHW systems. 2. Gravity heating systems. ELECTRICAL CONTROLS 3. -
Page 5: Hydraulic Resistance
GENERAL Relationship between load and water volume for the minimum capacity of water circuit during the 6 minute pump overrun period for different boiler outputs. Example A Example B Water Volume in Circuit during Pump Overrun (litres) 90 100 110 120 130 140 150 160 170 180 190 200 Flow (litres/min) -
Page 6: Pump
GENERAL The wiring diagrams in Frames 16,17 &18 illustrate the control MINIMUM FLOW OF WATER - Refer to Table 5 methods for achieving the above. The system design must provide for an adequate flow rate through the boiler at all times when the boiler is firing. The 3. -
Page 7: Installation Requirements
GENERAL FOR SMALL PIPE INSTALLATIONS; Conversely, when the system cools, water previously expelled is drawn back from the tank into the system together with a quantity BS. 6891; Installation of low pressure pipework of dissolved oxygen. FOR LARGE PIPE INSTALLATIONS Even if leakage from the heating and hot water system is eliminated there will be evaporation losses from the surface of Gas Installations... -
Page 8: Air Supply
GENERAL VENTILATION CHIMNEY SYSTEM Safe, efficient and trouble-free operation of open flued gas To ensure the safe and satisfactory operation of the boiler then boilers is vitally dependent on the provision of an adequate the chimney system (which may be common or individual, in the supply of fresh air to the room in which the appliance is case of twin or multiple boiler installations) must be capable of the installed. -
Page 9: Boiler Assembly - Exploded View
INSTALLATION CONCORD CXSD/H BOILER ASSEMBLY - Exploded view Alignment notches Distribution tube detail Legend 7. Drain cock 1. Cleanout cover 13. Section bolt 8. NOx duct 14. Distribution tube 2. Collector hood 9. Front plate 15. Tie rods 3. Middle section 10. - Page 10 INSTALLATION PACKAGING INSTALLATION HARDWARE PACK contains Check that all these packages are complete and have been correctly received on site. M10 washer ........4 off Factory assembled boilers are despatched from the works as fully packaged units comprising: Split pin ..........1 off 1.
-
Page 11: System Connections
INSTALLATION BOILER ASSEMBLY 1. Fit the distributor tube (supplied with the boiler) into one c. Fit the 2 thermostat pockets. Refer to Frame 9. of the return connections. That is one of the rear lower Note. Frame 9 shows the relationship between the ports. -
Page 12: Casing Assembly
INSTALLATION 10 FLUE CONNECTION 11 GAS CONNECTION 1. Complete the flue connection. 1. Connect the gas supply to the gas inlet pipe at the 2. The boiler is designed to accept flues to BS. 835 and rear LH side of should be sealed with an approved boiler putty. - Page 13 INSTALLATION 13 CASING ASSEMBLY - continued 4. Fit 3 clips to the top of each side panel. 5. Fit the spire clips to the side casing panels. 6. Hook on the control box to side panels. Screw in self tapping screws at the bottom of the control box to fix it to the side panels.
-
Page 14: Electrical Connections
INSTALLATION 14 ELECTRICAL CONNECTIONS Connection must be made in a way that allows complete voltage. If no external controls are fitted a link must be fitted isolation of the electrical supply - such as a double pole across 'EXT C' terminals. switch, having a 3mm (1/8") contact separation in both poles, The boiler provides frost protection via the boiler sensor. - Page 15 INSTALLATION LEGEND b blue br brown y/g yellow/green y yellow v violet 15 INTERNAL WIRING bk black w white or orange pk pink 16 ZONES WITH BI-DIRECTIONAL MOTORISED VALVES IMPORTANT Terminal L2 may control the appropriate pump(s) directly, provided that the total running or starting current does not exceed 6A (resistive or inductive): if this rating would be exceeded, then appropriate switchgear...
- Page 16 INSTALLATION 17 ZONES WITH INDIVIDUALLY PUMPED ZONES (3 zones shown) IMPORTANT Terminal L2 may control the appropriate pump(s) directly, provided that the total running or starting current does not exceed 6A (resistive or inductive): if this rating would be exceeded then appropriate switchgear must be used to control the pumps indirectly.
-
Page 17: Commissioning
INSTALLATION 19 COMMISSIONING AND TESTING GENERAL TESTING FOR GAS SOUNDNESS Check that all drain cocks are closed, that any stop valves Close the gas supply cock at the meter. fitted to the flow and return pipes are open and that the Remove the screw in the inlet pressure test point, Frames system has been filled and properly vented. - Page 18 INSTALLATION 22 CHECKING THE MANIFOLD PRESSURES Observe the burner pressures and compare them to the Turn the boiler OFF by pressing the [0/1] button and allow the values given in Table 1. If either pressure differs by more flow temperature to cool to less than 50 than 10%, reset the pressures by following the procedure in Connect a pressure gauge to the burner manifold test point Frames 23 or 24.
- Page 19 INSTALLATION 24 ADJUSTING THE MANIFOLD PRESSURES: CXSD 100/H-120/H ONLY to the value given in Table 8. Unscrew the adjuster on the LH 1. Press the [ENTER] button on the fascia panel, then press valve until the burner pressure falls then reset it to the value either the up or down arrow button until the display shows: given in Table 8.
-
Page 20: Operating Instructions
INSTALLATION 25 OPERATING INSTRUCTIONS CXSD/H features direct burner ignition, high/low burner operation, and a microprocessor control system. When the boiler flow temperature reaches the thermostat set point, the Upon a demand for heat, the controls open the low rate gas valve and controls will turn the burner to low rate. - Page 21 INSTALLATION 28 DESCRIPTION AND OPERATION OF BOILER CONTROLS - continued The diagram below shows the sequence of steps to be taken when reading the instructions on the following pages. Concord CXSD/H - Installation & Servicing...
- Page 22 INSTALLATION 29 DESCRIPTION AND OPERATION OF BOILER CONTROLS - continued MENU To access the menu screen ensure that the information screens are being displayed. To select any of the above use the [UP] or [DOWN] button Any key, except the [1/0] button, may now be pressed to until the option required is displayed and press [ENTER].
- Page 23 INSTALLATION 30 DESCRIPTION AND OPERATION OF BOILER CONTROLS - continued Delayed High Rate Gas valve Operation procedure should be followed but the [NO] button pressed. When the boiler is started from cold the high rate gas valve PROGRAMME HOURS will be delayed for 3 minutes and then energised. If the boiler flow temperature is equal to or greater than 55 C then this Enables a user-timed programme to be entered.
-
Page 24: Servicing
SERVICING 31 SPILLAGE CHECK 32 TESTING Check that the main burner responds correctly to manual on/off Check there is no spillage of operations of any controls fitted in the gas control circuit. combustion products from the boiler Check, in the following manner, the operation of the flame failure safety draught diverter by carrying out a device. - Page 25 SERVICING 36 SERVICING - continued In particular, check that: Unscrew the extended nuts at the top of the NOx duct behind the control box and lift the NOx duct clear of the burners, as 1. The ignition electrode shield and base fixing screws are illustrated below.
-
Page 26: Main Burner
SERVICING 38 GAS CONTROL VALVE 39 MAIN BURNER 1. Disconnect the electrical connections to the faulty gas 1. Remove the NOx duct and burner front plate, as valve. previously described in Frame 35 and 36. 2. Turn the gas inlet cock OFF and unscrew the 4 screws 2. -
Page 27: Cxsd 100/H-120/H
SERVICING 41 BURNER AND CONTROLS ASSEMBLY - Exploded View - CXSD 100/H - 120/H LEGEND Gas control valve Main injector, 3 off. Main gas inlet cock. Main (centre / RH) burner, 2 off. Gas control valve Gas inlet union. 10. Main (LH) burner, 1 off. Spark generator 'O' ring seals. - Page 28 SERVICING 43 CONTROL BOX - Basic Boiler, Exploded View LEGEND 1. Wiring clamp. 5. Back panel. 9. Printed circuit board No. RTC/34. 2. Connection box plug. 6. Controls box. 10. EMC Filter 3. Connection box. 7. Printed circuit board 'No. 35'. 11.Controls box fascia (not shown).
- Page 29 SERVICING 46 PC BOARD NO. 35 47 PC BOARD NO. RTC/34 1. Remove the lower front panel. 1. Remove the lower front panel. 2. Undo the 2 screws securing the control box front panel. 2. Undo the 2 screws securing the control box front panel. Carefully lift it up and lower it.
-
Page 30: Site Assembled Boilers
SITE ASSEMBLY 49 INSTRUCTIONS FOR SITE ASSEMBLED BOILERS Alignment notches Distribution tube detail Legend 10. Burner manifold assy. TOOLS REQUIRED 1. Cleanout cover. 11. Base plate. Spanners 2. Collector hood. Torque wrench 12. Combustion chamber. 3. Middle section. Pozi screwdriver 13. - Page 31 SITE ASSEMBLY 50 INSTRUCTIONS FOR SITE ASSEMBLED BOILERS - continued PREPARATION OF SECTIONS Each section should be brushed clean on all external surfaces and any debris which may have accumulated within the section should be removed via the bottom ports. Section assembly - Refer to exploded view 6.
-
Page 32: Fault Finding
FAULT FINDING 51 BOILER CONTROL WARNING reaches the set point plus 3 C the low rate gas valve will The ON/STANDBY [1/0] button does NOT electrically close. When the temperature falls 2 C the boiler will start at isolate the boiler. low rate and remain there until the temperature falls to the set point less 2 C then the high rate gas valve will operate. - Page 33 FAULT FINDING 52 SIMPLE FLOW CHART OF OPERATION SHUTDOWN Demand = ON DELAY Prepurge completed IGNITION Overrun Flame = ON completed Temp > LOW RATE than set point Flame = ON Temp >set For > 55°C no delay point If < 55°C ≅ ≅ ≅ ≅ ≅ 3 minutes Demand = off HIGH RATE...
- Page 34 FAULT FINDING 53 FAULT FINDING FLOW CHART Boiler will not light Is 230V ± 10% Carry out electrical available at checks. appliance ? Check all fuses. Do any external Reset external controls call for controls as heat ? appropriate Reset timer or Check boiler status as programme timer and...
-
Page 35: Short List Of Parts
SHORT LIST OF PARTS When ordering spare parts please quote: The following are parts commonly 1. Boiler model required as replacements due to 2. Boiler serial no. (refer to data plate on the combustion chamber) damage or expendability. Their failure 3. - Page 36 157 485 Technical Training The Ideal Boilers Technical Training Centre offers a series of first class training courses for domestic, commercial and industrial heating installers, engineers and system specifiers. For details of courses please ring: ..01482 498 432 Ideal Boilers, P.O. Box 103, National Ave, Kingston upon Hull, HU5 4JN.
Need help?
Do you have a question about the Concord CXSD 40/H and is the answer not in the manual?
Questions and answers