
Subscribe to Our Youtube Channel
Related Manuals for Ideal Boilers British Gas 440 RD2


Summary of Contents for Ideal Boilers British Gas 440 RD2
- Page 1 INSTALLATION & SERVICING M A N U A L British/Scottish Gas RD2 the floor standing boiler 440 - 480 RD2 Floor standing, gas fired fanned flue boiler...
- Page 2 British Gas: (Any internal reference to British Gas applies equally to Scottish Gas) The British Gas RD2 is a range of cast iron floor standing gas central heating boilers. A complete range of natural gas models is available. The ideal replacement boiler... Easy to install, easy to operate and easy to service.
- Page 3 GENERAL Table 1 - General Data Boiler Size Gas Supply Connection in. BSP Rc 1/2 (1/2) Number of Boiler Sections Flow and Return Connections Rc 1 (1" BSP) MAXIMUM Static Water Head m (ft.) 30.5 (100) (3 bar) MINIMUM Static Water Head m (ft.) 1.0 (3.3) Electrical Supply...
-
Page 4: Table Of Contents
GENERAL British Gas RD2 CONTENTS 440 RD2 G.C. No. 41 392 33 Air Supply..............7 450 RD2 G.C. No. 41 392 34 Boiler Assembly - Exploded view ......12 460 RD2 G.C. No. 41 392 35 Boiler Clearances ............6 470 RD2 G.C. -
Page 5: Gas Safety Regulations
GENERAL GAS SAFETY Manufacturer’s notes must NOT be taken in any way as overriding statutory obligations. Current Gas Safety (Installation and Use) Regulations, IMPORTANT. These appliances are certificated by the BG or the rules in force. Technology Certification Services for safety and performance. It It is law that all gas appliances are installed by a CORGI is important, therefore, that no external control devices, e.g. -
Page 6: Boiler Clearances
GENERAL Bathrooms An existing cupboard or compartment may be used, The boiler may be installed in any room or internal space, providing it is modified for the purpose. although particular attention is drawn to the requirements of the In both cases details of essential features of cupboards/ current I.E.E. -
Page 7: Air Supply
GENERAL GAS SUPPLY 4. Where the lowest part of the terminal is fitted less than 2m (6'6") above a balcony, above ground or above a flat roof to The local gas supplier should be consulted, at the installation which people have access then the terminal MUST be planning stage, in order to establish the availability of an protected by a purpose designed guard. -
Page 8: Electrical Supply
GENERAL WATER CIRCULATION SYSTEM WATER TREATMENT The boiler must NOT be used for direct hot water supply. The The boiler incorporates a cast iron heat exchanger. As part of boiler is suitable for connection to pumped open vent central the installation the central heating system should be thoroughly heating systems, pumped central heating combined with flushed with appropriate water treatment in order to comply with pumped or gravity indirect domestic hot water supply systems. -
Page 9: Pump
GENERAL MINIMUM REQUIREMENTS Fully pumped systems 1. Open vent and cold feed connections must be made to the boiler flow and return tappings according to the options shown in Frame 12. 2. The boiler is assumed to be the highest point of the circulating system. - Page 10 GENERAL SEALED SYSTEM REQUIREMENTS Make-up vessel Hose (max. capacity union 3 litres Air vent Non-return valve Water supply Safety valve Pressure gauge Automatic air vent Drain cock HEATING CIRCUIT Hosepipe (disconnect after filling) Pump Expansion Double check valve BOILER vessel BS.1010:2 stop tap Test cock...
- Page 11 GENERAL SEALED SYSTEM REQUIREMENTS - continued 7. Mains Connection c. Through a temporary hose connection from a draw-off tap supplied from a service pipe under mains pressure. Where There must be no direct connection to the mains water supply the mains pressure is excessive a pressure-reducing valve or to the water storage tank supplying domestic water, even shall be used to facilitate filling.
-
Page 12: Boiler Assembly - Exploded View
INSTALLATION 7 BOILER ASSEMBLY - Exploded View With casing removed. Fan sensor Flow sensor Overheat sensor Return sensor Tie rod Data badge LEGEND 1. Heat exchanger assembly. 14. Fan assembly. 2. Front section. 16. Front plate assy. 3. Centre section. 18. -
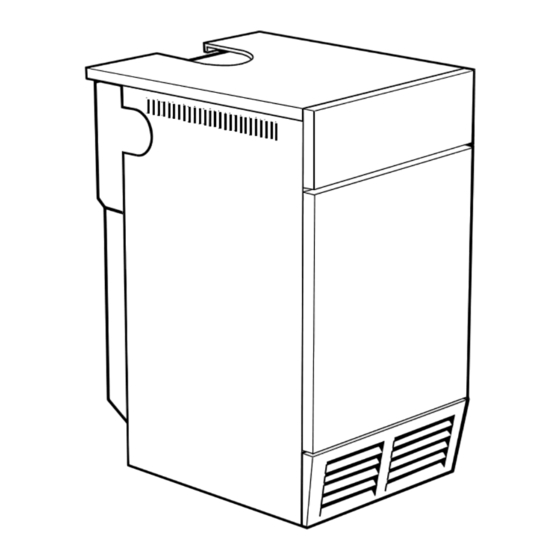
Page 13: Boiler Casing Removal
INSTALLATION UNPACKING BOILER HARDWARE PACK The boiler is supplied fully assembled in ! 1" BSP plugs - 3 off. Pack A, together with a standard flue ! Distributor tube - 1 off. assembly for lengths up to 600mm ! 28mm x 1" BSP male straight (23 1/2") rear or side flue outlet in Pack B. -
Page 14: Determining The Flue Length
INSTALLATION 10 BOILER CASING REMOVAL - continued 6. Release the screw securing the control box to the baseplate and slide to the left to release the box. 7. Remove the 2 screws securing the top panel to the sides. 8. Draw the top panel forward and lift it off the boiler. 9. -
Page 15: Preparing The Boiler
INSTALLATION 12 PREPARING THE BOILER 1. Screw the distributor tube (supplied with a 1" BSP x Table 6 - Fully Pumped Systems 28mm copper adaptor) into the selected heating return tapping, using an appropriate jointing material. Connections Sensor Position IMPORTANT. (as viewed at front) It is IMPERATIVE that the index mark on the distributor Back Section... - Page 16 INSTALLATION 14 SIDE FLUE ASSEMBLY - Exploded view - For wall thickness 114mm to 600mm Note. For lengths greater than 600mm see Frame 11. 4. Fit the outlet elbow pointing in the desired direction. Rotate in the bayonet slot and secure with the M4 screw. 1.
-
Page 17: Preparing The Wall
INSTALLATION 16 PREPARING THE WALL 1. Tape the template into the selected position. 2. Mark onto the wall the position of the flue duct hole. Note. IMPORTANT. Ensure that, during the cutting If the terminal is to be operation, masonry falling outside of the sited within 25-40mm building does not cause damage or personal of a corner or vertical... -
Page 18: Fitting The Flue Assembly
INSTALLATION 19 FITTING BOILER SEALING RING TO THE FLUE - Top 1. Fit the boiler sealing ring inside the appropriate length (A) of outer flue duct (refer to Frame 11). Ensure the boiler sealing ring is fully engaged. 2. Drill 3 holes 3.2mm ( ") dia. -
Page 19: Locating The Boiler
INSTALLATION 22 LOCATING THE BOILER Rear and Side flue B. If the flue assembly has been fitted from A. If the flue assembly can be fitted from the outside, proceed as the inside proceed as follows: follows: Move the boiler into position ensuring 1. -
Page 20: Fitting The Side Outlet Plates
INSTALLATION 25 CONNECTING THE FLUE TO THE BOILER - Top 1. Connect the flue terminal to the boiler, using the length (A) of flue duct previously cut and ensuring that the inner flue locates into the kit extension tube (without ring). 2. - Page 21 INSTALLATION 27 FLUE EXTENSION DUCTS 28 FLUE EXTENSION DUCTS - continued Top outlet flue length = A + B + Elbow allowance Elbow = 1m Elbow = 0.7m FLUE KITS Pack B: supplied as standard. Pack D: optional extension kit for side flue, top or rear flue outlet. Refer to Frame 27. 1.
-
Page 22: Gas Connection
INSTALLATION 30 TERMINAL WALL PLATE This plate allows neat concealment and full compression of the rubber seal. Its use is not essential if the flue hole and flue ducts have been accurately cut and the outside wall face is flat. 1. -
Page 23: Electrical Connections
INSTALLATION 33 ELECTRICAL CONNECTIONS 1. Remove the securing screw and lift off the mains terminal box cover. WARNING. The appliance must be efficiently earthed. 2. Route the mains cable from the LH rear of the boiler, along A mains supply of 230 V ~ 50 Hz is required. the front of the baseplate to the terminal box. -
Page 24: External Controls
INSTALLATION 35 EXTERNAL CONTROLS IMPORTANT. A link wire between terminal EC1 and EC2 is not acceptable. The wiring diagrams illustrated in Frames 37-39 cover the Note. Route the cable to terminals EC1 & EC2 from the RH rear systems most likely to be fitted to this appliance. of the boiler and across the top of the control box. - Page 25 INSTALLATION 37 MID POSITION VALVE Pumped only Notes. 1. Some earth wires are omitted for clarity. Ensure proper earth continuity when wiring. 2. For numbering of terminals on thermostats see the manufacturer's literature. 3. This is a fully controlled system - set the boiler thermostat to maximum.
-
Page 26: Frost Protection
INSTALLATION Clock with volt free contacts should be used. 40 FROST PROTECTION Central heating systems fitted wholly inside the house do not normally require frost protection as the house acts as a 'storage heater' and can normally be left at least 24 hrs. without frost damage. -
Page 27: Initial Lighting
INSTALLATION 42 COMMISSIONING AND TESTING GAS INSTALLATION 1. The whole of the gas installation, including the meter, ELECTRICAL INSTALLATION MUST be inspected and tested for soundness, and purged 1. Checks to ensure electrical safety should be carried in accordance with the recommendations of BS. 6891. out by a competent person. -
Page 28: Handing Over
INSTALLATION 44 GENERAL CHECKS Make the following checks for correct operation: Thermostat Flow Temperature Knob Setting 1. Turn the boiler thermostat OFF and ON to check that the main burner is extinguished and relit in response. 2. Set the boiler thermostat knob to position 6 and operate the mains on/off switch. -
Page 29: Servicing
SERVICING 46 SCHEDULE WARNING. e. Clean the heat exchanger. Refer to Frame 50. BEFORE SERVICING always turn OFF the gas supply at the gas service cock and switch OFF and DISCONNECT the f. Clean the main injector. Refer to Frame 49. electrical supply to the appliance. -
Page 30: Burner And Controls Assembly Removal
SERVICING 48 BURNER AND CONTROLS ASSEMBLY REMOVAL 1. Remove the control box cover. 2. Unplug the HSI lead from the PCB and withdraw it from the box. 3. Disconnect the detection lead from the electrode. 4. Remove the screw securing the control box to the baseplate, slide to the left to release and place to one side. -
Page 31: Gas Pressure Adjustment
SERVICING 51 RE-ASSEMBLY Reassemble the boiler in the following order: 4. Refit the thermistor sensor and secure with the M4 1. Refit the flue baffles. screw. 2. Inspect the collector hood rope gasket and replace, if 5. Refit the burner assembly. necessary, ensuring that the self adhesive rope is fitted 6. - Page 32 SERVICING 54 HOT SURFACE IGNITER (HSI) REPLACEMENT 1. Remove the lower front panel and grille assembly. Refer to Frame 47. 2. Remove the securing screw and lift off the control box cover. 3. Unplug the HSI lead from the PCB and withdraw it from the control box.
-
Page 33: Controls Panel Replacement
SERVICING 56 CONTROLS PANEL REPLACEMENT 1. Remove the lower front panel/grille assembly and control 4. Fit the new control panel and reassemble in reverse order. panel. Refer to Frame 47. 5. Check the operation of the boiler. 2. Remove the control thermostat potentiometer. Refer to Frame 55. -
Page 34: Main Burner Replacement
SERVICING 58 MAIN BURNER REPLACEMENT 1. Remove the lower front panel/grille assembly. Refer to Frame 47. 2. Remove the burner and controls assembly. Refer to Frame 57. 3. Remove the 2 nuts and washers securing the burner to the front plate and manifold. -
Page 35: Gas Valve Replacement
SERVICING 60 GAS VALVE REPLACEMENT 1. Remove the lower front panel and grille assembly. Refer to Frame 47. 2. Remove the burner and controls assembly. Refer to Frame 57. 3. Unscrew the gas inlet pipe from the valve. 4. Remove the 4 securing screws and withdraw the valve from the burner manifold. -
Page 36: Printed Circuit Board (Pcb) Replacement
SERVICING 63 PRINTED CIRCUIT BOARD (PCB) REPLACEMENT IMPORTANT. Any failure indicating a PCB fault should be confirmed before replacing the PCB by ensuring that all electrical connections are correctly made (Check pin alignment) and secure. 1. Remove the lower front panel and grille assembly. -
Page 37: Overheat Thermostat Replacement
SERVICING 65 OVERHEAT THERMOSTAT REPLACEMENT Hook plate 1. Remove the lower front panel and grille assembly. Refer Thermostat to Frame 47. pocket 2. Undo the overheat thermostat sensor retaining screw and withdraw the sensor from the pocket. 3. Remove the control box cover. 4. -
Page 38: Fault Finding
FAULT FINDING Before attempting any electrical fault finding ALWAYS carry out Detailed instructions on the cleaning and adjustment or preliminary electrical system checks, i.e. earth continuity, replacement of faulty components are contained in the polarity and resistance to earth using a suitable meter. 'Servicing' section of this publication. -
Page 39: Short List Of Parts
SHORT LIST OF PARTS The following are parts commonly required as replacement components, When ordering spares please quote: due to damage or expendability. Their failure or absence is likely to affect 1. Boiler model safety or performance of this appliance. 2. - Page 40 SHORT LIST OF PARTS 66 SHORT PARTS British Gas 440 - 480 RD2 - Installation & Servicing...
-
Page 41: Boiler Casing Assembly
LIST OF PARTS 67 BOILER CONTROL PANEL - Exploded View Legend 63. Control panel complete assembly. 67. Control potentiometer knob. 71. Control front panel (door). 72. Magnetic strip. 89. Control potentiometer. 68 BOILER CASING ASSEMBLY Legend 46. Baseplate 63. Control panel complete assembly. 64. - Page 42 LIST OF PARTS 69 CONTROL BOX - Exploded View Legend 29. Control box. 30. PCB . 34. PCB standoff (not shown). 37. Control box cover. 70 BURNER ASSEMBLY Legend 16. Burner assembly complete. 18. Burner manifold. 20. Main burner. 21. Main burner injector. 24.
- Page 43 NOTES British Gas 440 - 480 RD2 - Installation & Servicing...
- Page 44 This boiler is exclusively manufactured for British Gas by Ideal Boilers THIS SYMBOL IS YOUR ASSURANCE OF QUALITY These appliances are designed for use with Natural Gas only. They have been tested and conform with the provisions of BS. 6332 and BS. 5258.
Need help?
Do you have a question about the British Gas 440 RD2 and is the answer not in the manual?
Questions and answers