
Related Manuals for Ideal Boilers 30 RD1


Summary of Contents for Ideal Boilers 30 RD1
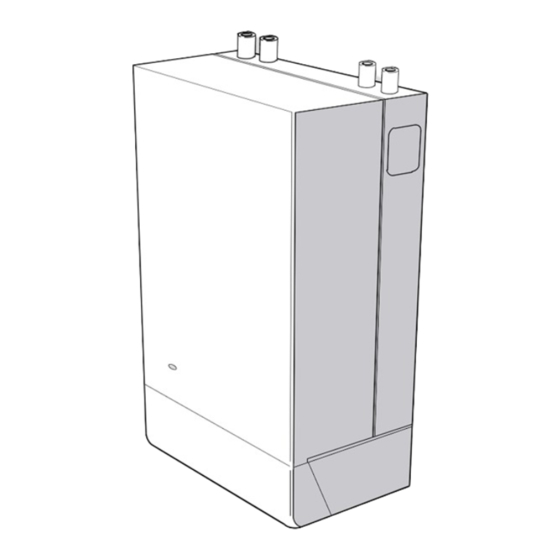
- Page 1 INSTALLATION & SERVICING M A N U A L British/Scottish Gas RD1 the wall hung boiler 30 - 100 RD1 Wall hung, gas fired fanned flue boiler Supplied By www.heating spares.co Tel. 0161 620 6677...
- Page 2 British Gas: (Any internal reference to British Gas applies equally to Scottish Gas) The British Gas RD1 is a range of cast iron wall mounted fanned flue gas central heating boilers. A complete range of natural gas models is available. The ideal replacement boiler...
-
Page 3: Burner Operating Pressure
GENERAL Table 1 - General Data Boiler Size Gas supply connection (in. BSP) Rc 1/2 (1/2) 1/2" (BSP Female) Flow connections (Pumped & Gravity) mm copper 28 Fem (Pumped only) mm copper 28 Fem Return connections (Pumped & Gravity) mm copper 28 Fem (Pumped only) mm copper... -
Page 4: Table Of Contents
GENERAL British GasRD1 CONTENTS B.G. Certified - P.I. No. 87 BL 27 Air Supply..............7 Destination Countries: GB Boiler Clearances ............6 Boiler Exploded View ..........12 Natural Gas only Appliance type: C & C Burner Exploded View ..........37 Data Badge: Top of Controls Support. -
Page 5: Gas Safety
GENERAL INTRODUCTION BS.6891 Low pressure installation pipes. BS.6798 Installation of gas fired hot water boilers of rated The 30-100RD1 is a range of automatically fully controlled, input not exceeding 60 kW. wall mounted, balanced flue, fanned gas boilers. BS.5449 Forced circulation hot water systems. The heat exchanger is cast iron. -
Page 6: Boiler Clearances
GENERAL BOILER WATER CONNECTIONS This appliance is NOT suitable for use in a direct hot water system. 1. If the boiler is to be used for gravity domestic hot water supply then cut off the spun ends of the gravity flow and return pipes and fit the 22 mm to 28 mm copper compression fittings (provided in the Hardware Pack) at the boiler gravity flow and return connections, in order to run the gravity circuits in 28 mm pipe. -
Page 7: Air Supply
GENERAL Compartment Installations Tower Flue Components Ltd., A compartment used to enclose the boiler MUST be designed Vale Rise, Tonbridge, Kent TN9 1TB (Model K1) and constructed specially for this purpose. Telephone No. 01732 351 555 An existing cupboard or compartment may be used, provided it Ensure that the guard is fitted centrally. -
Page 8: Electrical Supply
GENERAL Table 5 - Water flow rate and pressure loss the cupboard/compartment, at both high and low levels. The air vents must either communicate with room/internal space, Boiler Size or be direct to outside air. The minimum effective areas of the permanent air vents, required in the cupboard/compartment, Pressure 2.2 2.07 3.15 4.17 5.49 7.74 10.62... -
Page 9: Pump Systems
GENERAL OPEN VENT SYSTEM REQUIREMENTS - FULLY PUMPED. The system should be vented directly off the boiler flow pipe, as close to the boiler as possible. The cold feed Feed / expansion 450 (18") entry should be inverted and MUST be positioned cistern Mimimum between the pump and the vent, and not more than... - Page 10 GENERAL SEALED SYSTEM REQUIREMENTS Make-up vessel Hose (max. capacity union 3 litres) Air vent Non-return valve Water supply Safety valve Pressure gauge Automatic air vent Drain cock HEATING CIRCUIT Hosepipe (disconnect after filling) Pump BOILER Expansion Double check valve vessel BS.1010:2 stop tap Test cock...
- Page 11 GENERAL SEALED SYSTEM REQUIREMENTS - cont. other draw-off points at a lower level then a double check b. Where access to a make-up vessel would be difficult by valve shall be installed upstream of the draw-off point. pre-pressurisation of the system. Refer to 'Filling.' c.
-
Page 12: Boiler Exploded View
INSTALLATION REQUIREMENTS FOR CORRECT GRAVITY HOT WATER PERFORMANCE Note. Gravity horizontal pipes should be ABOVE ceiling level and as SHORT as possible. A MINIMUM inclination of 25mm per 3m run (1" per 10') is required to avoid air locks. If these conditions cannot be met, pumped primaries MUST be used. - Page 13 INSTALLATION UNPACKING Pack A Contents The boiler is supplied fully assembled in Pack A, together with The complete boiler. a standard flue assembly for lengths up to 600mm (23 "), Installation & Servicing Instructions. rear or side flue outlet, in Pack B. User's Instructions.
- Page 14 INSTALLATION 10 PACKAGING AND CASING REMOVAL 1. Unpack the boiler. 2. Remove the casing as follows and place to one side to avoid damage. a. Undo the 2 casing screws (a) retaining the casing to the back panel. b. Swing the bottom of the boiler casing up until the controls support casing has cleared the controls then unhook the top from the back panel.
- Page 15 INSTALLATION 12 DETERMINING THE FLUE LENGTH It is MOST IMPORTANT that the boiler is installed in a vertical position. FLUE KITS REAR FLUE INSTALLATION Pack B: supplied as standard. Pack D*: optional extension kit for side flue or rear flue outlet.
- Page 16 INSTALLATION 14 SIDE FLUE ASSEMBLY - Exploded view For wall thickness 114mm to 600mm 1. An optional flue duct extension kit is required for lengths (distance from the outside wall to the relevant side of the boiler casing) greater than 600mm (23 ") Refer to Frame 8.
- Page 17 INSTALLATION 17 PREPARING THE WALL IMPORTANT. Ensure that, during the cutting operation, masonry falling outside of the building does not cause damage or personal injury. 1. Cut the flue hole, preferably with a 125mm (5") core boring tool, ensuring that the hole is square to the wall. If the hole has been accurately cut with a drill then making good the wall faces is not essential as seals are provided at both ends of the flue.
- Page 18 INSTALLATION 19 FITTING THE BOILER SEALING RING TO THE FLUE 1. Fit the boiler sealing ring inside the outer flue duct. Ensure Do NOT drill the inner flue and boiler sealing ring. the boiler sealing ring is fully engaged. duct Ensure the notch aligns with the groove on the outer flue 3.
- Page 19 INSTALLATION 22 WALL MOUNTING PLATE 1. Fix the mounting plate to the wall with the No.14 x 50mm wood screws. 2. If downward routing of pipes is required then the downward routing pipe brackets and M8 spacer should be fitted to the wall mounting plate now (supplied in separate kit).
-
Page 20: Extension Ducts - Fitting
INSTALLATION 25 TERMINAL WALL PLATE This plate allows neat concealment and full compression of the rubber seal. Its use is not essential if the flue hole and flue ducts have been accurately cut and the outside wall face is flat. 1. -
Page 21: 31 Electrical Connections
INSTALLATION 28 FITTING THE KIT 1. Remove the cardboard support aid from the flue and place safely to one side. 2. Fit the inner flue extension duct onto the inner flue duct. 3. Fit the outer flue extension duct onto the outer air duct. -
Page 22: 33 External Controls
INSTALLATION 32 FLOW WIRING DIAGRAM Volt Free Contacts LEGEND If switched live is connected here (EC1) leave other terminal without b blue connection. If programmer is used here (EC1) the switched live MUST gy grey bk black BE FUSED AT 2A MAXIMUM. or orange br brown Air pressure switch... -
Page 23: System Diagrams (Electrical)
INSTALLATION 34 PICTORIAL WIRING IMPORTANT. No system controls to be wired in this mains supply. Return sensor Flue sensor MAINS Air pressure switch Flow sensor Detection probe Overheat Hot surface igniter thermostat Read Note 1 Gas valve Earth stud, LEGEND Controls support blue pk y... - Page 24 INSTALLATION 36 TWO SPRING CLOSED VALVE (Pumped only) Notes. 1. Some earth wires are omitted for clarity. Ensure proper earth continuity when wiring. 2. For numbering of terminals on thermostats see the manufacturer's literature. 3. This is a fully controlled system - set the boiler thermostat to maximum.
- Page 25 INSTALLATION 38 FROST PROTECTION Clock with volt free contacts should be used. Central heating systems fitted wholly inside the house do not Designation of the terminals will vary but the programmer and normally require frost protection as the house acts as a thermostat manufacturer's leaflets will give full details.
-
Page 26: Initial Lighting
INSTALLATION 40 INITIAL LIGHTING 4. Slacken the screw in the burner pressure test point (F) and connect a gas pressure gauge via a flexible tube. 5. Swing the control box back into its working position. 6. Switch the electricity supply ON and check that all external controls are calling for heat. - Page 27 INSTALLATION 41 INITIAL LIGHTING- continued 19. Remove the boiler casing. 20. Refit the controls support to the boiler casing and tighten the 2 front fixing screws. 21. Refit the complete casing to the boiler. 22. Close the pod door. 23. Finally stick the appropriate British/ Scottish Gas Logo (supplied in the hardware pack) in the recess at the top LH...
-
Page 28: Servicing
SERVICING 44 SCHEDULE To ensure the continued safe and efficient operation of the h. If the appliance has been installed in a compartment, appliance, it is recommended that it is checked at regular check that the ventilation areas are clear. intervals and serviced as necessary. - Page 29 SERVICING 47 CLEANING THE FAN ASSEMBLY / THE FLUEWAYS 1. Remove the 2 silicon rubber tubes from the fan sensing points. 2. Disconnect all the fan leads. 3. Undo the M4 thermistor securing screw and remove thermistor from the fan. 4a.
-
Page 30: Spares Replacement
SERVICING 50 GAS PRESSURE ADJUSTMENT PILOT MAIN BURNER The pilot is factory set to maximum and no further After any servicing, reference should be made to Table 2 adjustment is possible. If, after removing and checking the which quotes details of the rated output with the related injector (as detailed in Frame 48) and ensuring that there burner setting pressure and the heat input. - Page 31 SERVICING 54 CONTROL POTENTIOMETER, THERMISTOR SENSOR LEADS and RESET SWITCH REPLACEMENT Refer to Frame 51. A. Remove the fixing screws. B. Swing the control box down into the servicing position. Control potentiometer 1. Pull the knob off the shaft. 2. Remove the backnut securing the control potentiometer to the control box.
- Page 32 SERVICING 56 DETECTION ELECTRODE AND LEAD REPLACEMENT 1. Refer to Frame 51. 2. Remove the burner and air box assembly. Refer to Frame 46. 3. Remove the electrode retaining nut. 4. Remove the pilot shield. 5. Remove the electrode and integral lead. 6.
- Page 33 SERVICING 59 COMBUSTION CHAMBER INSULATION REPLACEMENT 1. Refer to Frame 51. 8. Fit the new front and rear insulation panels. 2. Remove the burner and air box assembly and igniter. Refer to Frame 46. 9. Fit the new side panels ensuring the cut out is on the 3.
- Page 34 SERVICING 63 GAS CONTROL VALVE REPLACEMENT Note. Refer also to Frame 67 of 'Exploded Views' for 8. Remove the 4 screws retaining the manifold to the gas illustration of the procedure detailed below. control valve, and fit the manifold to the new valve. Ensure that the new control is fitted the correct way 1.
-
Page 35: Fault Finding
FAULT FINDING START Check mains supply and fuses. Reset the overheat 'stat. Set control Press the lockout reset switch. Check programmer and system 'stat to maximum. Allow the boiler to Check the mains supply to the thermostats are all ON. Check that reach temperature - if the overheat terminal block and that there is a boiler plug and socket are OK and... -
Page 36: Short List Of Parts
SHORT LIST OF PARTS The following are parts commonly required due to damage or When ordering spares please quote: expendability. Their failure or absence is likely to affect safety or 1. Boiler Model performance of this appliance. 2. Appliance G.C. Number The list is extracted from the British Gas List of Parts, which 3. -
Page 37: Burner Exploded View
SHORT LIST OF PARTS 66 SHORT PARTS LIST 67 BURNER ASSEMBLY - Exploded View 12. Main burner. LEGEND 42. Gas service cock. 13. Main burner injector. (Numbers up to 51 relate to the B.G. spares list) 10. Burner manifold 16. Pilot shield. 17. -
Page 38: Control Box Exploded View
SHORT LIST OF PARTS 68 CONTROL BOX - Exploded View LEGEND Control box. 21A. Thermostat potentiometer. Fuse Thermostat knob. 23A. Printed circuit board. 58A. Lockout reset switch. LED 1 LED 2 LED 3 LED 4 69 BOILER CASING ASSEMBLY British Gas RD1 - Installation &... - Page 39 British Gas RD1 - Installation & Servicing Supplied By www.heating spares.co Tel. 0161 620 6677...
- Page 40 This boiler is exclusively manufactured for British Gas by Ideal Boilers Ltd. THIS SYMBOL IS YOUR ASSURANCE OF QUALITY These appliances are designed for use with Natural Gas only. They have been tested and conform with the provisions of BS. 6332 and BS. 5258.
Need help?
Do you have a question about the 30 RD1 and is the answer not in the manual?
Questions and answers