Table of Contents
Advertisement
Available languages
Available languages
Quick Links
Download this manual
See also:
Operating Manual
Advertisement
Table of Contents

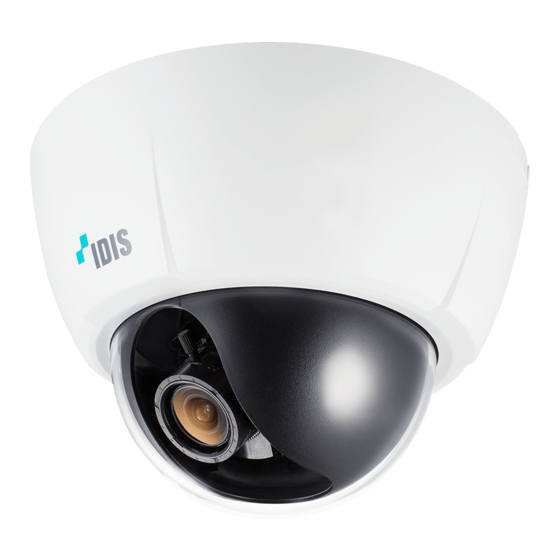
Summary of Contents for Idis DC-D1123
-
Page 1: Network Camera
Network Camera Quick Guide Powered by... -
Page 2: Safety Precautions
Safety Precautions WARNING RISK OF ELECTRIC SHOCK DO NOT OPEN WARNING: TO REDUCE THE RISK OF ELECTRIC SHOCK, DO NOT REMOVE COVER (OR BACK). NO USER-SERVICEABLE PARTS INSIDE. REFER SERVICING TO QUALIFIED SERVICE PERSONNEL. Important Safeguards 1. Read Instructions 10. Overloading All the safety and operating instructions should be read before Do not overload wall outlets and extension cords as this can the appliance is operated. -
Page 3: Fcc Compliance Statement
IDIS Co., Ltd. reserves all rights concerning this operation manual. Use or duplication of this operation manual in part or whole without the prior consent of IDIS Co., Ltd. is strictly prohibited. Contents of this operation manual are subject to change without prior notice for reasons such as functionality enhancements. -
Page 4: Dome Camera
• Product color and design may vary depending on the model. • For more details on each part name, refer to the operation manual. Dome Camera DC-D1122V / DC-D1022W / DC-D1123 / DC-D1223 DC-D1123WHR / DC-D1223WHR DC-D1122W DC-D1122VR / DC-D1022WR /... -
Page 5: Box Camera
Back Focus Power Adjustment Ring Alarm In/Out and Audio In/Out are supported by DC-D1123 / DC-D1123R / DC-D1123V / DC-D1123VR / DC-D1123W / DC-D1123WR / DC-D1123WHR / DC-D1223 / DC-D1223R / DC-D1223V / DC-D1223VR / DC-D1223W / DC-D1223WR / DC-D1223WHR models only. -
Page 6: Camera Installation
DC-D1011 / DC-D1111 / DC-D1212R models do not have a zoom feature. Attach the shield case to the vertical rotation DC-D1122 / DC-D1122R / DC-D1123 / adjustment screw and secure it in place. DC-D1123R / DC-D1223 / DC-D1223R DC-D1022W / DC-D1122 / DC-D1122V /... - Page 7 Angle Adjustment DC Type Auto Iris Lens Solder on the lens connection line to the connector socket, if necessary. For more information about soldering on the lens control wire, refer to the lens manufacturer's operation manual. Remove the protective cover from the camera. Turn the lens in clockwise direction, mount it on to the camera, and connect the auto iris jack to the auto iris lens connector.
-
Page 8: Specifications
External DC-D1022W / DC-D1022WR / DC-D1122 / DC-D1122R / DC-D1122V / DC-D1122VR 160mm x 112mm / DC-D1122W / DC-D1122WR / DC-D1123 / DC-D1123R / DC-D1123V / DC-D1123VR Dimensions / DC-D1123W / DC-D1123WR / DC-D1123WHR / DC-D1223 / DC-D1223R / (Ø x H) - Page 9 Netwerk Camera Snelle gids Powered by...
-
Page 10: Belangrijke Veiligheidsinformatie
Voorzorgsmaatregelen WAARSCHUWING ELEKTRISCHE SCHOKGEVAAR NIET OPENEN WAARSCHUWING: VOOR HET VERMINDEREN VAN HET SCHOKGEVAAR, HET DEKSEL (OF ACHTERKANT) NIET VERWIJDEREN. BEVAT GEEN SERVICEONDERDELEN. LAAT ONDERHOUD OVER AAN BEVOEGD SERVICEPERSONEEL. Belangrijke veiligheidsinformatie 1. Lees de instructies 10. Overbelasting Lees alle veiligheid- en bedieningsinstructies voordat u het Zorg ervoor dat u de wandstekkerdozen en verlengsnoeren apparaat bedient. - Page 11 © 2013 IDIS Co., Ltd. IDIS Co., Ltd. behoudt alle rechten met betrekking tot deze bedieningshandleiding. Gebruik of duplicatie van deze bedieningshandleiding in deel of geheel zonder voorafgaande toestemming van IDIS Co., Ltd. is strikt verboden. De inhoud van deze bedieningshandleiding is onderhevig aan veranderingen zonder opgave vooraf om redenen zoals functionaliteit verbeteringen.
- Page 12 • Product kleur en ontwerp kunnen verschillen, afhankelijk van het model. • Voor meer details over de onderdelen, zie de bedieningshandleiding. Dome Camera DC-D1122V / DC-D1022W / DC-D1123 / DC-D1223 DC-D1123WHR / DC-D1223WHR DC-D1122W DC-D1122VR / DC-D1022WR / DC-D1123R / DC-D1223R...
- Page 13 B1103 / DC-B1203 Back Focus afstel Alarm In/Out en Audio In/Out worden alleen ring ondersteund door DC-D1123 / DC-D1123R / DC-D1123V / DC-D1123VR / DC-D1123W / Bovenkant DC-D1123WR / DC-D1123WHR / DC-D1223 / DC-D1223R / DC-D1223V / DC-D1223VR / DC-D1223W / DC-D1223WR / DC-D1223WHR...
- Page 14 DC-D1011 / DC-D1111 / DC-D1212R modellen hebben geen zoom functie. Plaats de plastic kap op de vertikale rotatie afstel DC-D1122 / DC-D1122R / DC-D1123 / schroef en zet het vast. DC-D1123R / DC-D1223 / DC-D1223R alleen DC-D1022W / DC-D1122 / DC-D1122V /...
- Page 15 Hoek aanpassing DC Type Auto Iris Lens Indien nodig, soldeer de lens verbindingsdraad met de connector. Voor meer informatie over het solderen van de lens besturingsdraad, zie de handleiding van de fabrikant van de lens. Verwijder de beschermende cover van de camera.
- Page 16 Buiten DC-D1022W / DC-D1022WR / DC-D1122 / DC-D1122R / DC-D1122V / DC-D1122VR 160mm x 112mm / DC-D1122W / DC-D1122WR / DC-D1123 / DC-D1123R / DC-D1123V / DC-D1123VR afmetingen / DC-D1123W / DC-D1123WR / DC-D1123WHR / DC-D1223 / DC-D1223R / (Ø x H)


Need help?
Do you have a question about the DC-D1123 and is the answer not in the manual?
Questions and answers